A Plan comprises a collection of methods allowed on resources/operations from one or more APIs. You can subscribe to Plans under a Pack that has the set of operations that you want to use in your application. As an API subscriber, you can also choose from different types of plans that the Publisher devises for the Pack based on their Throttling and Rate Limiting policies. For more information on Subscriptions, refer: Developer Portal - Overview.
To subscribe a Free plan:
In the API Stores page, browse/search through the API Packs to find a relevant API Pack.
Click the API Pack card. The API Pack Details page displays.
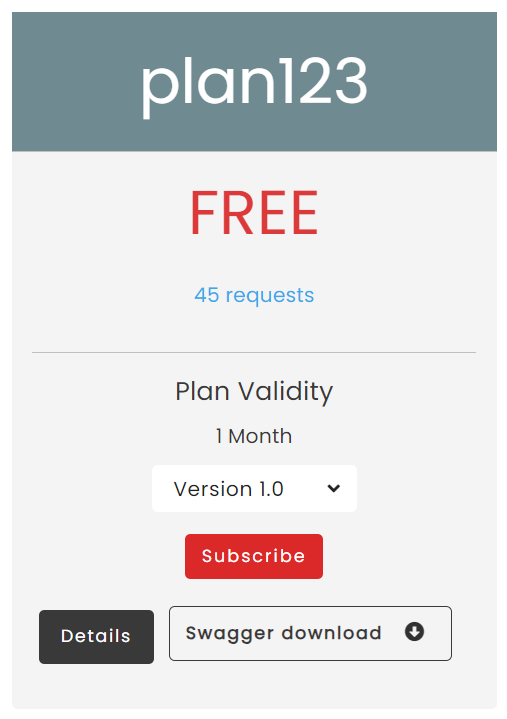
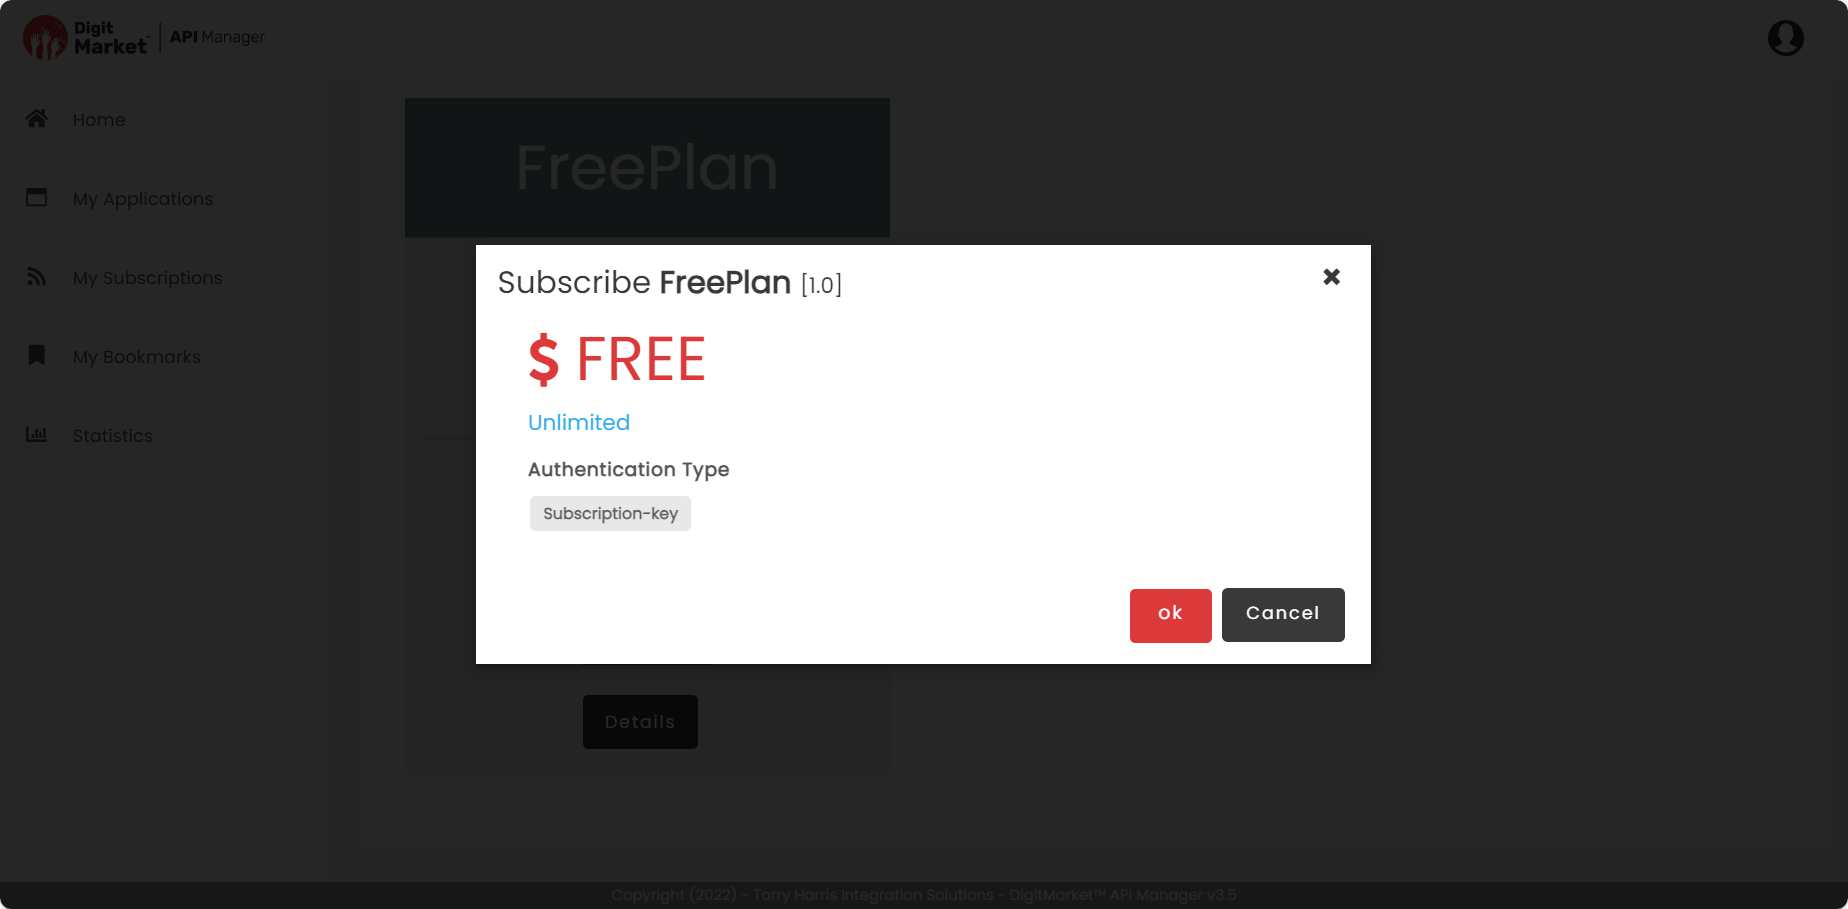
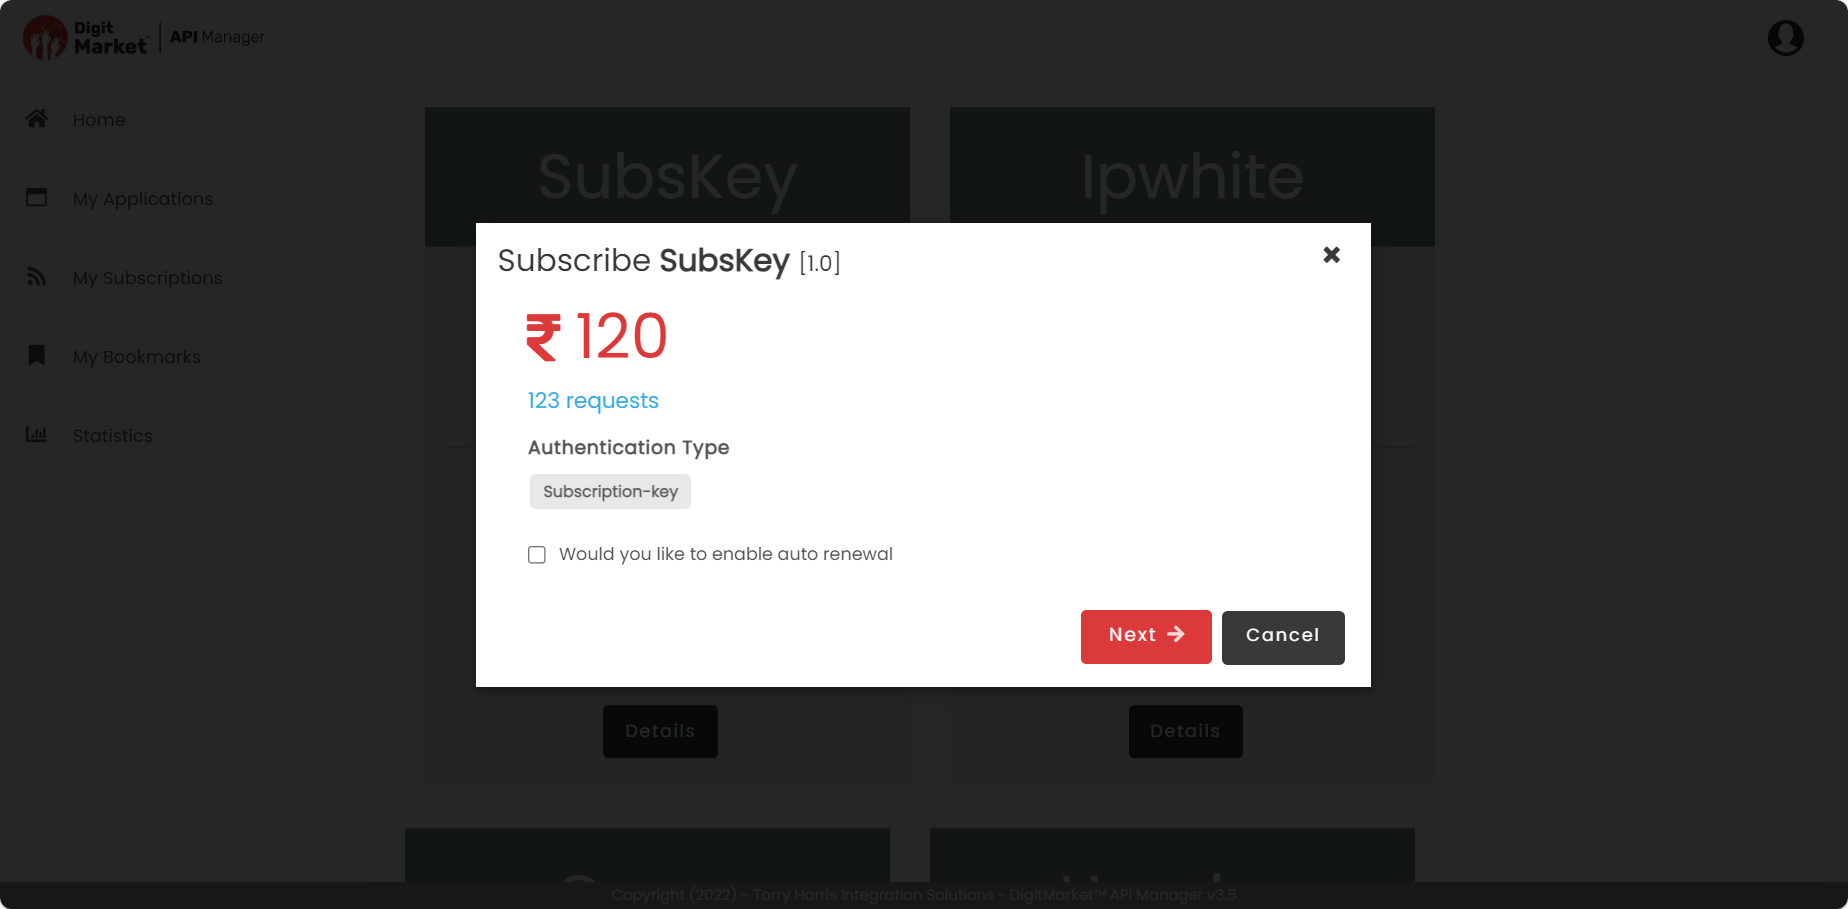
In the Plans tab, click Subscribe on the plan that you want to subscribe. A dialog box displays. The Subscribe button will be enabled/displayed only for business role users.
The dialog box displays an auto-renew check box if the Publisher has enabled the Auto-renew option for the Plan. The Auto-renew option allows the Developer user to automatically renew a subscription at the end of Subscription validity period.
Configuring Subscription Authentication Values:
API subscribers with Publisher rights (Publisher Users) can select an authentication type for a subscription. This can be done from the Plan Authentication section under the Usage Plans tab of an API Pack. The Publisher user will define the Authentication Type for the Plan which a subscriber can subscribe. Based on that the subscriber (with Developer rights) can edit the values on this page. To know more about plan authentication types, refer Adding Plan Level Authentication section within Edit an API Pack.
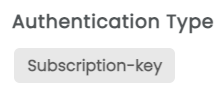
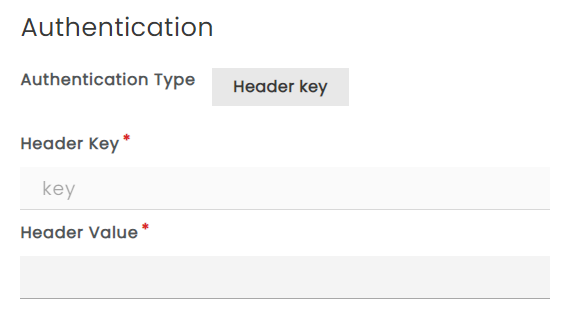
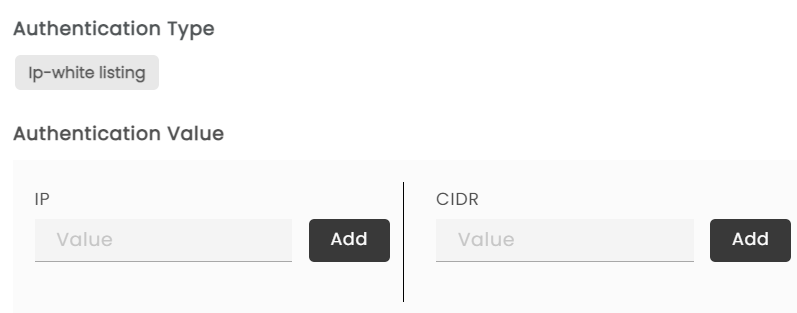
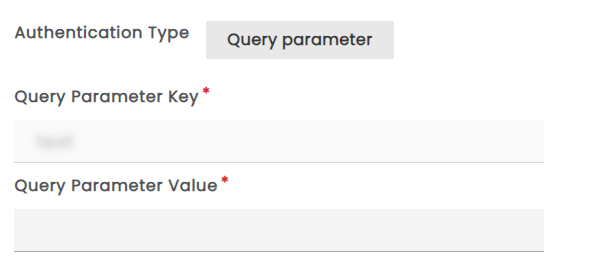
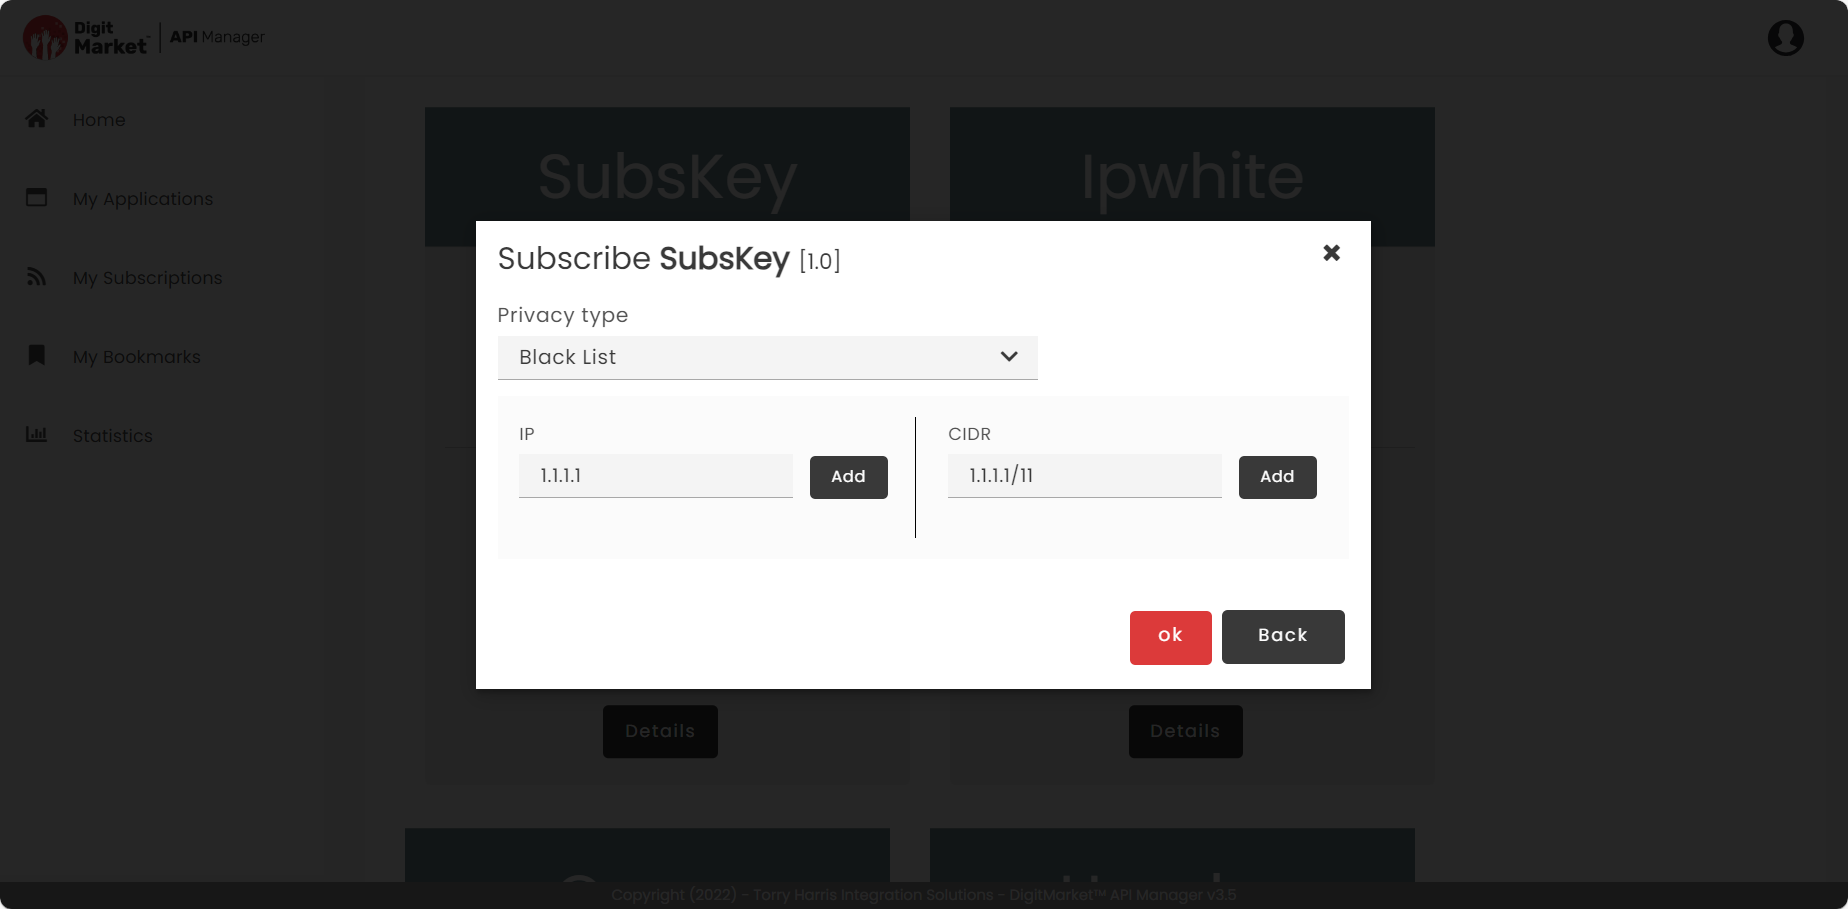
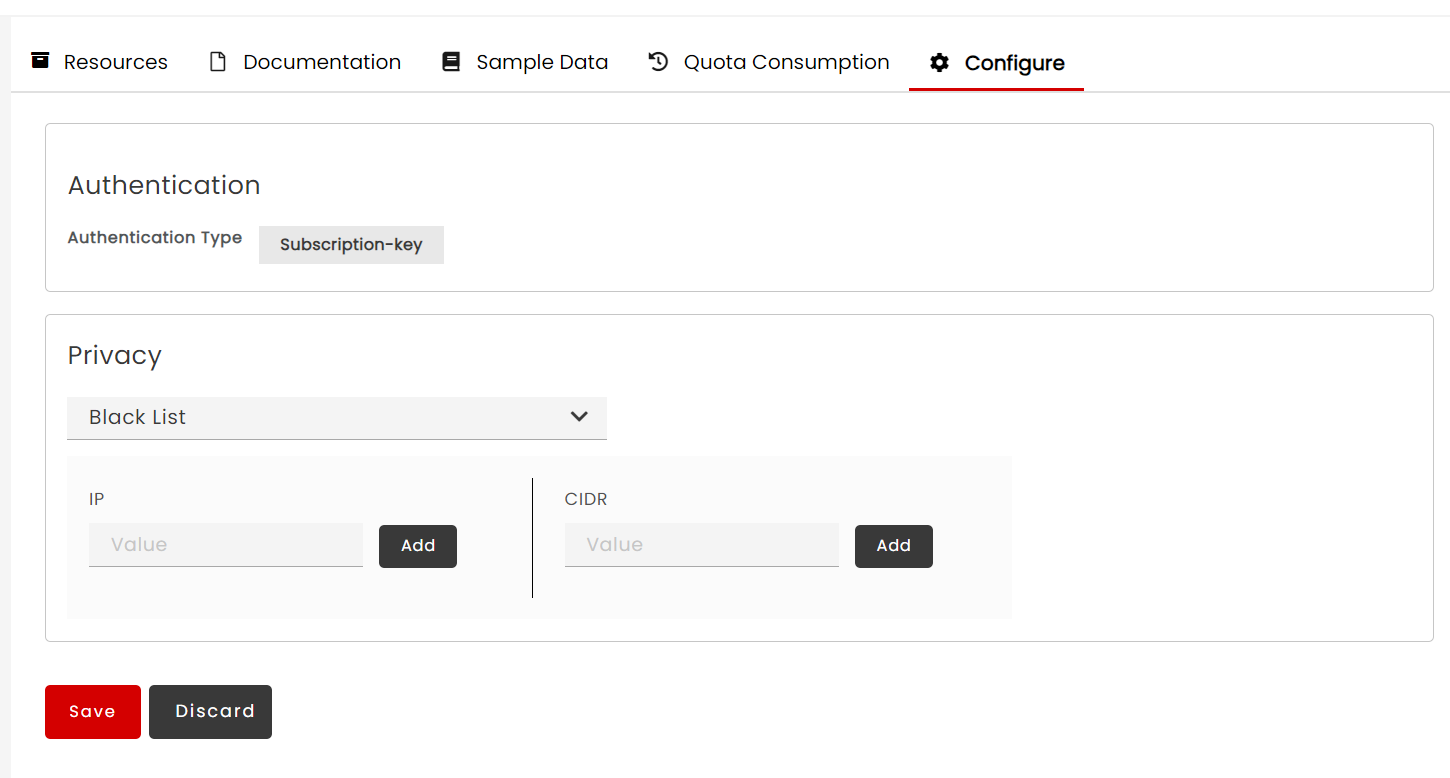
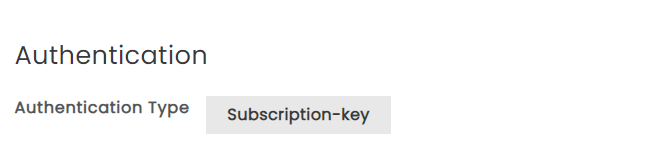
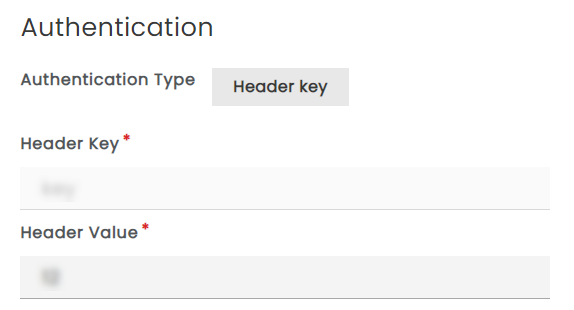
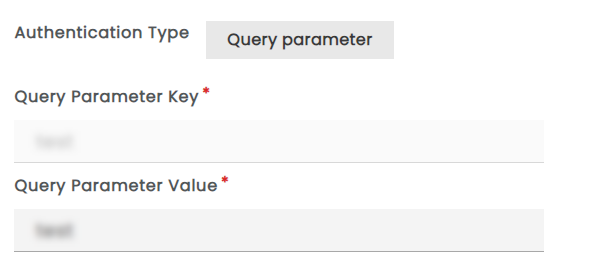
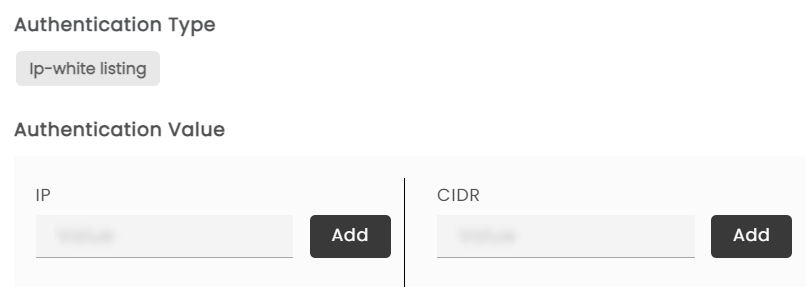
Based on the Authentication Type selected at Plan level (Subscription key, IP Whitelisting, Header Key, Query Parameter), you can configure the values accordingly.
If Authentication Type is Subscription key, a subscription key will be generated once you add the subscription.
After a Subscriber subscribes to a plan, a subscription key will be generated only if the plan authentication type is selected as Subscription-key.
If Authentication Type is Header key, you need to specify the header value. The header key name has already been configured at the time of selecting Plan Authentication type. In the Header Value box, enter the header key value.
Enter the IP address range and click Add CIDR. The IP address range is added.
Note
IP and CIDR range should be valid.
If Authentication Type is selected as Query Parameter, you need to specify the query parameter value. The query parameter name has already been configured at the time of selecting Plan Authentication type. In the Query Parameter Value box, enter the query parameter value.
Reserved special characters are not allowed in query parameters.
Publisher can choose to define the header and query value on the respective subscription model or not. If the Publisher defines the header and query value, the subscriber with developer rights can specify the value at the time of subscription from the developer portal, but that subscriber will not be able to override the header and query name.
It is advisable to have unique IP/Headers/query param for validation. For example, let us suppose that Subscription A created for Plan A contains header name ‘test’ and header value ‘1234’ then Subscription B for the Plan B cannot be created with same header name ‘test’ and header value ‘1234’ if both Plan A and Plan B contains common resources.
In case they are not unique, then the combination of resource and IP/CIDR or Headers or QueryParam should be unique. For example, let us suppose that Plan A with a header key authentication has header name ‘test’ and Plan B with a header key authentication also has header name as ‘test’. Subscription A is created for the Plan A with header value ‘1234’. Subscription B is created for the Plan B. This Subscription B for Plan B cannot have a header value ‘1234’ if both Plan A and Plan B contains common resources.
Note
It is mandatory to specify the Plan authentication values before adding the Subscription.
Click Subscribe to finish subscribing to the plan. A “Subscription is created” notification message displays. The Subscribe button for the Plan is disabled to indicate that you have subscribed to the Plan. The Subscribe button is enabled again either on rejection of your subscription or at the end of validity period.
After clicking Subscribe, if the developer has configured a subscription authentication method, it will be sent to publisher for approval. An email notifying about the plan authentication values is sent to the approver. If the approver approves the values, then an email is sent notifying the developer user of the approval. Once the publisher approves, it will be listed in the Gateway Sync page from where they can be propagated to the Gateway to make them operational. If the subscription is rejected by the approver, then an email is sent notifying the developer user of the rejection.
Note
After clicking subscribe, if the developer has configured a subscription authentication method, it will be sent to publisher for approval. Once the publisher approves, it will be listed in the Gateway Sync page from where they can be propagated to the Gateway to make them operational.
Note
The Subscribe button will be enabled/displayed only for business role users .
Note
You should first create an Application instance before going ahead with subscribing to an API Pack Plan as subscriptions without an Application is bound to be rejected at the Approval stage.
Note
The Subscribe button in a Plan is disabled if you have already subscribed to the Plan.
Note
An email notifying about a subscription made to a plan and is sent to the email recipients specified in the application.
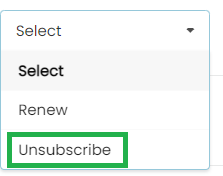
To unsubscribe from a Plan:
Click the hamburger menu icon on the header bar to display the hamburger menu.
A notification message, “Are you sure you want to cancel the subscription?” displays.
Click OK to unsubscribe from the API Pack plan. A request to Unsubscribe is sent for approval. The Status in the Status column changes from active to pending cancellation.
Once approved, the Subscription is cancelled and the status changes to Cancelled, which means that the plan has been unsubscribed.
Note
The Actions options in the Subscription page remain blank until the status of the Subscription in the My subscriptions page changes from Awaiting for approval to Approved.
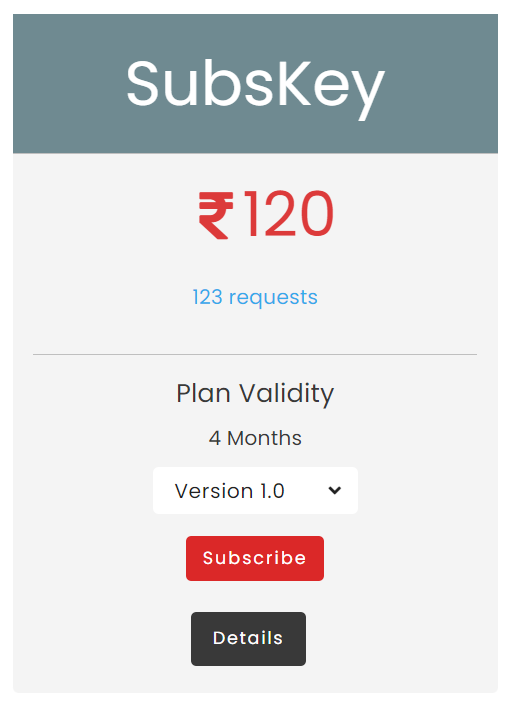
To subscribe a Paid plan:
In the API Stores page, browse/search through the API Packs to find a relevant API Pack.
Click the API Pack card. The API Pack Details page displays.
In the Plans tab, click Subscribe on the plan that you want to subscribe. A dialog box displays. The Subscribe button will be enabled/displayed only for business role users.
The dialog box displays an auto-renew check box if the Publisher has enabled the Auto-renew option for the Plan. The Auto-renew option allows the Developer user to automatically renew a subscription at the end of Subscription validity period.
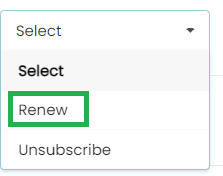
A notification message, “Are you sure you want to renew the subscription?” displays.
Click OK to auto-renew the API Pack plan.
The Subscription is renewed and the validity period is updated in the End date column.
Once approved, the Subscription is renewed and at the end of the validity period (as indicated in the End date column), the status will change to Active, which means that the renewal was successful.
Note
The Renew option will not be available if the user has selected the auto renew option at the time of subscribing to the Plan or the Renewal has already been done using the Renew option in the Actions column.
Note
The Actions options in the Subscription page remains blank until the status of the Subscription in the My subscriptions page changes from Awaiting for approval to Approved.
4.5.2. View Subscriptions and filter Subscriptions view
To view Subscriptions:
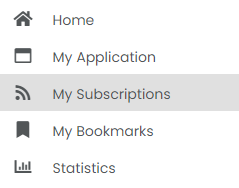
Click the hamburger menu icon on the header bar to display the hamburger menu.
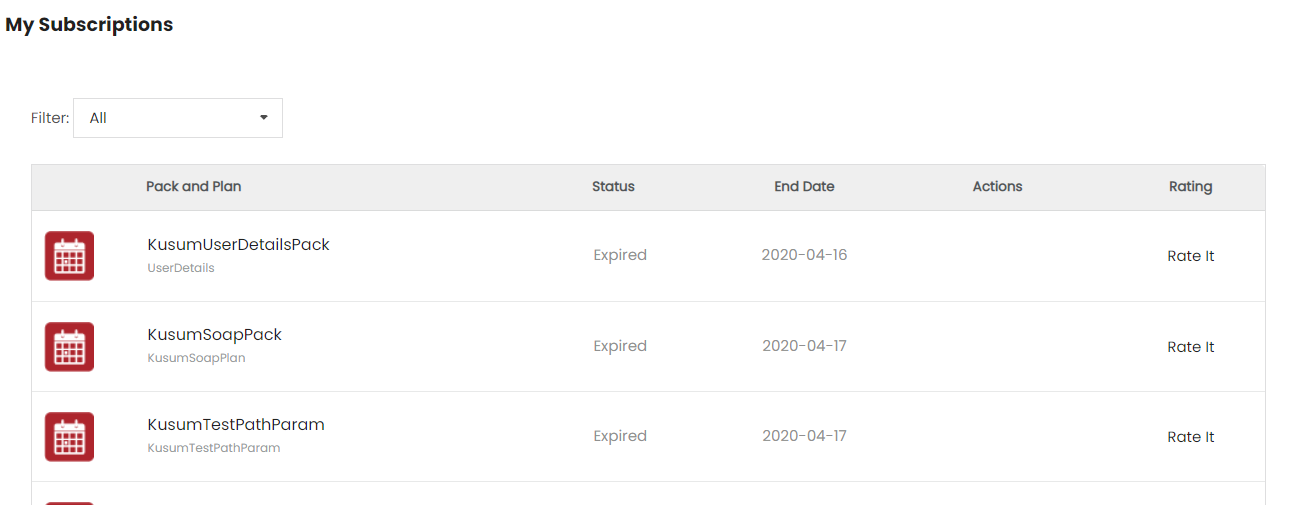
In the hamburger menu, click My Subscriptions. The My Subscriptions page displays a list of all Subscriptions irrespective of their Status; whether they are in Awaiting Approval, Active, Rejected, Canceled(Unsubscribed), or Pending Cancellation(pending approval after the pack plan is unsubscribed) states.
My Subscriptions page displays API Pack names with information on the current Status and End Date for each Subscription.
To filter Subscription view:
Click the hamburger menu icon on the header bar to display the hamburger menu.
Click Pending to view Subscriptions that are waiting for approval, Active to view Subscriptions that are currently operational, Rejected to view Subscriptions that are rejected by the Publisher, Cancelled to view Subscriptions that are cancelled by you, and Pending Cancellation to view the Subscriptions that are unsubscribed by you but are waiting for the Publisher’s approval.
In the My Subscriptions page, in the row for which you want to see the Pack and Plan details, click the Pack name. The <Pack and Plan name> Details page displays.
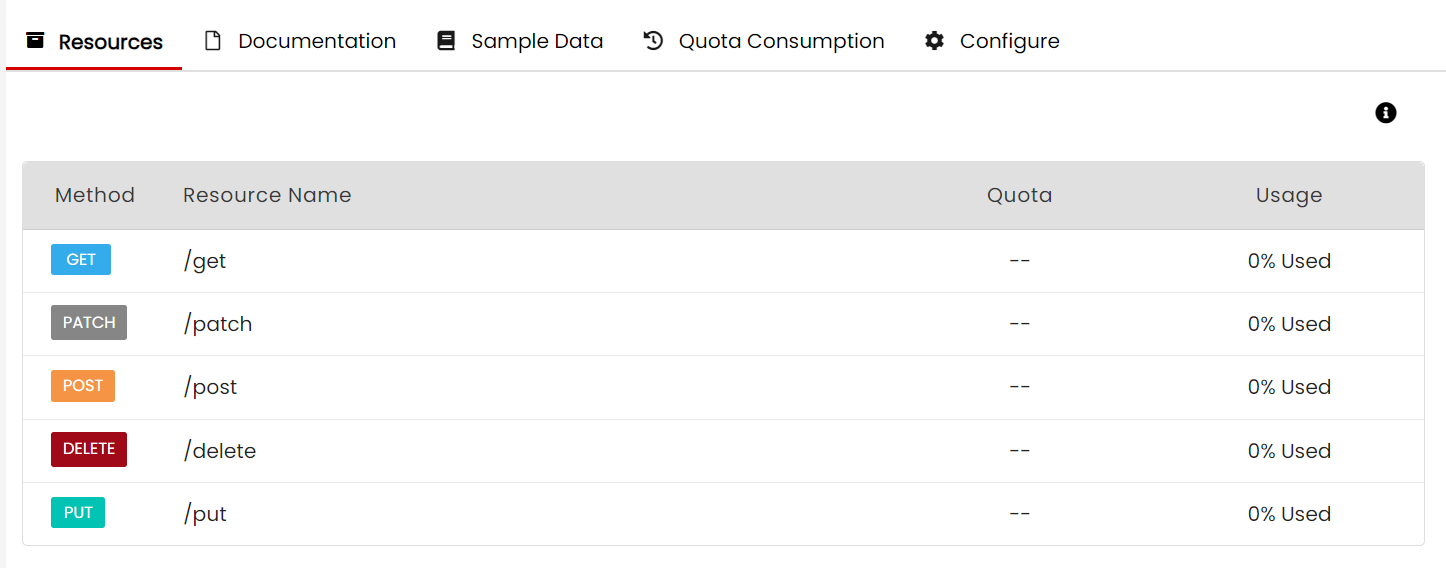
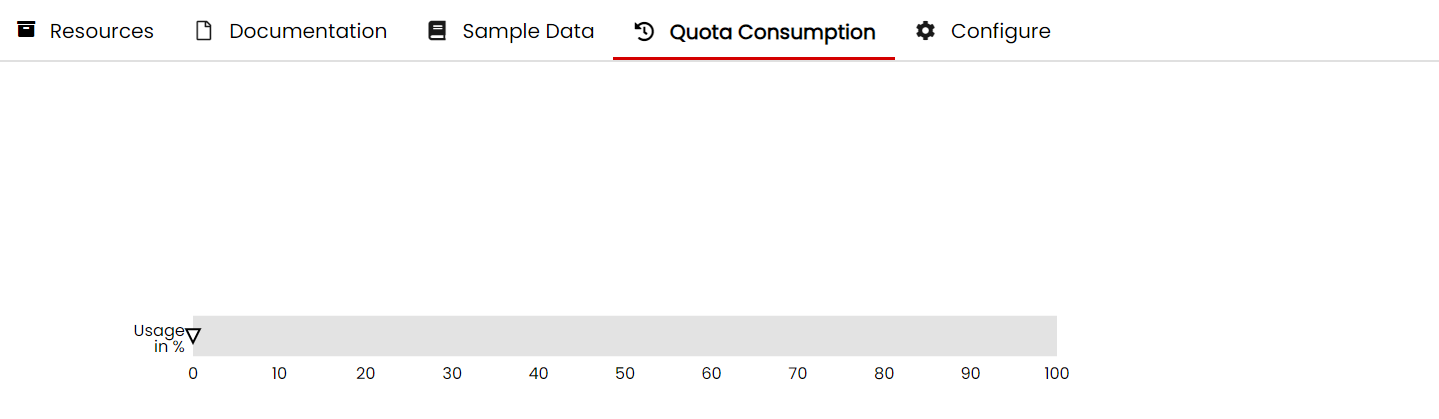
Quota Consumption - Clicking the Quota Consumption tab shows a graphic representation of the amount of subscription quota consumed to date. For unlimited quota, the statistics displays only the number of requests consumed for a subscribed plan.
For a non-monetized pack when Quota is unlimted then “Quota Consumption is unlimited” message will be displayed.
Note
You can view the details of a Subscription only if the Subscription status is active.
Configure - Clicking the Configure tab allows you to edit the authentication method values that you had configured in the Do you want to Subscribe? dialog box.
The Congigure tab also allows the user to enter privacy logs in either a Black List or White List.
If Authentication Type is Subscription key, a subscription key would have been generated after the subscription is added in the Add Subscription page in the publisher portal. This key is auto-generated and is not editable.