The next steps after assigning a name and Policy type to a Usage Policy is providing the amount of data the Policy will permit at run time. To find more information on usage limits, which include Rate Limiting and Throttling, visit: Usage Limits.
It is assumed that you have completed the tasks enumerated in the earlier section.
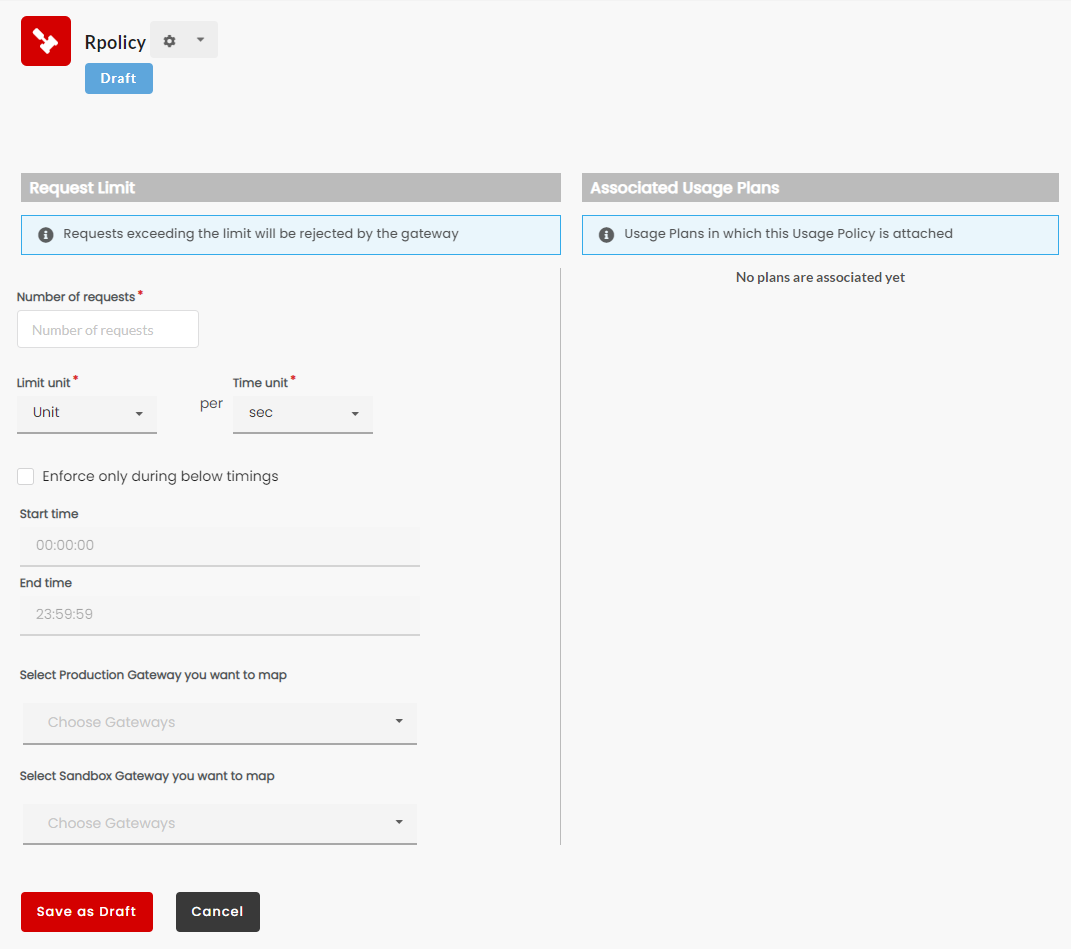
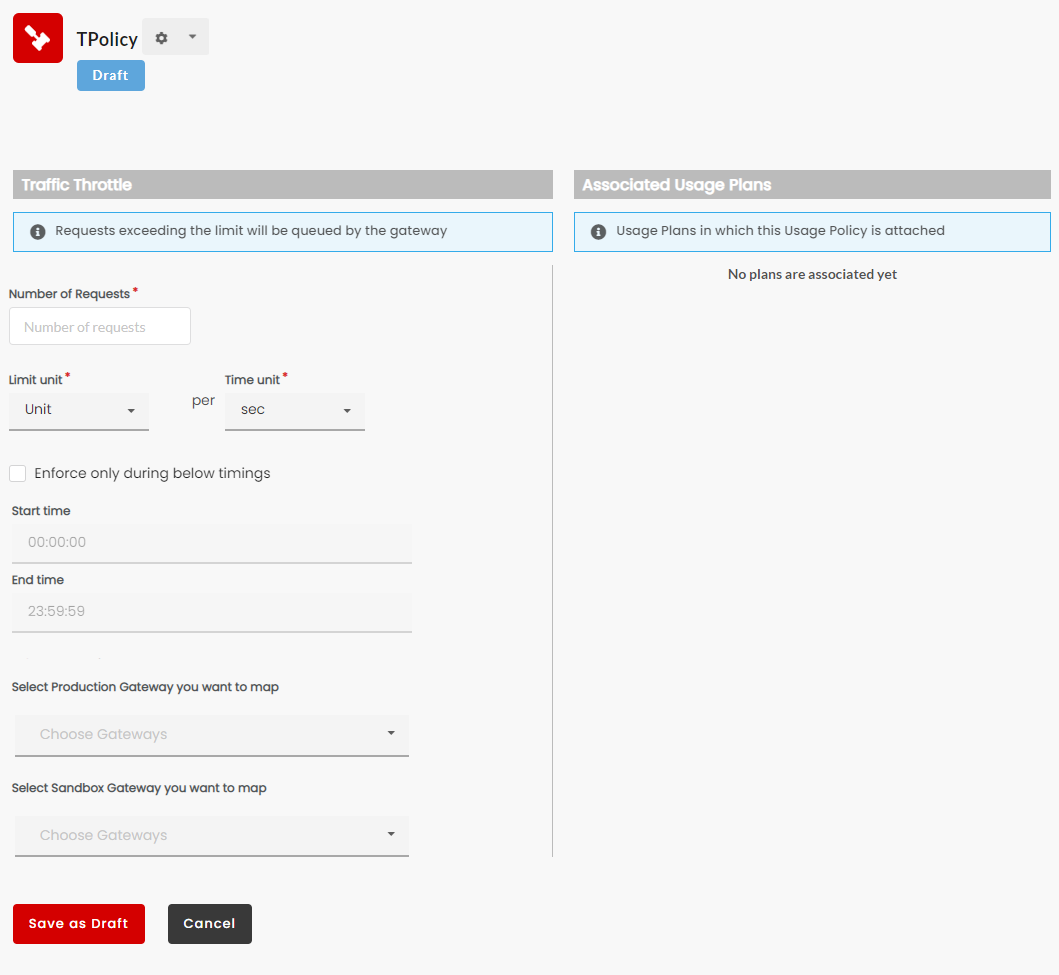
The Usage Policy screen, being context sensitive, displays only those fields that are relevant to the type of Usage Policy selected.
The right panel of the Usage Policy screen has the Impacted Plans table that displays a list of Usage Plans that the Policy in the left panel enforces.
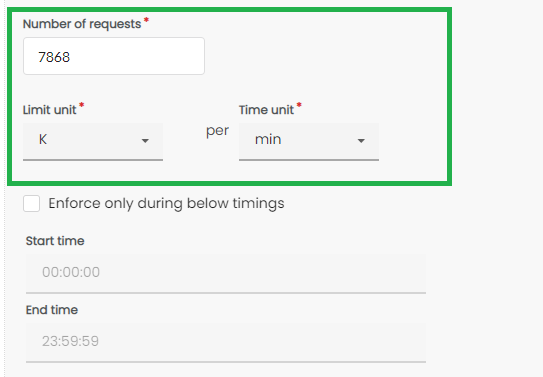
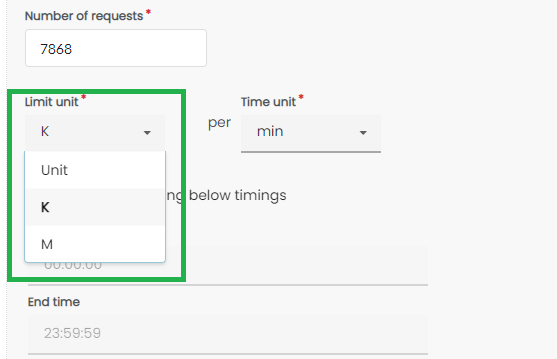
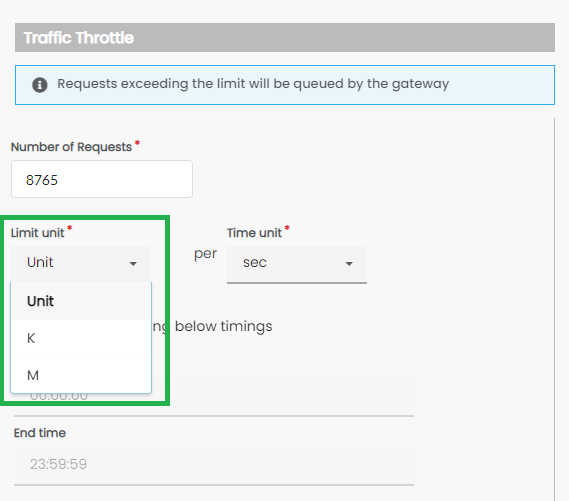
The tasks in this section has mentions of K and M as the unit of Request Count. K stands for kilo, the Latin word for 1000 (a thousand) and M stands for 1,000,000 (a million).
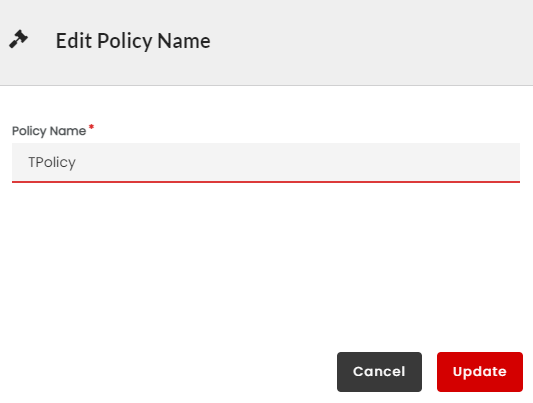
The fields marked with asterisks are mandatory.
Depending on the context, one of the two UI screens below could be referenced in this section:
In the Usage Policies list screen, click the row that has the Usage Policy that you want to edit. The Usage Policy screen displays. Being context-sensitive, the Usage Policy screen that displays are different for Request Count Limit and Traffic Throttle Usage Policies.
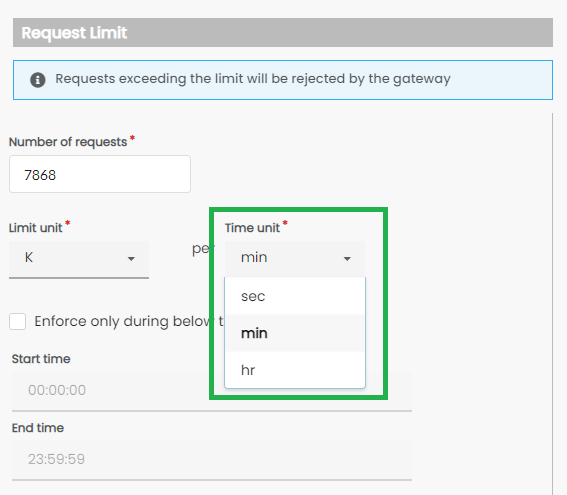
Click the Time unit drop-down box to select the unit of time for which the data volume is applicable. The options for units of time are sec (for seconds), min (for minutes), and hr (for hours).
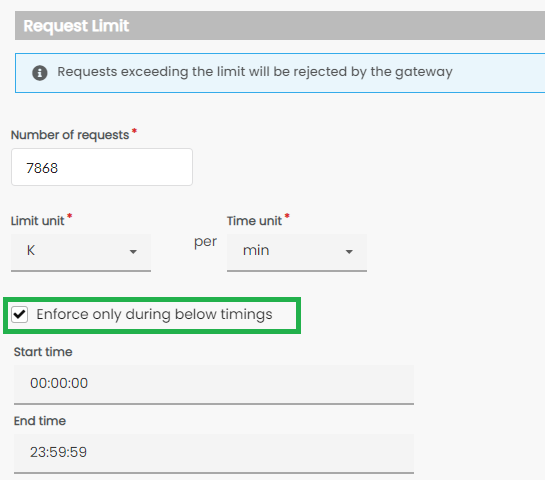
In the Start time box, type the start time, and in the End time box, the end time to specify the time duration for which you want to enforce the policy. Ignore this step if you left the check box Enforce only during below timings unchecked.
Note
Type the time in HH:MM:SS 24-hour clock format.
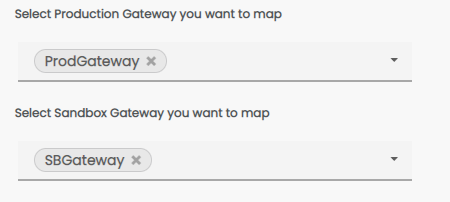
The Select Production Gateway you want to map drop-down displays the list of Production Gateways that are configured for the publisher organization. The Select Sandbox Gateway you want to map drop-down displays the list of Sandbox Gateways that are configured for the publisher organization. From the drop-down, choose the Production/Sandbox Gateway to which you want to map the Usage Policy. The Gateways you select will appear at the top of the drop-down. You can remove the selected Gateways by clicking the .
The Usage Policy will be mapped only to the selected Gateways. If a Plan has a dependency on Usage Policy then that Usage Policy will also be mapped along with the Plan.
You can also map the Usage Policy from the Usage Policy tab of the selected Gateway. Refer Usage Policy.
Click Save As Draft to save changes.
Traffic Throttle:
In the Number of Request box, type an amount to specify the M or K of data.
Once you are done with creating and editing a Named Usage Policy, the next step is to send it for approval so that after approval it can be assigned to a Plan. Note that approval request is applicable only if the automatic approval workflow is disabled for usage policies under Global Configurations.
To publish a Named Usage Policy:
Navigate to the Usage Policy screen.
Click the Usage Policy Action icon . The Usage Policy Action menu displays.
Click to select Submit for Approval to submit the draft Usage Policy for approval (for manual workflows) or click Approve to approve the draft Usage Policy (for automatic workflows) .
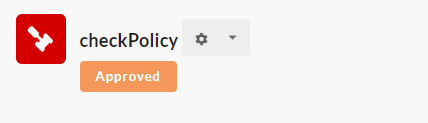
If automatic Approval Workflow for logged-in user role is enabled: The Usage Policy state changes from Draft to Approved.
A deprecated Usage Policy is not available for assigning to a new Usage Plan. If an approved or Published Usage Policy that has been attached to a Usage Plan and has active subscribers is marked for deprecation, it will remain enforceable until the end of the subscription validity period.
You can deprecate a Named Usage Policy only if it has an Approved or Published State.
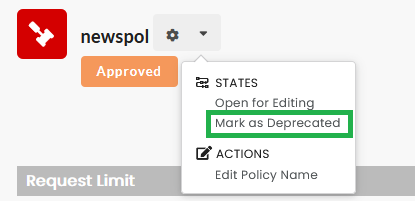
To deprecate a Usage Policy:
Navigate to the Named Usage Policy screen.
Click the Usage Policy Action icon . The Usage Policy Action menu displays.
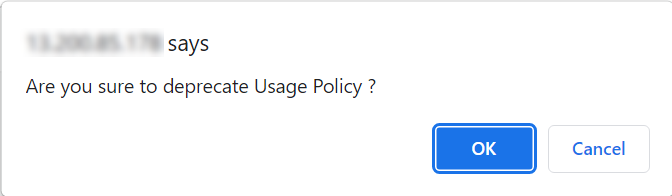
Click Submit for Deprecation (for manual Workflows) to send the usage policy you want to Deprecate for approval or click Deprecate (for automatic Workflows) to deprecate the usage policy.
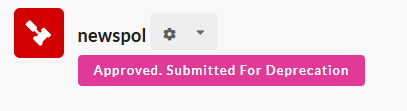
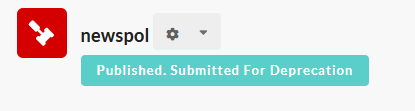
If automatic Approval Workflow for logged-in user role is disabled: For published policy state changes from Published to Published.Submitted For Deprecation.
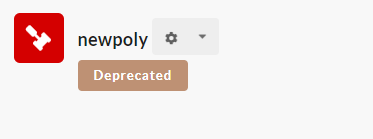
Once a Publisher user approves the policy submitted for deprecation, the state in the policy screen changes from Submitted for Deprecate to Deprecated.
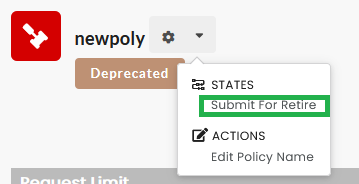
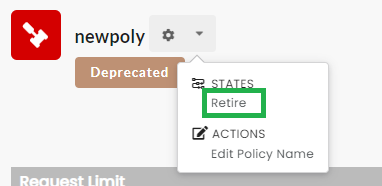
You can send a Named Usage Policy for retirement if the Usage Policy is in its Deprecated State. Once a Policy is Retired, it will not available for attaching to a Usage Plan. You cannot send a Deprecated Usage Policy for retirement if it is associated with a Usage Plan.
To retire a Usage Policy:
Navigate to the Named Usage Policy screen.
Click the Usage Policy Action icon . The Usage Policy Action menu displays.
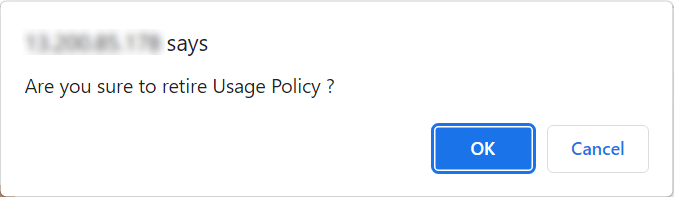
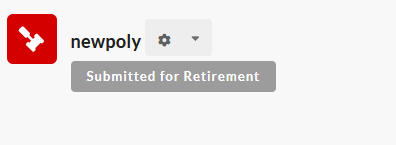
Click Submit for Retire (for manual workflows) or click Retire (for automatic workflows) to send the Usage Policy for retirement.
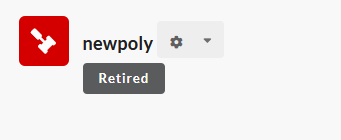
Once the Publisher user approves the policy submitted for retirement, the State of the Usage Policy changes from Submitted for Retirement to Retired.
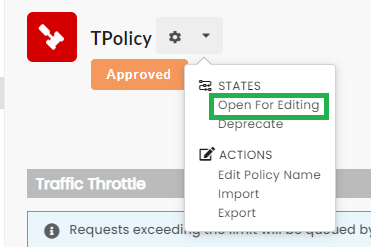
3.14.6. Open an Approved or Published Usage Policy for Editing
Since a Usage Policy after its approval becomes available for attaching to Usage Plans, editing or making changes directly is not permitted. In cases where it becomes necessary to make changes to an Approved or Published Usage Policy, you need to use the Open for Editing option available from the Usage Policy Action menu.
To open an Approved or Published Usage Policy for editing:
Navigate to the Named Usage Policy screen.
Click the Usage Policy Action icon . The Usage Policy Action menu displays.
Click Open for Editing to submit the currently open Usage Policy for edit.
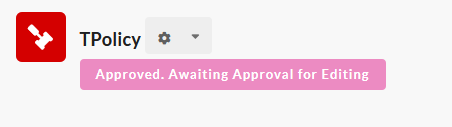
The State of the Usage Policy changes from Approved to Approved. Awaiting Approval for Editing.
Fig. 3.398 Approved. Awaiting Approval for Editing
Once the Publisher user approves the Usage Policy, the State of the Policy changes to Draft, which allows you to edit the Policy.
Once you are done with making changes to the Usage Policy, submit the Policy for Approval. After the Approval, the Usage Policy State changes to the Approved State.
To make the changes operational, complete the tasks in the section: Synchronize Changes. After synchronizing the state in the Usage Policy changes to Published.
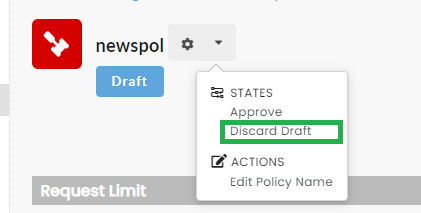
3.14.7. Discard Changes after opening a Usage Policy for Editing
You can discard the draft and revert to earlier Approved or Published Usage Policy if you change your mind about making any revision for the policy.
To Discard the Draft after opening a Usage Policy for edit:
Navigate to the Named Usage Policy screen.
Click the Usage Policy Action icon . The Usage Policy Action menu displays.
Click Discard Draft to submit the request for discarding the draft Usage Policy.
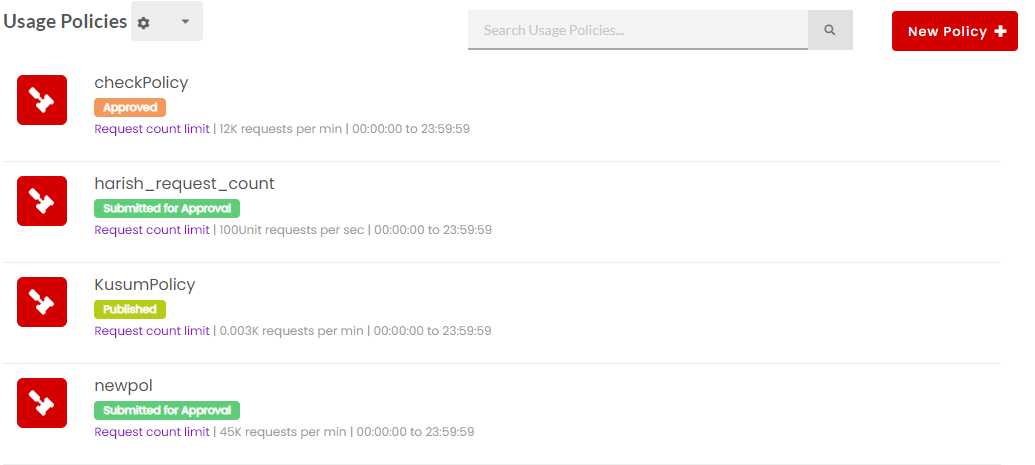
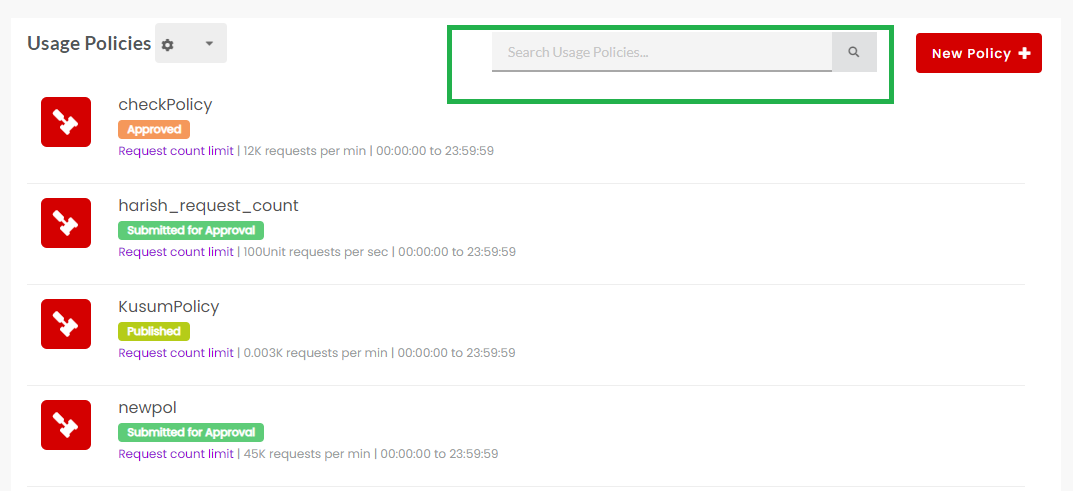
The user can search for a Usage Policy using the Search feature present in the Usage Policies page. To learn more about the Search feature, refer the topic: Search
The search results page displays matches for the search from the following Usage Policy components:
Usage Policy name
Associated pack names
Associated usage plan names
Number of Requests in Policy detail page
To search a Usage Policy:
Navigate to the Usage Policies page.
In the search box, type in the keyword(s) for starting a search on a Usage Policy or one of its components.
 .
.

 . The Usage Policy Action menu displays.
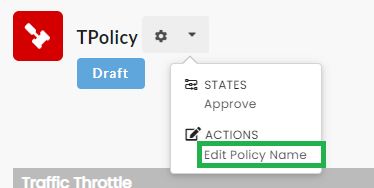
 . The Usage Policy Action menu displays.


 to display the search results.