In the last section, you created an API by giving it a name and type. The tasks in this section will allow you to control an API’s behavior. You will learn to add and edit API resources/operations, configure endpoints, handle Transformations and Schema Validation, and manage API Versions and their Visibility.
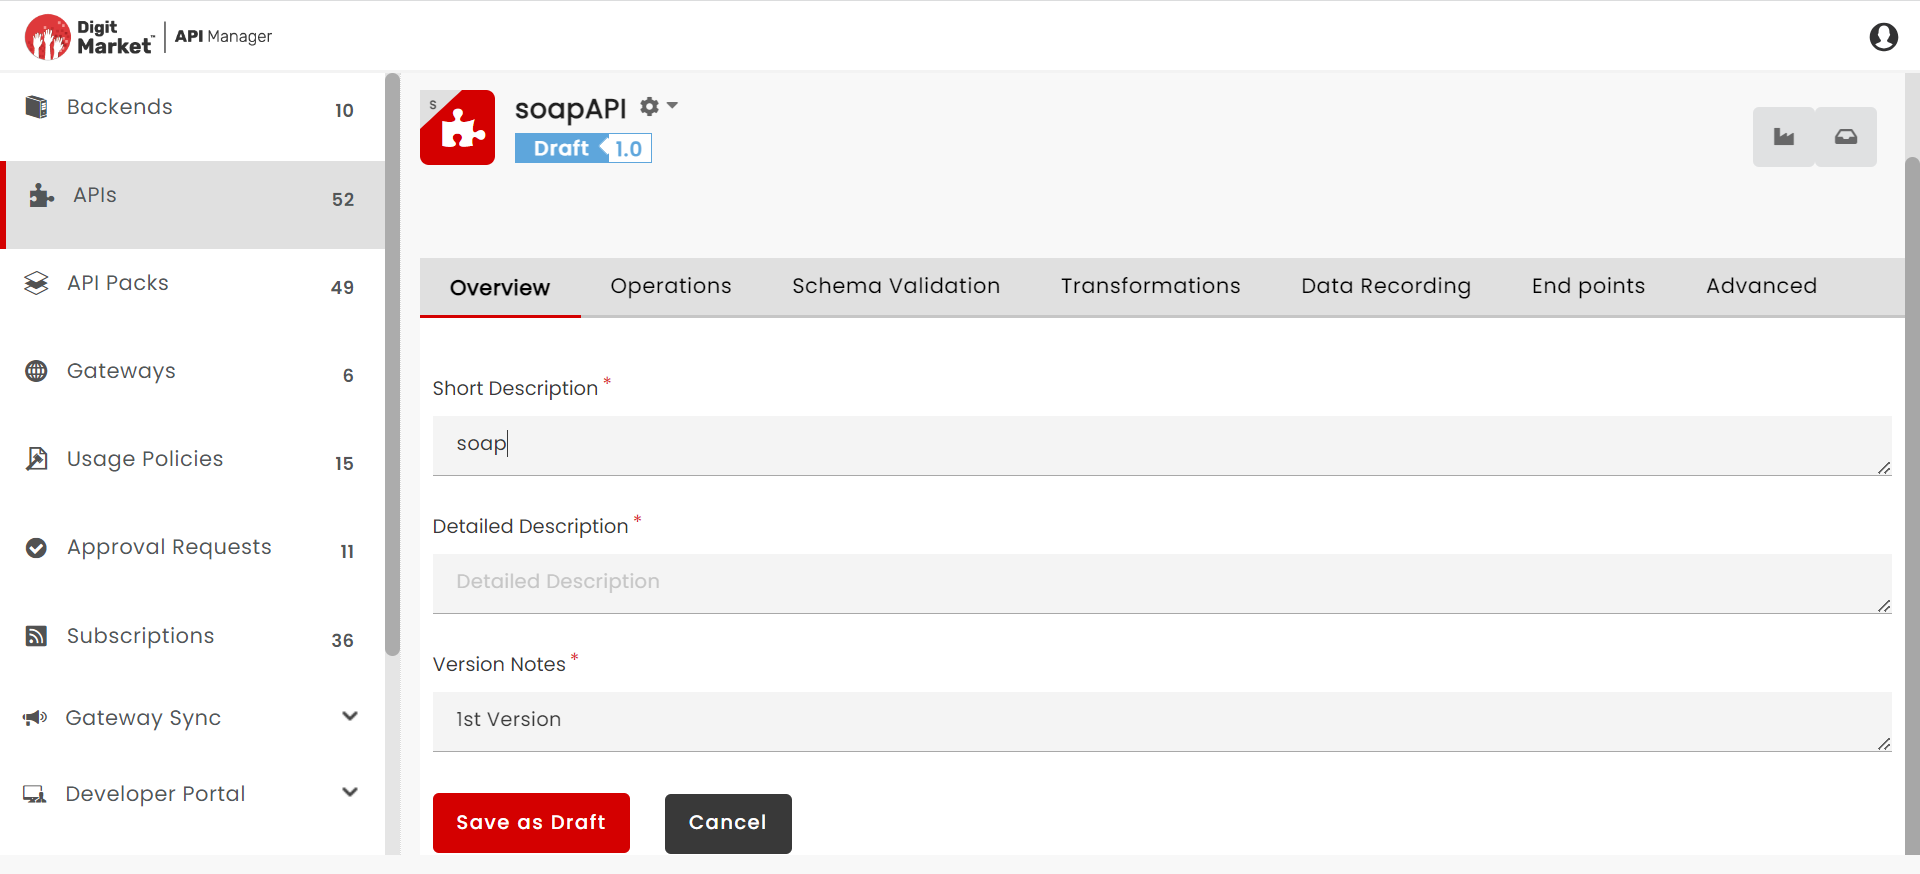
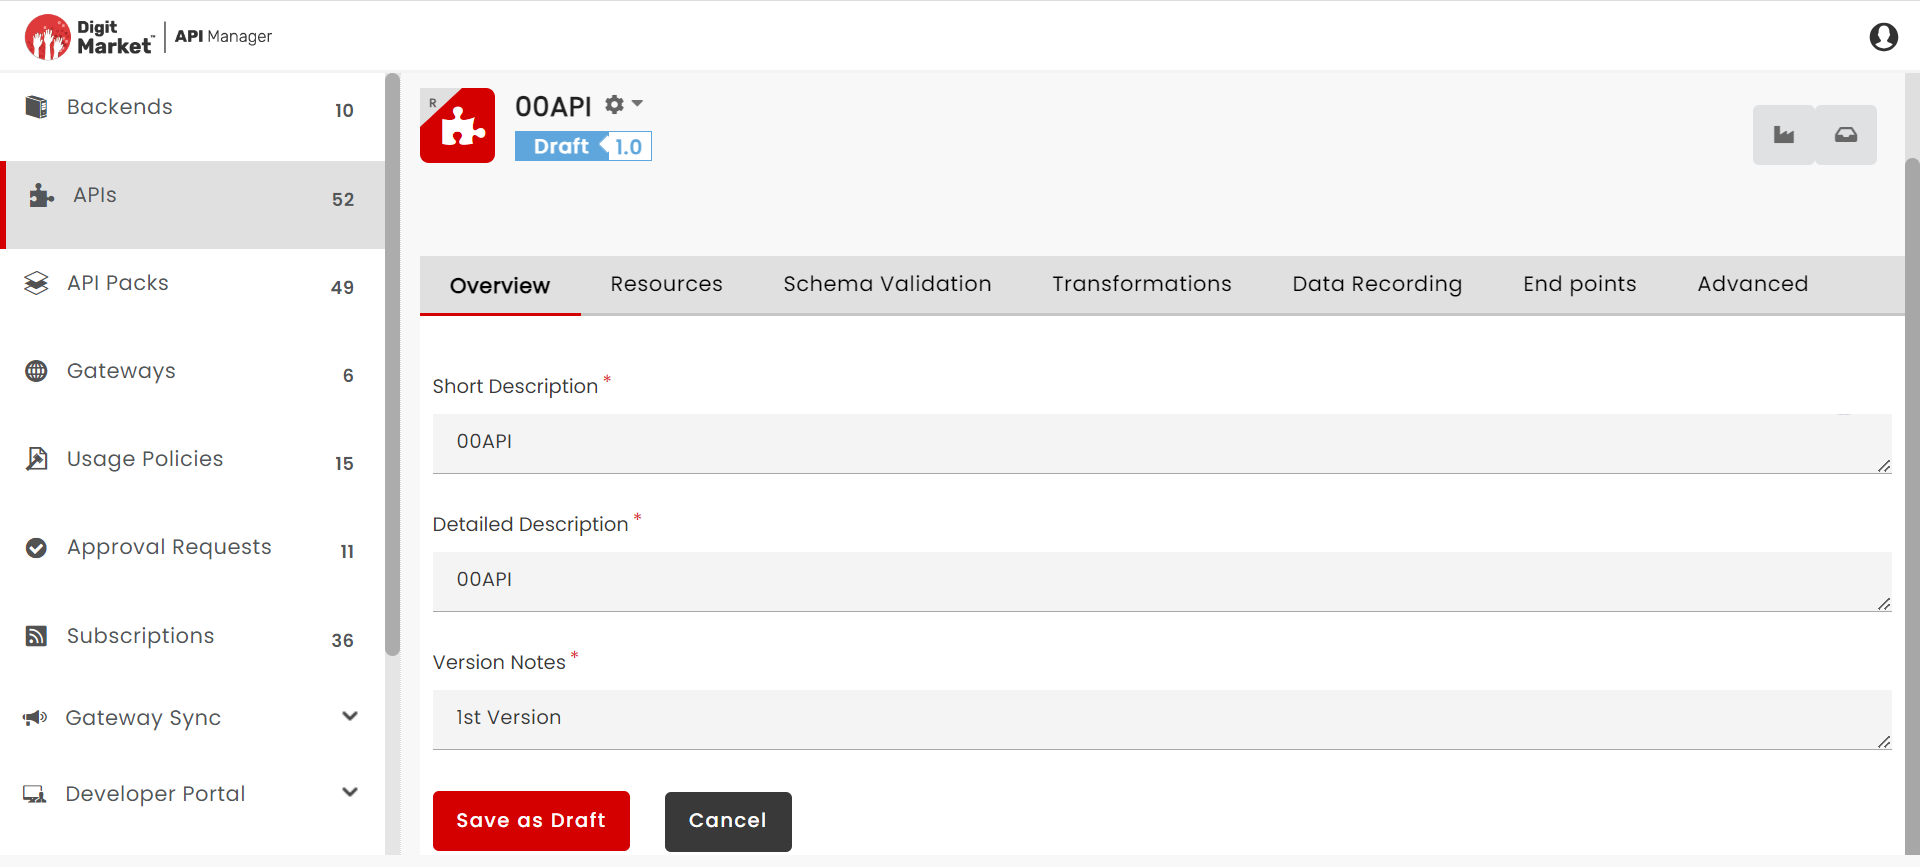
In the Short Description box, type a short description, if not already provided through the Add New API dialog box from the earlier task: Assign a Name and Type to an API.
In the Detailed Description box, type a detailed description.
In the Version Notes box, type version notes . Version Notes are used to specify what is new in the currently open version. By default, DigitMarket™ API Manager allots the first Version (1.0) to a newly created API version and populates the Version Notes box with the text: 1st Version.
Click Save As Draft to save changes and finish adding the Descriptions.
Resources can be added to a REST API using either of the following two methods:
Manual method
Upload method
Adding resources using the Manual method requires you to add resources by selecting a method, Resource name and Resource description. Conversely, if you add resources using the Upload method, you need to upload a Swagger Specifications file that contains the methods, Resource names and descriptions. The file is used to parse and load Resource definitions.
To add Resources to an API the Manual method:
Navigate to the REST API Configuration screen.
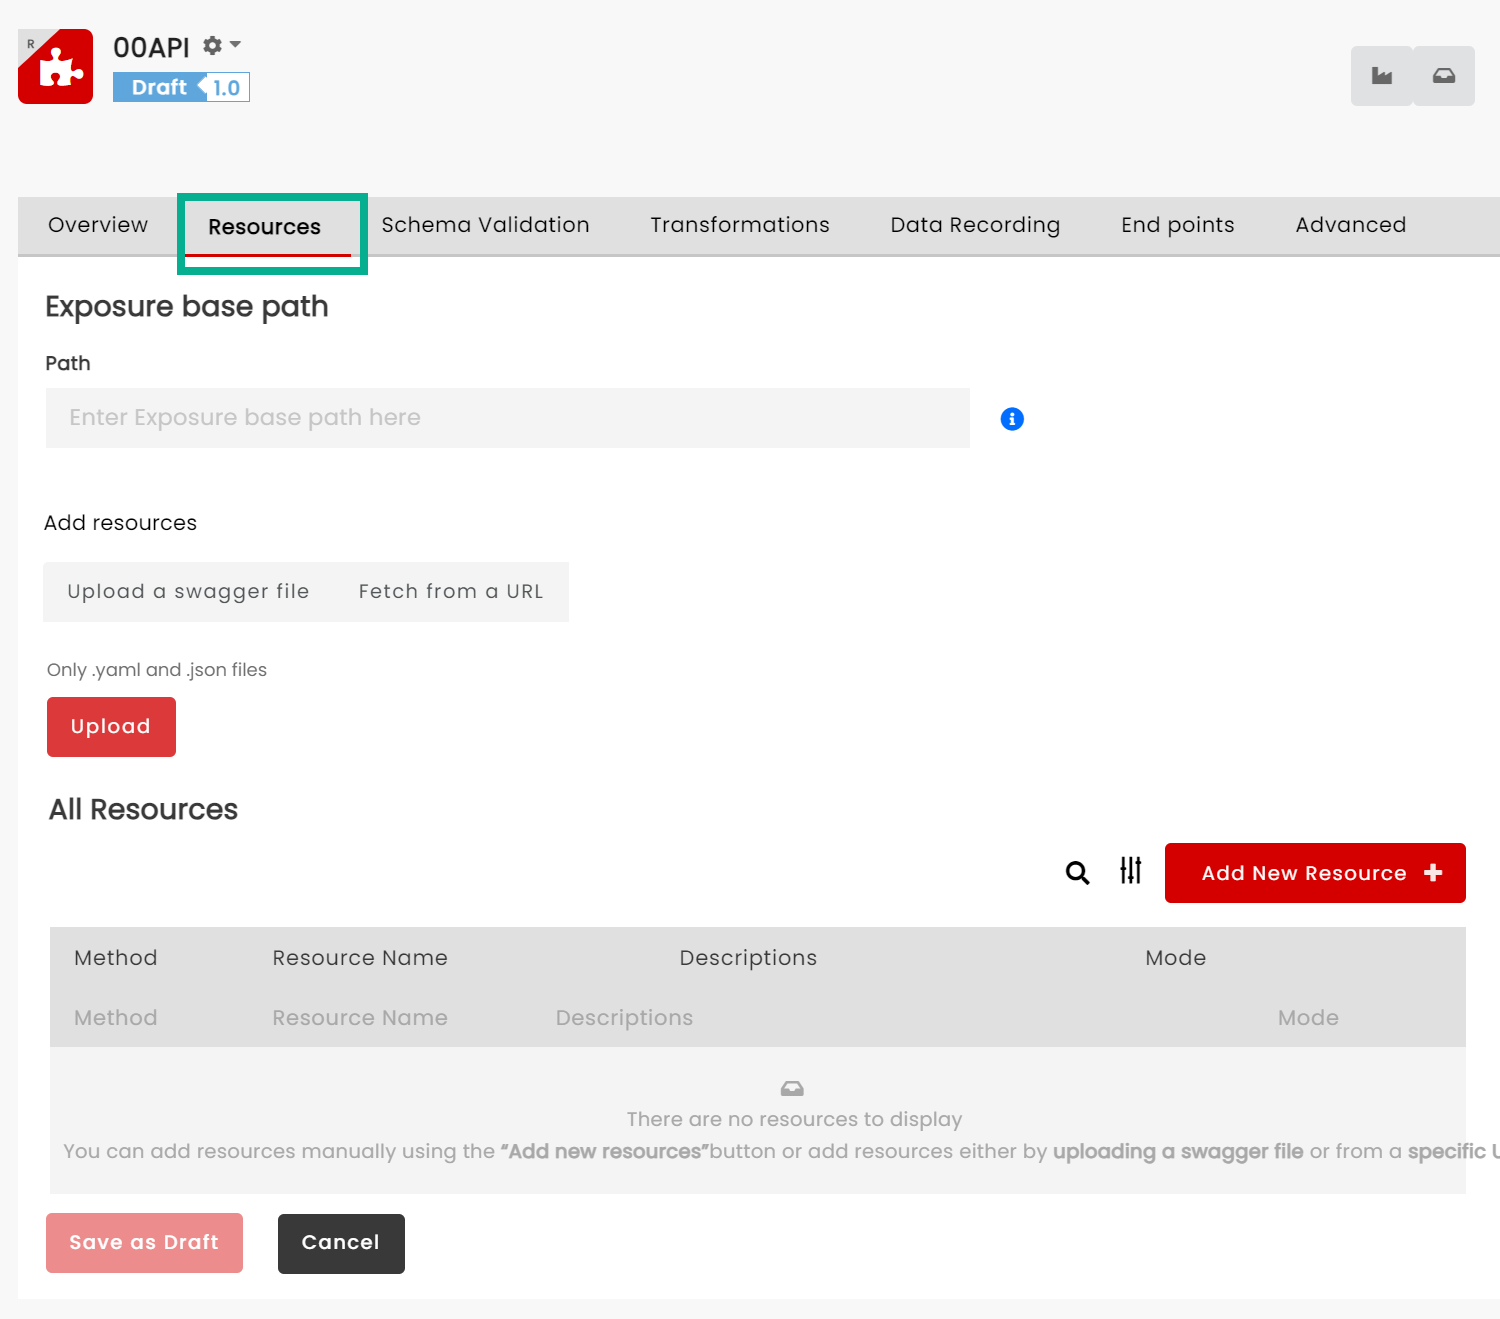
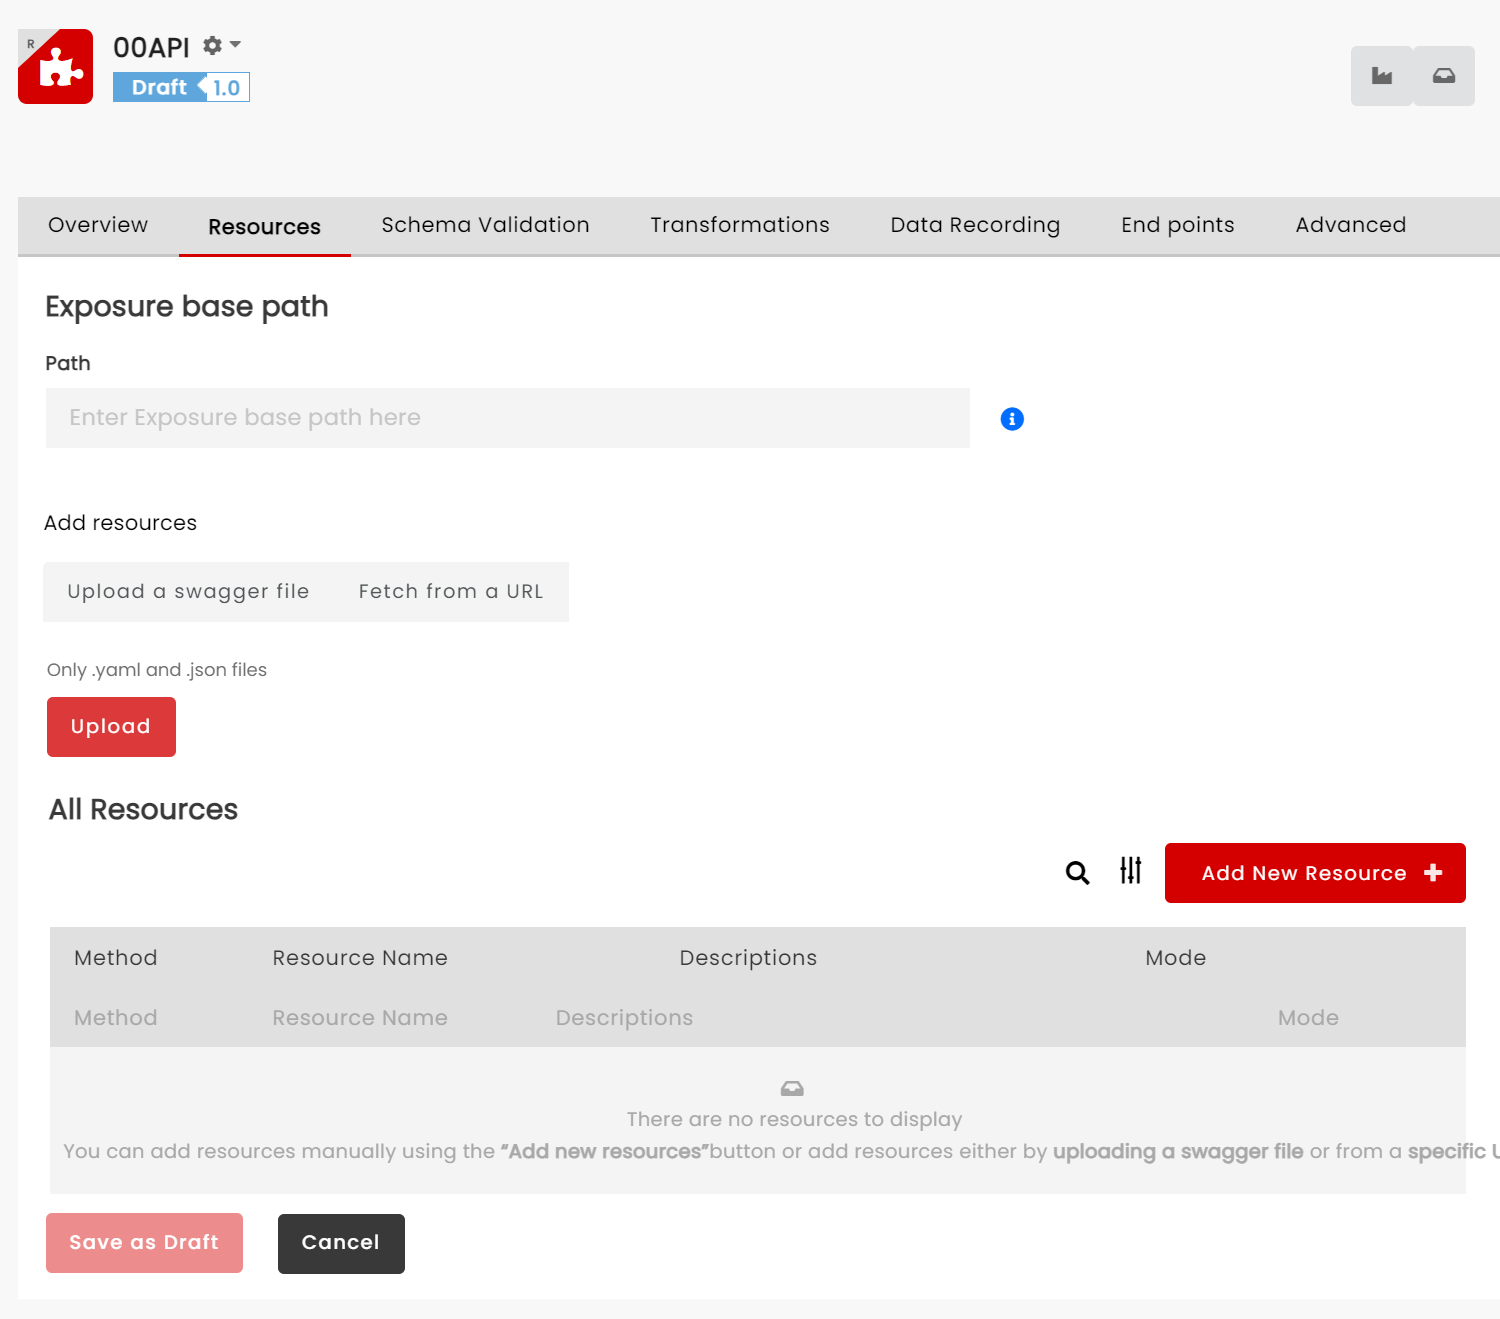
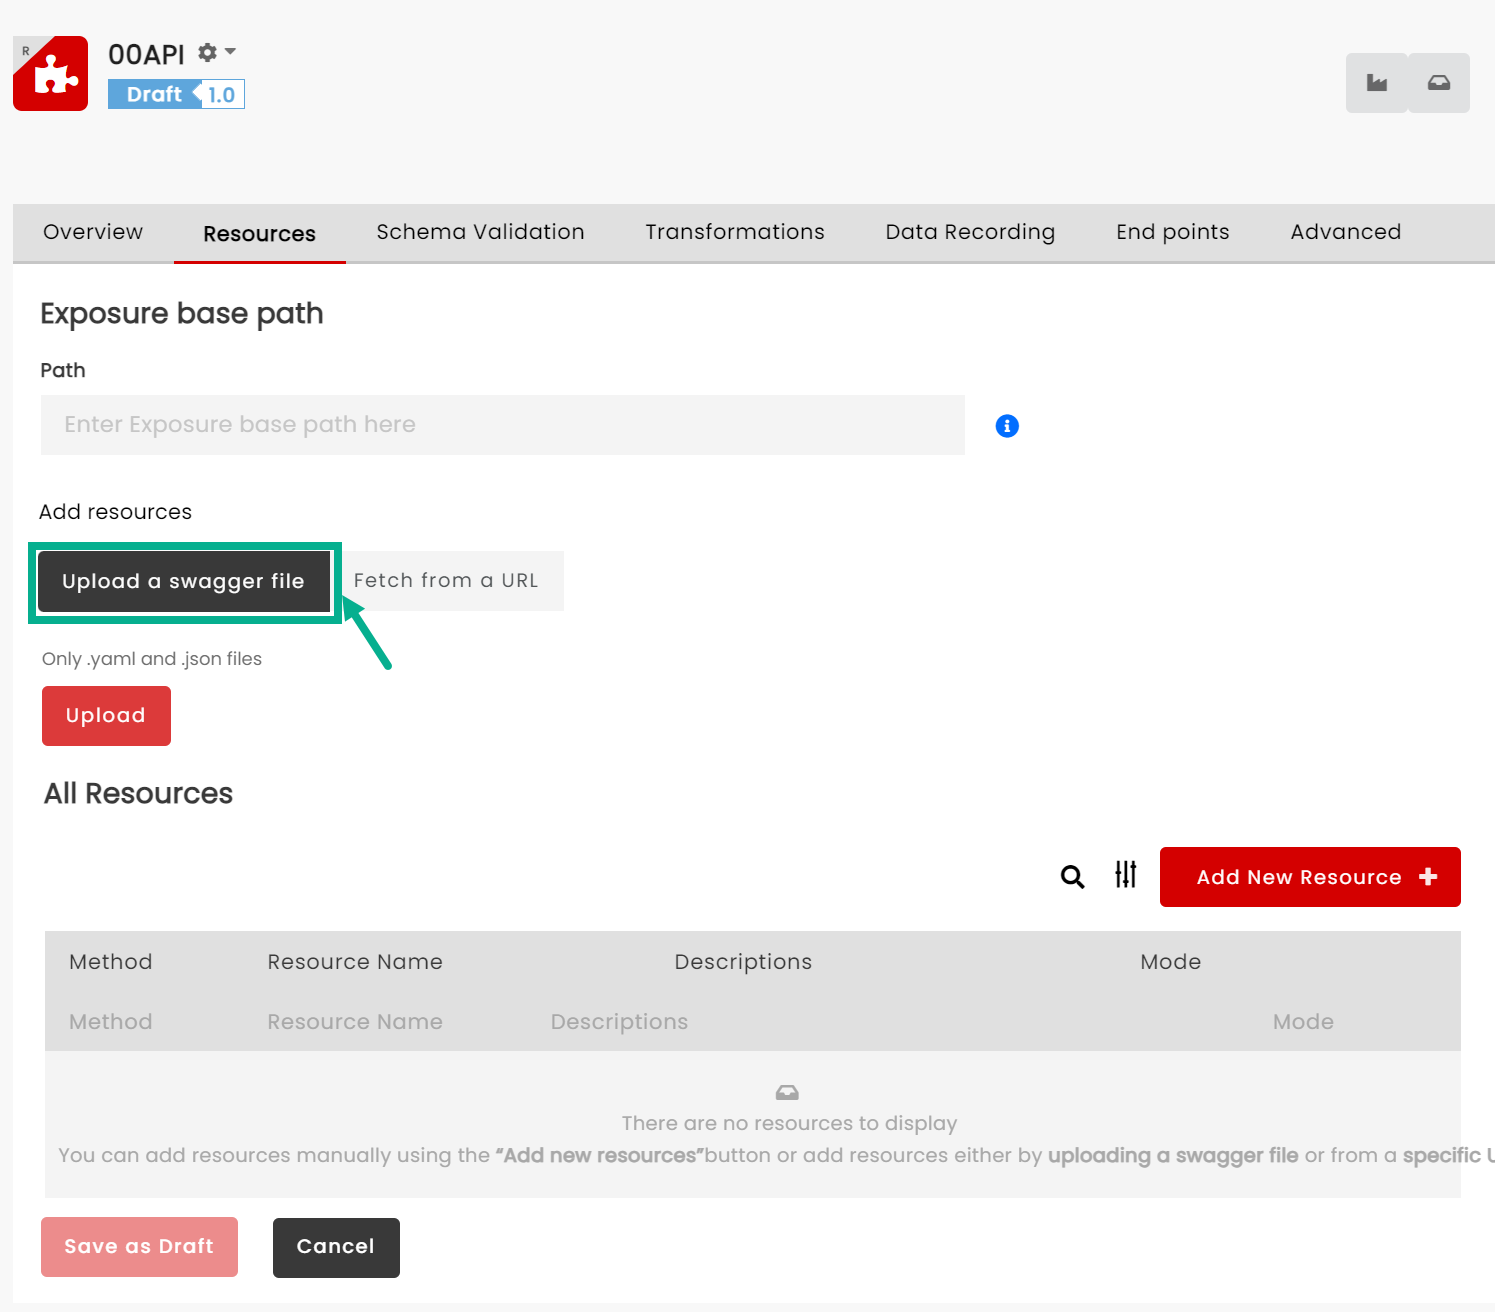
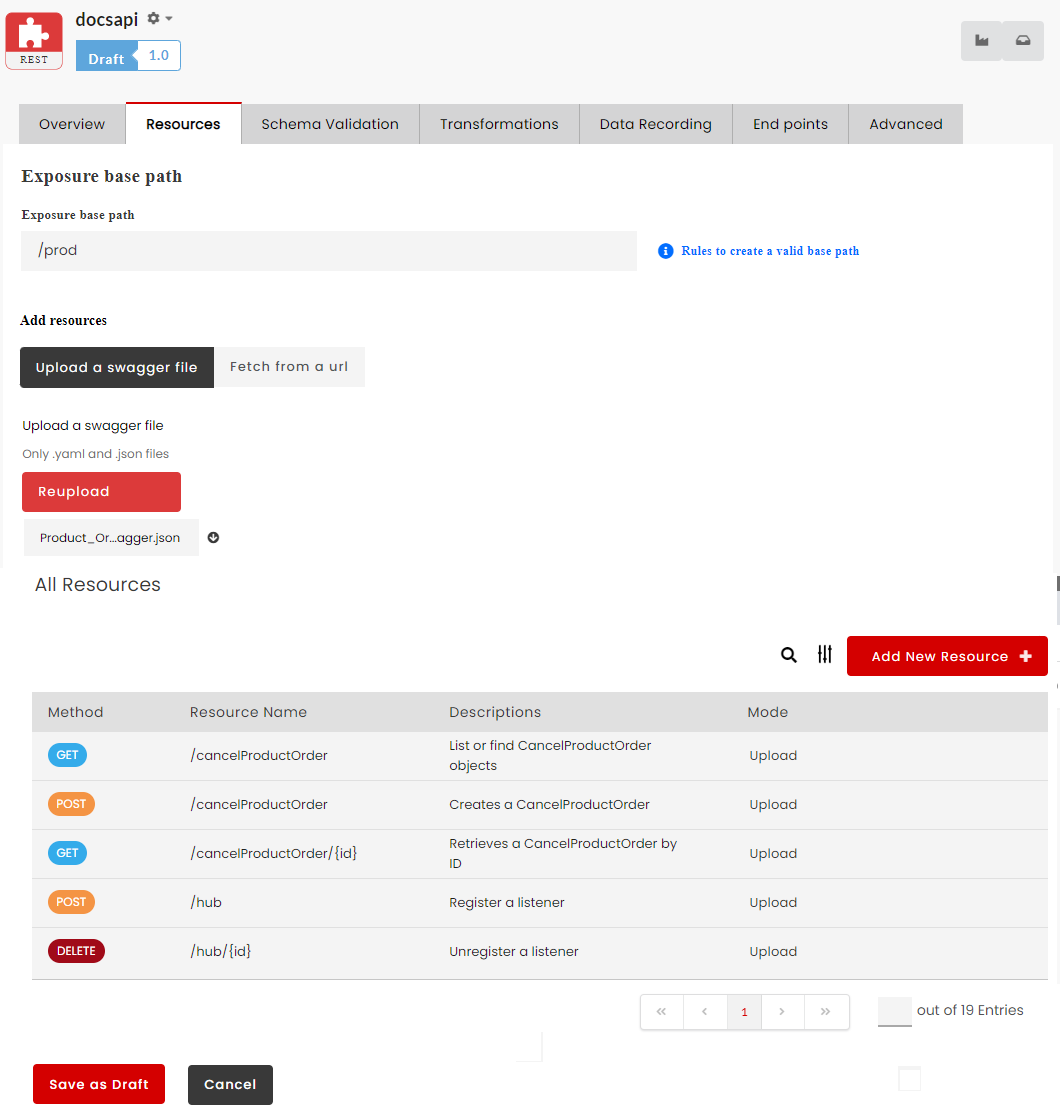
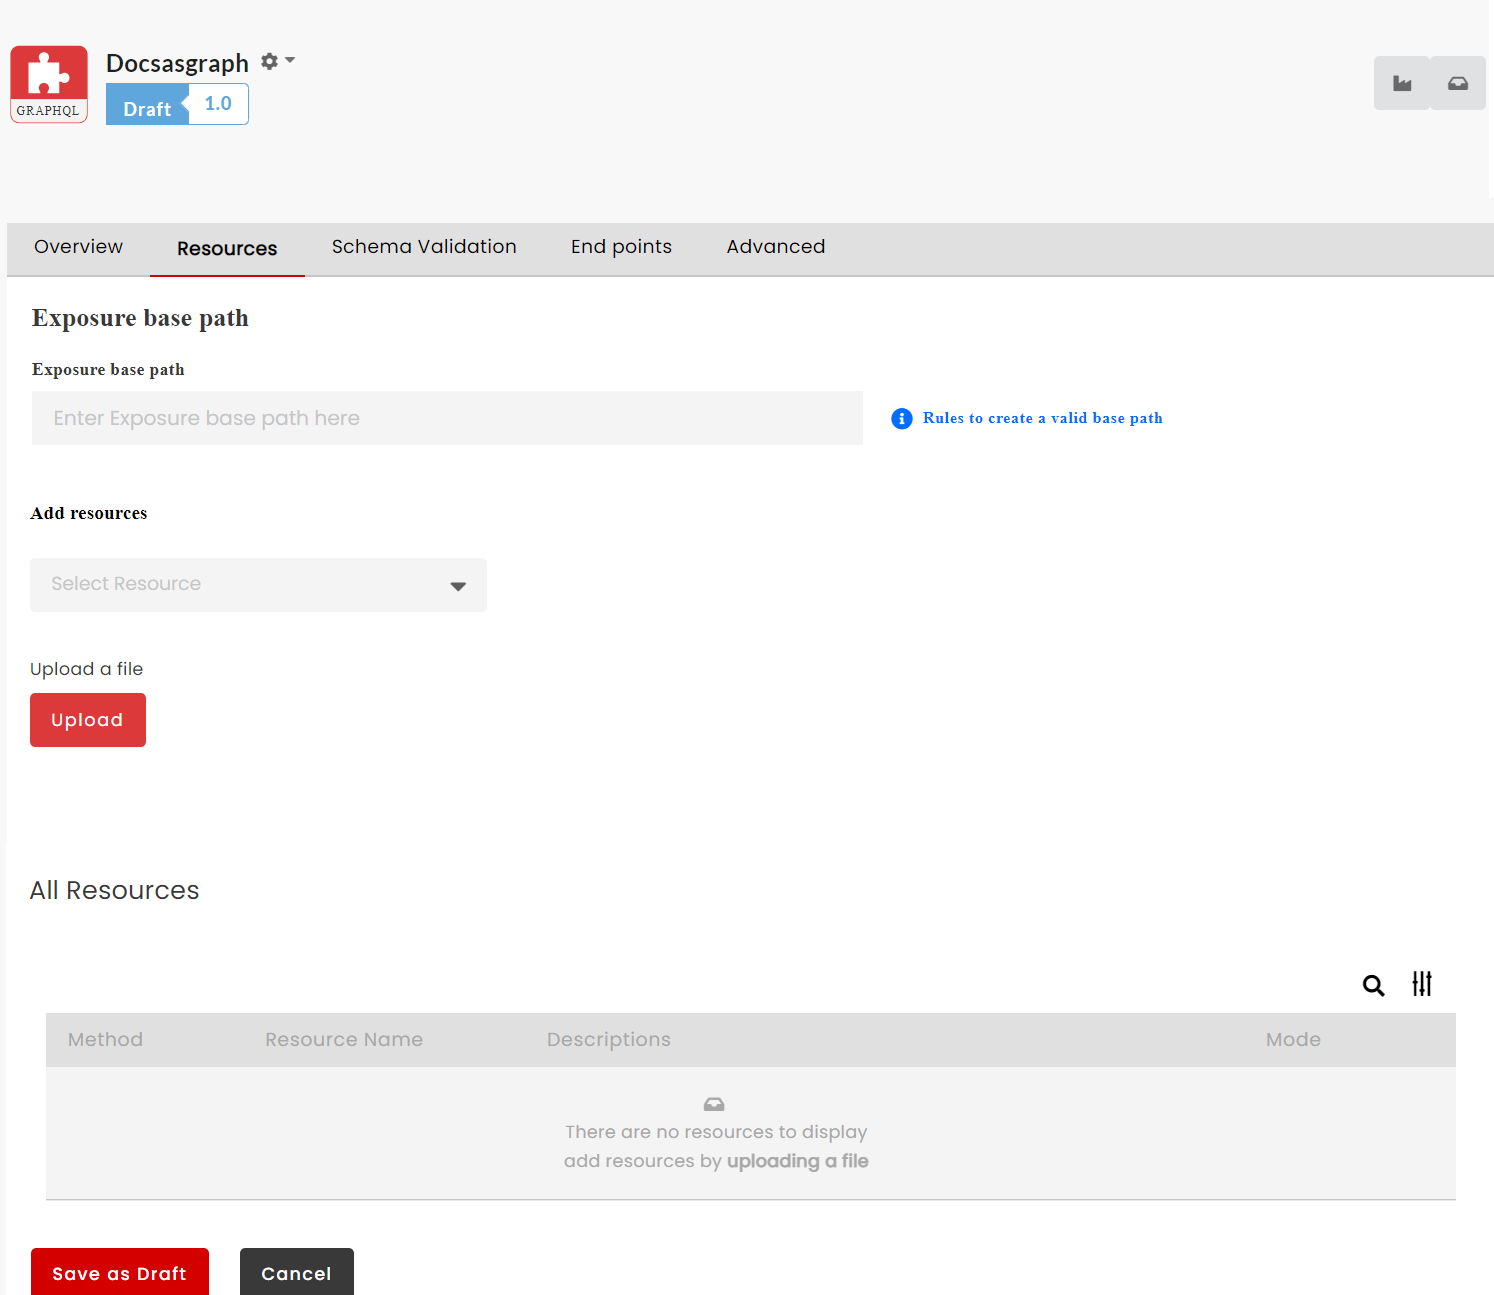
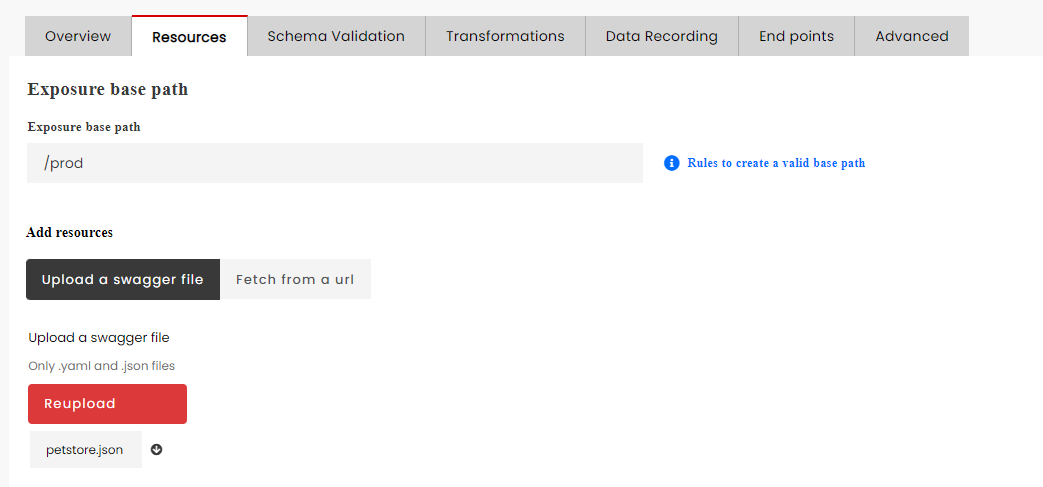
In the REST API Configuration screen, click the Resources tab.
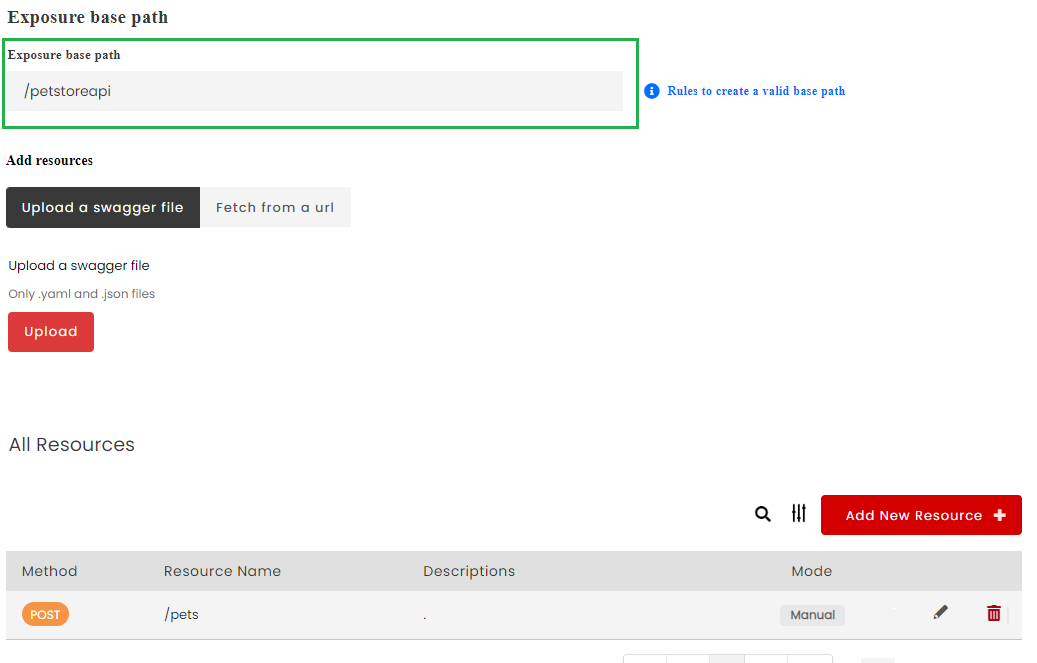
Scenario 1: The Resources tab displays the exposure base path and current list of resources (if the API already has a Resource added to it).
In the Exposure Base Path box, type an exposure base path for the new API.
The exposure base path is the root path that is visible to API consumers. It precedes the resource name and must be common to all resources. A URL with base path should resemble the following format: https://myorg-test.dmapim.com/v1/weather/forecast wherein https://myorg-test.dmapim.com/ is the URL fragment that stands for domain name of your company and /v1/weather is the base path of the exposed endpoint while /forecast is the Resource name. Here, you need to use the /v1/weather in the Exposure Basepath box.
Note
Rules to consider while adding/updating the exposure base path:
A minimum of three characters, including the initial special character (/)
Supports numerals (0 to 9), uppercase (A-Z), lowercase (a-z) and special characters (. - / _)
For the first two characters, begin with special character (/) followed by uppercase (A-Z), lowercase (a-z), numerals (0-9) and special characters (_ -)
From third character onwards, use numerals (0 to 9) or uppercase (A-Z) or lowercase (a-z) or special characters (/ _ - .) (can be 0 or multiple characters of those)
For characters third and above, use special character (.) and any of the numerals (0 to 9) or uppercase (A-Z) or lowercase (a-z) or special character (_) (can be 0 or multiple characters of those)
Must not end with (. or /)
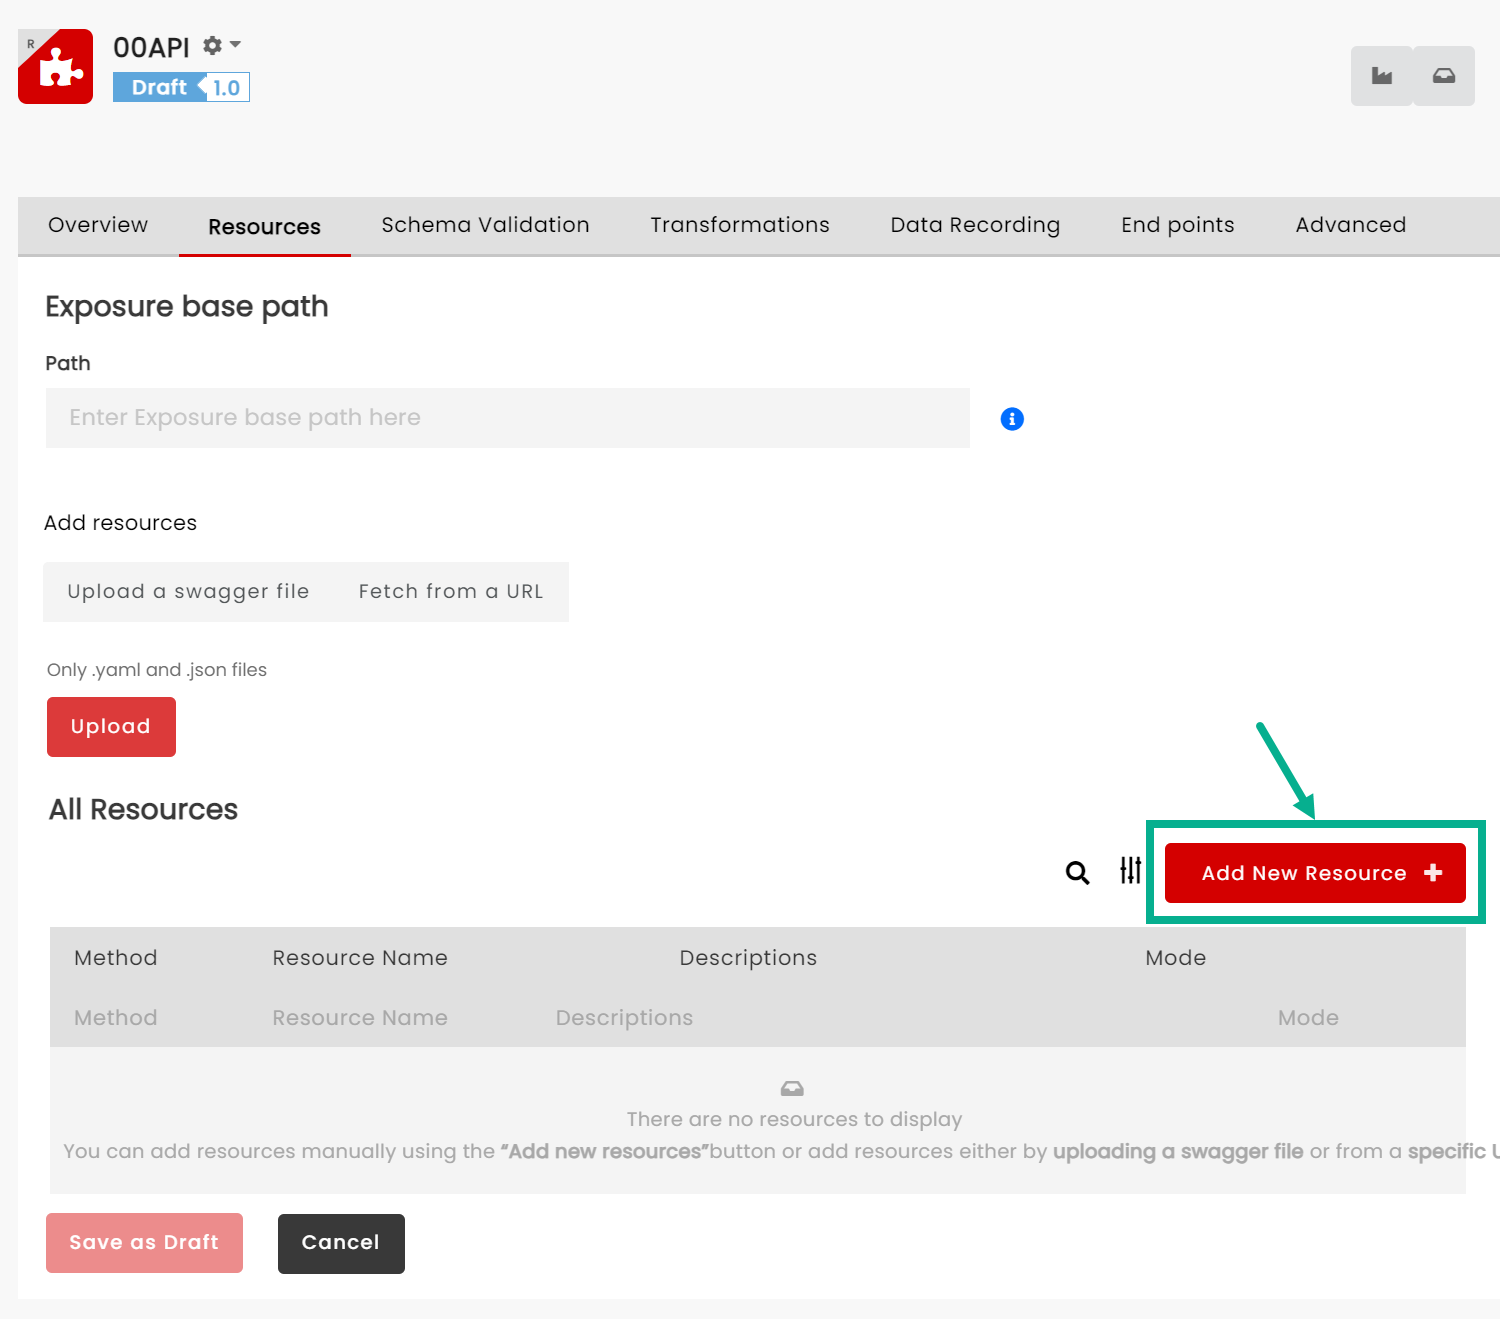
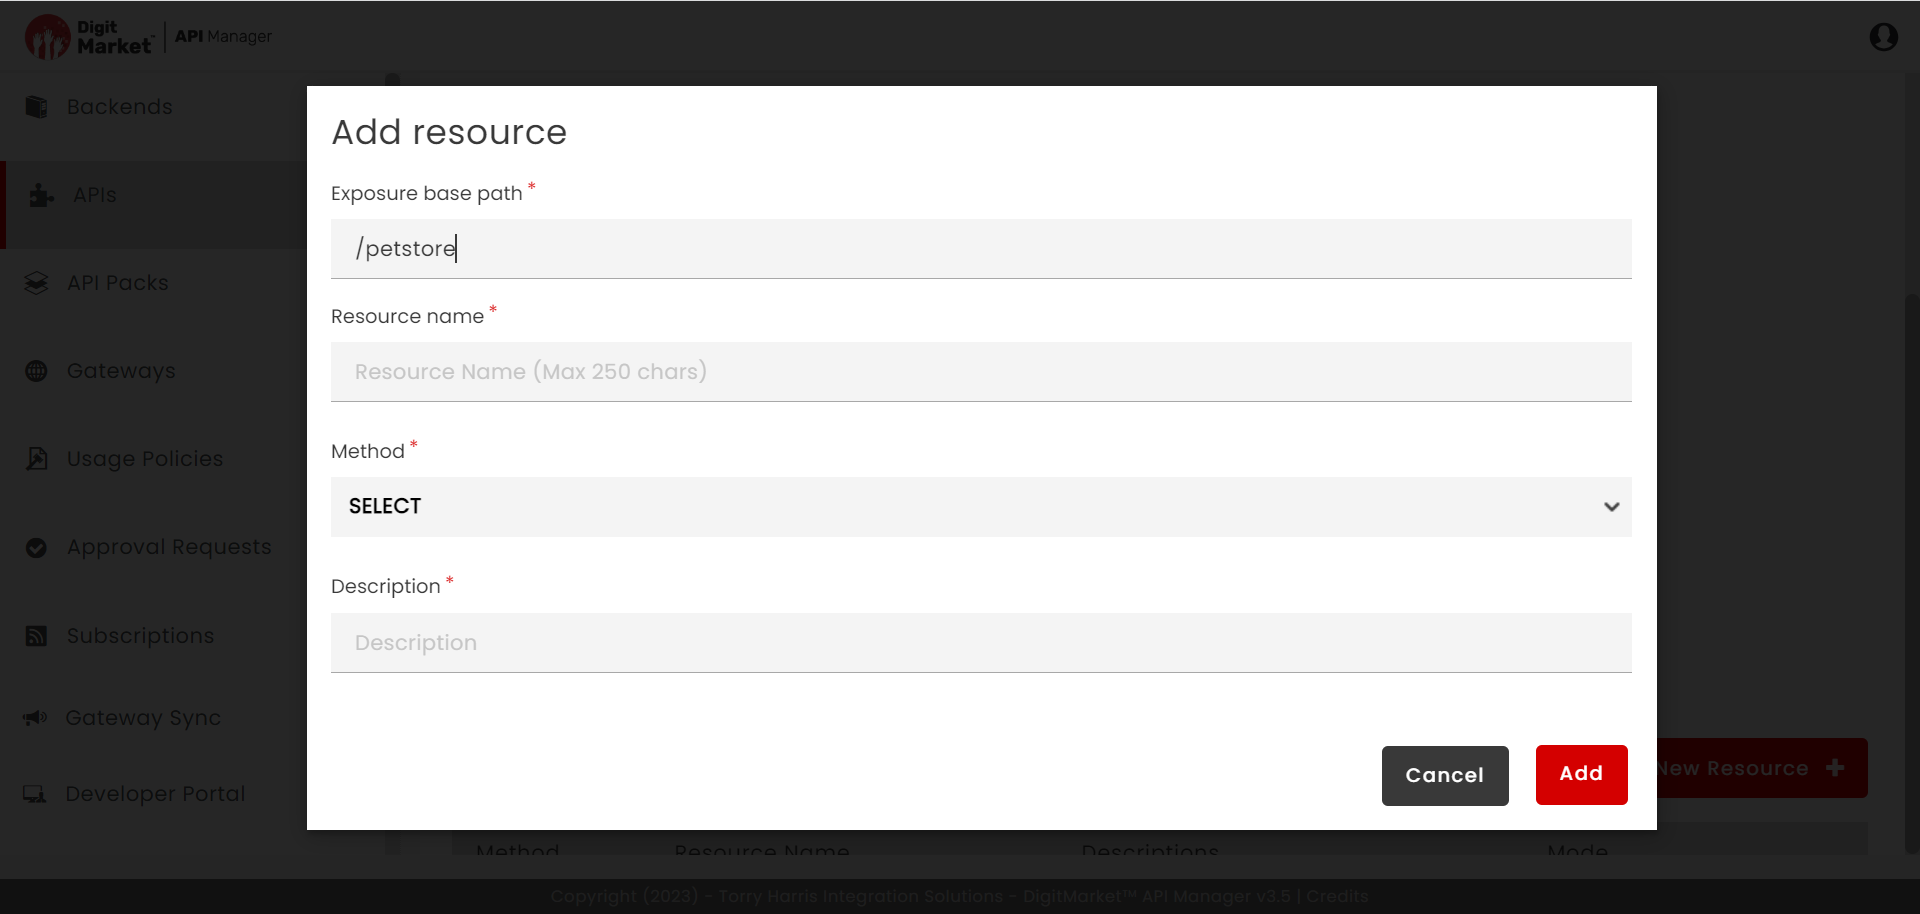
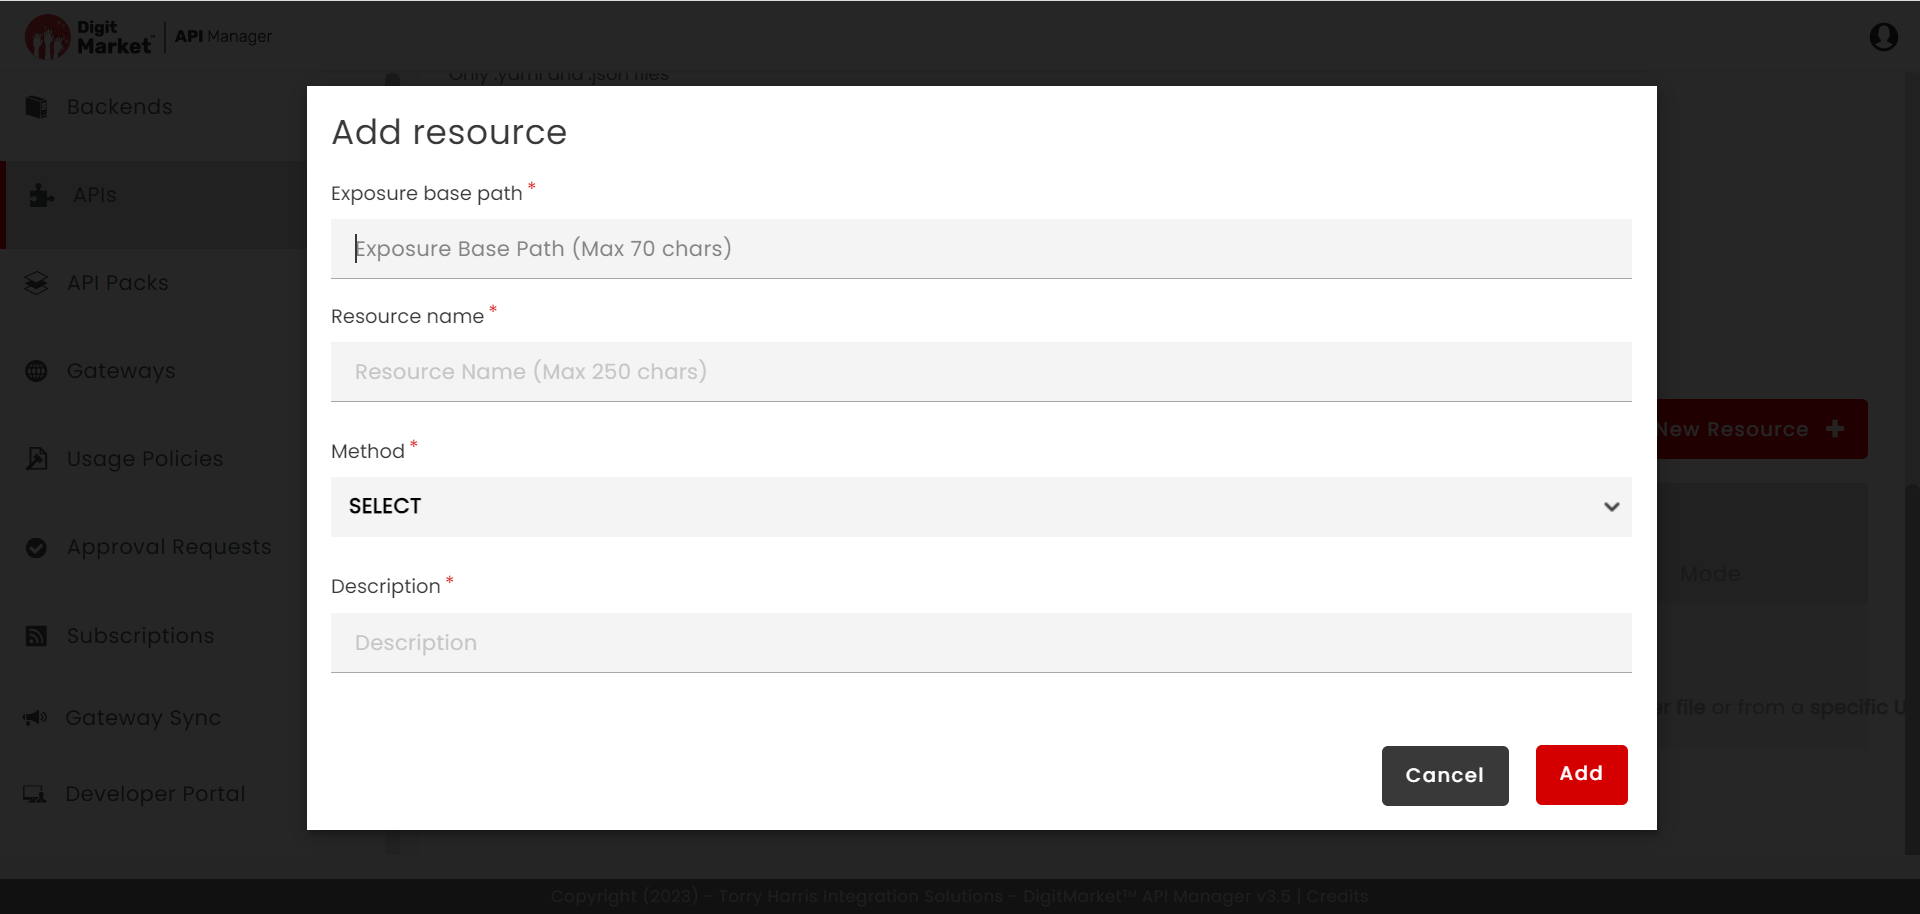
Click Add New Resource to add a new resource to the API.
In the Resource Name box, type the name of the Resource. The resource name should be prefixed with a forward slash, i.e., “/” as in “/forecast”
The Resource name represents a data entity. The name that you choose should be easily identifiable with the information it is intended to provide. Since RESTful is a state, naming a Resource as a noun as opposed to a verb is more beneficial as verbs are generally reserved for commands. For instance, in the URL: https://myorg-test.dmapim.com/v1/weather/forecast, /forecast is the Resource name and has a noun form. For an example of the verb form in a URL, let us take a look at our next URL example: https://myorg-test.dmapim.com/v1/weather/capture. Here /capture is a verb form.
Note
Resource name can be alphanumeric and must not more than 250 chars long.
Click the Method drop-down list to select the method to be used for the Resource. You find HTTP methods GET, PUT, POST, DELETE, and PATCH in the drop-down list.
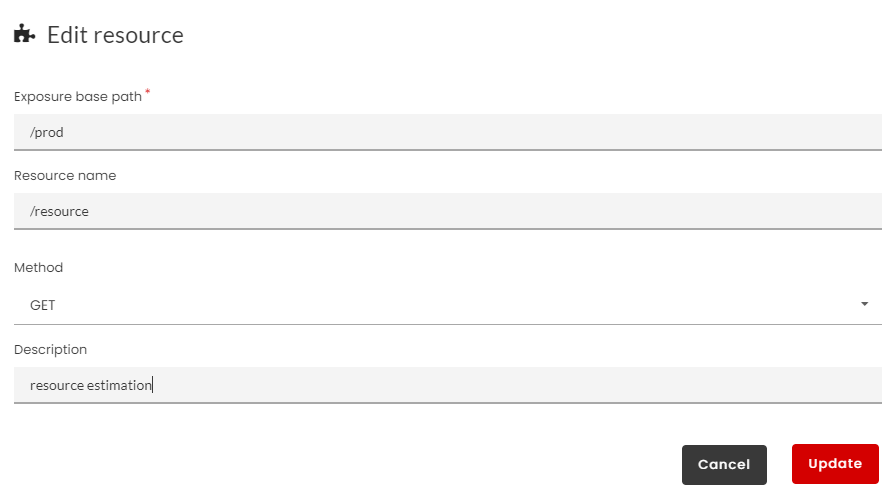
Click Add New Resource to display Add Resource page where user has to provide Exposure Path and other fields like Resource Name, Method and Description. Click Add to add the resource to the API or click Cancel to exit.
In the Resources tab, click Upload a swagger file tab and then click Upload to upload a YAML file or JSON file(s) with Swagger Specifications. When you select the required file from your computer and click Open, the Upload a Swagger file dialog appears.
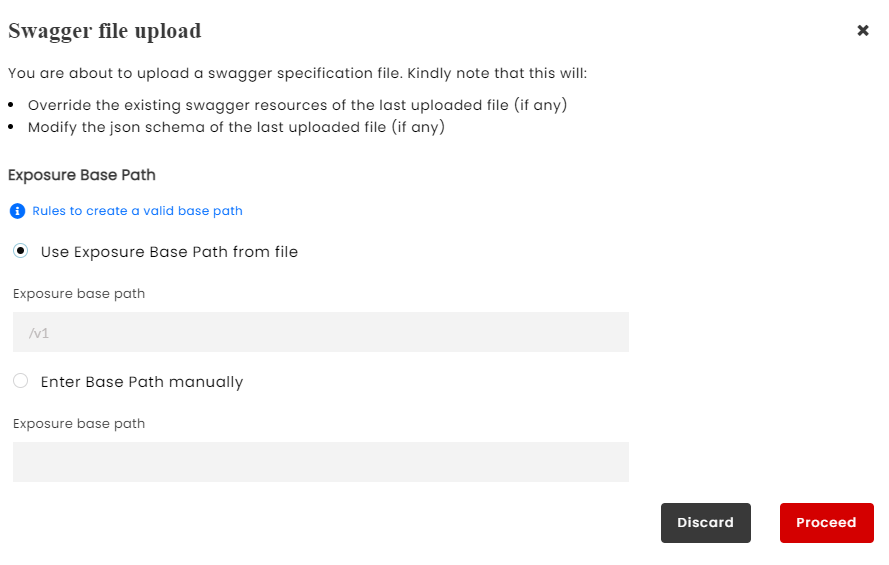
Click to select the Exposure Base Path from the radio button options: Use Exposure Base Path from file or Enter Base Path manually. You can edit the existing Exposure Base Path during file reupload. Consider the rules to create valid base path while updating the exposure base path.
Note
When you upload the swagger file, you will:
Override the existing swagger resources of the last uploaded file (if any).
Modify the json schema of the last uploaded file (if any).
Click Proceed. The chosen file displays alongside the Upload a Swagger file button. Multiple JSON files can also be uploaded in a zip file. For more information, refer the topic: Supporting Multiple JSON File Upload.
Click Save as Draft to save changes.
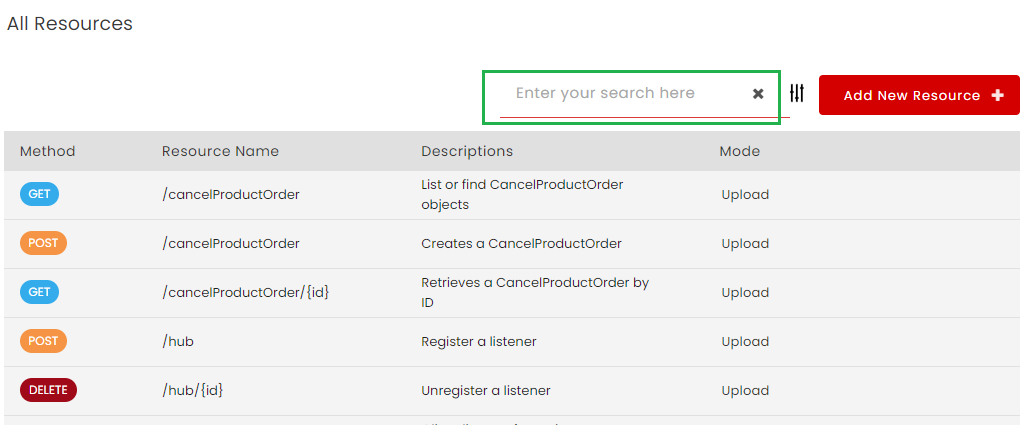
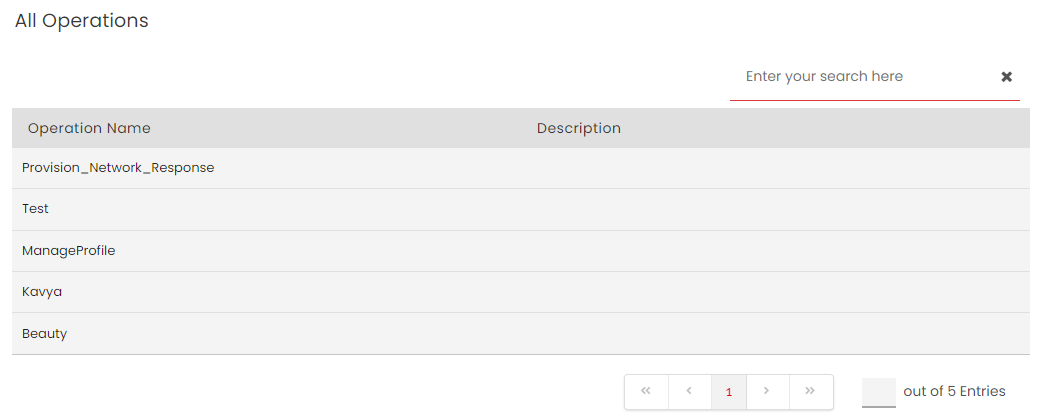
DigitMarket™ API Manager retrieves Resource information from the uploaded YAML file, and accordingly updates/overwrites the resources list. Use the search box to search for the required operations.
Note
You can add a new Resource to an API only if the API is in its Draft State.
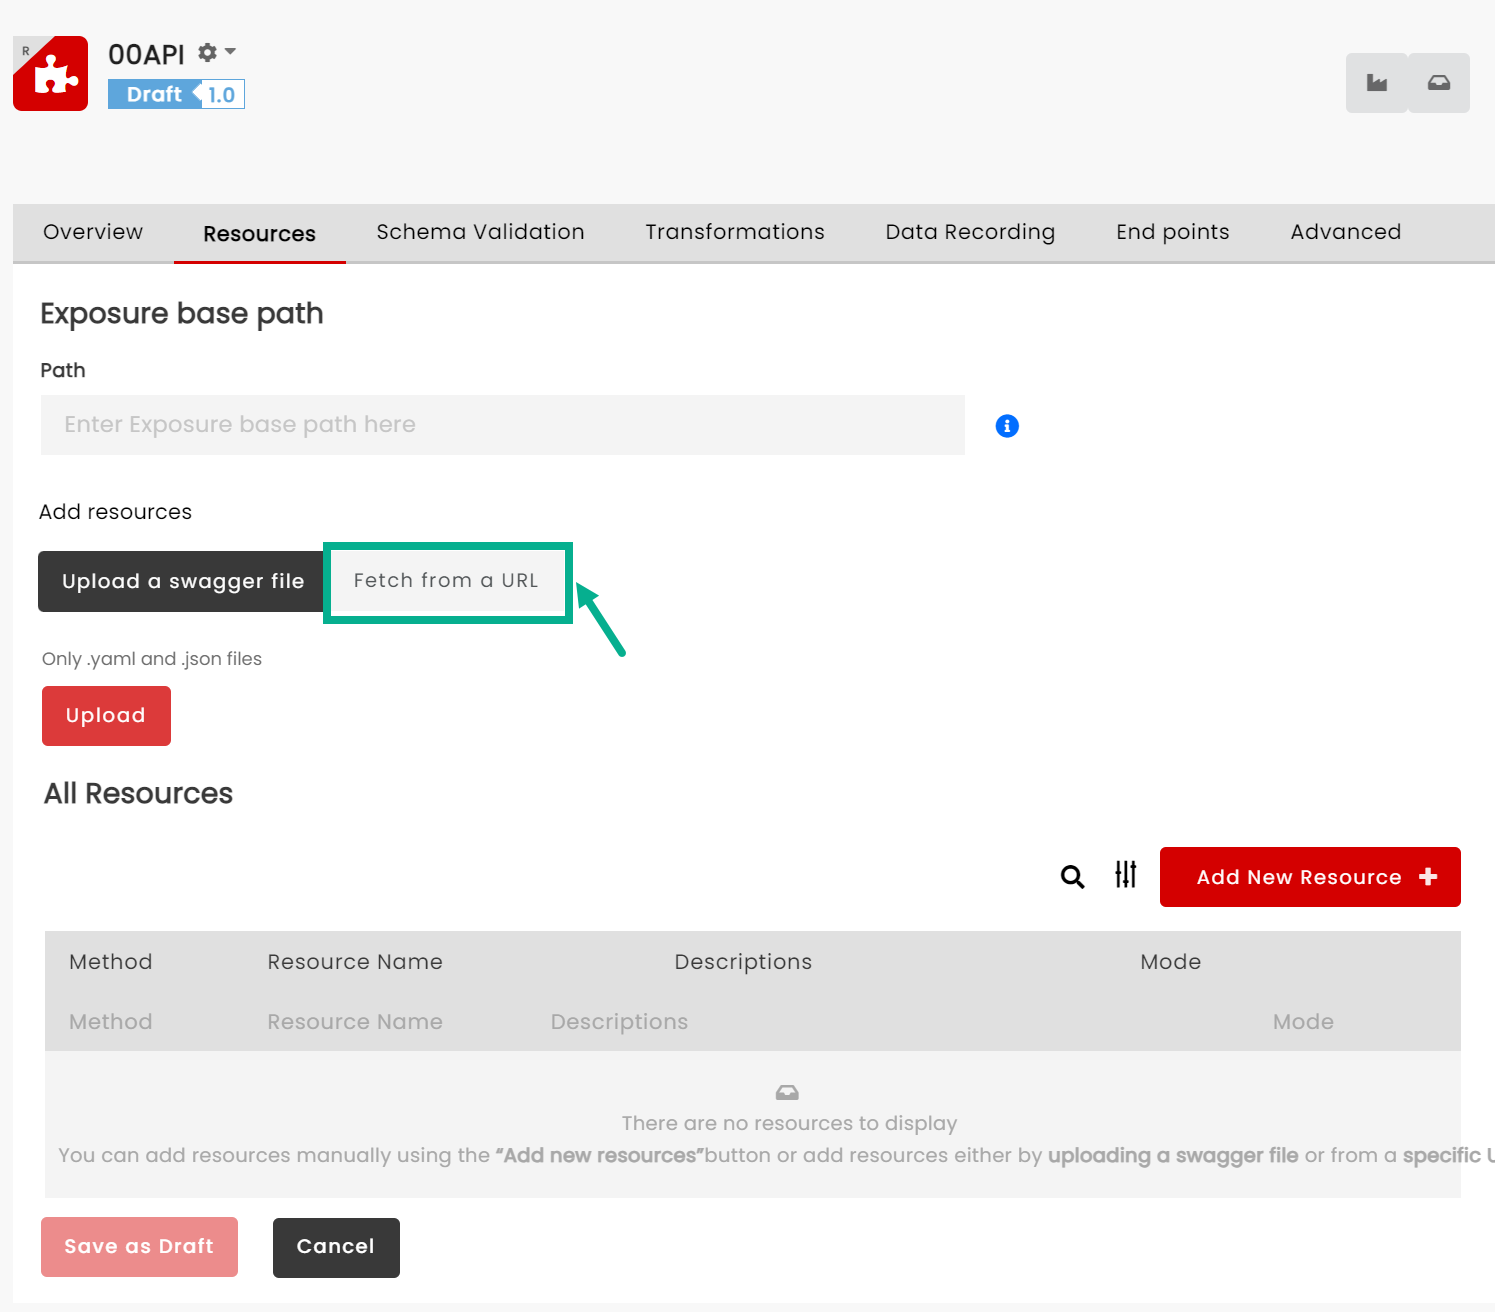
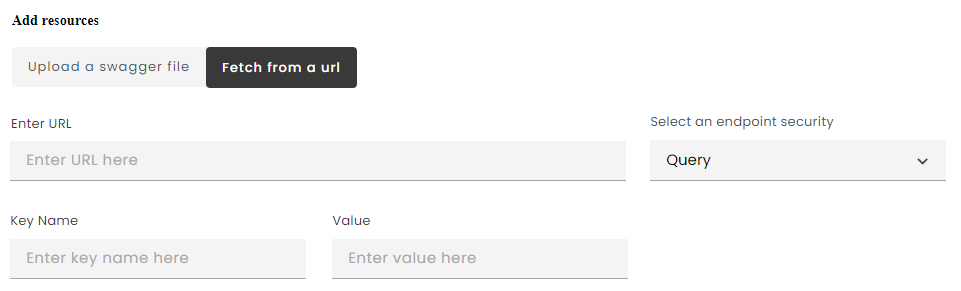
To add Resources from URL:
Navigate to the REST API Configuration screen.
In the REST API Configuration screen, click the Resources tab.
The Pagination feature at the bottom-right corner of the Resources tab allows you to choose the number of resources to display per page. Twenty entries per page is displayed by default, but you can customize it by selecting the required value at the bottom-right corner of the page. Use the previous and next icons to navigate between the pages.
Supporting Multiple JSON File Upload
You can also add resources for REST APIs from multiple JSON files. This can be done by compressing all the JSON files in a Zip file format and uploading the same on the application. Resource information from the zipped JSON file will then be extracted and retrieved. A JSON file consists of resources and schemas. A resource contains application data and information that is specific to Rest APIs. Schemas give information about what a resource looks like.
For a REST API, resource information can exist in multiple JSON files. To upload these files in bulk, they must be zipped. Each zipped file contains one master file and many child files. The master file will contain links to all the child files. When the zipped JSON file is uploaded, a node service performs the extraction process on the JSON file. The node service first reads the JSON file. It then identifies the master and child files. Once the master and child files are identified, it extracts the resource information from the individual JSON files and combines it into a single file that contains all the resources. The node service then sends this file to the application database.
You can add Operations to a SOAP API using the WSDL Spec method whereby you need to upload a WSDL Specifications file.
The WSDL Specifications file contains all the information necessary to invoke methods of a SOAP web service. DigitMarket™ API Manager parses this file to load operations, which is then populated into the API Operations definition for SOAP APIs.
The file formats that are allowed to be imported are WSDL files and XSD files and Zip of WSDL and XSD files. An XSD file contains the schema for the WSDL file.
To learn more about WSDL files, refer the topic: API.
Note
All Operations that need to go into an API version through the WSDL file can only be added as a whole, not individually.
To add Operations using Upload method:
Navigate to the SOAP API Configuration screen.
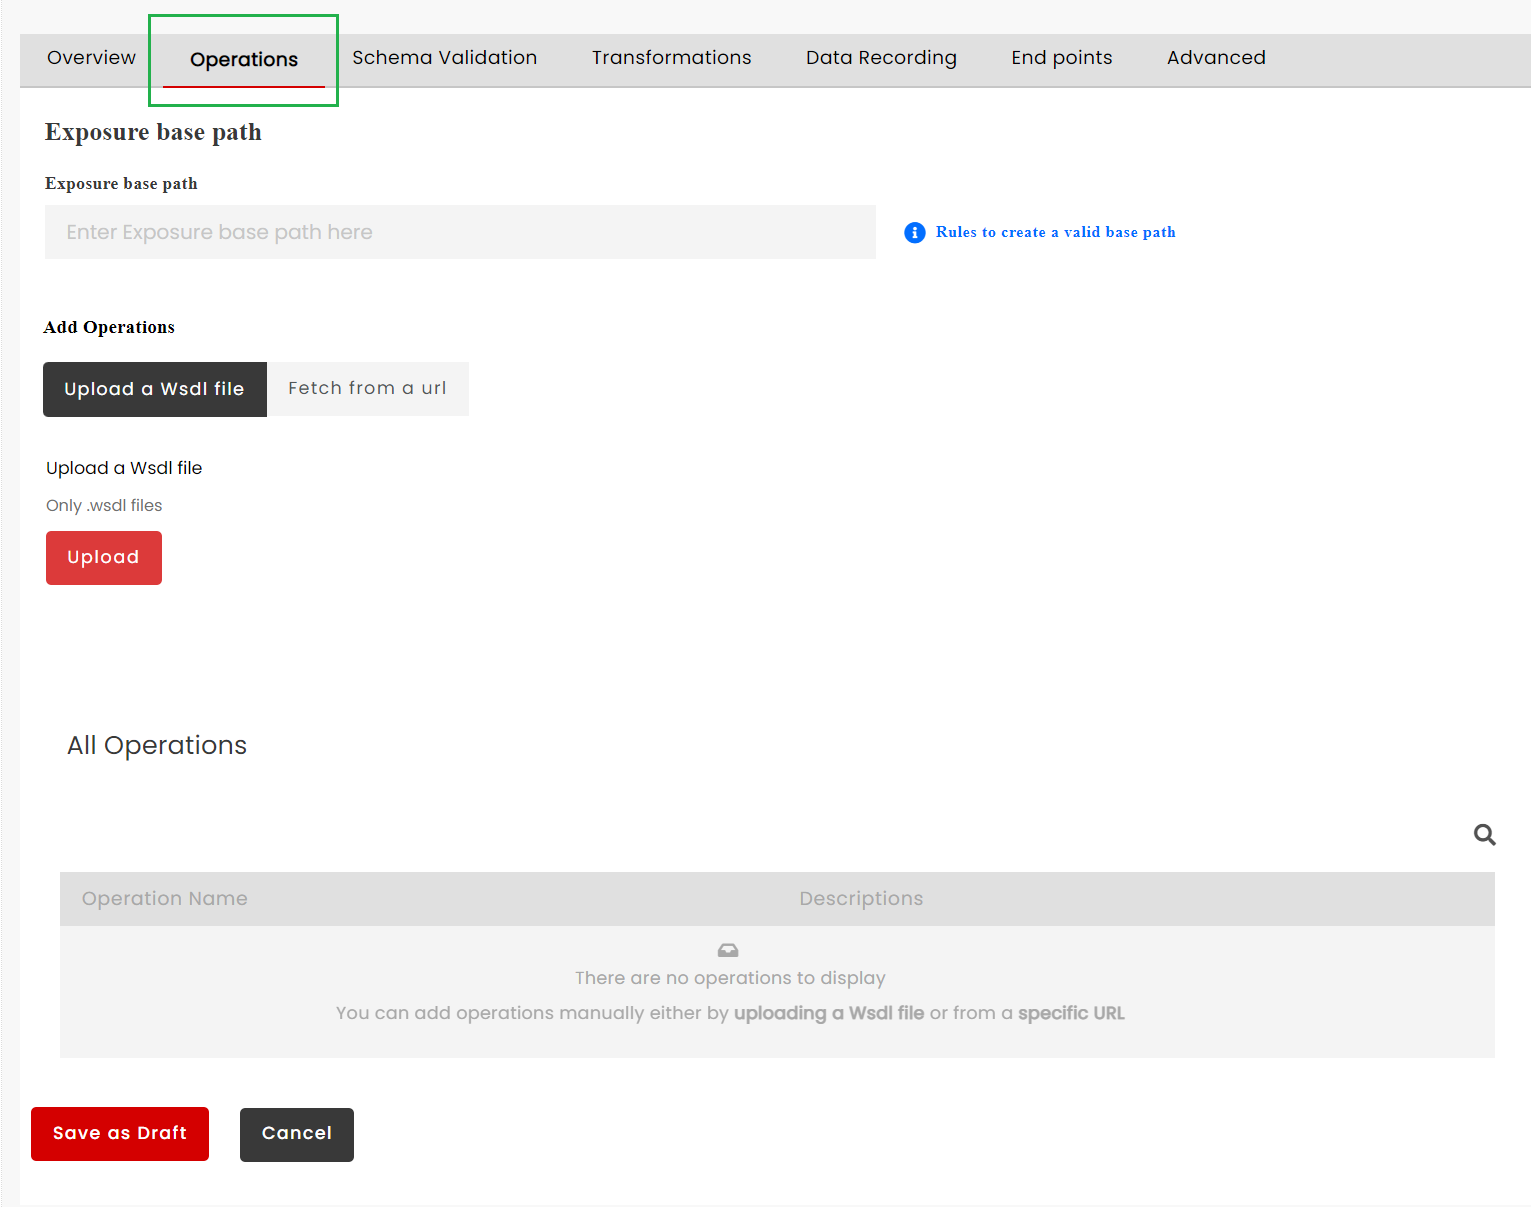
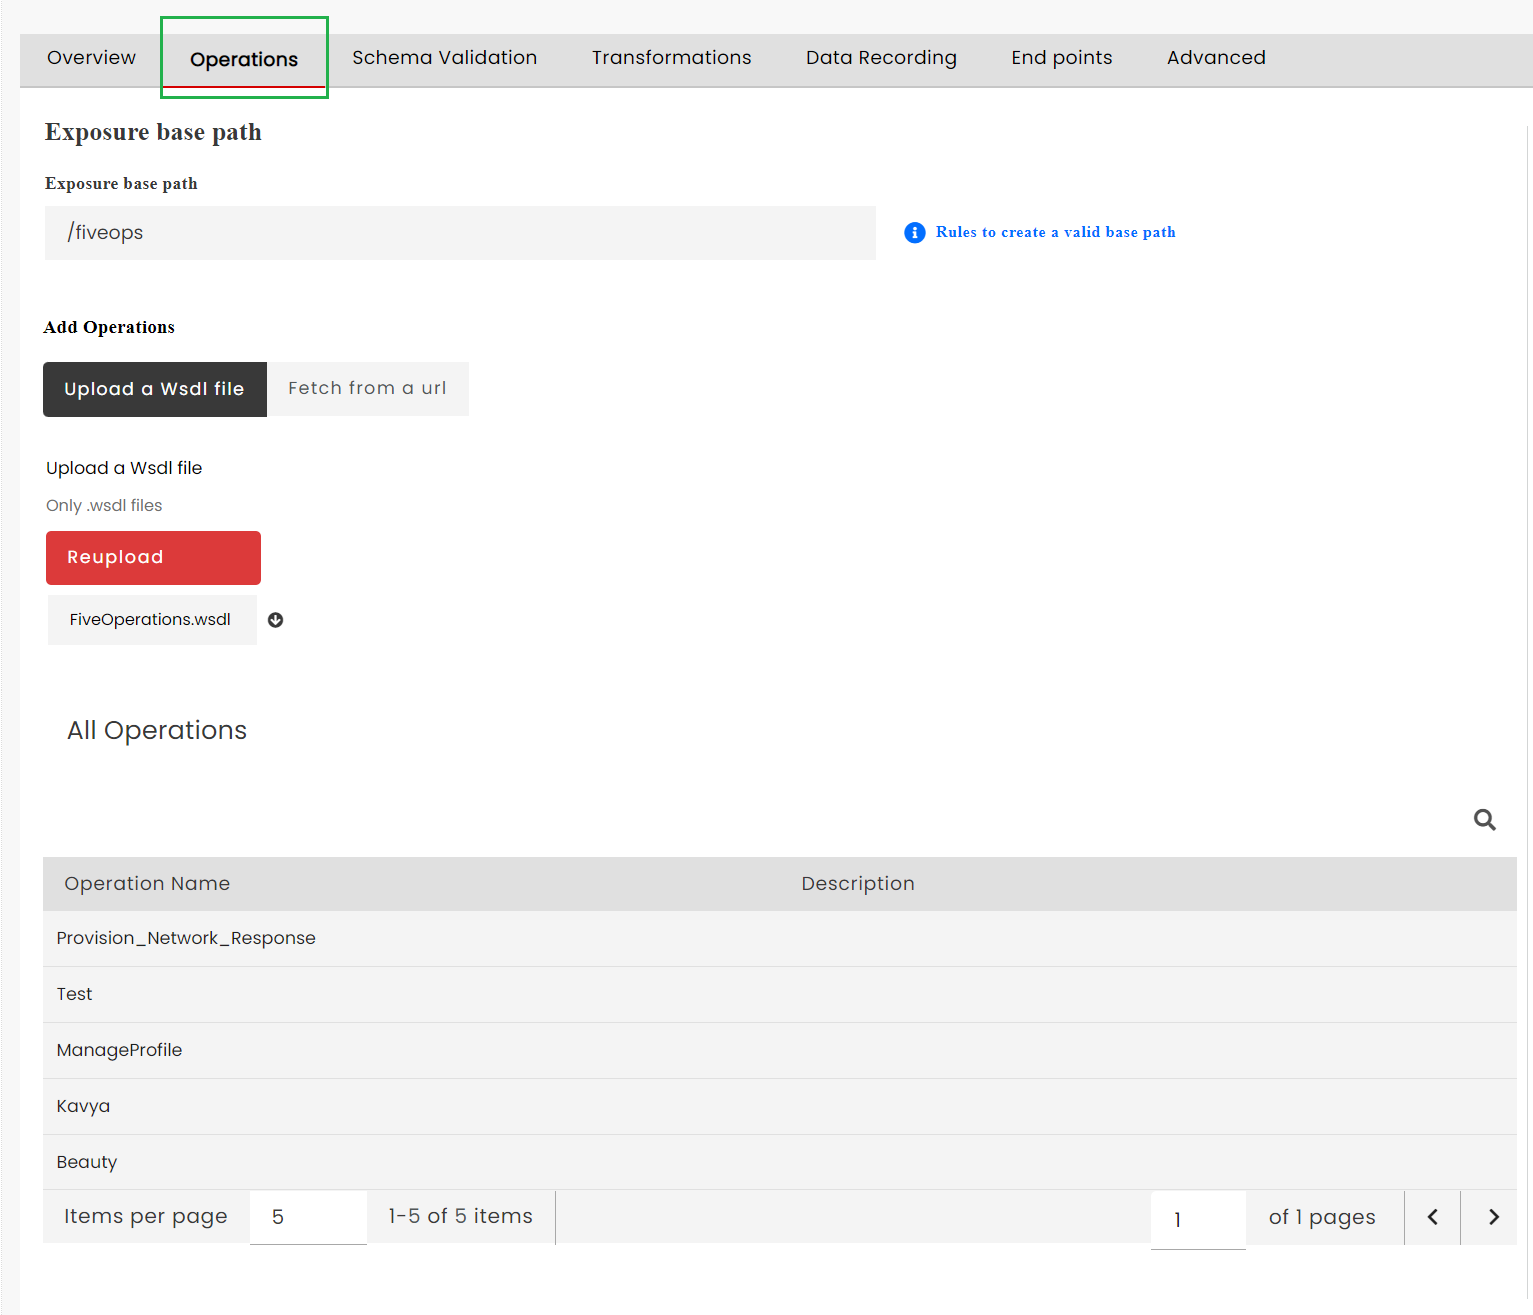
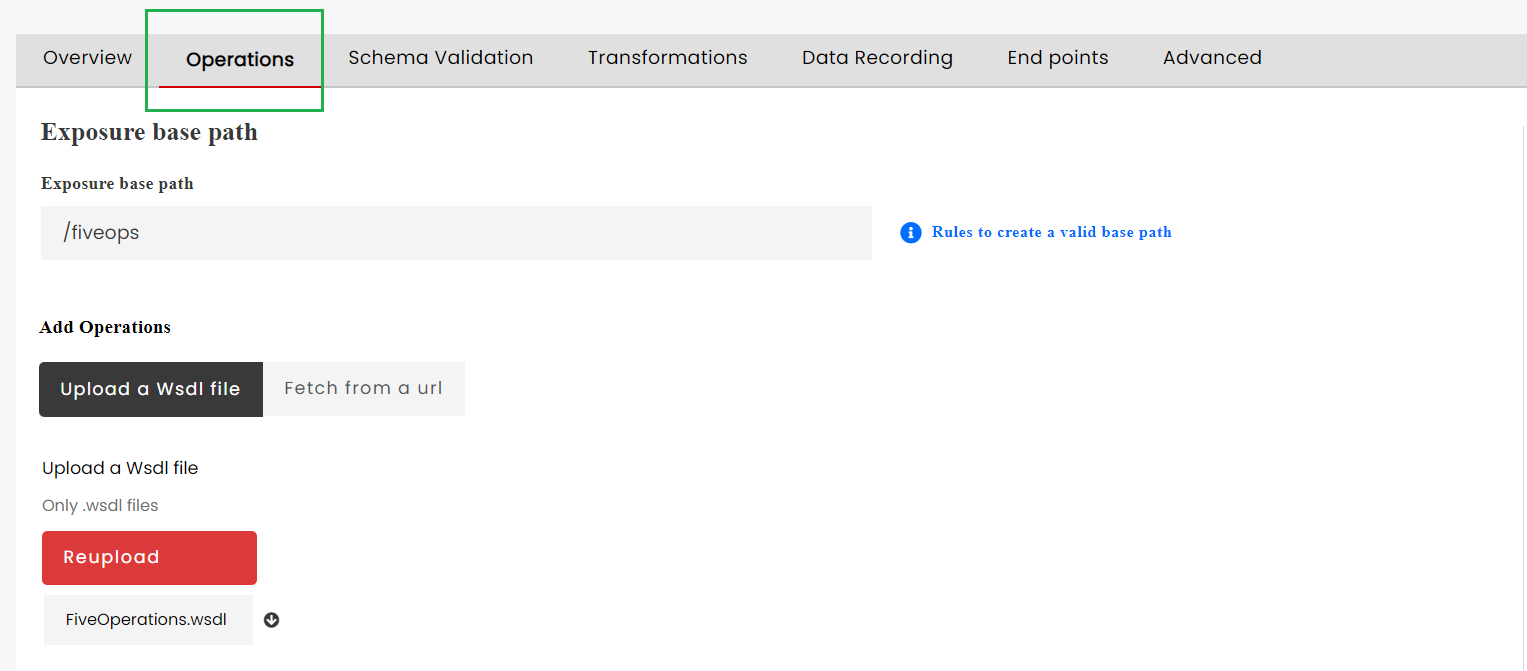
In the SOAP API Configuration screen, click the Operations tab.
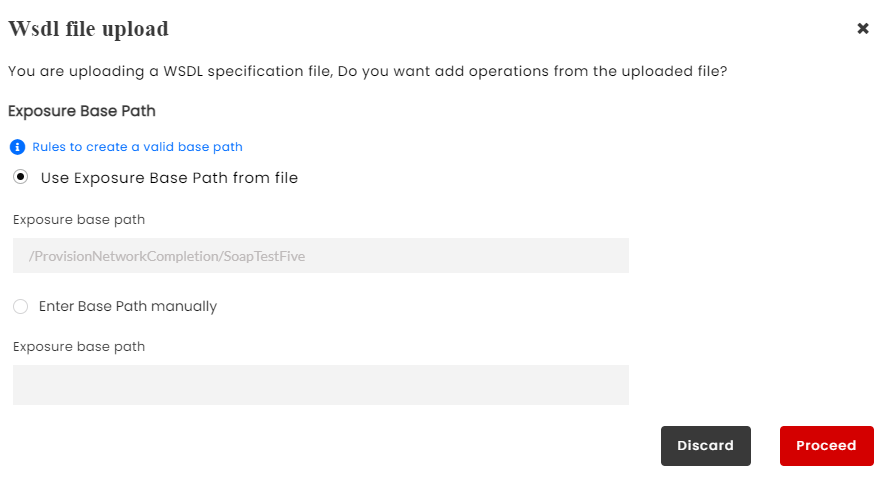
In the Operations tab, click Upload a WSDL file tab and then click Upload to upload a WSDL file. Browse your computer to locate and open the WSDL/Zip file. When you select the required file from your computer and click Open, the Upload a WSDL file dialog appears.
Click to select the Exposure Base Path from the radio button options: Use Exposure Base Path from file or Enter Base Path manually. Consider the rules to create valid base path while updating the exposure base path.
Note
Rules to consider while adding/updating the exposure base path:
A minimum of three characters, including the initial special character (/)
Supports numerals (0 to 9), uppercase (A-Z), lowercase (a-z) and special characters (. - / _)
For the first two characters, begin with special character (/) followed by uppercase (A-Z), lowercase (a-z), numerals (0-9) and special characters (_ -)
From third character onwards, use numerals (0 to 9) or uppercase (A-Z) or lowercase (a-z) or special characters (/ _ - .) (can be 0 or multiple characters of those)
For characters third and above, use special character (.) and any of the numerals (0 to 9) or uppercase (A-Z) or lowercase (a-z) or special character (_) (can be 0 or multiple characters of those)
Must not end with (. or /)
Click Proceed. The chosen file displays alongside the Upload a WSDL File button.
Click Save as Draft to save changes. You can find the imported information from the WSDL/Zip file populated under the Operation Name column in API Configuration screen. The Exposure Base Path is also automatically filled from the imported WSDL file.
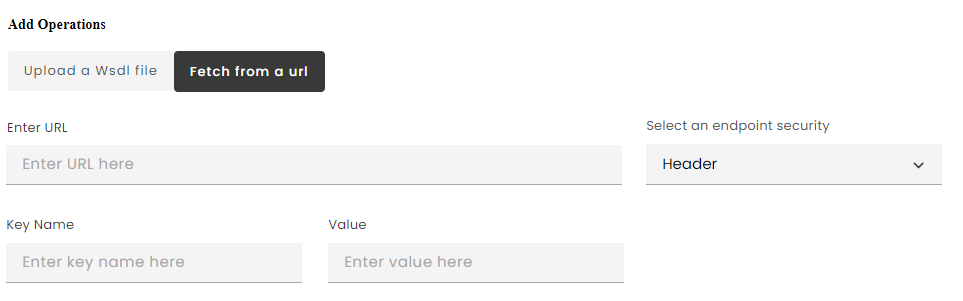
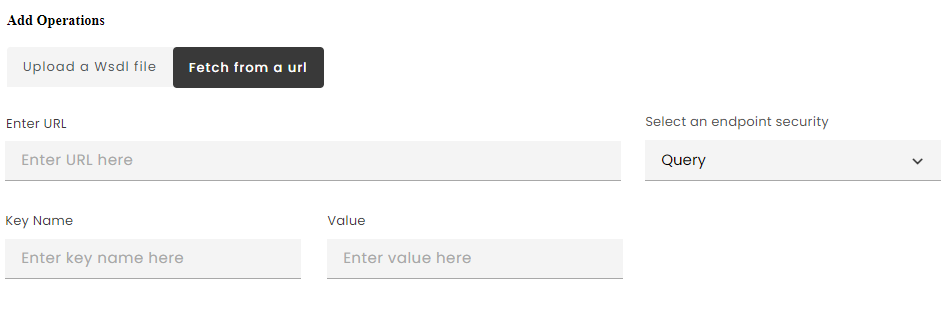
To add Operations from URL:
Navigate to the SOAP API Configuration screen.
In the SOAP API Configuration screen, click the Operations tab.
The Pagination feature at the bottom-right corner of the Operations tab allows you to choose the number of operations to display per page. Twenty entries per page is displayed by default, but you can customize it by selecting required value in the text box at the bottom-right corner of the page. Use the previous and next icons to navigate between the pages.
Resources can be added to a GraphQL API using either of the following two methods:
GraphQL Schema Definition Language
GraphQL Introspection Query Result
Adding resources using the GraphQL Schema Definition Language method requires you to upload a .graphql or .graphqls format files.
Adding resources using the Introspection Query Result method requires you to upload a .json format files.
These files contain all the information necessary to invoke methods of a GraphQL web service. DigitMarket™ API Manager parses this file to load resources, which is then populated into the API Resources definition for GraphQL APIs.
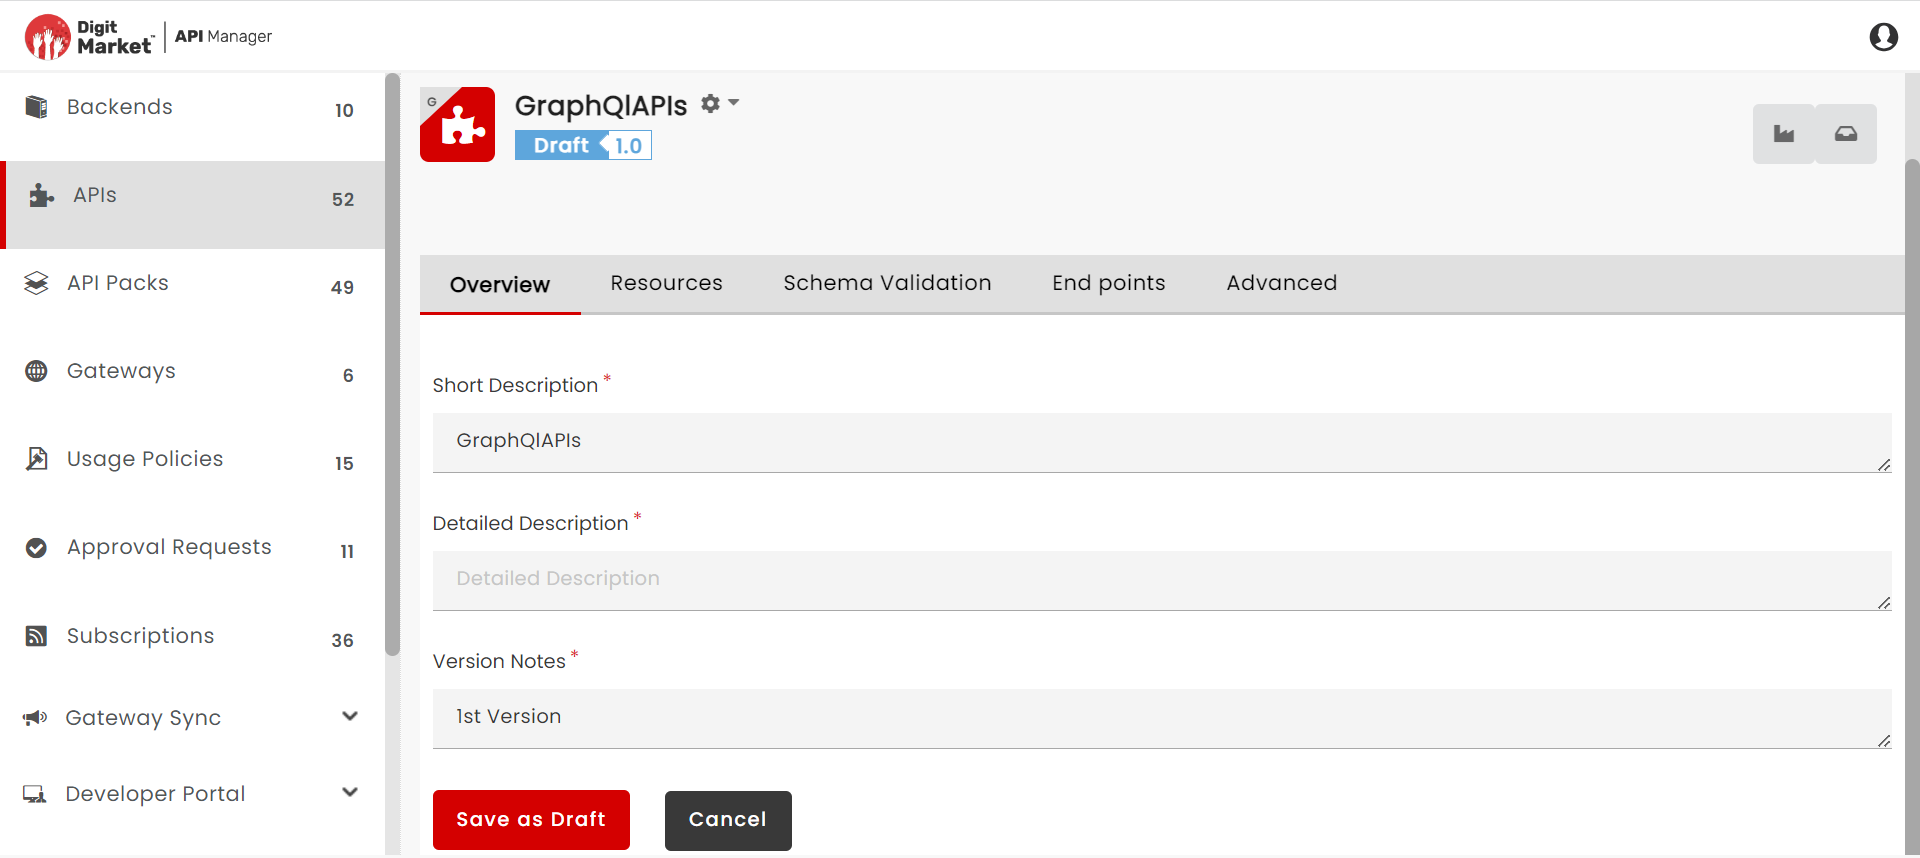
To add Resources using GraphQL Schema Definition Language method:
Navigate to the GraphQL API Configuration screen.
In the GraphQL API Configuration screen, click the Resources tab.
Under Exposure base path, enter an exposure base path for the new GraphQL API.
Note
Rules to consider while adding/updating the exposure base path:
A minimum of three characters, including the initial special character (/)
Supports numerals (0 to 9), uppercase (A-Z), lowercase (a-z) and special characters (. - / _)
For the first two characters, begin with special character (/) followed by uppercase (A-Z), lowercase (a-z), numerals (0-9) and special characters (_ -)
From third character onwards, use numerals (0 to 9) or uppercase (A-Z) or lowercase (a-z) or special characters (/ _ - .) (can be 0 or multiple characters of those)
For characters third and above, use special character (.) and any of the numerals (0 to 9) or uppercase (A-Z) or lowercase (a-z) or special character (_) (can be 0 or multiple characters of those)
Must not end with (. or /)
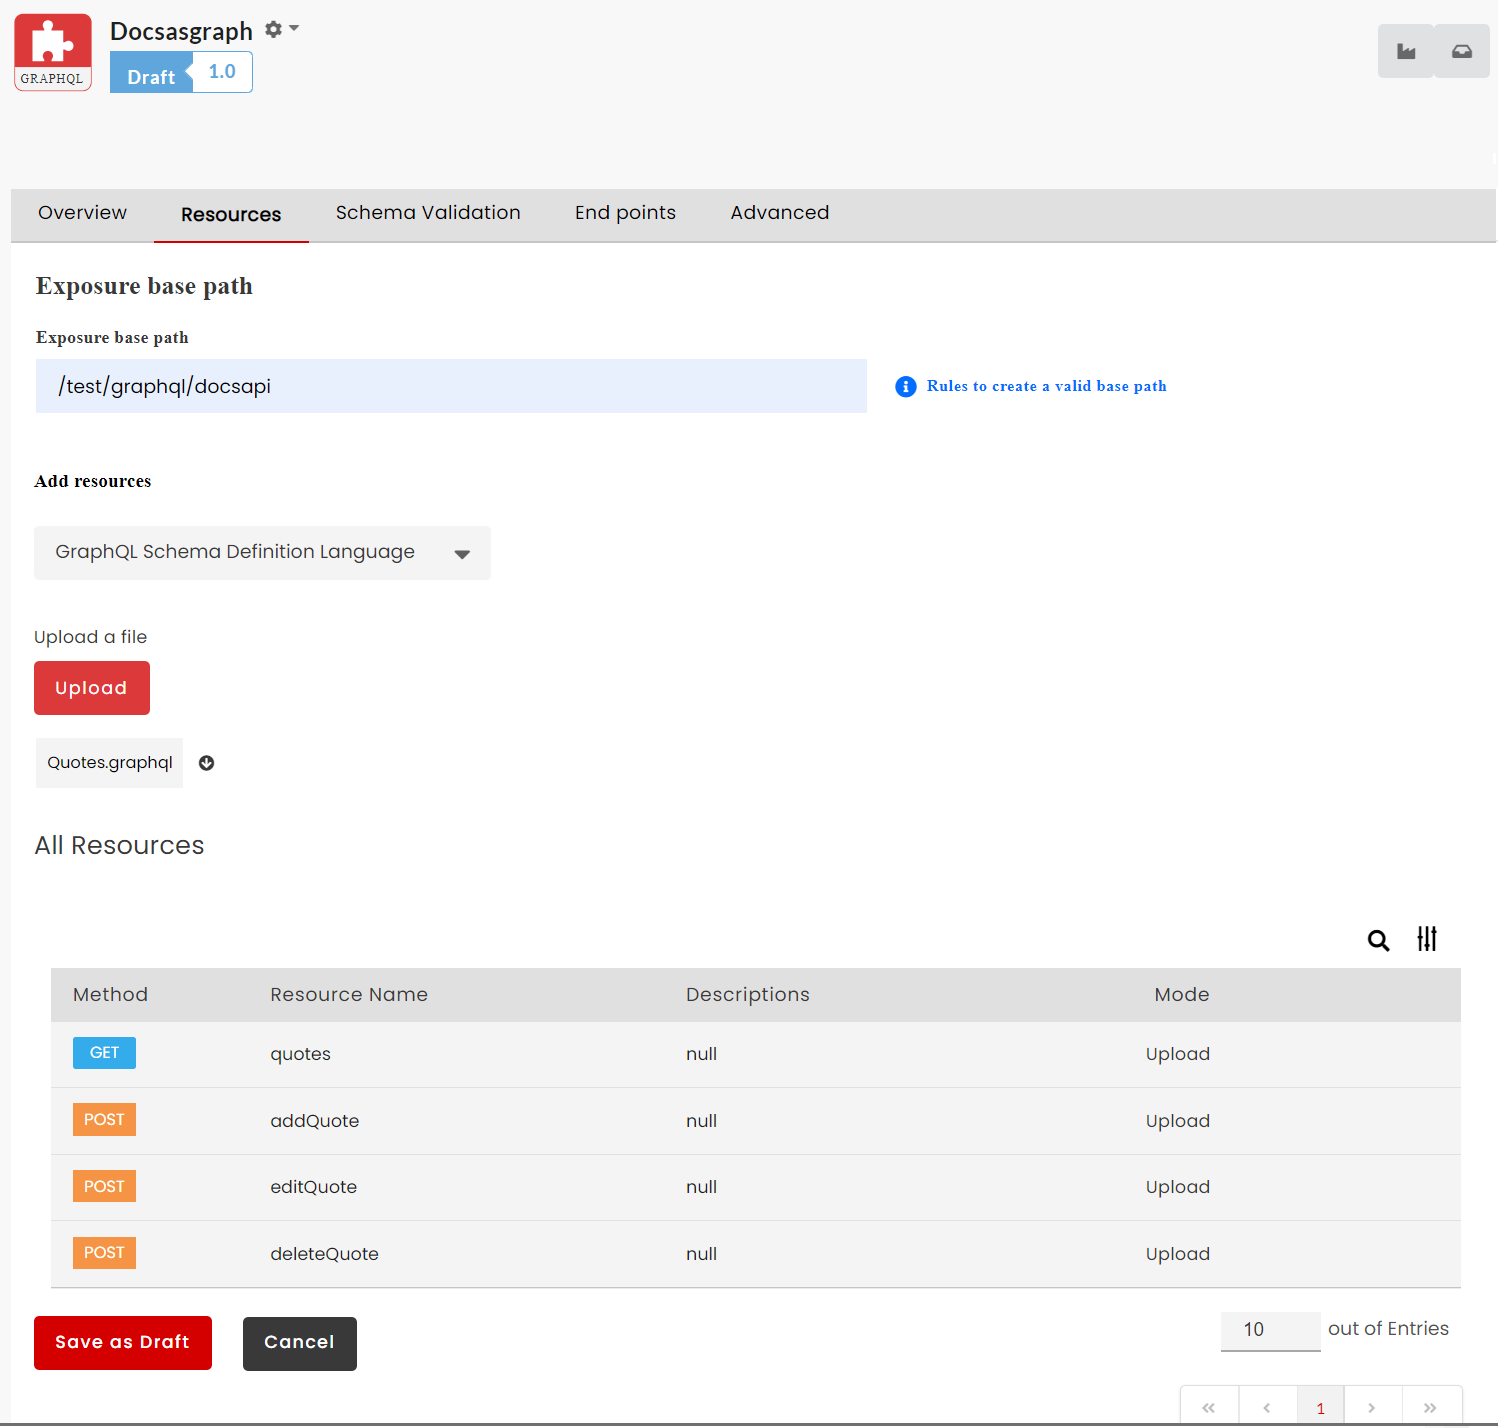
In the Resources tab, under Add resources drop-down, select GraphQL Schema Definition Language and then click Upload to upload a GraphQL file. Browse your computer to locate and open the GRAPHQL file to upload. The chosen file displays.
Click Save as Draft to save changes. You can find the imported information from the GraphQL file populated under the Resource Name column in API Configuration screen.
To add Resources using GraphQL Introspection Query Result method:
Navigate to the GraphQL API Configuration screen.
In the GraphQL API Configuration screen, click the Resources tab.
Under Exposure base path, enter an exposure base path for the new GraphQL API.
Note
Rules to consider while adding/updating the exposure base path:
A minimum of three characters, including the initial special character (/)
Supports numerals (0 to 9), uppercase (A-Z), lowercase (a-z) and special characters (. - / _)
For the first two characters, begin with special character (/) followed by uppercase (A-Z), lowercase (a-z), numerals (0-9) and special characters (_ -)
From third character onwards, use numerals (0 to 9) or uppercase (A-Z) or lowercase (a-z) or special characters (/ _ - .) (can be 0 or multiple characters of those)
For characters third and above, use special character (.) and any of the numerals (0 to 9) or uppercase (A-Z) or lowercase (a-z) or special character (_) (can be 0 or multiple characters of those)
Must not end with (. or /)
In the Resources tab, under Add resources drop-down, select GraphQL Introspection Query Result and then click Upload to upload a JSON file. Browse your computer to locate and open the JSON file to upload. The chosen file displays.
Click Save as Draft to save changes. You can find the imported information from the JSON file populated under the Resource Name column in API Configuration screen.
The Resource tab with all the resources for GraphQL API is displayed as shown below.
The Pagination feature at the bottom-right corner of the Operations tab allows you to choose the number of operations to display per page. Ten entries per page is displayed by default, but you can customize it by selecting required value in the text box at the bottom-right corner of the page. Use the previous and next icons to navigate between the pages.
WSDL files are used to create and configure SOAP APIs. DigitMarket™ API Manager through its Gateway allows users to upload the WSDL files for adding operations to a SOAP API. You can read about how to add operations to a SOAP API, here: Add Operations to a SOAP API.
If there is an error in the uploaded WSDL file, or a new operation has to be added to / deleted from the API, the user will have to re-upload a new WSDL file in the same API. The WSDL re-upload feature allows users to re-upload a WSDL/Zip file in the same SOAP API. Users will be able to add/delete operations, as well as make changes to the existing operations within the same API.
To re-upload a WSDL file:
From the API menu, navigate to the SOAP API Configuration screen.
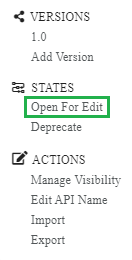
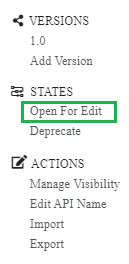
On the SOAP API Configuration screen, click the drop-down list and select Open For Edit option to edit the API in the Draft state.
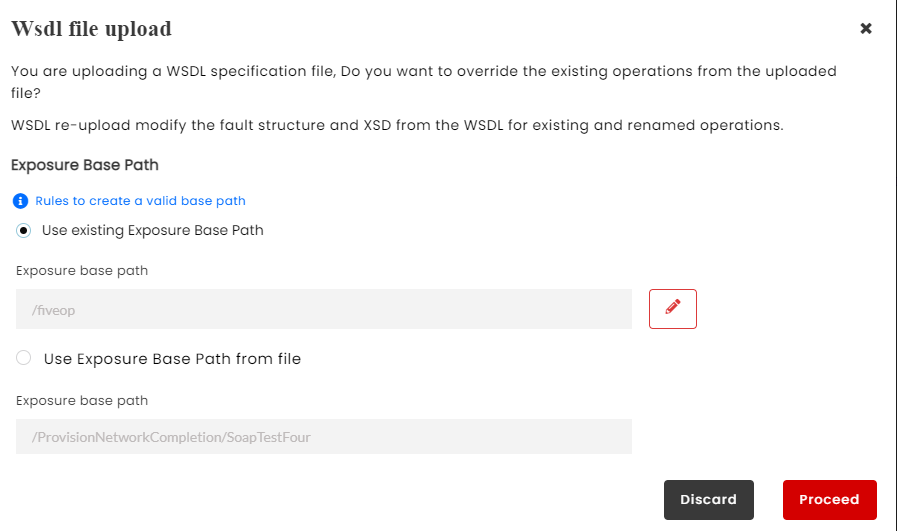
In the Operations tab, click Reupload to upload a new WSDL file. Previously uploaded WSDL file name will be displayed next to the Upload a WSDL file button. When you select the required file from your computer and click Open, the Upload a WSDL file dialog appears.
Click to select the Exposure Base Path from the radio button options: Use existing Exposure Base Path or Use Exposure Base Path from file. You can also edit the Existing Exposure Base Path using the Edit icon .
Click Proceed.
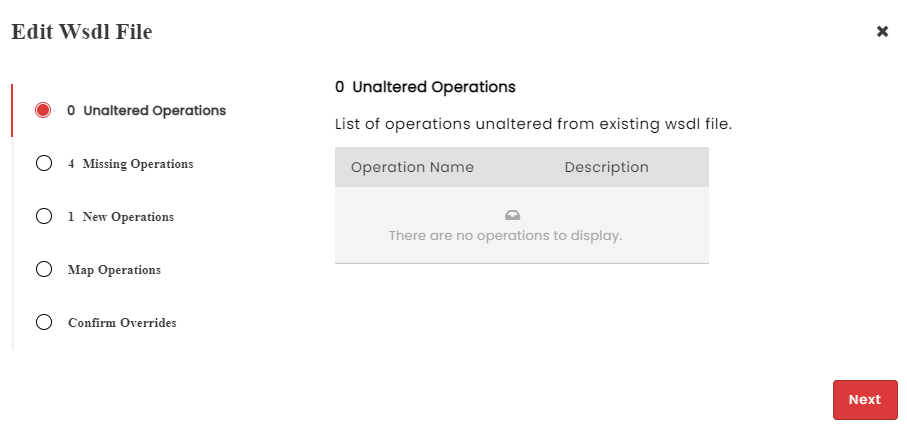
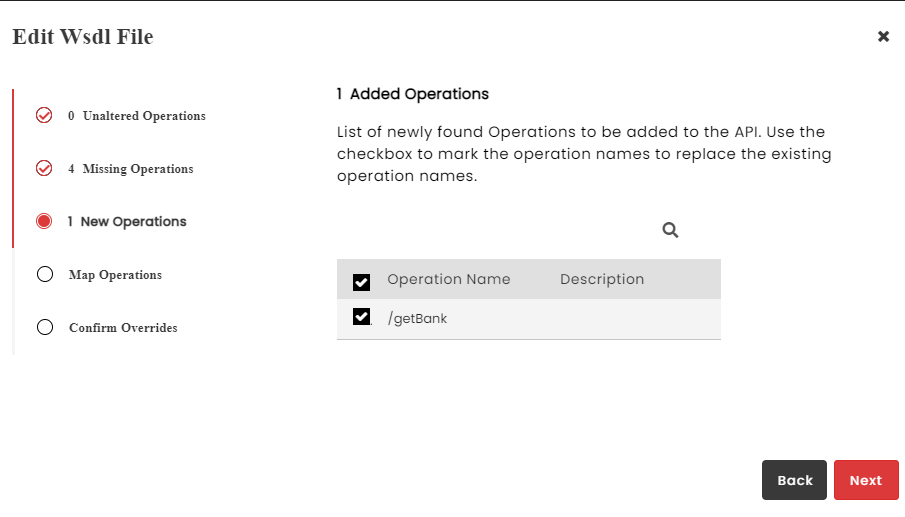
Upon clicking the Proceed button, the Edit WSDL File dialog displays the following tabs:
Unaltered Operations
Missing Operations
New Operations
Map Operations
Unaltered Operations:
Unaltered Operations tab displays the list of operations that are present in the last approved/published WSDL file as well as the file you want to re-upload. The unchanged operations from the existing WSDL file is automatically populated under this tab.
Comparison of the revised WSDL file is always made with the last approved/published WSDL file and not the last uploaded file.
Click Next to navigate to the Missing Operations tab.
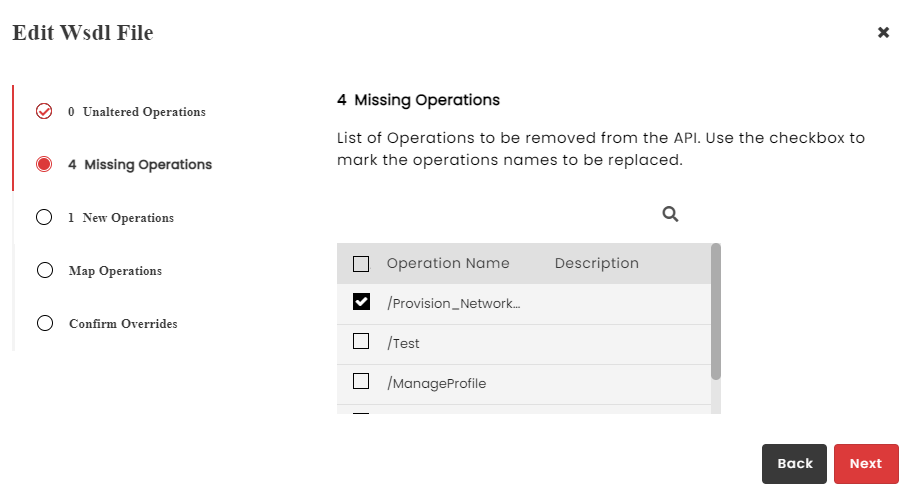
Missing Operations:
Operations that are present in the last approved/published WSDL file but not in the file you want to re-upload are displayed under the Missing Operations tab. These operations are missing from the revised WSDL file because they may have been deleted or updated in the revised version.
Check-boxes are displayed alongside each missing operation. Click each checkbox to update the operation in the revised version, else they will be automatically deleted.
Note
If any of the operations in the existing WSDL file is associated with a pack (An API pack is a collection of resources/operations selected from Approved or Published APIs for use by consumers. For more information, refer: API Pack) then the existing WSDL file cannot be deleted. An error message is displayed in such case: Failed to delete operations, since operation is associated with pack(s).
Note
Operations associated with API Packs in the existing WSDL file, must also be present in the revised WSDL file for re-upload.
Click Next to navigate to the New Operations tab.
New Operations:
New Operation tab lists the Operations that are present in the file you want to re-upload but not in the last approved/published WSDL file. These are the newly found operations in the revised WSDL file that have to be added to the API.
Check-boxes are displayed alongside each new operation. Click each check-box to update the operation in the revised version for one-to-one mapping.
Click Next to navigate to the Map Operations tab.
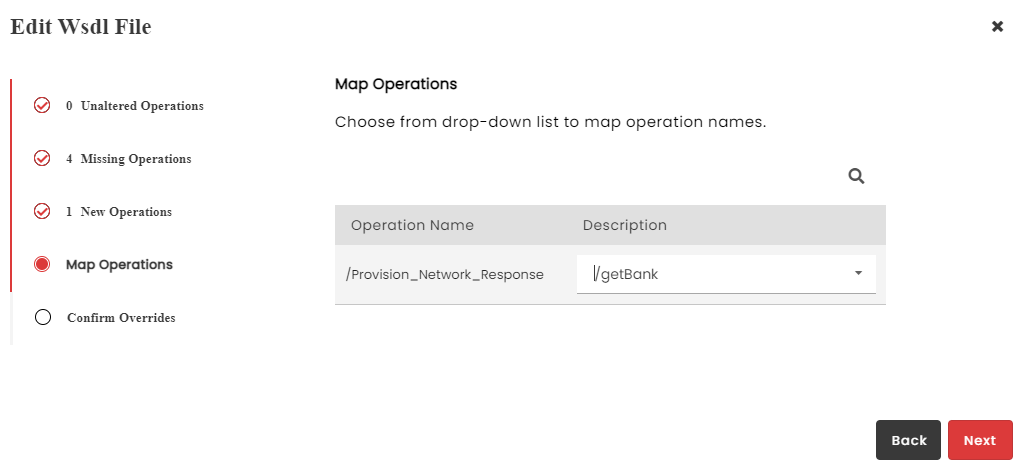
Map Operations:
One-to-one mapping of Missing Operations to New Operations is done under Map Operations tab. Under New Operation Name column, click the drop-down list to select the operation names to be mapped.
Ensure that you choose an equal number of missing and new operations to map.
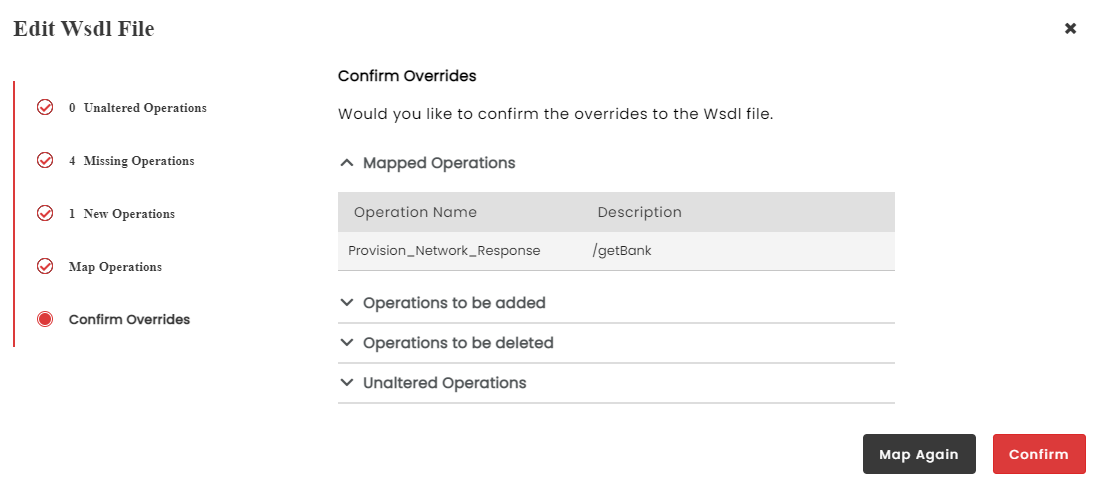
After mapping the required operations, click Next. The Confirm Override window displays. The Confirm Override window gives a summary of the Mapped Operations, Operations to be added and Operations to be deleted. Click Confirm to confirm the WSDL file override or click Map Again to return to the Map Operations screen.
You can find the list of operations imported from the WSDL/Zip file populated into under the Operation Name column. If exposure base path from file is used, it gets auto-populated from the revised WSDL/Zip file.
Swagger files are used to create and configure REST APIs. The Swagger re-upload feature allows users to re-upload a JSON/YAML file in the same REST API.
To re-upload a Swagger file:
From the API menu, navigate to the REST API Configuration screen.
On the REST API Configuration screen re-upload screen, click the drop-down list and select Open For Edit option to edit the API in the Draft state.
A REST API should be in draft state to re-upload a JSON/YAML file. Only APIs in Published and Approved states can be converted into Draft for re-upload.
Once the API is opened for editing, you can upload/re-upload a JSON/YAML file.
To re-upload a Swagger file, click the Resource tab. The Resource tab screen displays.
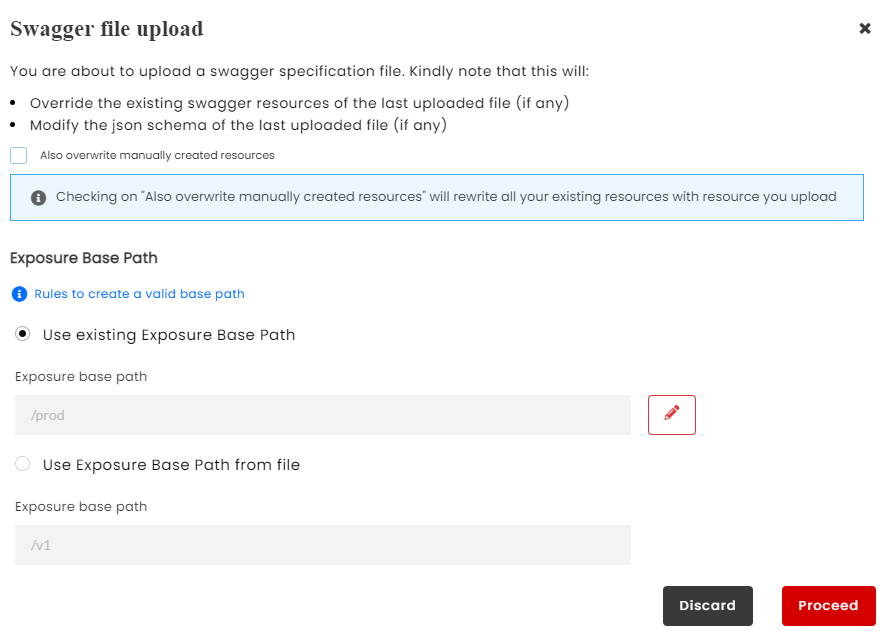
In the Resource tab, click Reupload to upload a new JSON/YAML file. Previously uploaded JSON/YAML file name will be displayed next to the Upload a Swagger file button. When you select the required file from your computer and click Open, the Upload a Swagger file dialog appears.
Override the existing swagger resources of the last uploaded file (if any).
Modify the json schema of the last uploaded file (if any).
Click to select the Exposure Base Path from the radio button options: Use existing Exposure Base Path or Use Exposure Base Path from file. You can also edit the existing exposure base path using the Edit icon .
To rewrite all your existing resources with the resource from the file you upload, select the Also overwrite manually created resources check box.
Click Proceed.
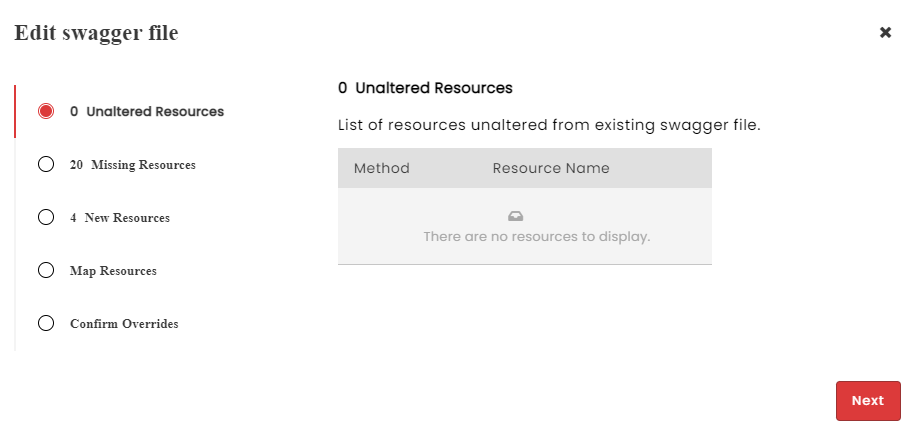
Upon clicking Proceed button, the Edit Swagger File dialog displays the following tabs:
Unaltered Resources
Missing Resources
New Resources
Map Resources
Unaltered Resources:
Unaltered Resources tab displays the list of resources that are present in the last approved/published JSON/YAML file as well as the file you want to re-upload. The unchanged resources from the existing JSON/YAML file is automatically populated under this tab.
Comparison of the revised JSON/YAML file is always made with the last approved/published JSON/YAML file and not the last uploaded file.
Click Next to navigate to the Missing Resources tab.
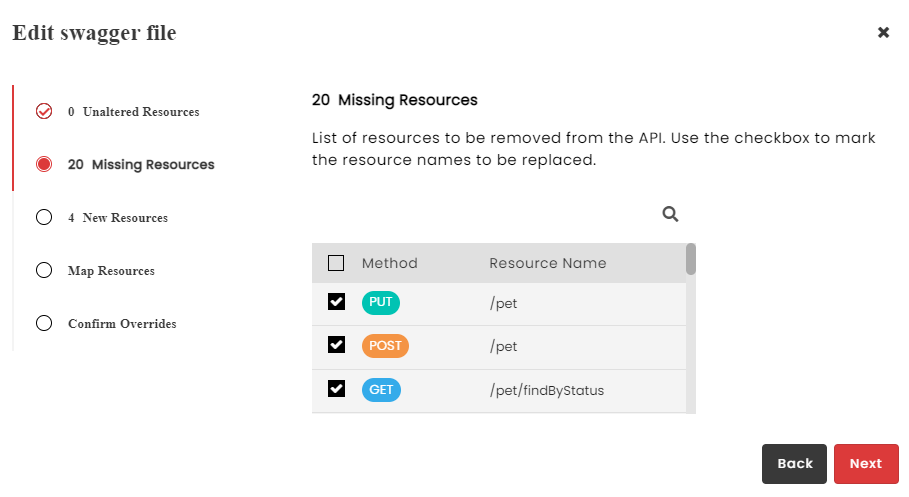
Missing Resources:
Resources that are present in the last approved/published JSON/YAML file but not in the file you want to re-upload are displayed under the Missing Resources tab. These resources are missing from the revised JSON/YAML file because they may have been deleted or updated in the revised version.
Check-boxes are displayed alongside each missing resources. Click each checkbox to update the resource in the revised version, else they will be automatically deleted.
Note
If any of the resource in the existing JSON/YAML file is associated with a pack (An API pack is a collection of resources/operations selected from Approved or Published APIs for use by consumers. For more information, refer: API Pack) then the existing JSON/YAML file cannot be deleted. An error message is displayed in such case: Failed to delete operations, since operation is associated with pack(s).
Note
Resources associated with API Packs in the existing JSON/YAML file, must also be present in the revised JSON/YAML file for re-upload.
Click Next to navigate to the New Resources tab.
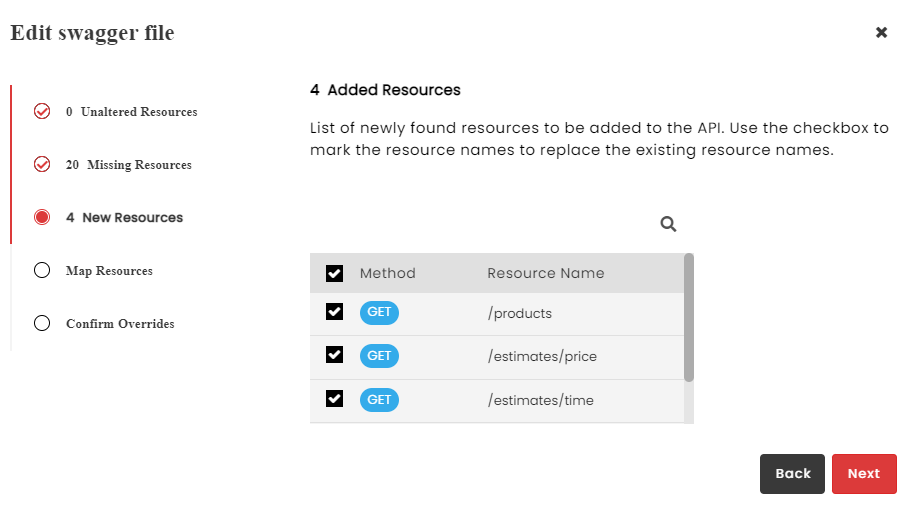
New Resources:
New Resources tab lists the Resources that are present in the file you want to re-upload but not in the last approved/published JSON/YAML file. These are the newly found resources in the revised JSON/YAML file that have to be added to the API.
Check-boxes are displayed alongside each new resource. Click each check-box to update the resource in the revised version for one-to-one mapping.
Click Next to navigate to the Map Resources tab.
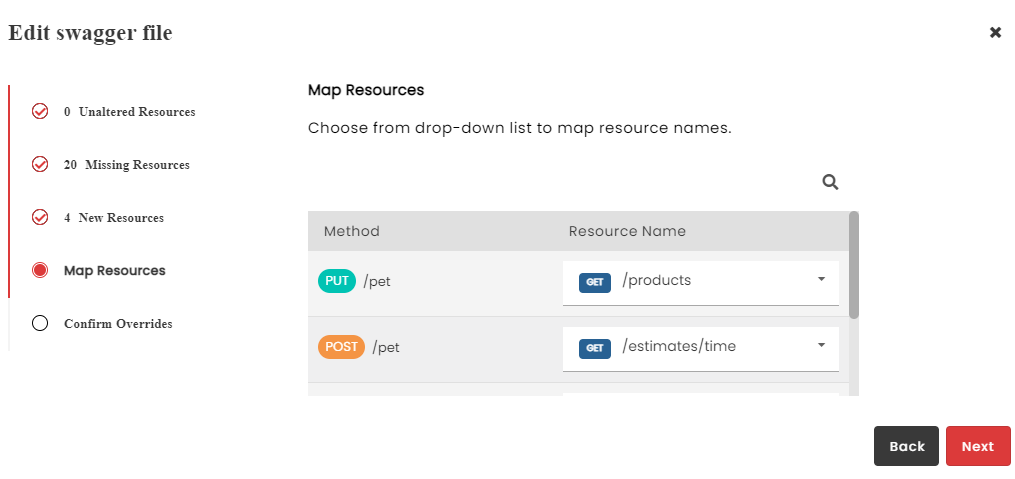
Map Resources:
One-to-one mapping of Missing Resource to New Resource is done under Map Resource tab. Click the drop-down list to select the resource names to be mapped.
Ensure that you choose an equal number of missing and new resource to map.
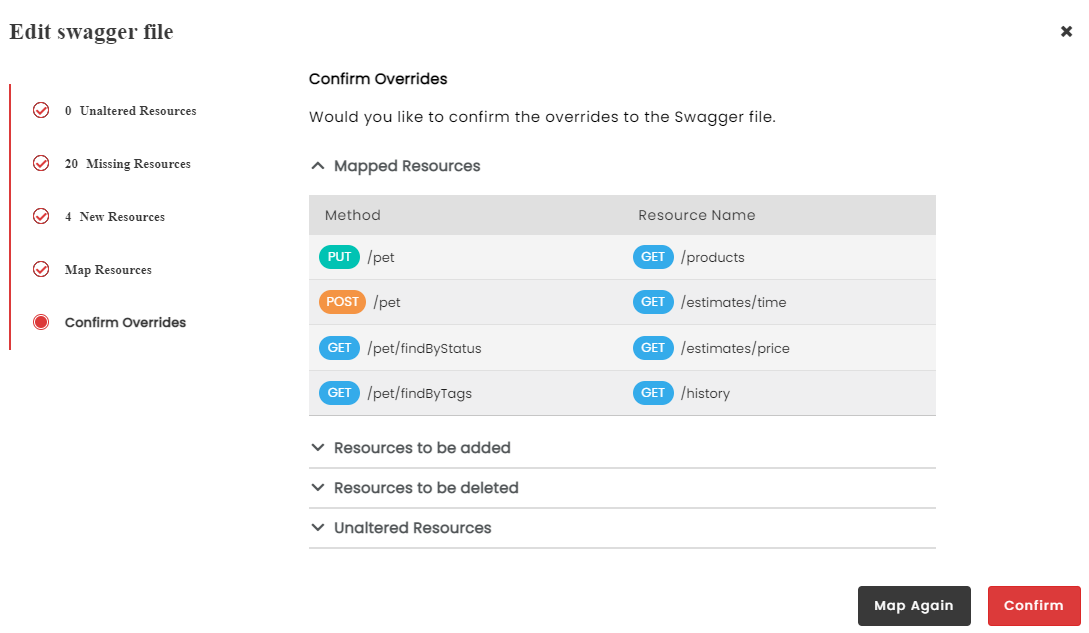
After mapping the required resource, click Next. The Confirm Overrides window displays. The Confirm Override window gives a summary of the Mapped Resources, Resources to be added, Resources to be deleted and unaltered resources. Click each accordian tab to view the details.
Click Confirm to confirm the JSON/YAML file override or click Map Again to return to the Map Resource screen.
You can find the list of resources imported from the JSON/YAML file populated into under the Resource Name column. If exposure base path from file is used, it gets auto-populated from the revised JSON/YAML file.
DigitMarket™ API Manager allows the user to upload JSON and XSD schema documents against a REST API at Resource level. The Gateway then uses this JSON/XSD document to validate requests and responses based on the schema and content type in the document. Users can turn the schema validation feature on or off by enabling/disabling the schema validation for a Resource depending on their requirements.
To enable Schema Validation for a REST API:
Navigate to the REST API Configuration screen.
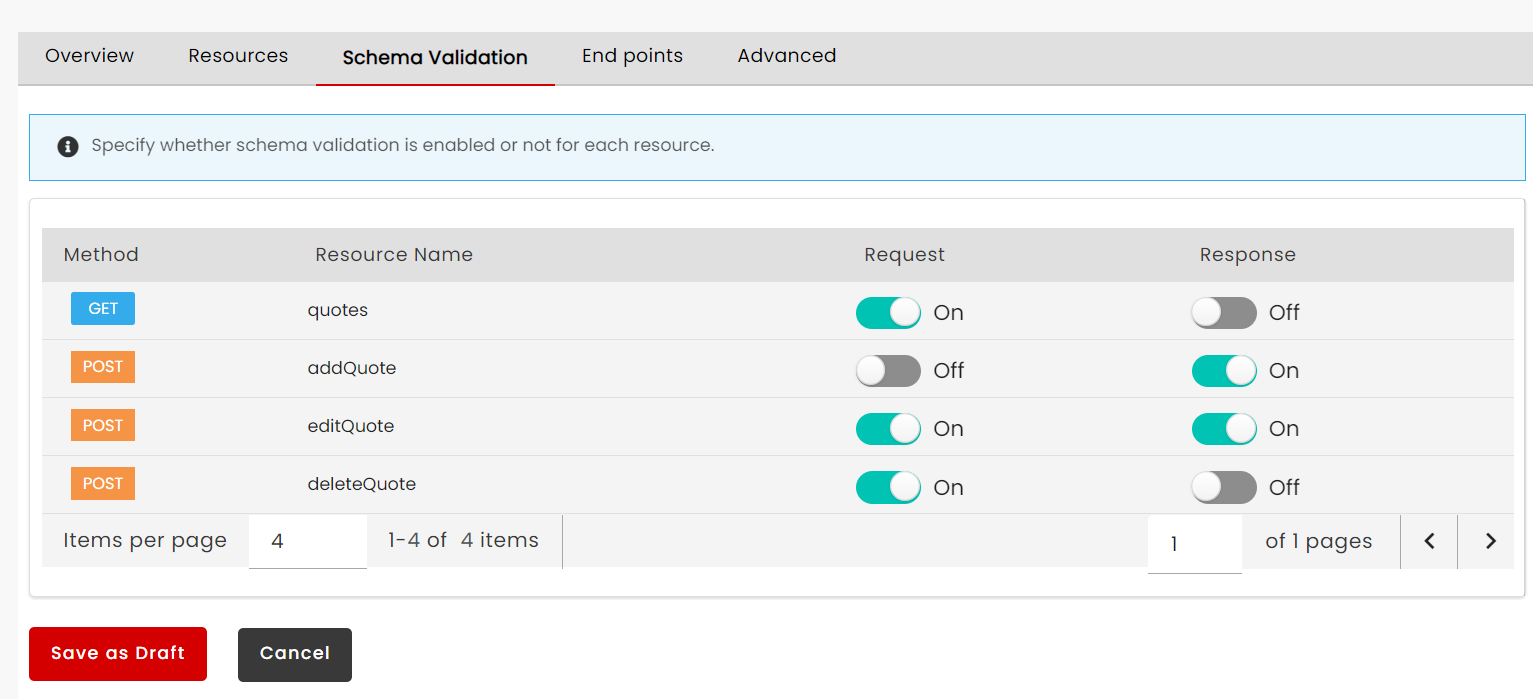
In the REST API Configuration screen, click the Schema Validation tab. The tab screen lists all the Resources added to the REST API.
Click to enable the Request / Response toggle button for the Resource that you wish to enable for Schema Validation. This enables the Upload File buttons in the JSON Schema and XSD Schema columns corresponding to the Resource.
In the JSON Schema column, corresponding to the selected Resource, click Upload File to select a JSON Schema file from your computer. The file must have a JSON extension (i.e., .json).
In the XSD Schema column, corresponding to the selected Resource, click Upload File to select a XSD Schema file in the XSD or ZIP format from your computer. The file must have either XSD extension (i.e., .xsd) or a ZIP extension (i.e., .zip).
Note
If no files are uploaded, the DigitMarket™ API Manager Gateway uses Swagger information from Swagger Specifications to complete the validation.
Click Save as Draft to save changes.
Note
JSON schema validation is used as a validation mechanism to ensure the JSON requests conform to the structure and requirements as present in the standard JSON document.
Note
XSD schema validation is used as a validation mechanism to ensure that the XML requests conform to the structure and requirements as present in the standard XML document.
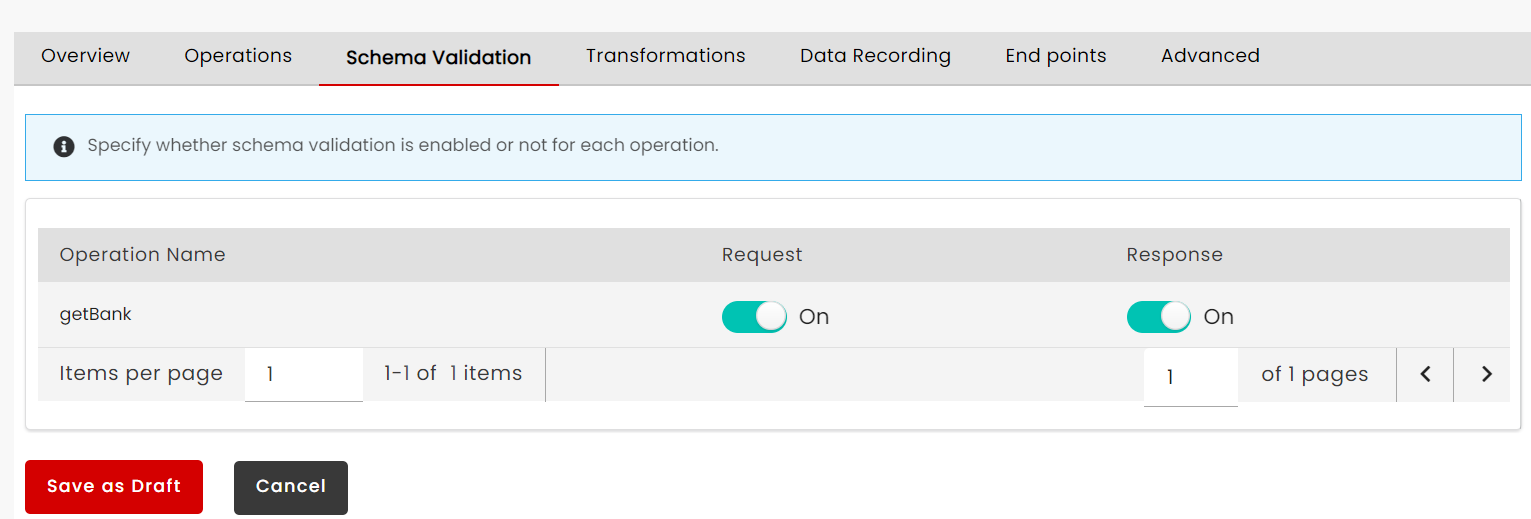
To enable Schema Validation for a SOAP API:
Navigate to the SOAP API Configuration screen.
In the SOAP API Configuration screen, click the Schema Validation tab. The tab screen lists all the Operations added to the SOAP API.
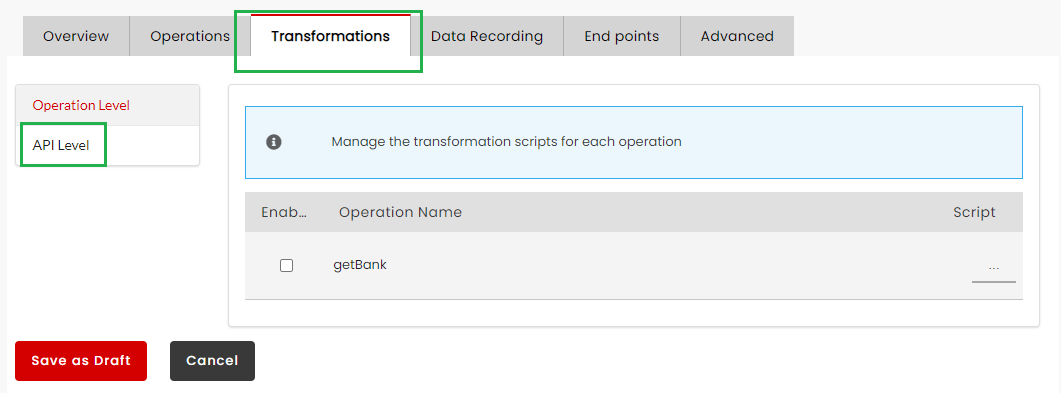
In DigitMarket™ API Manager, Transformations allow users to carry out the following operations:
Make Content modification, injection and removal
Accept user-provided JavaScript for transforming REST and SOAP messages
Change message exchange protocol from REST to SOAP and vice-versa
For more information on Transformations, refer Transformations.
How it works?
A predefined primary object called customTransformation allows the user to define transformation methods used in DigitMarket™ API Manager. This object provides six pre-defined methods that can be implemented by the user to transform requests, responses and error objects. DigitMarket™ API Manager provides helper methods to write the code that will do the actual transformation through these six methods.
Following are the four Transformation methods used for REST Transformations :
Request Header
Request Body
Response Header
Response Body
Following are the two Transformation methods used for SOAP Transformations :
Request SOAP Header
Response SOAP Header
The above methods are assisted by helper methods that perform the actual transformation operation. Refer the sample REST and SOAP Transformation scripts in the topics below to gain more understanding about helper methods.
Following are some of the Header Transformation Methods:
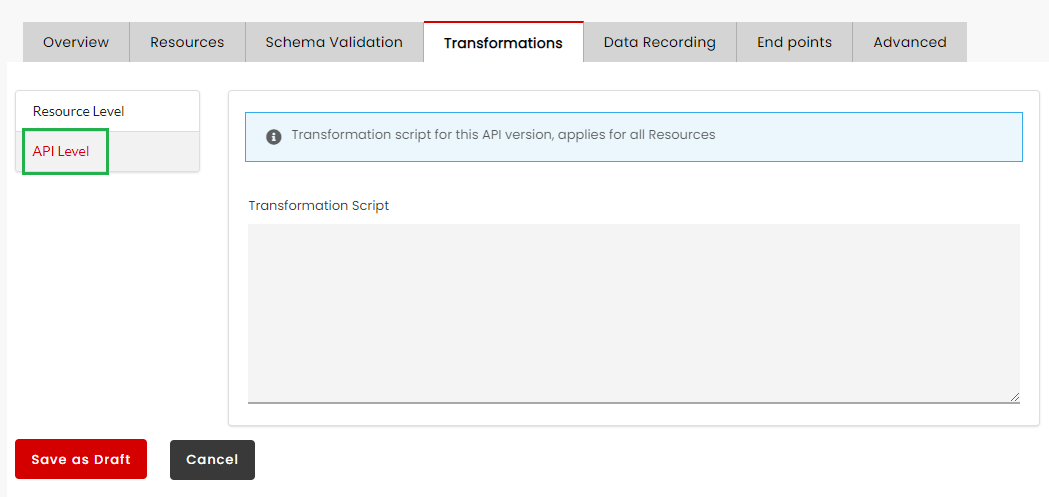
In the Transformation Script box, type the JavaScript that will be used for the transformation.
Click Save as Draft to save changes.
Note
Any Transformation done at API level applies to the API as a whole and takes precedence over the Resource/Operation level transformation at runtime. In cases where both levels of Transformations are included, API-level transformation is performed first and if the Resource/Operation-level Transformation is applicable for the Resource/Operation, then the Resource/Operation-level Transformation is applied to the message.
Note
You can add Transformations to an API only if the API is in its Draft State.
To learn more about Transformations, refer: Transformations.
Json Body can be obtained using customTransformation.getJsonBody()
jsonPath
JsonPath, the path should indicate the JSON element that should be removed
Sample JSON Transformation Script
To add Request Header:
var obj = new Object();
obj.transformRequestHeader = function(customTransformation){
customTransformation.addRequestHeader("CustomTransform","Checking the transformation");
return customTransformation;
}
To modify/add/remove JSON element from Request Body:
 obj.transformRequestBody = function(customTransformation){

 //to modify Json element's value
     var jsonBody = customTransformation.getJsonBody();
     var jsonPath = "$.partyInteraction[0].interactionItem[0].id";
     var replaceValue = "555555";
      if(jsonBody != "" && jsonPath != "" && replaceValue != ""){
         customTransformation.modifyJsonElement(jsonBody, jsonPath, replaceValue);
     }

 //to modify Json key
     var jsonBody = customTransformation.getJsonBody();
     var jsonPath = "$..relatedParty[0]";
     var keyToReplace = "id";
     var replaceKey = "SOA_Id";
      if(jsonBody != "" && jsonPath != "" && keyToReplace != "" && replaceKey != ""){
         customTransformation.modifyJsonKeyElement(jsonBody, jsonPath, keyToReplace, replaceKey);
     }

 //to add new Json element
     var jsonBody = customTransformation.getJsonBody();
     var jsonPath = "$..topic[0]";
     var addKey = "New_Key";
     var addValue = "New_Value";
      if(jsonBody != "" && jsonPath != "" && addKey != "" && addValue != ""){
         customTransformation.addJsonElement(jsonBody, jsonPath, addKey, addValue);
      }

//to remove Json element
     var jsonBody = customTransformation.getJsonBody();
     var jsonPath = "$..topic[0].reasonLevel2";
      if(jsonBody != "" && jsonPath != ""){
         customTransformation.removeJsonElement(jsonBody, jsonPath);
      }

  return customTransformation;
 }
Name of the node for which the prefix has to be added
flag
The flag value can either be true or false. If it is true, the namespace prefix will be added to the specific node and all its child nodes. If it is false, the namespace prefix will be added only for that node
Note
Below methods from the above list are also used in Data Recording:
Payload is the actual message or body data that is transmitted in a request/response. DigitMarket™ API Manager through its Gateway allows users to perform payload conversion for REST services. Payload conversion is applicable for the following scenarios:
To convert incoming REST XML request payload to JSON payload and incoming JSON response to XML.
To convert incoming JSON request payload to RESTXML payload and incoming XML response to JSON.
In cases where the requesting and receiving applications are configured with different services, conversion is done by the Gateway so that the payload request/response is sent in the preferred data format to the appropriate application.
XML to JSON
Let us suppose that the client application supports XML service and the receiving application backend is configured with JSON service. In such cases for XML requests from the client, the Gateway will convert the request into JSON and send it to the backend. As the backend supports JSON, the response sent by it will be in JSON format. This response is converted to XML by Gateway and sent to the client application. Conclusion is that, conversion has taken place within the Gateway from XML to JSON for requests and vice versa for responses.
JSON to XML
Let us suppose that the client application supports JSON service and the receiving application backend is configured with XML service. In such cases for JSON requests from the client, the Gateway will convert the request into XML and send it to the backend. As the backend supports XML, the response sent by it will be in XML format. This response is converted to JSON by Gateway and sent to the client application. Conclusion is that, conversion has taken place within the Gateway from JSON to XML for requests and vice versa for responses.
None
Let us suppose that the client application backend is configured with JSON service and the receiving application also supports JSON. In such cases for JSON requests from client, the backend will send a JSON response. Conclusion is that, no conversion takes place, as the value None is rendered in this case.
Note
Although payload conversion does not take place, transformation will be applicable as per the transformation script.
To enable Payload Conversion for a REST API:
Navigate to the REST API Configuration page.
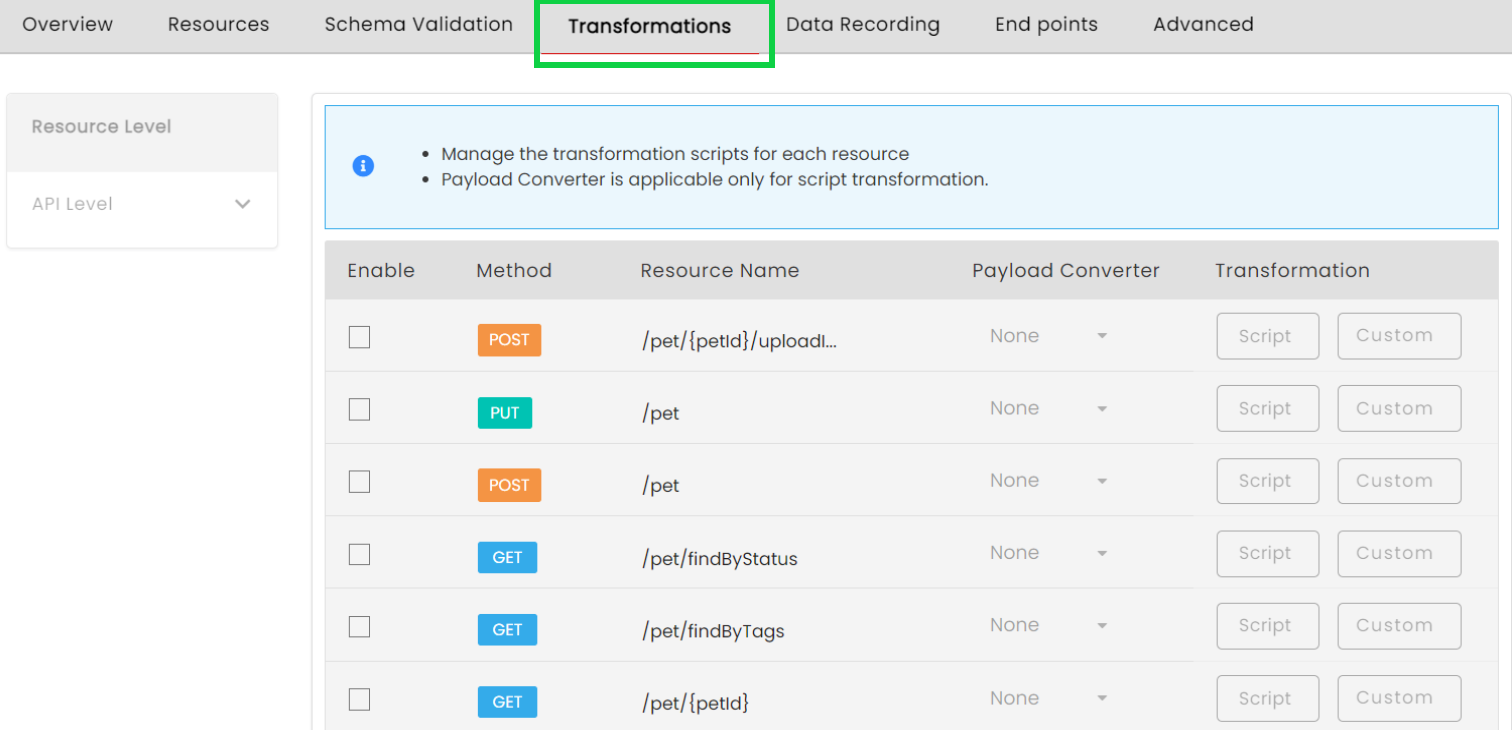
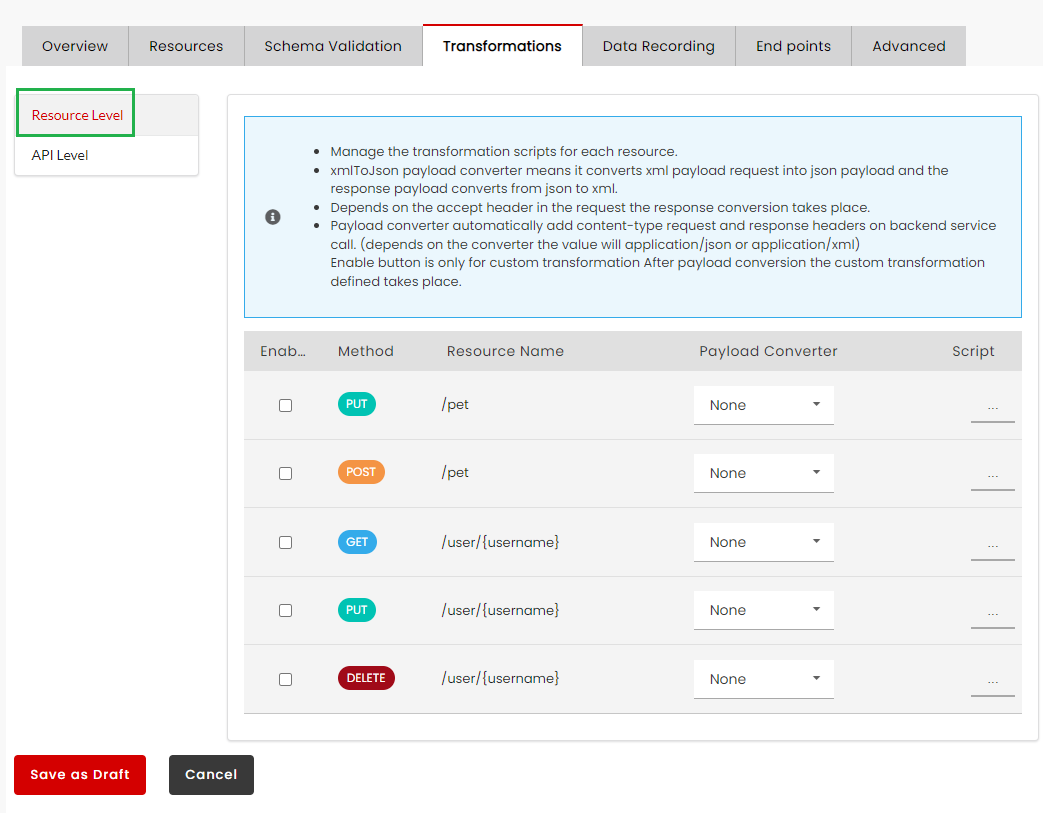
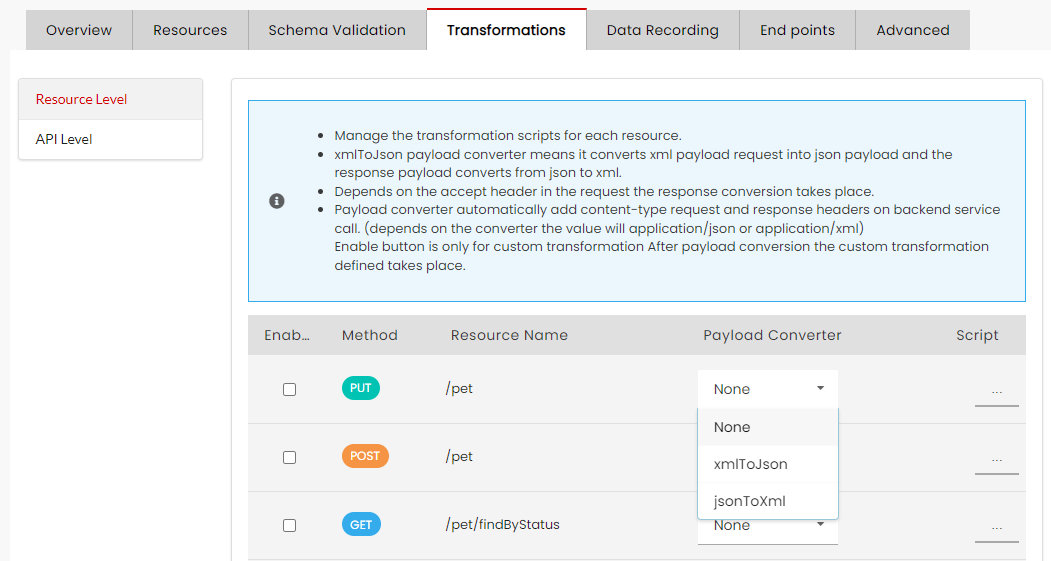
In the REST API Configuration screen, click the Transformations tab. The tab screen lists all the Resources added to the REST API. In the active sub-tab Resource Level, a list of all resources that have been added to the API Version displays.
From the Payload Conversion drop-down list, select the required conversion scenario: None, XMLtoJSON and JSONtoXML.
Click Save as Draft to save changes.
Additionally, user can also upload a transformation JavaScript to the API to make content modification, addition and removal to the request and response elements and headers. For payload conversion, user can also modify the Content Type header in the transformation script. If not specified, the default Content Type value that is hardcoded in the Gateway will be used. In such cases payload conversion will take place first, and custom transformation will be applied on the converted payload.
For more information on transformation, refer Manage Transformations and to know how to upload a Transformation script, refer the topic ‘To include Transformation at the Resource/Operation level’ in that section .
Content-Type header
Let us suppose that both the client application and the receiving application backend is configured with different services, and payload conversion is required to send appropriate data. In a typical scenario, the payload conversion will take place first followed by the Content Type conversion. That is, the Content Type conversion will take place on the converted payload.
The Content Type header will be specified in the Transformation script. After payload conversion, the Gateway will modify the Content Type header of the converted payload by using the client specified value or default value (application/xml for XML payload and application/json for JSON payload) hardcoded in the Gateway and send it to the backend.
This payload and Content Type conversion is applicable for both request and response scenarios. In case of response, the Content Type will be defined by the backend, and conversion will take place in the Gateway.
The client may also modify the Content Type with custom value in the transformation script. If the Content-Type header is not modified in the script, or in case of faulty script, gateway will modify the headers, based on the converted payload, by using the default values (application/xml for XML and application/json) for JSON payload.
Accept header
If a request contains an Accept header, then the payload conversion for the request will occur based on the selected payload conversion value in the user interface value. Response transformation will be based on the Accept header and will be applicable to the scenarios discussed below.
XML to JSON
Let us suppose that the client application supports XML service and the receiving application backend is configured with JSON service. In such cases, for XML requests from the client, the Gateway will convert the request into JSON and send it to the backend. As the backend supports JSON, the response sent by it will be in JSON format. This response is converted to XML by Gateway based on the payload conversion value selected in the user interface. This is a typical payload conversion scenario.
If the client has specified the Accept header as JSON (application/json), then no payload conversion will take place as the response from the backend is already in JSON. Since the Accept header has been specified, this JSON response from the backend will be sent to the client application without payload conversion. If no Accept header is specified, payload conversion will take place, and JSON response from Gateway will be converted into XML for the client.
JSON to XML
Let us suppose that the client application supports JSON service and the receiving application backend is configured with XML service. If the client has specified the Accept header as XML (application/xml), then no payload conversion will take place as the response from the backend is already in XML. Since the Accept header has been specified, this XML response from the backend will be sent to the client application without payload conversion. If no Accept header is specified, payload conversion will take place, and XML response from Gateway will be converted into JSON for the client.
Note
If the Accept header is a value other than [application/xml or application/json or text/xml] then “Request Handling Error“ will be thrown by the Gateway.
GET requests do not have a request body. In cases where the incoming request is a GET request with an empty request body, the payload conversion will happen only for the response body.
For example, for an incoming GET request, if the payload conversion is selected as JSON to XML in the user interface, it is by default understood that the client application has JSON service configured while the backend supports XML service. In such case, the response coming from the backend will be in XML. The Gateway will perform payload conversion on the XML response and convert it to JSON to be sent to the client.
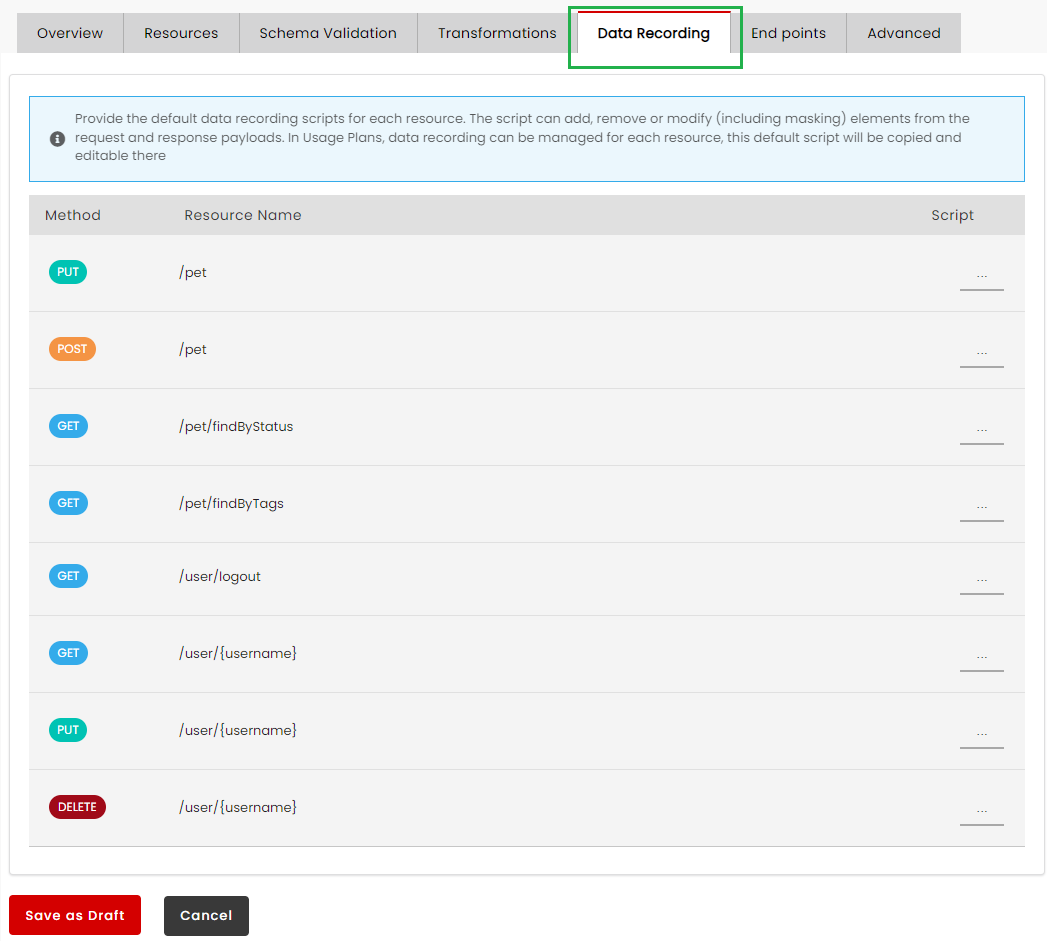
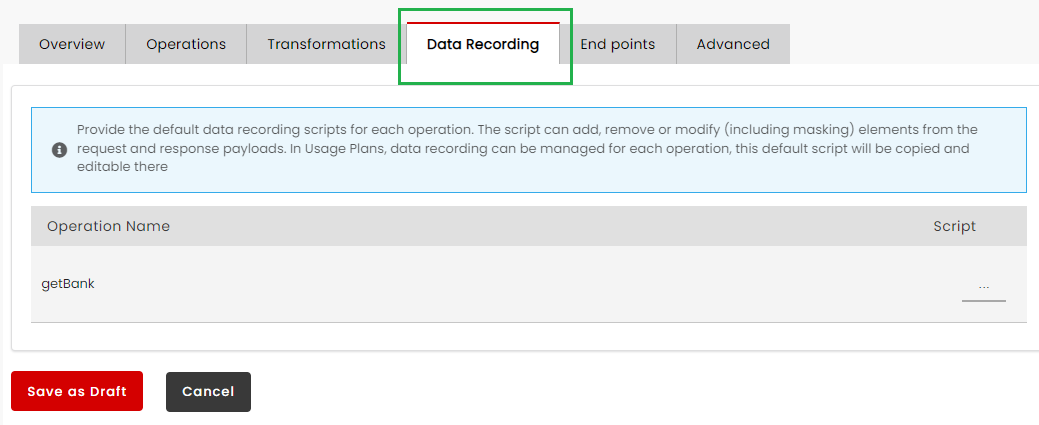
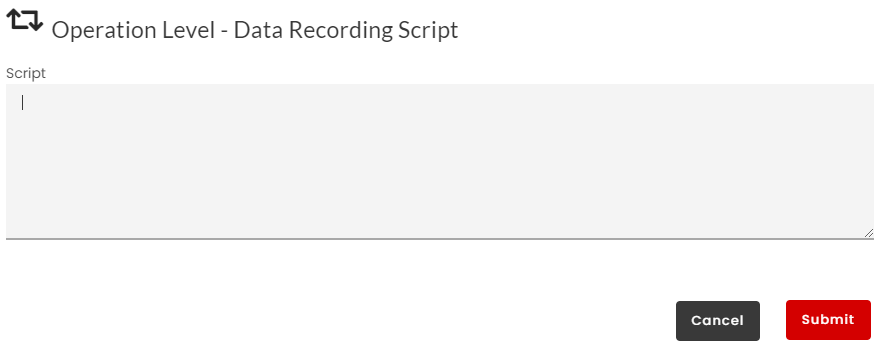
DigitMarket™ API Manager allows the user to add a script based on a template that will be used to output data to be logged for each Resource/Operation. The script can be used to add, remove or modify (including masking elements to conceal certain data) from the requests and responses (including payloads and header information).
A list of Resource(s)/Operation(s) added to the API displays.
Under Script, against the resource/operation for which you wish to add a script, click the three-dot button to display the Resource level - Data Recording script/ Operation level - Data Recording Script dialog.
This method is used to mask REST XML and SOAP XML data partially.
Helper Methods Used - partialMaskingUsingXPath(xmlBody, xpath, namespace, startLen, endLen, maskUnmask)
Parameter
Description
xmlBody
xmlBody can be obtained from the code using transactionRecording.getXmlBody()
xpath
the path should indicate the key whose value should be masked
namespace
The namespaceURI if the xpath contains namespace prefix,if there is no namespace prefix in the xpath, then this field can be empty or null
If the xpath contains multiple namespace prefixes then comma separated namespaceURI should be given.
The format for this field is -namespace = prefix1=namespaceUri1,prefix2=namespaceUri2
startLen
No. of starting characters in the jsonPath value to be masked/unmasked
endLen
No. of last characters in the jsonPath value to be masked/unmasked
maskUnmask
Indicates whether to mask or unmask the no. of characters specified in the above two parameters
Note
If the value for the parameter maskUnmask is mask, then the characters indicated by startLen and endLen will be masked with and the remaining characters in the value will be unmasked.
If the value for the parameter maskUnmask is unMask, the the characters indicated by startLen and endLen will be unmasked and the remaining characters in the value will be masked with.
Additionally, there are the following helper methods used for masking in Data Recording:
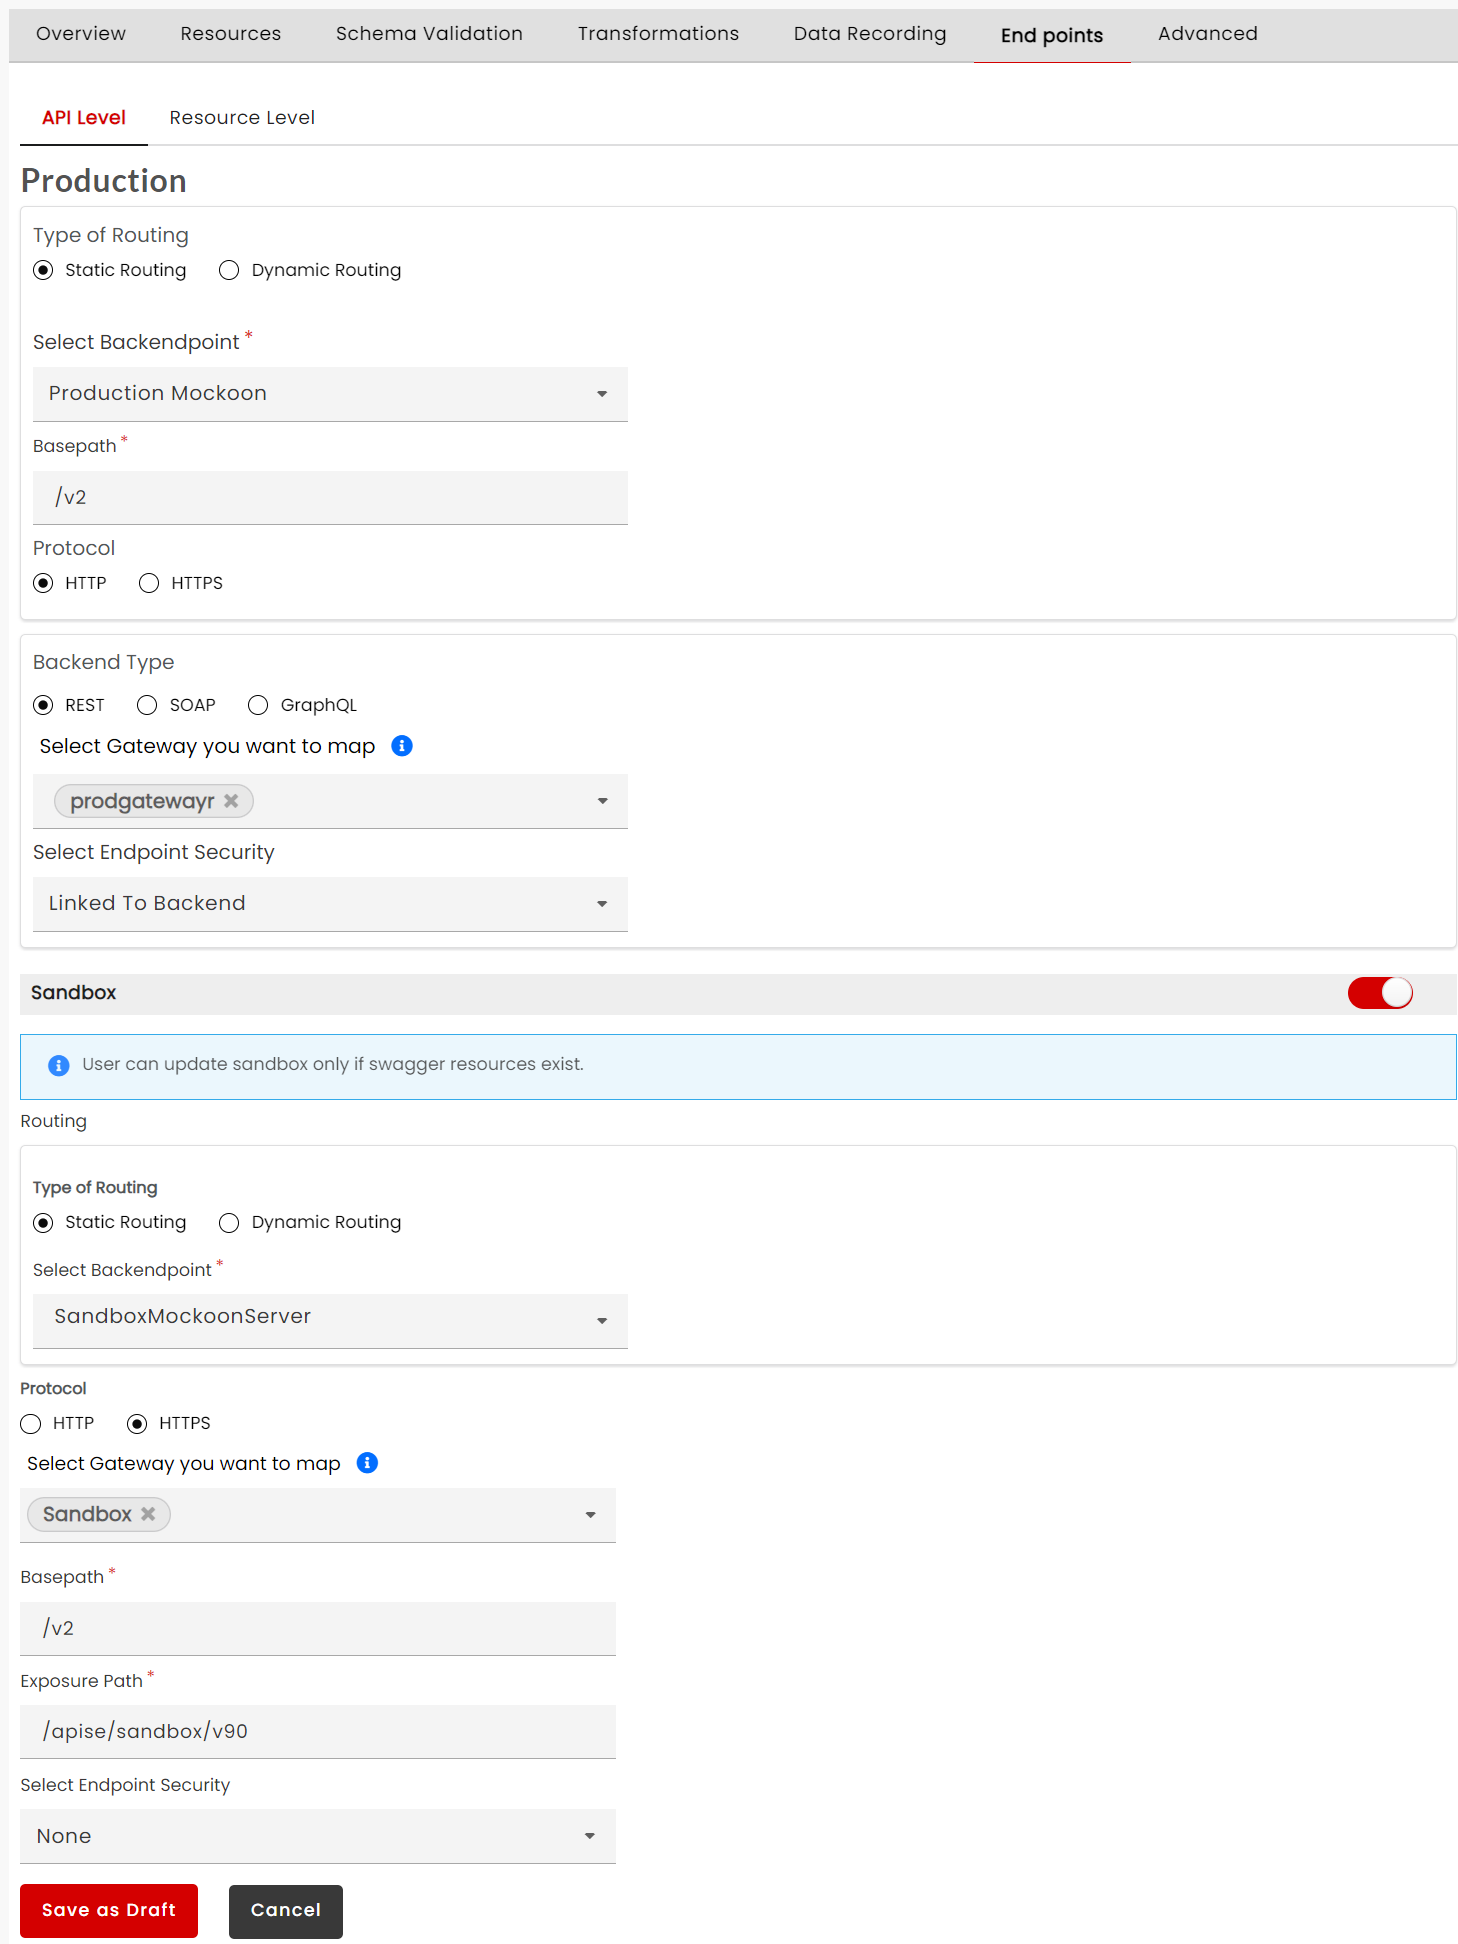
You can have an API Endpoint for the Production environment and one for the Sandbox environment. The production Endpoint is the actual location of the API. The Production environment has active paying subscribers who access APIs via Production Endpoints. Sandbox environment is meant solely for testing the APIs with the intent of learning how to use them. You can call it the “Try-it Out” version of the Production environment. The Sandbox environment, nevertheless, has production-like data and capabilities. Sandbox allows the Consumers to try out APIs via the Sandbox Endpoints before going live and start using the APIs via the Production Endpoints. It is, however, important to know that the Usage Policies set for Sandbox environment are comparatively more rigid.
The DigitMarket™ API Manager Gateway uses a static and a dynamic mode to enable you to route a message to a particular Endpoint. In the static mode, the Endpoints remain the same and cannot be changed. In the dynamic mode, you can provide a script to choose the Endpoint to which you want to route the messages to. DigitMarket™ API Manager allows JavaScript as the scripting language to implement dynamic routing. If the incoming request call needs to be routed to a different Endpoint than the default one, one can provide the required logic in the script, wherein a condition can be set to route the request message to the required backend Resource Endpoint. Based on the routing information in the message header, the request is routed to the required destination.
Note
When you configure Endpoints using the Dynamic Routing scripts, use the Backend Server Name (not the port or IP) to route requests to the required Backend Server.
To configure an Endpoint for Production environment with Static Routing (API-level):
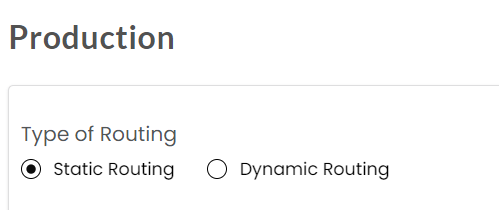
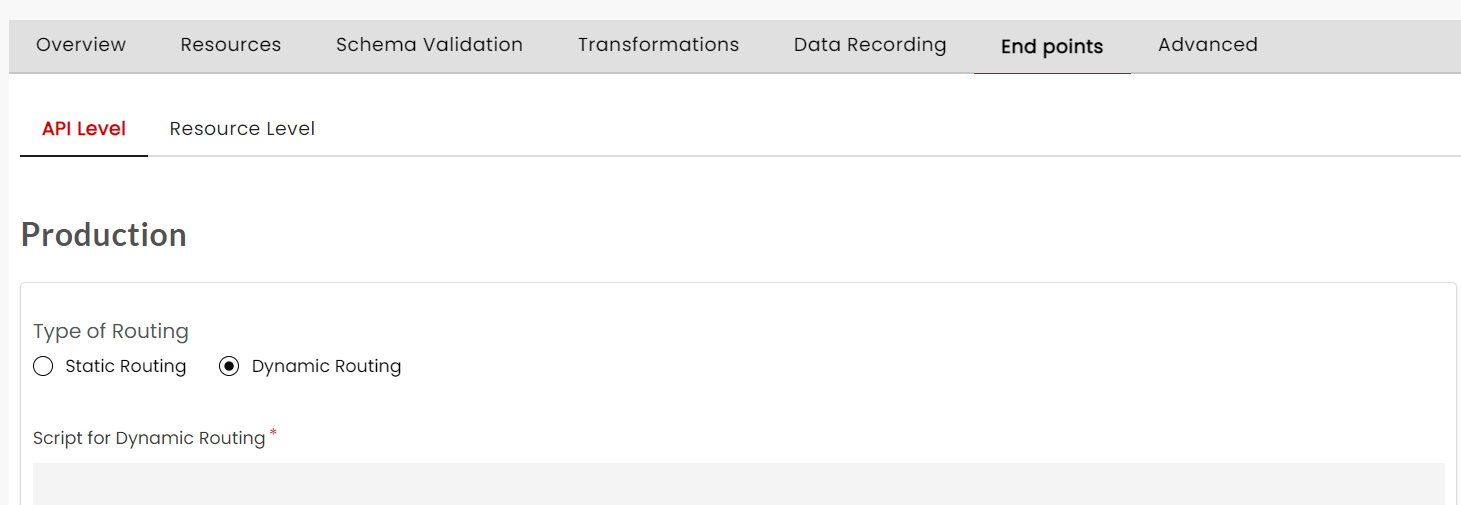
The API Level tab has two panels, namely Production and Sandbox. In the Production panel, under Types of Routing, you can find two radio buttons namely, Static Routing and Dynamic Routing.
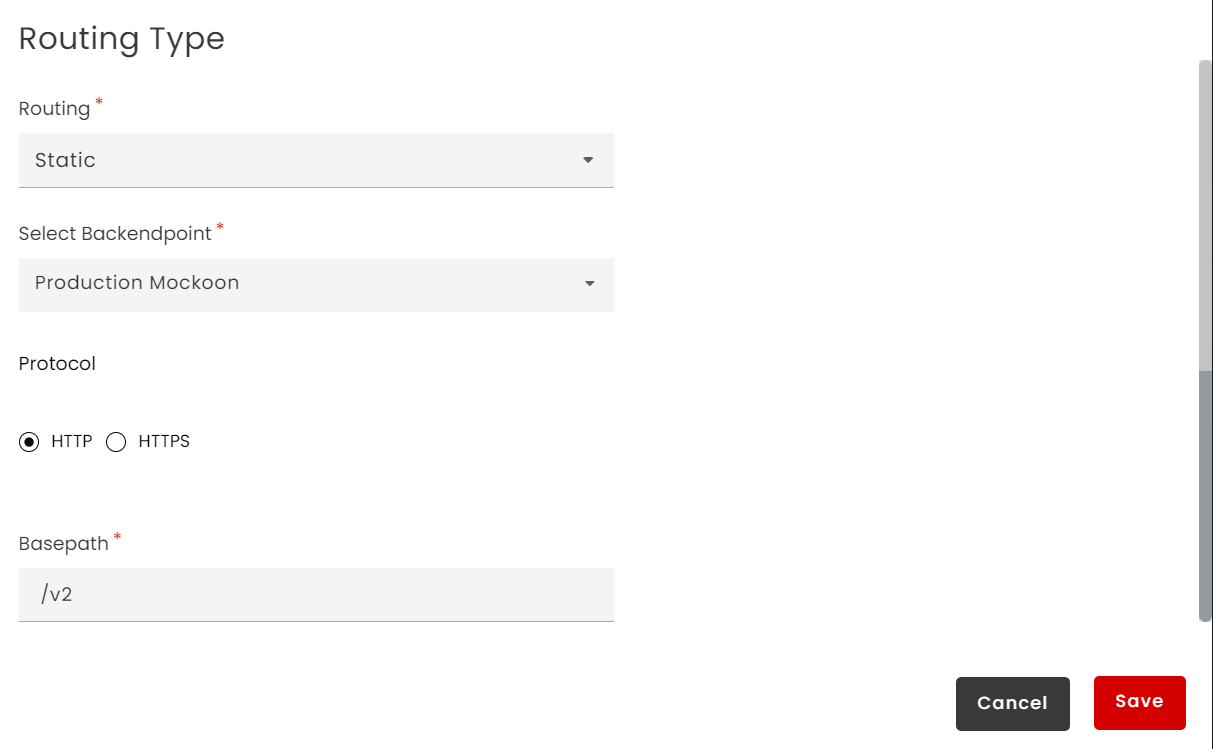
In Type of Routing, select the Static Routing radio button to display the Static Routing screen (Static Routing radio button is selected by default).
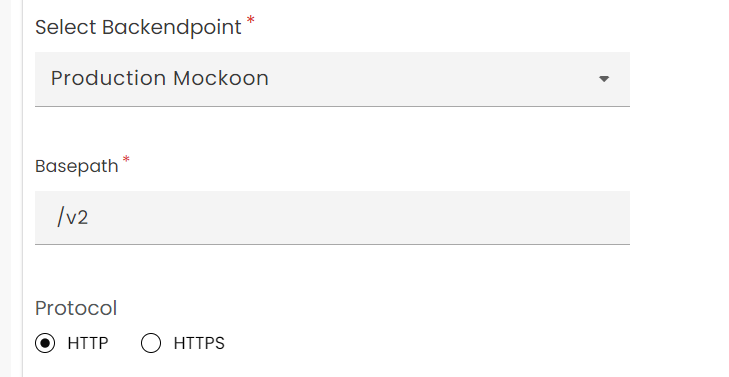
Select Backendpoint from the drop-down. The drop-down lists all the Backend servers that have been added to the Production environment from the Backends main menu option.
In the Basepath box, type the base path to be used with the Real Endpoint in the Production environment. The base path is the root path of the Real Endpoint. It precedes the Resource/Operation name and shall be common to all Resources. A URL with base path should resemble the following format:https://myorg-test.dmapim.com/v1/weather/forecast (for HTTPS) and http://myorg-test.dmapim.com/v1/weather/forecast (for HTTP), wherein https://myorg-test.dmapim.com/ (https://myorg-test.dmapim.com/ in the case of HTTP) is the URL fragment that stands for backend server point and /v1/weather is the base path of the Real Endpoint.
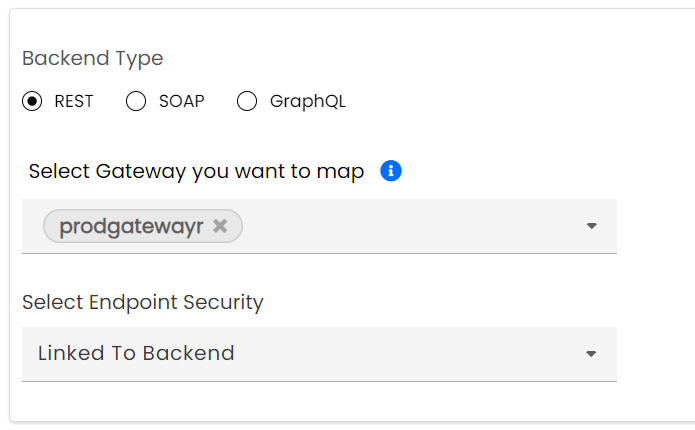
The Select the Gateway you want to map drop-down displays the list of Gateways that are configured for the publisher organization. From the Select the Gateway you want to map drop-down, choose the Gateway to which you want to map the API. The Gateways you select will appear at the top of the drop-down. You can remove the selected Gateways by clicking the .
Note
The API Version will be mapped only to the selected Gateways.
You can also map the API Version from the API tab of the selected Gateway. Refer API.
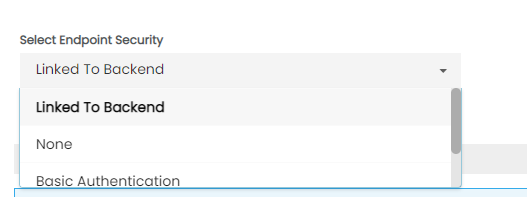
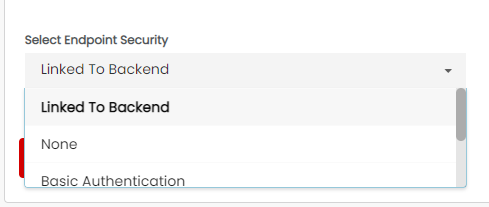
Click the Select Endpoint security drop-down box to select a security based on the following options:
None: Select None if you do not wish to have any security for the endpoint.
Linked to Backend: When authentication is linked to the backend, the Gateway replaces credentials in the message header at the subscription-level with the credentials provided at the backend server security-level and the authentication takes place at the backend server-level.
Basic Authentication: When the user selects Basic Authentication, the Gateway authenticates the user credentials (User ID and Password) and then replaces the credentials with the one from the backend security to allow authentication from the backend endpoint-level.
Pass-through: When the user selects pass-through authentication as the API endpoint security, the message is allowed to pass through the Gateway without any processing or alterations and the backend server then authenticates the credentials passed in the message before sending the response back to the client.
WS Security (for SOAP APIs): WS Security behaves similar to Basic Authentication except that it is meant for SOAP messages.
For more information on Authentication, refer: Authentication.
Note
The WS Security option appears when the user is configuring a SOAP API.
You can reveal the password to verify the typed password by clicking to select the check box Show password. Select None if you do not want any security for the Endpoint.
Note
Make sure to uncheck Show password before saving the draft.
Refer To configure Endpoint for Sandbox environment below for instructions on Sandbox panel.
Click Save as Draft to save changes.
For an API Version, if a user selects a Gateway to map, then upon clicking Save as Draft, the application first verifies if in that particular gateway, the selected backend is already mapped or not. If it is not mapped then it will ask if both the backend and the API version has to be propagated automatically.
For better understanding, let us assume that for an API 1, the dependency is Backend 1. Plan 1 also has dependency on API 1. Plan 1 and its dependencies are propagated to Gateway 1. Let us suppose that for a Gateway 2 which has no API mapped to it, a user tries to map API 1 to Gateway 2. The application analyzes that API 1 has dependency on Backend 1. But as the Backend 1 is not mapped to Gateway 2, it too needs to be mapped to Gateway 2. So in this case, system automatically maps both Backend 1 and API 1 to Gateway 2. Under the Endpoints tab of the API Version, both Backend and API can automatically be propagated to the Gateway (if the Backend is not mapped). If the user agrees to the mapping then on the Gateway Sync page, both Backend 1 and API 1 will be available for propagation to Gateway 2. First, Backend 1 has to be propagated and then the API 1 will be propagated to Gateway 2.
If the Backend is not mapped to the Gateway, the application asks for a confirmation as shown below:
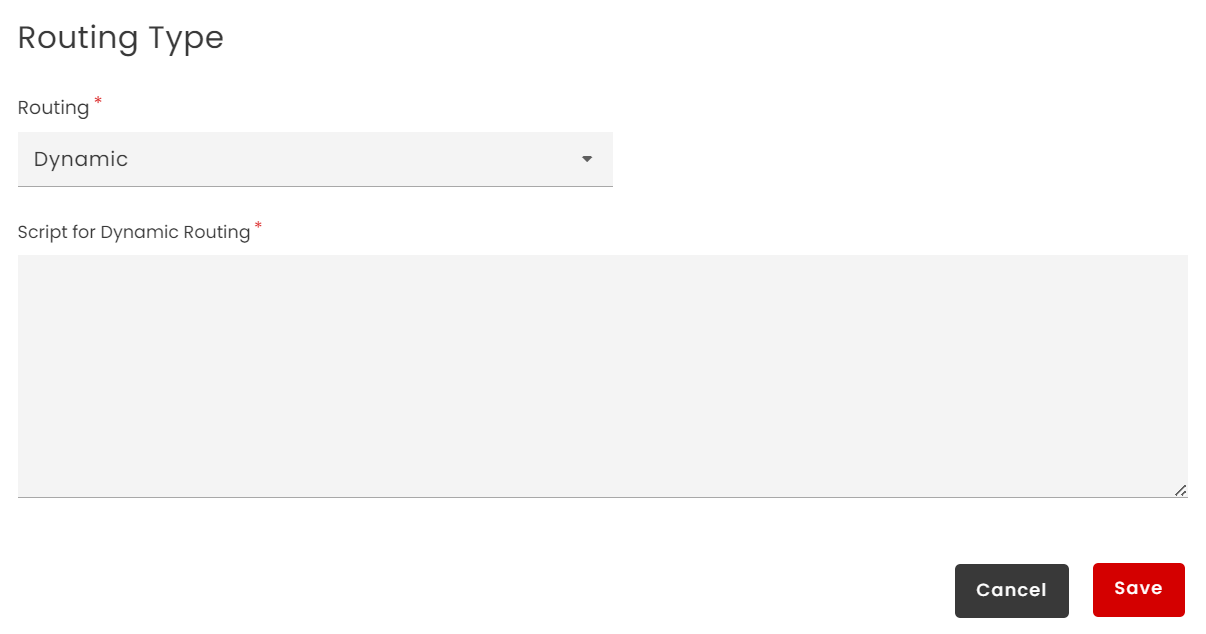
In Type of Routing, Select the Dynamic Routing radio button to display the Dynamic Routing screen. Note that the Static Routing radio button is selected by default.
Use this method to get http header value for the incoming request
key
key passed in http request header
setTarget(protocol, backendName, basePath)
Use this method to set the actual URI for the real backend
protocol
should be http or https
backendName
Name of the Backend where the request will be processed
basePath
Actual Base URL
Dynamic Routing Sample script
var obj = new Object();
obj.routeRequest = function(dynamicRouting)
{
  var headerValue = dynamicRouting.getHeaderValue("X-SSL-client-s-dn");
  var result = headerValue.split("CN=");
  StringFinalHeaderVal = result[result.length-1];
  if(StringFinalHeaderVal == "PERF")
    {
      dynamicRouting.setTarget("http,ThbsOSBPerf,/sim/autostub/Enterprise/JaxwsWebservice/jaxwsWebservice");
      }else{
      dynamicRouting.setTarget("http,ThbsOSBSoap,/sim/autostub/Enterprise/Webservice/jaxwsWebservice");
     }
   return dynamicRouting;
}
Note
When a dynamic routing script has backend server dependencies, make sure to propagate all the backend server to the relevant Gateways mapped to the API version.
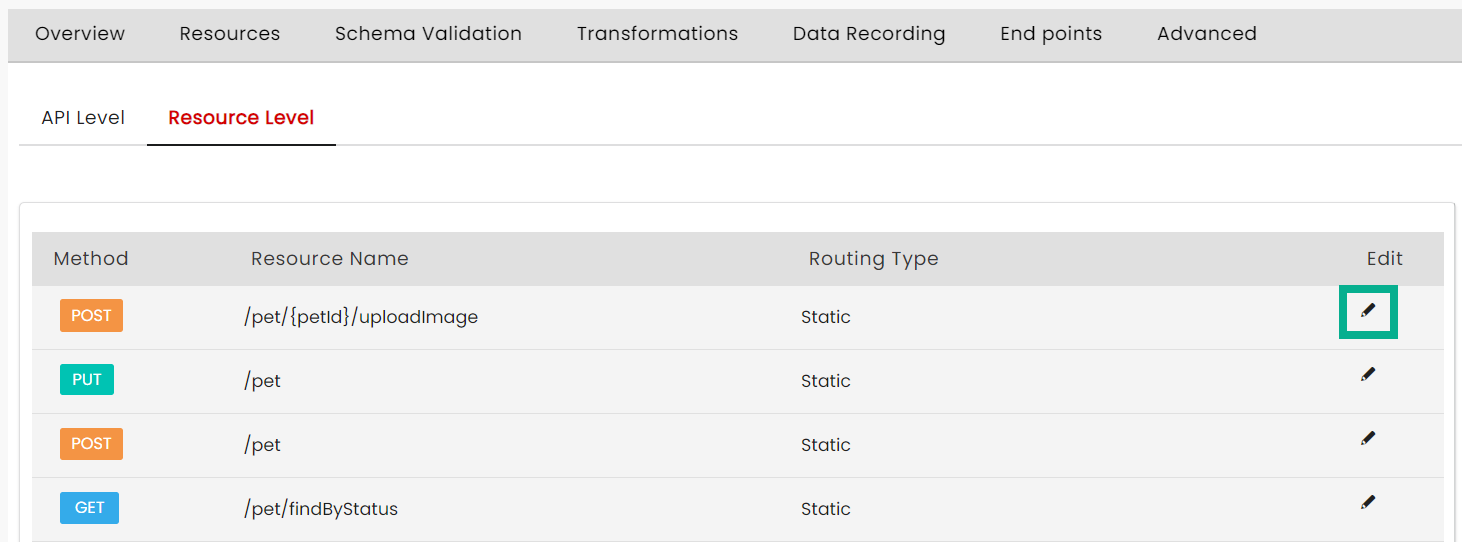
To configure an Endpoint for Production environment (Resource-level):
The Resource Level tab enables the user to set up various payloads for various resources.
var obj = new Object();
obj.routeRequest = function(dynamicRouting){
      var xml = dynamicRouting.getPayload();
      var xpath = "//orderStatusEvent/@orderCode";
      var namespace = "";
      var value = "CB2z8ule1njiwd-2uxwi";
      var type = "attribute";
   if (dynamicRouting.isXmlElement(xml, xpath, namespace, value, type)) {
    dynamicRouting.setTarget("http,Mock Backend,/xmlValidation/mock");
      } else {
     dynamicRouting.setTarget("http,ThbsBackend,/services/helloservice_1_0");
      }
      return dynamicRouting;
}
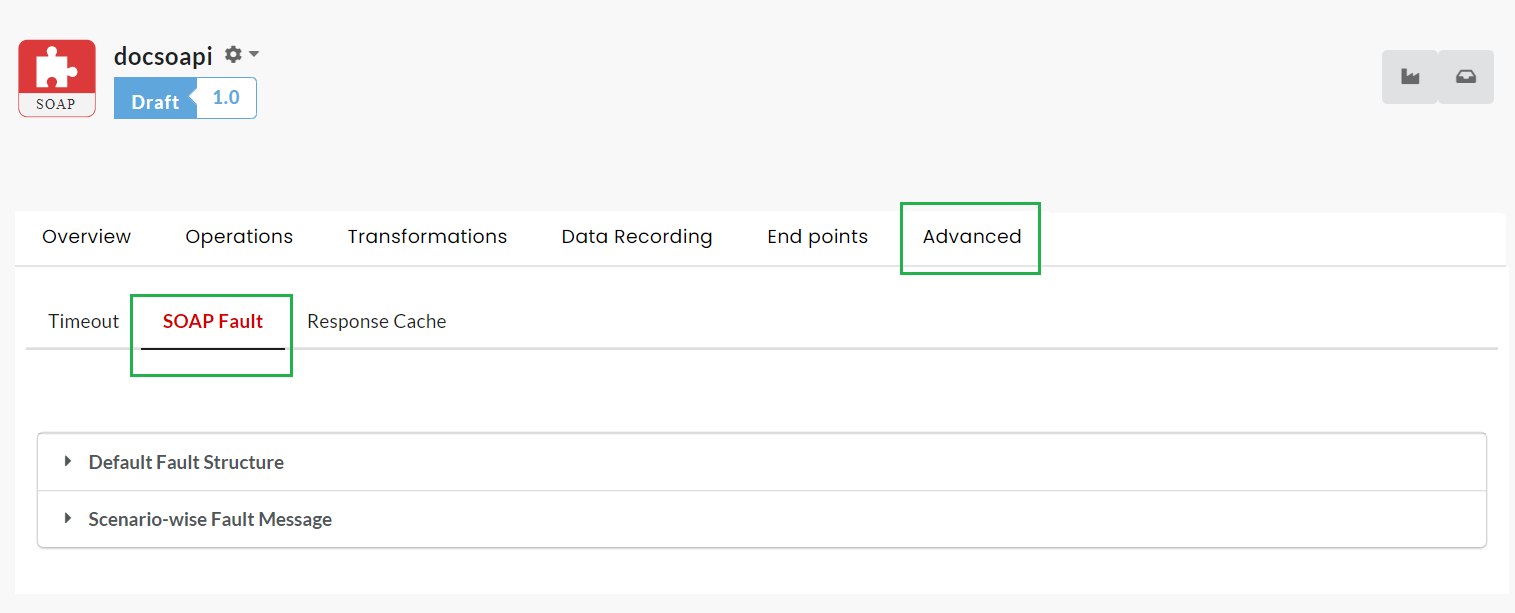
The Advanced tab in the API Configuration screen allows you to specify the time for request timeouts, set fault message details and response cache for REST, SOAP and GraphQL APIs.
You can configure as to how long the Gateway can wait for an API request to be serviced before giving up. If a response is not sent within the time specified by you, a request timeout message is sent back.
Timeout can be set at the API version-level and/or the Resource/Operation-level. When you set timeout at the API version-level, the value that you provide applies commonly to all the Resource/Operation endpoints for the API version being configured. For Resource/Operation-level timeout setting, you specify the timeout value for each Resource/Operation separately.
To set Request timeout for a REST API:
Navigate to the API Configuration screen.
Click the Advanced tab to display the Advanced tab screen.
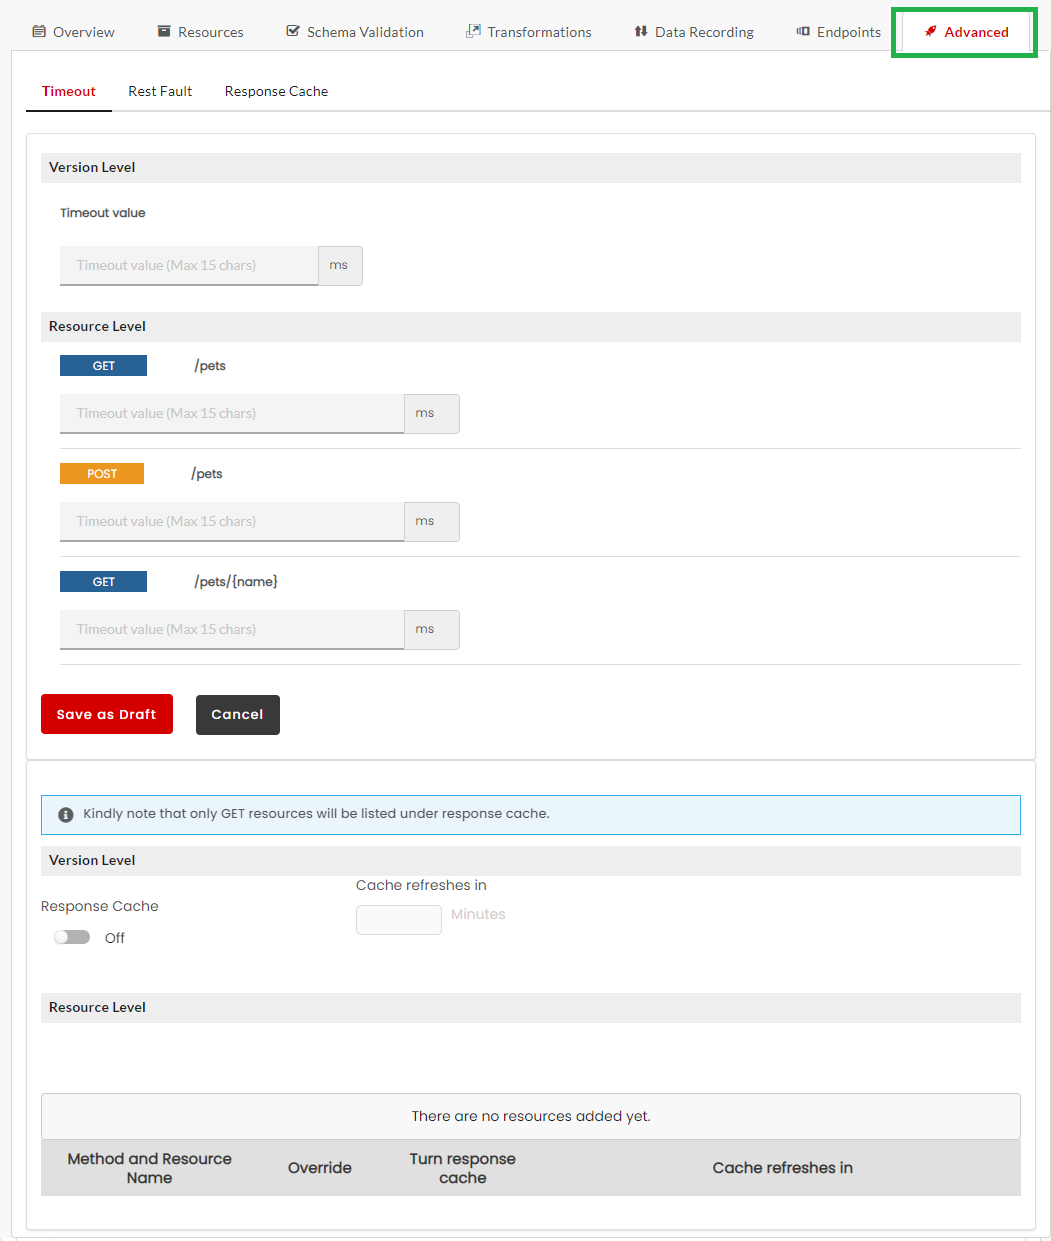
The Timeout sub-tab is the default sub-tab. The Timeout sub-tab has two panels, namely, Version Level and Resource Level.
In the Version Level panel, in the Timeout Value box, type the timeout value (in milliseconds) that you want to allocate at the version level.
In the Resource Level/Operation Level panel, under each Resource/Operation name listed, in the box provided, type the Timeout value in ms (milliseconds).
Click Save as Draft to save changes.
To set Request timeout for a SOAP API:
Navigate to the API Configuration screen.
Click the Advanced tab to display the Advanced tab screen.
The Timeout sub-tab is the default sub-tab. The Timeout sub-tab has two panels, namely, Version Level and Operations level.
In the Version Level panel, in the Timeout Value box, type the timeout value (in milliseconds) that you want to allocate to all Operations at the version level.
In the Operations Level panel, in the Timeout Value box, type the Timeout value in milliseconds that you want to allocate for each Operation in the API.
Click Save as Draft to save changes.
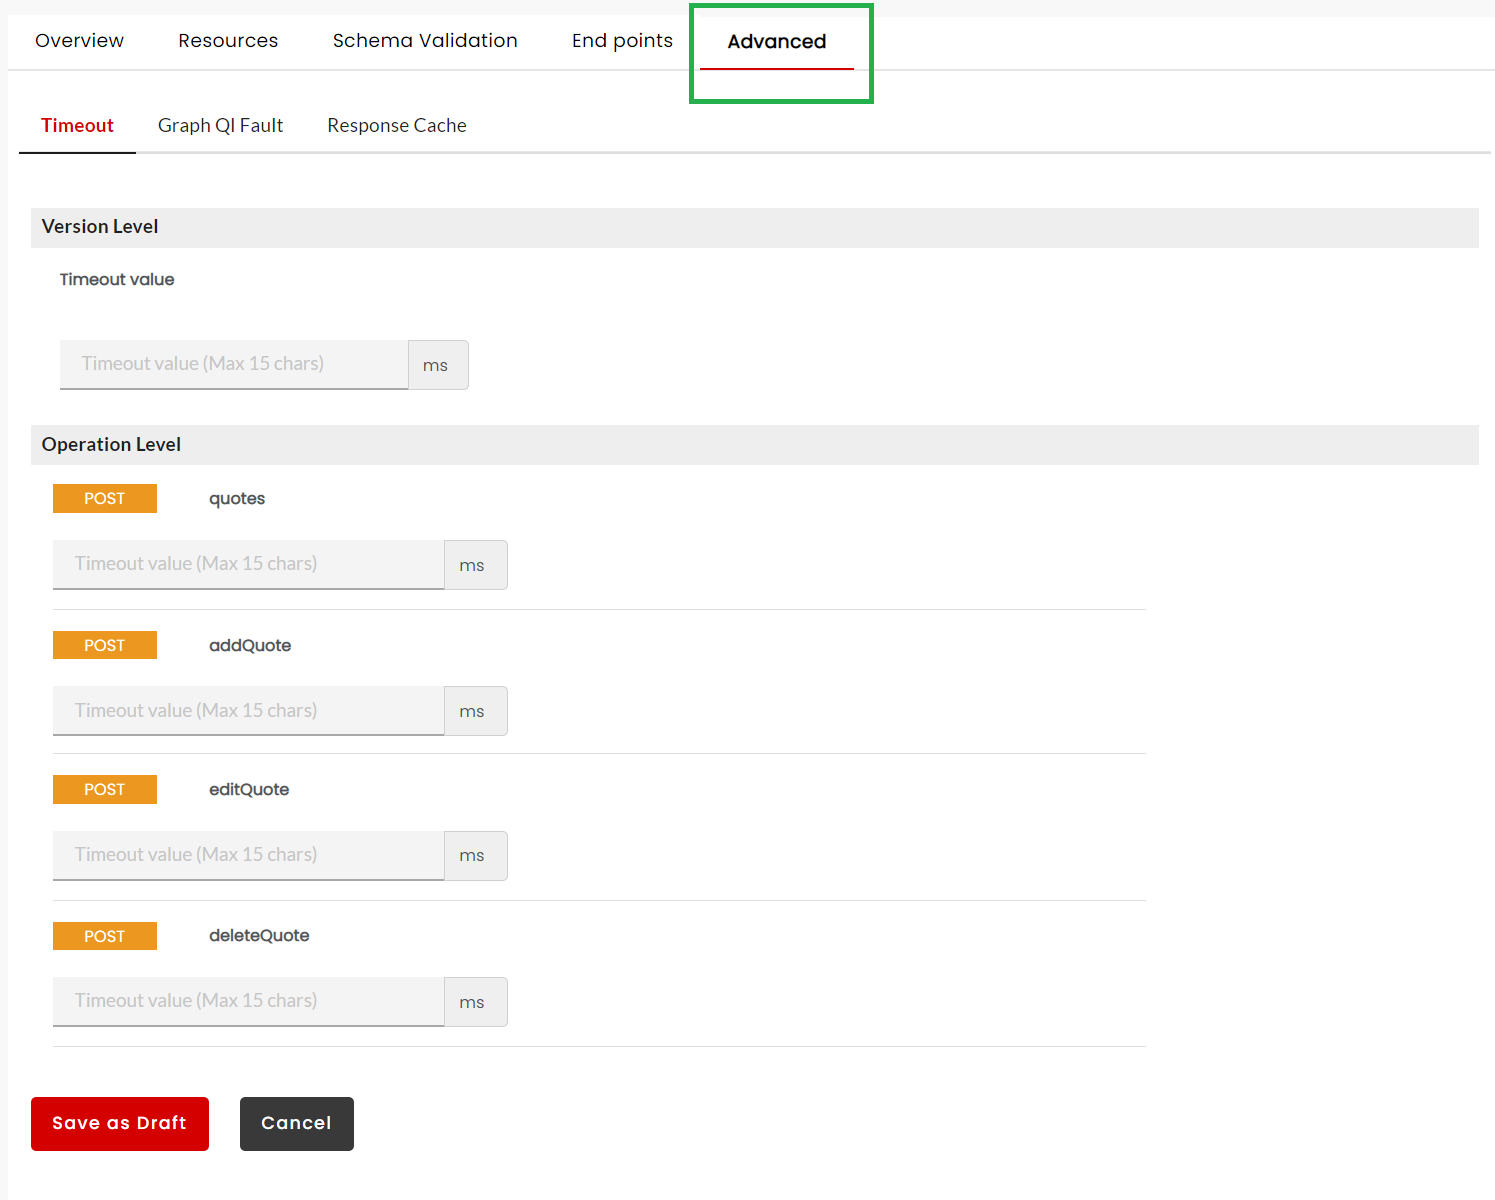
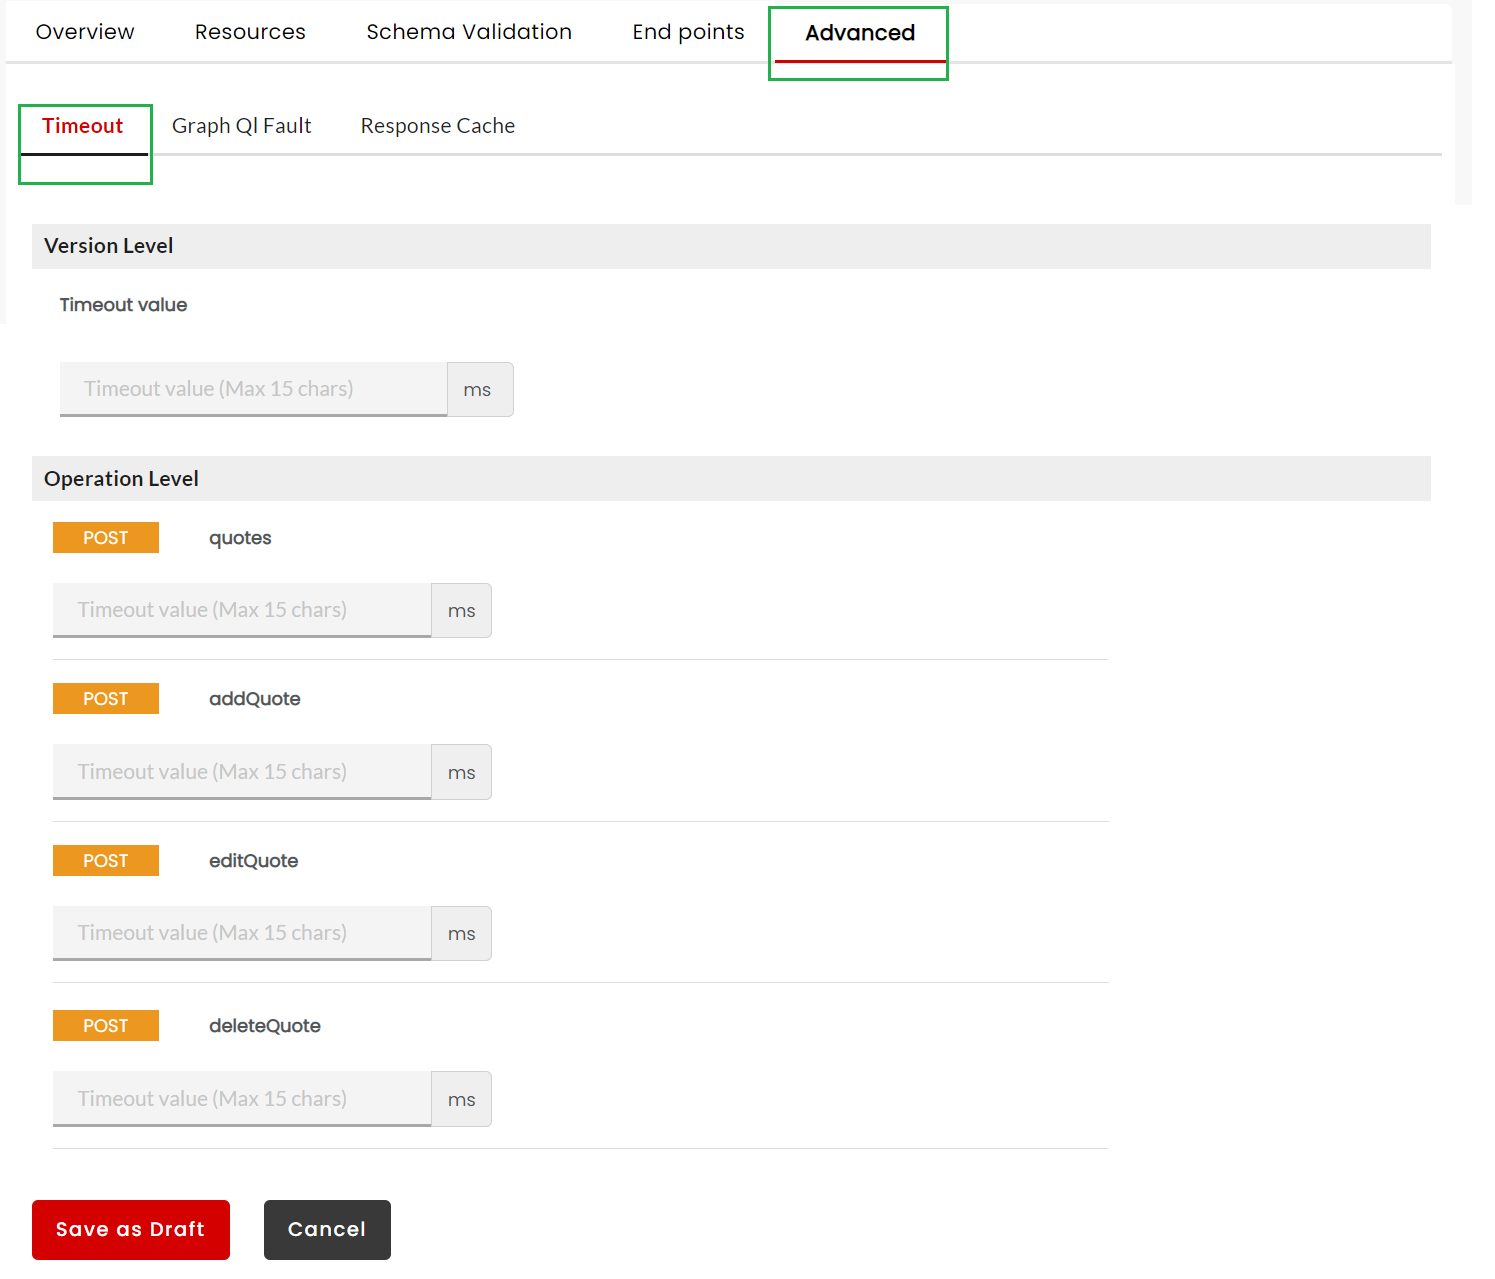
To set Request timeout for a GraphQL API:
Navigate to the GraphQL API Configuration screen.
Click the Advanced tab to display the Advanced tab screen.
The Timeout sub-tab is the default sub-tab. The Timeout sub-tab has two panels, namely, Version Level and Resource Level.
In the Version Level panel, in the Timeout Value box, type the timeout value (in milliseconds) that you want to allocate at the version level.
In the Resource Level/Operation Level panel, under each Resource/Operation name listed, in the box provided, type the Timeout value in ms (milliseconds).
Click Save as Draft to save changes.
To set Request timeout for a GraphQL API:
Navigate to the GraphQL API Configuration screen.
Click the Advanced tab to display the Advanced tab screen.
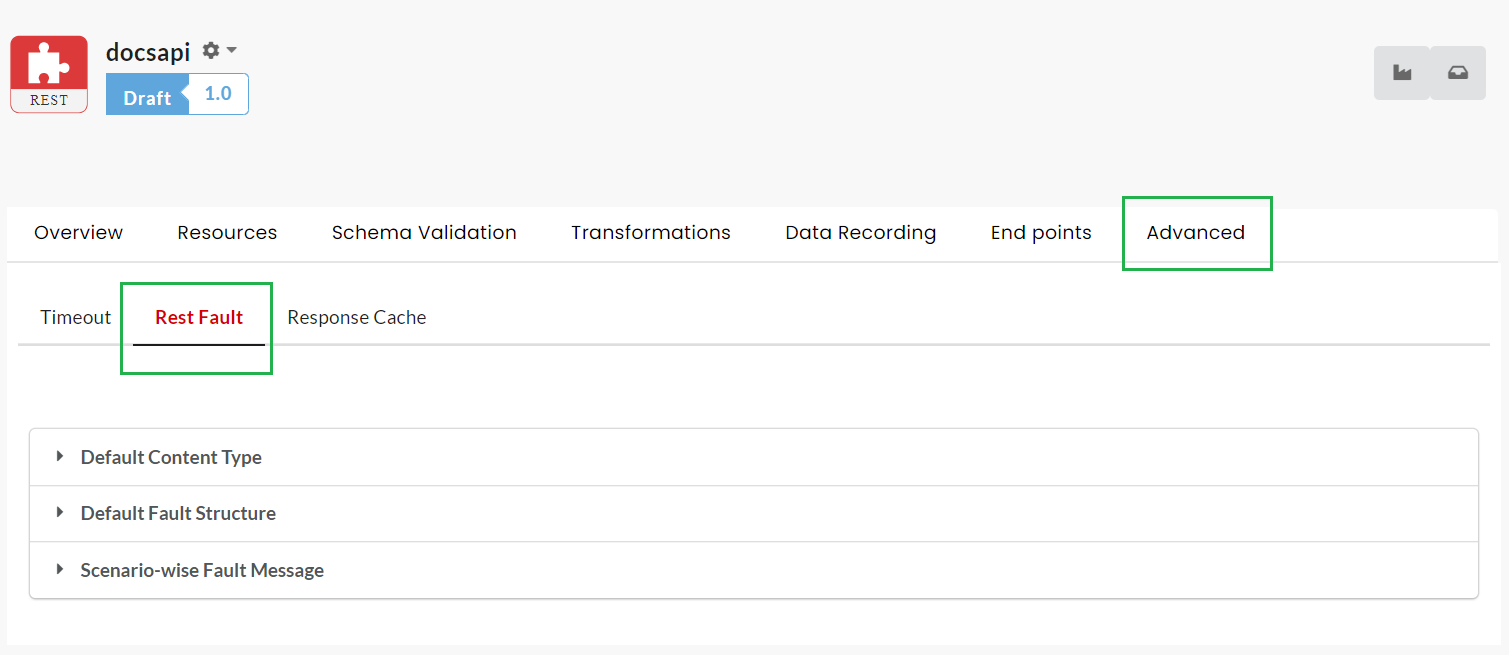
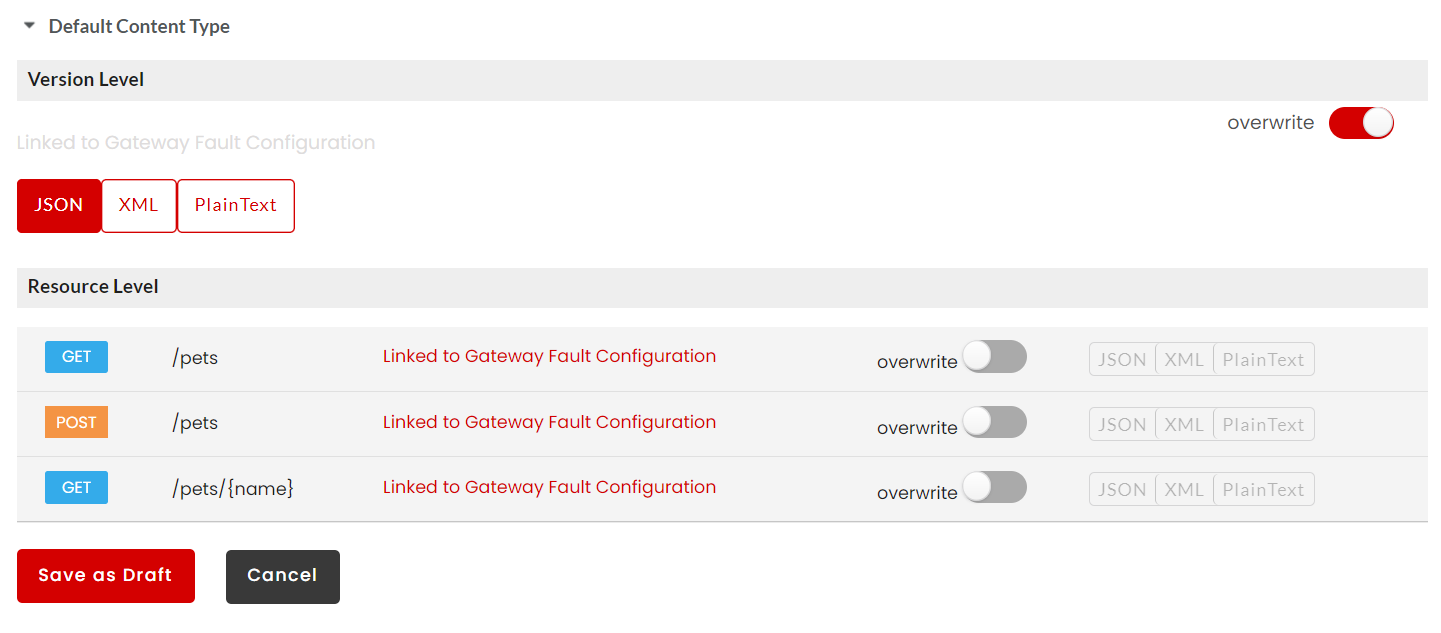
Click to expand the Default Content Type accordion tab. You can overwrite the configured Content Type at API Version Level and for each Resource. Click the Overwrite toggler to activate overwrite and click again to disable overwrite and retain the default Content Type settings. Upon enabling Overwrite, the Content Type options at Version Level and for each Resource will be enabled.
Click to select the required Content Type (JSON/XML/PlainText) option to be configured at API Version Level and for each Resource and then click Save. This will overwrite the Default Content Type settings.
Next, click to expand the Fault Structure accordion tab. You can overwrite the configured Fault Structure at API Version Level and for each Resource. Click the Overwrite toggler to activate overwrite and click again to disable overwrite and retain the default Fault Structure settings. Upon enabling Overwrite, the Fault Structure options at Version Level and for each Resource will be enabled.
(Optional) Edit the JSON/XML/PlainText Fault box to make any required changes to the Fault template at API Version Level and for each Resource and then click Save to save the changes.
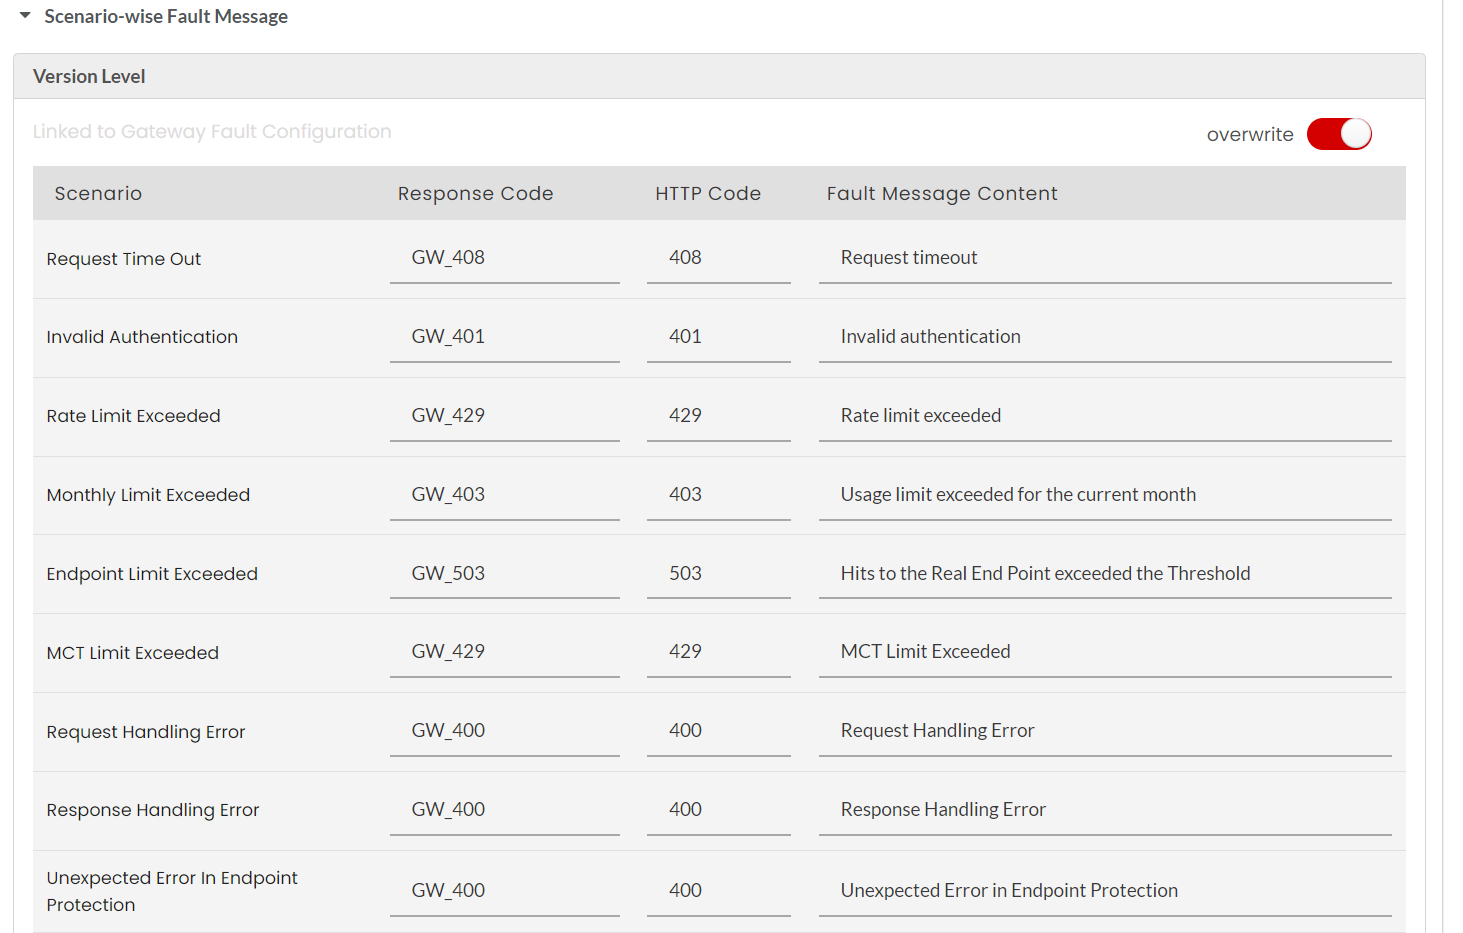
Next, click to expand the Scenario-wise Fault Message accordion tab. You can overwrite the configured Fault Message at API Version Level and for each Resource. Move the Overwrite toggler to the right to activate overwrite and do the inverse to retain the default Fault Message settings. Upon enabling Overwrite, the Fault Message options at Version Level and for each Resource will be enabled.
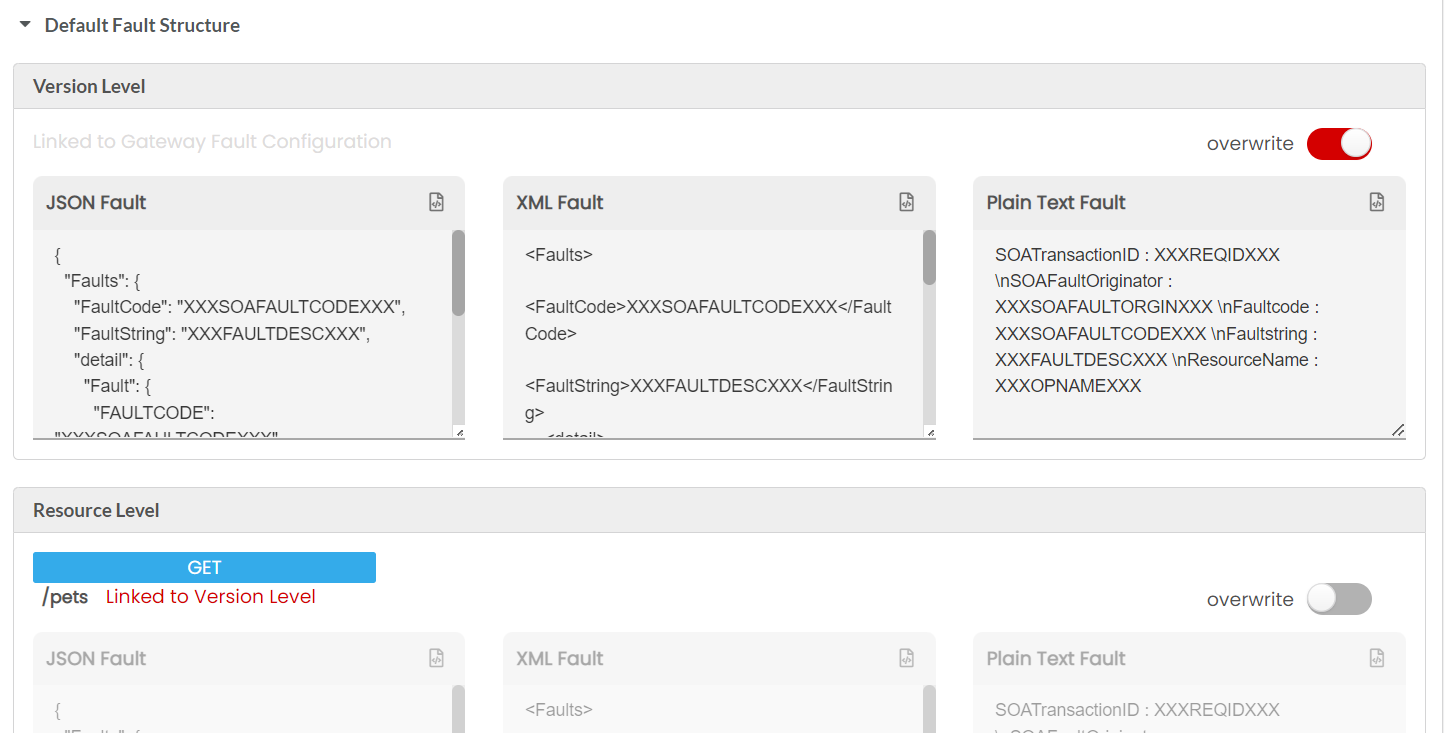
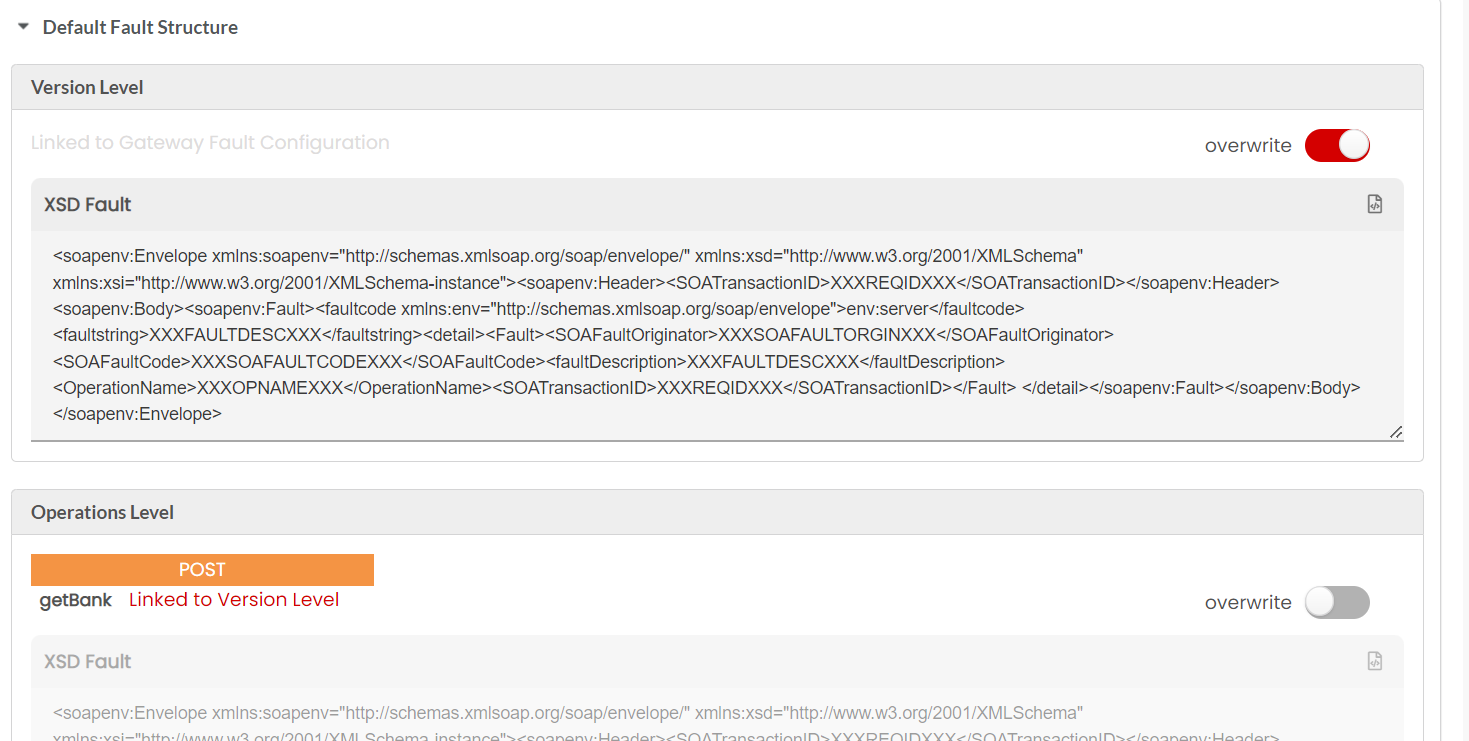
Click to expand the Fault Structure accordion tab. You can overwrite the configured Fault Structure at Version level and for each Operation. Click the Overwrite toggler to activate overwrite and click again to disable overwrite and retain the default Fault Structure settings. Upon enabling Overwrite, the Fault Structure options at Version level and for each Operation will be enabled.
(Optional) Edit the XML Fault box to make any required changes to the Fault template at API Version Level and for each Operation and then click Save as Draft to save the changes.
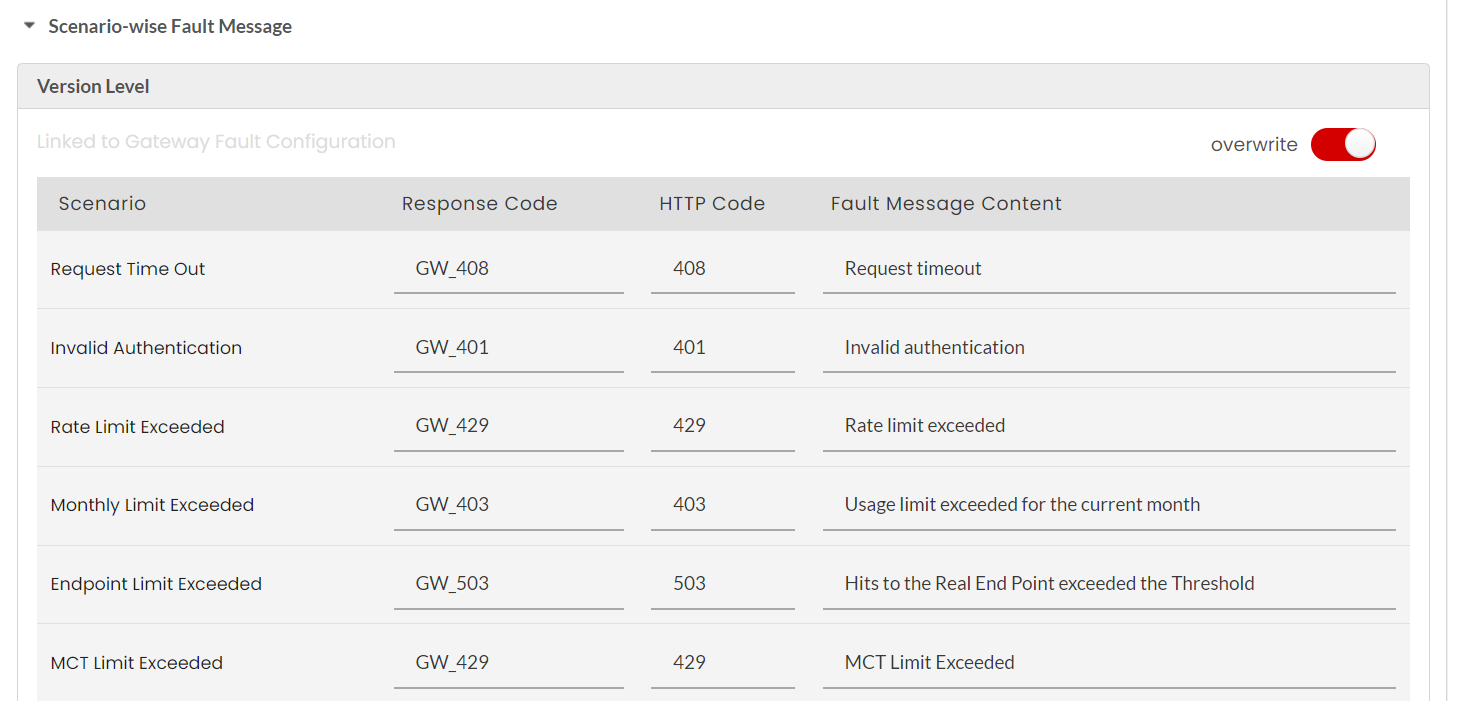
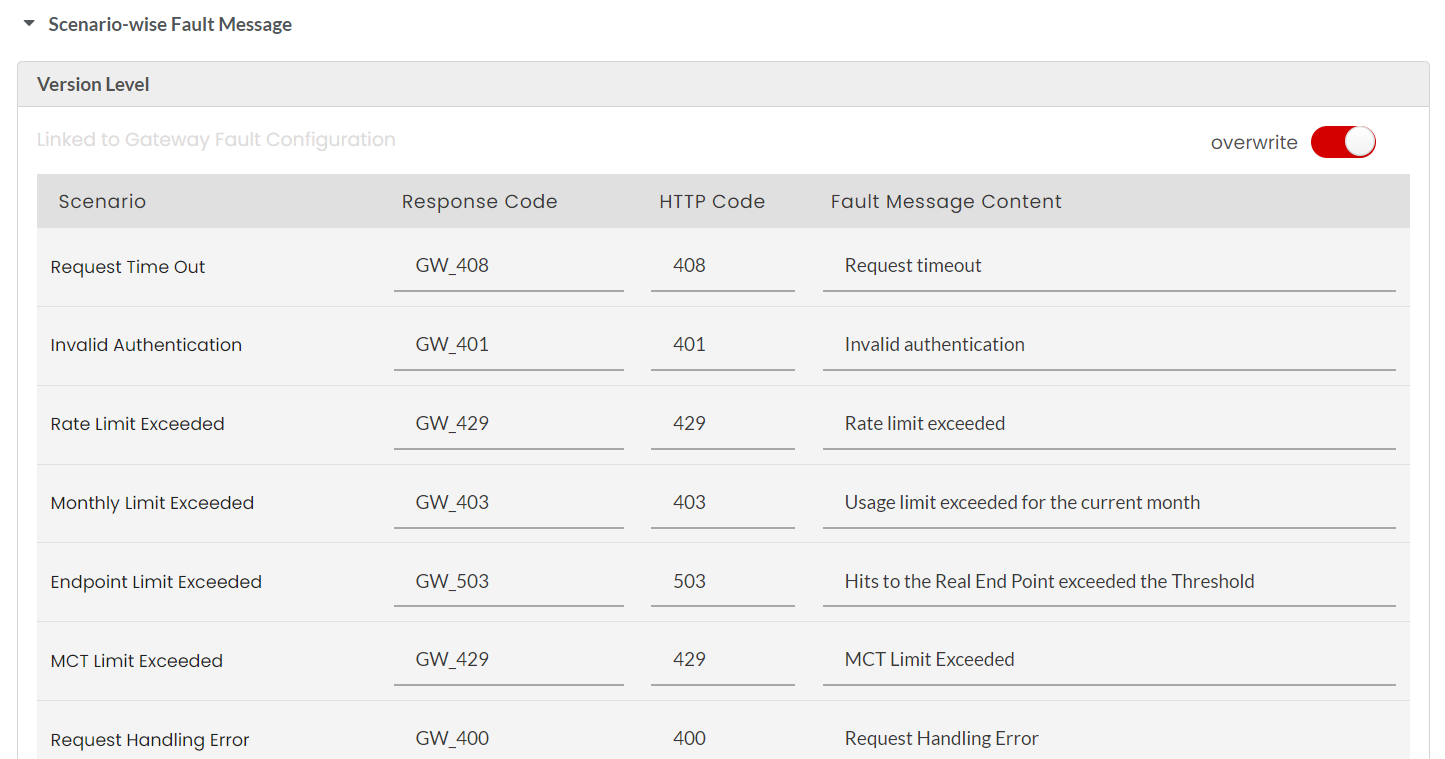
Next, click to expand the Scenario-wise Fault Message accordion tab. You can overwrite the configured Fault Message at Version level and for each Operation. Click the Overwrite toggler to activate overwrite and click again to disable overwrite and retain the Default Fault Message settings. Upon enabling Overwrite, the Fault Message options at Version Level and for each Operation will be enabled.
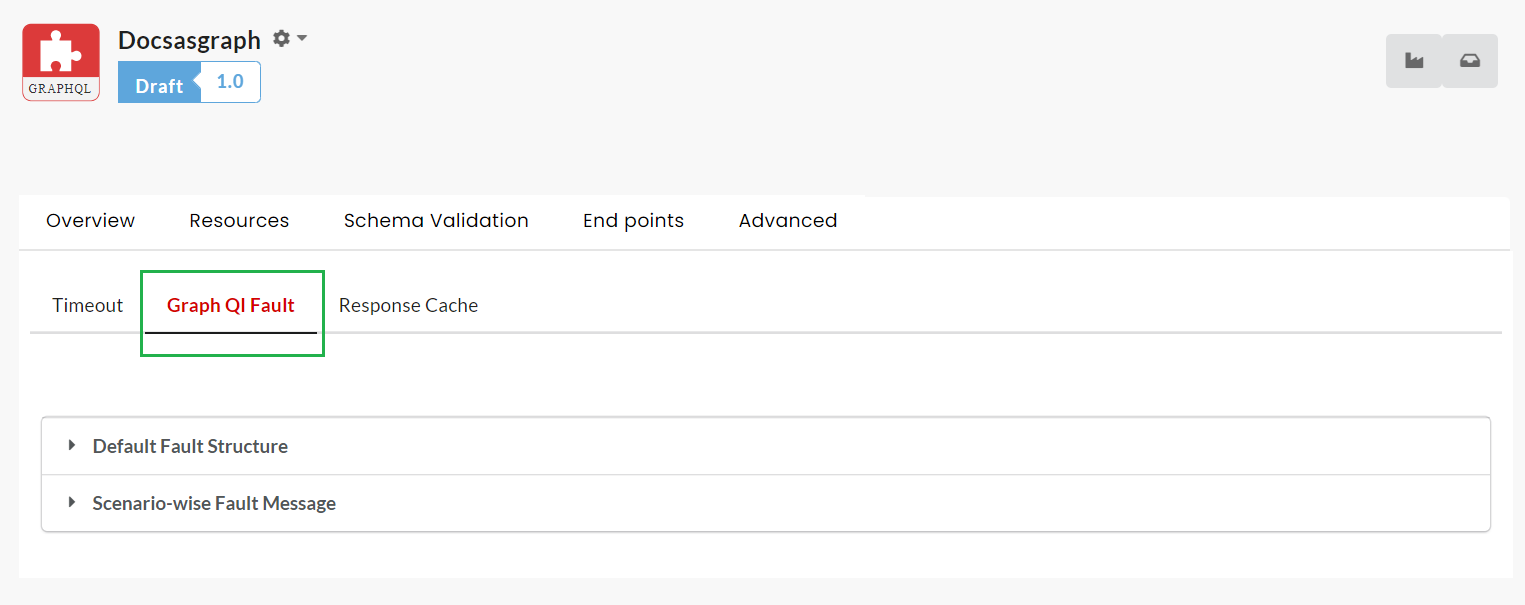
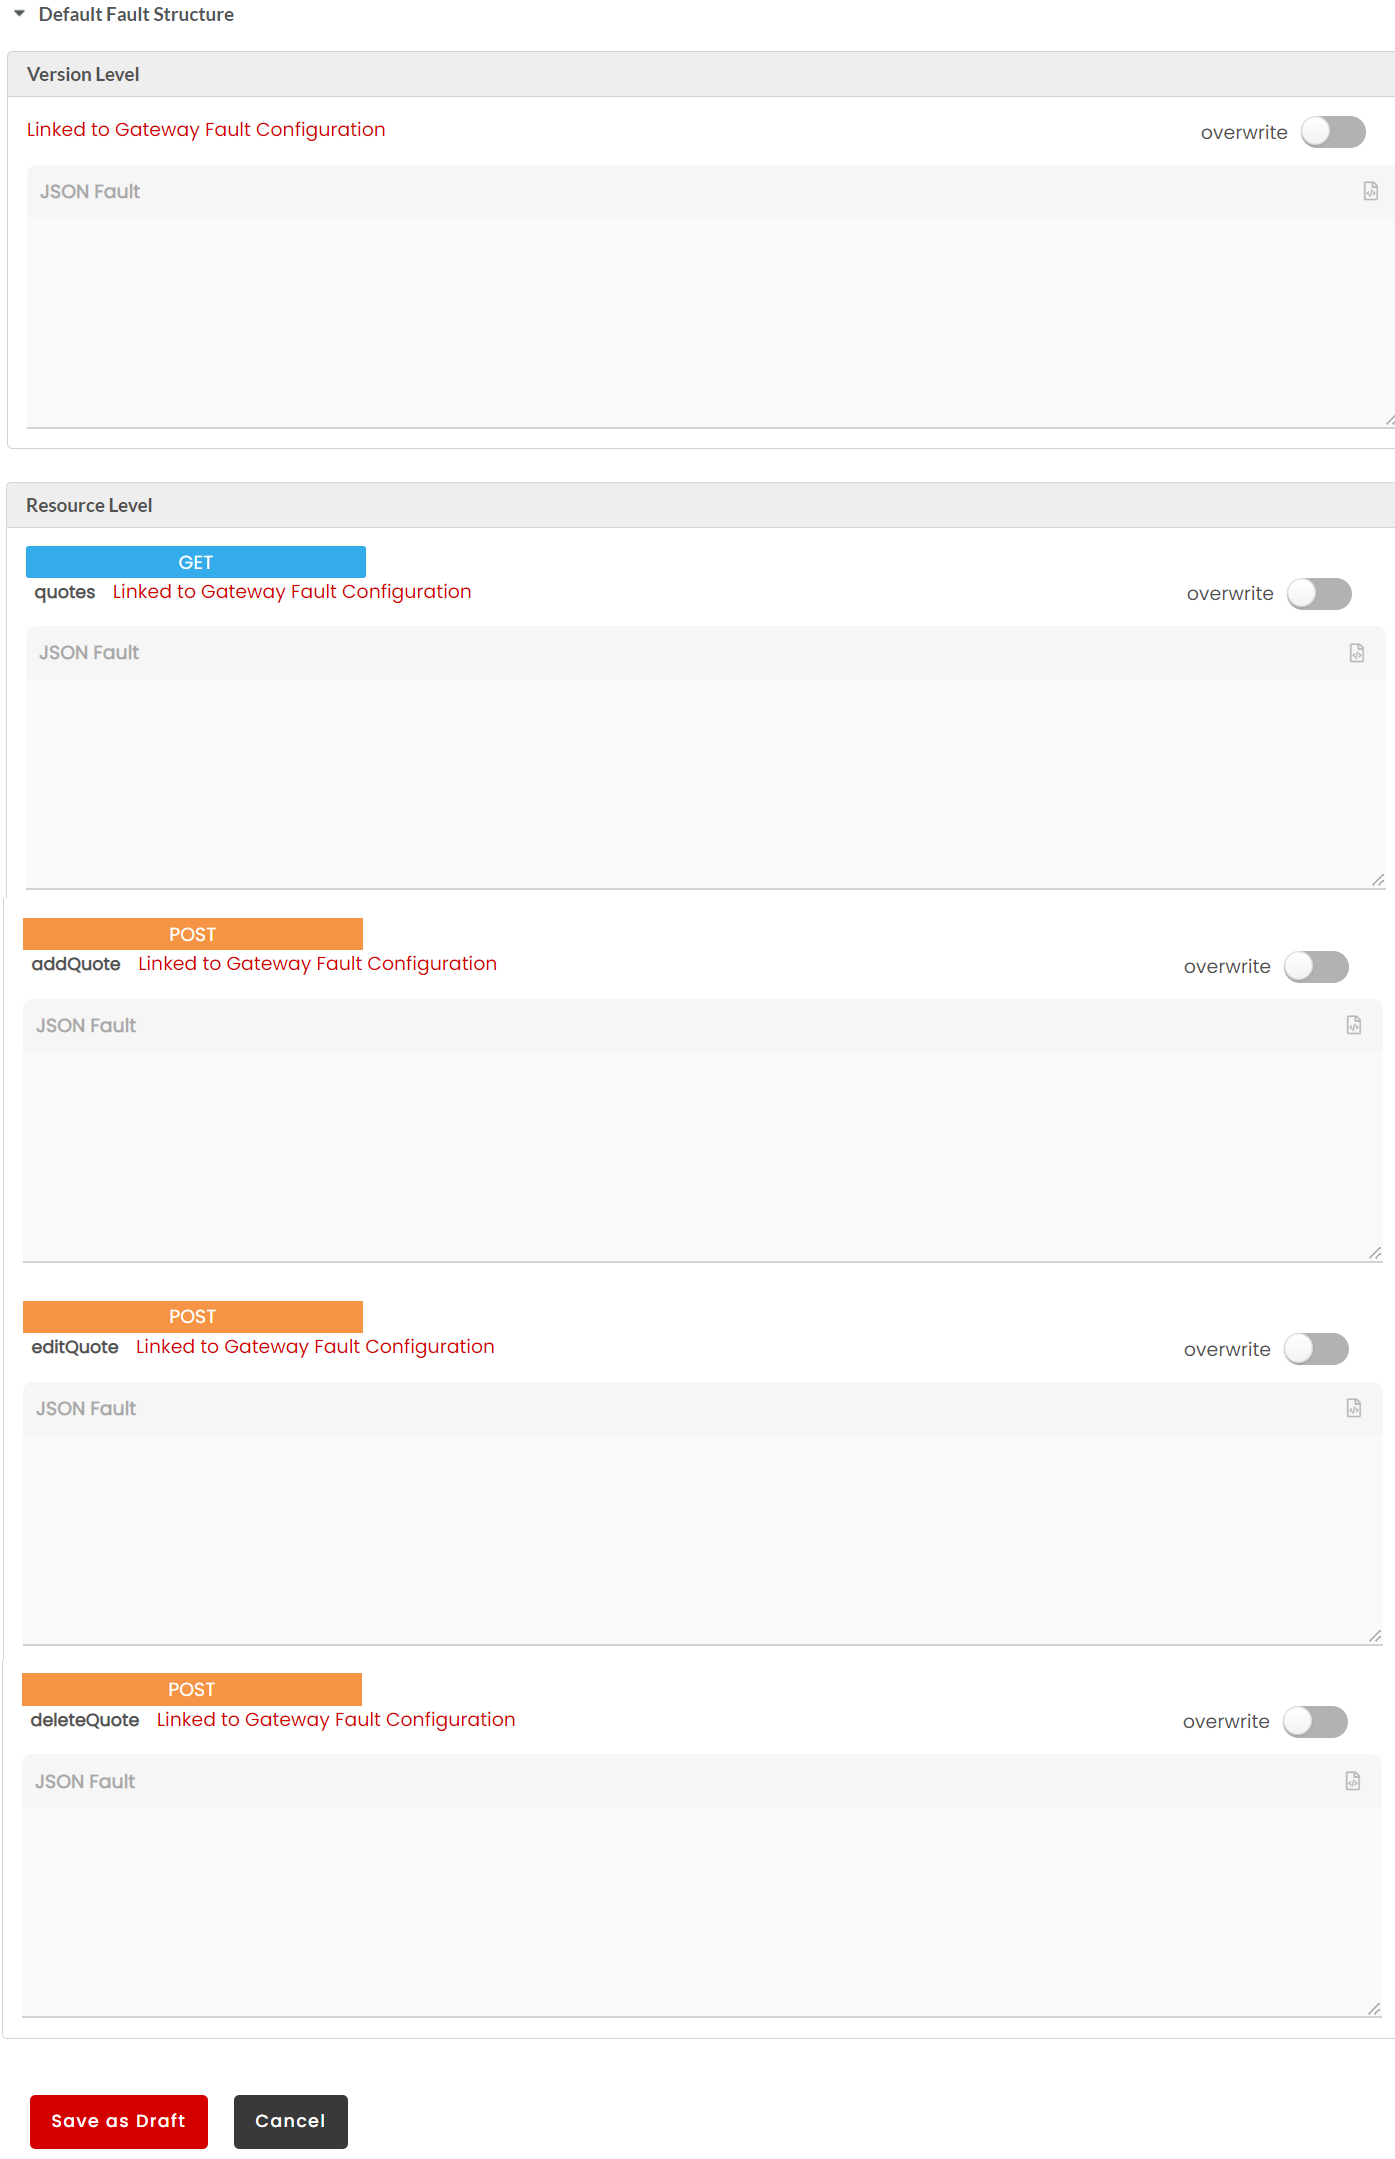
Click to expand the Fault Structure accordion tab. You can overwrite the configured Fault Structure at API Version Level and for each Resource. Click the Overwrite toggler to activate overwrite and click again to retain the default Fault Structure settings. Upon enabling Overwrite, the Fault Structure options at Version Level and for each Resource will be enabled.
(Optional) Edit the JSON Fault box to make any required changes to the Fault template at API Version Level and for each Resource and then click Save as Draft to save the changes.
Next, click to expand the Scenario-wise Fault Message accordion tab. You can overwrite the configured Fault Message at API Version Level and for each Resource. Click the Overwrite toggler to activate overwrite and click again to disable overwrite and retain the default Fault Message settings. Upon enabling Overwrite, the Fault Message options at Version Level and for each Resource will be enabled.
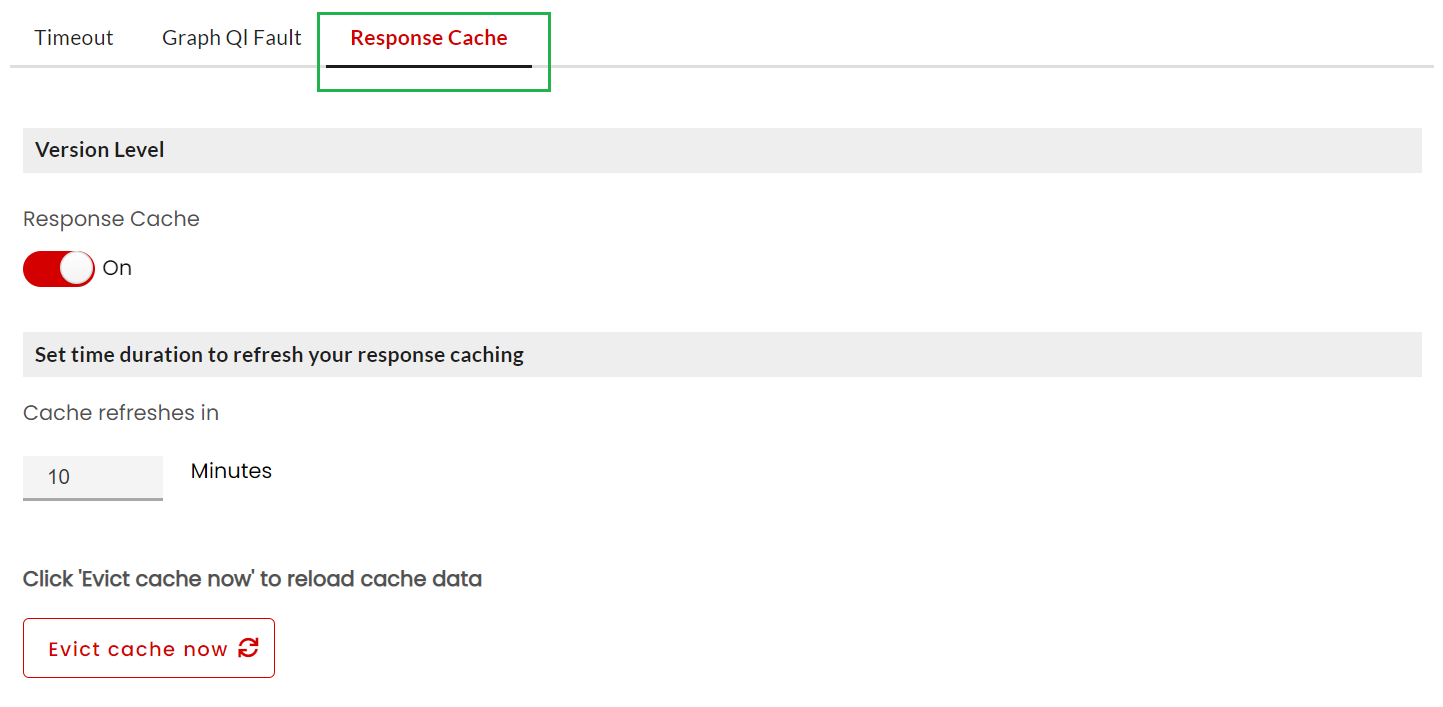
Response caching is a storing mechanism used to deal with repeated requests for the same resource. Storing response in a cache reduces the number of requests the client or proxy will make to the backend, thereby reducing the load on the backend. When a client sends a request to the backend for the first time, the Gateway will fetch the response from the backend. This response is stored in a cache for a specific time interval. During that time interval, if a request comes from the same client, the Gateway will fetch the response from the cache instead of the backend. If the user wants to evict the cache before the set time interval, they can do so using the Evict cache now option. By doing this the stored cache will be cleared, and for any new request the response will come from the backend.
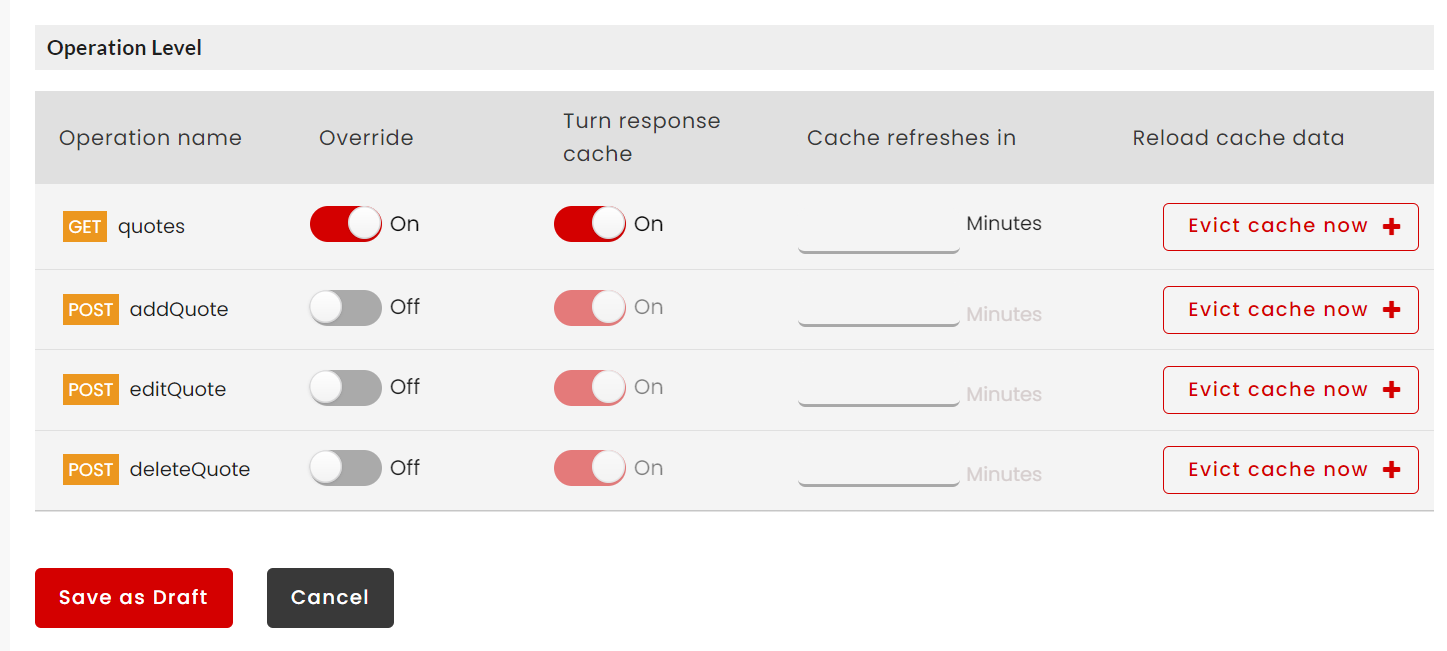
Users can set response cache at both version level and at resource/operation level. If response cache is enabled at version level, then it will automatically be applicable to all resources/operations. If the user does not wish to set response cache for all resources/operations or if they want to configure different response cache settings for individual resources/operations, then they can do so using the Override option. If the user clicks the override option for a resource/operation, the response cache settings for that particular resource/operation can be configured separately. Evict cache now option can be set at both version level and at resource/operation level. If cache is evicted at version level, then it will automatically be applicable to all resources/operations. If the user does not wish to evict cache for all resources/operations, then they can do so using the Override option. If the user wants to evict cache for a particular resource/operation, then they can click the Evict cache now button for that resource/operation.
Note
For the first request coming for a resource/operation, response will always come from the backend.
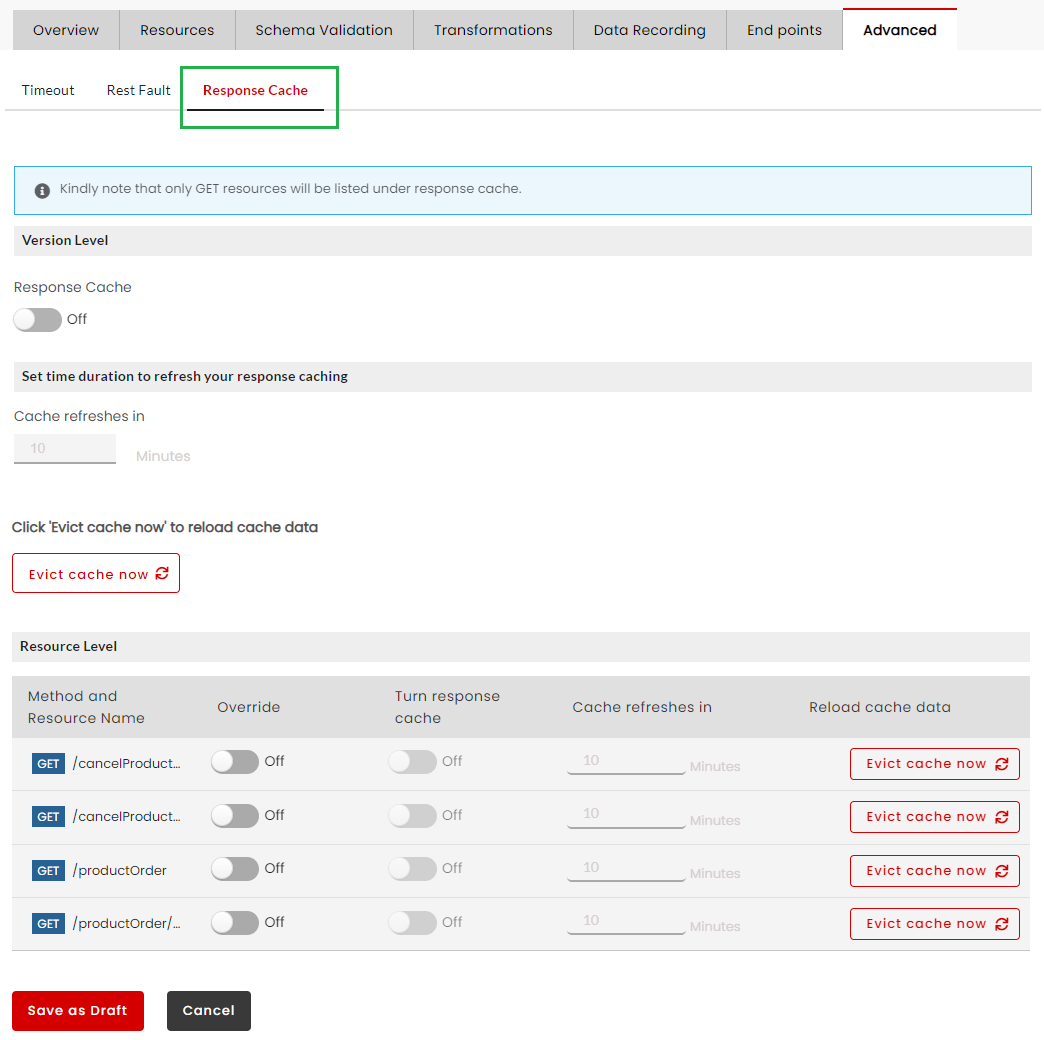
Response caching is applicable only to GET resources for REST APIs, POST operations for SOAP APIs and both GET and POST resources for GraphQL APIs.
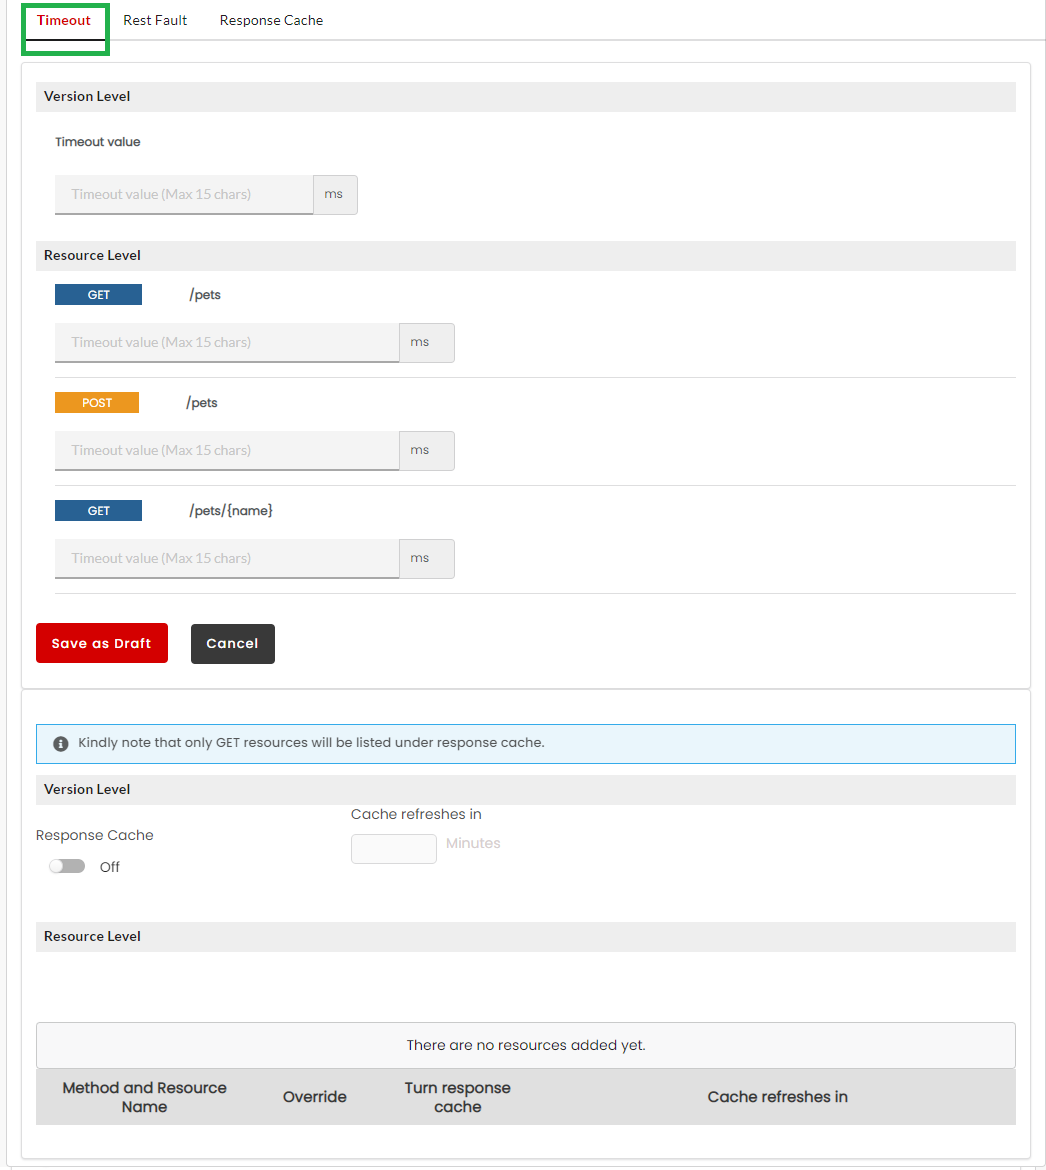
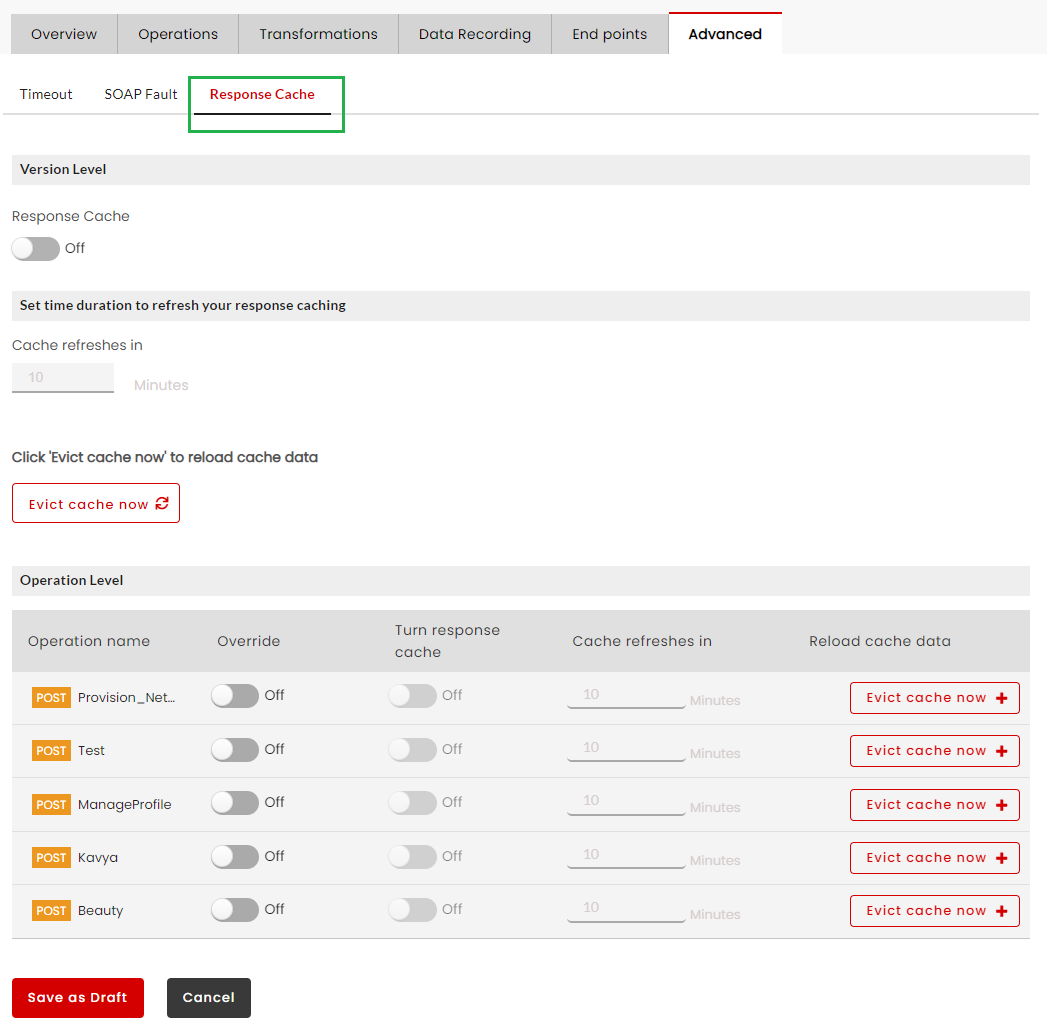
Click the Advanced tab and then click Response Cache sub-tab. The Response Cache sub-tab displays the response cache settings at version level and resource level. For REST API, only GET resources will be displayed.
When you create an API, the response cache will be disabled by default. If you add a resource after enabling the response cache at version level, then the response cache will be enabled for the newly added resource. You can enable/disable response cache at version level for all resources. These settings can be overriden at resource level for specific resources.
Response cache at version level
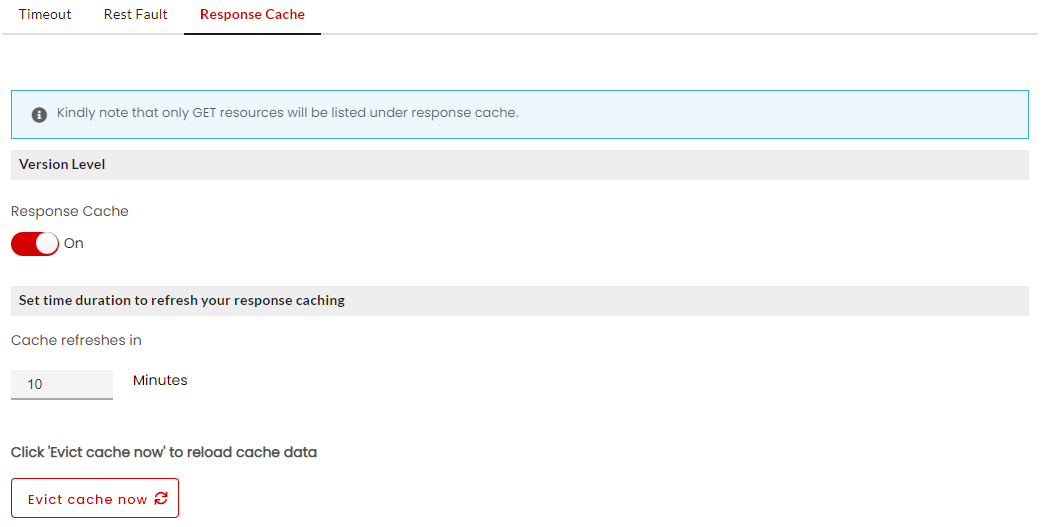
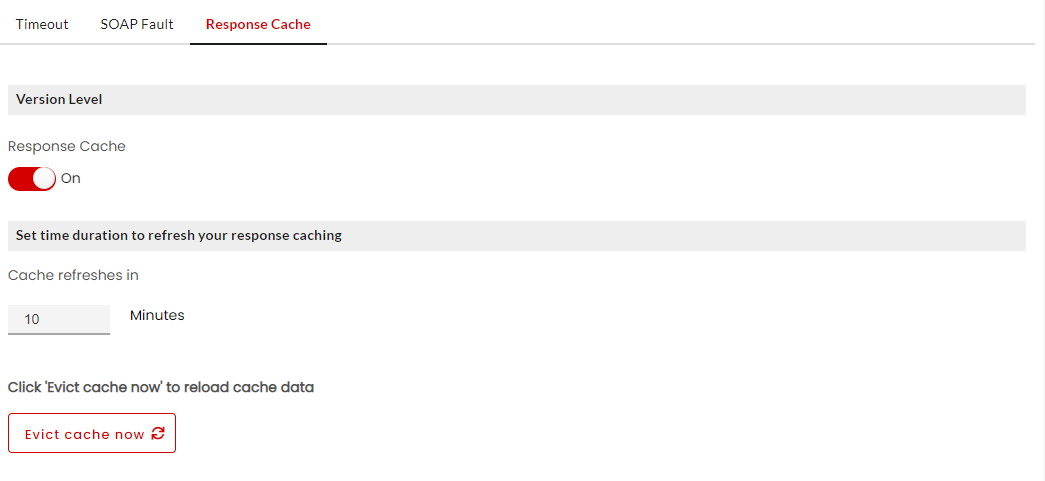
To enable response cache at version level, click Response Cache toggle button. Inversely, click Response Cache toggle button again to disable it.
In the Cache refreshes in field, enter the time interval after which the response cache will be cleared.
Click Evict cache now to clear the cache at version level for all resources.
Any changes made to response cache settings at version level, will by default be applicable to all the resources. You can override the response cache settings configured at version level for specific resources at resource level.
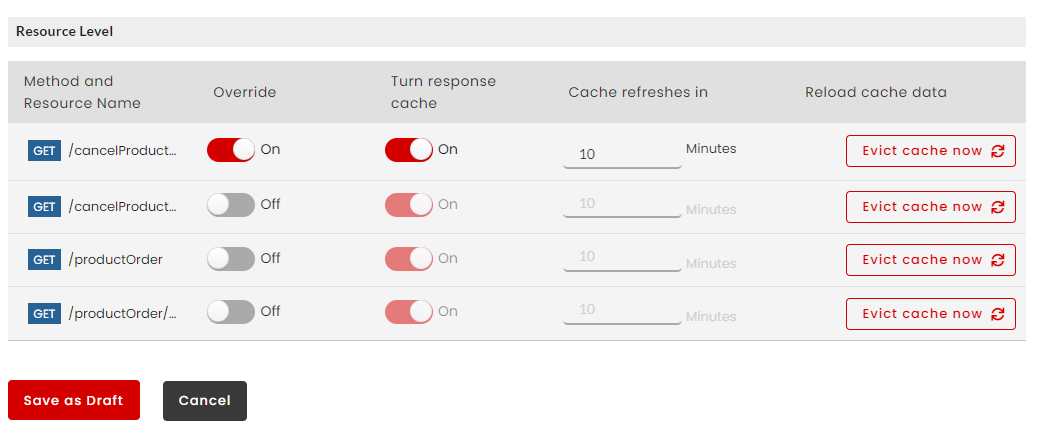
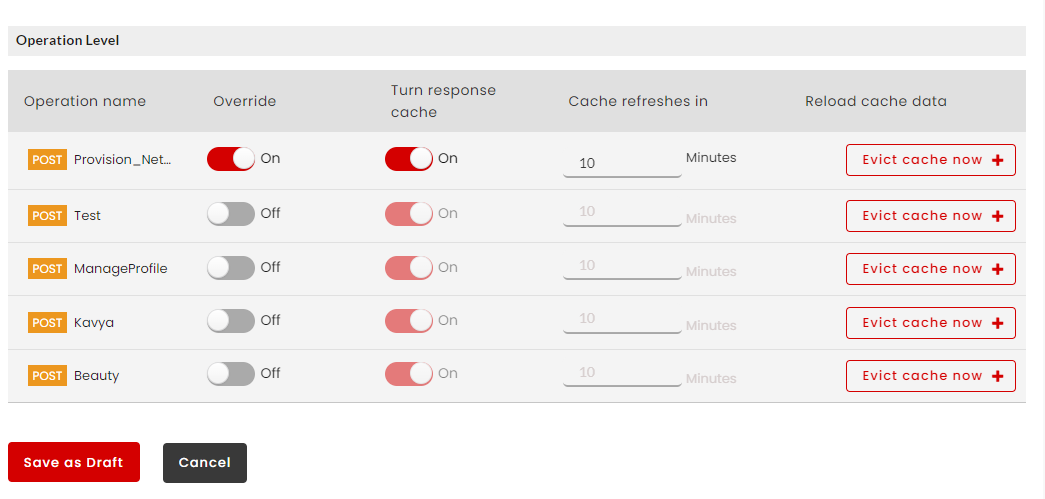
Response cache at resource level
To override response cache at resource level, for the required resource, click Override toggle button. Inversely, click Override toggle button again to disable it.
If response cache is not set, click Turn response cache toggle button to enable it for a particular resource. Click it again to disable it.
In the Cache refreshes in field, for the required resource, enter the time interval after which the response cache will be cleared.
Click Evict cache now to clear the cache at resource level for a particular resource.
Click the Advanced tab and then click Response Cache sub-tab. The Response Cache sub-tab displays the response cache settings at version level and operation level. For SOAP API, only POST operations will be displayed.
When you create an API, the response cache will be disabled by default. If you add an operation after enabling the response cache at version level, then the response cache will be enabled for the newly added operation. You can enable/disable response cache at version level for all operations. These settings can be overriden at operation level for specific operations.
Response cache at version level
To enable response cache at version level, click Response Cache toggle button. Inversely, click Response Cache toggle button again to disable it.
In the Cache refreshes in field, enter the time interval after which the response cache will be cleared.
Click Evict cache now to clear the cache at version level for all operations.
Any changes made to response cache settings at version level, will by default be applicable to all the operations. You can override the response cache settings configured at version level for specific operations at operation level.
Response cache at operation level
To override response cache at operation level, for the required operation, click Override toggle button. Inversely, click Override toggle button again to disable it.
If response cache is not set, click Turn response cache toggle button to enable it for a particular operation. Click it again to disable it.
In the Cache refreshes in field, for the required operation, enter the time interval after which the response cache will be cleared.
Click Evict cache now to clear the cache at resource level for a particular operation.
Any changes made to response cache settings at version level will not affect the response cache settings of operations overriden at operation level.
Note
Response cache gets updated whenever the data is propagated or when a new operation is added to the SOAP API.
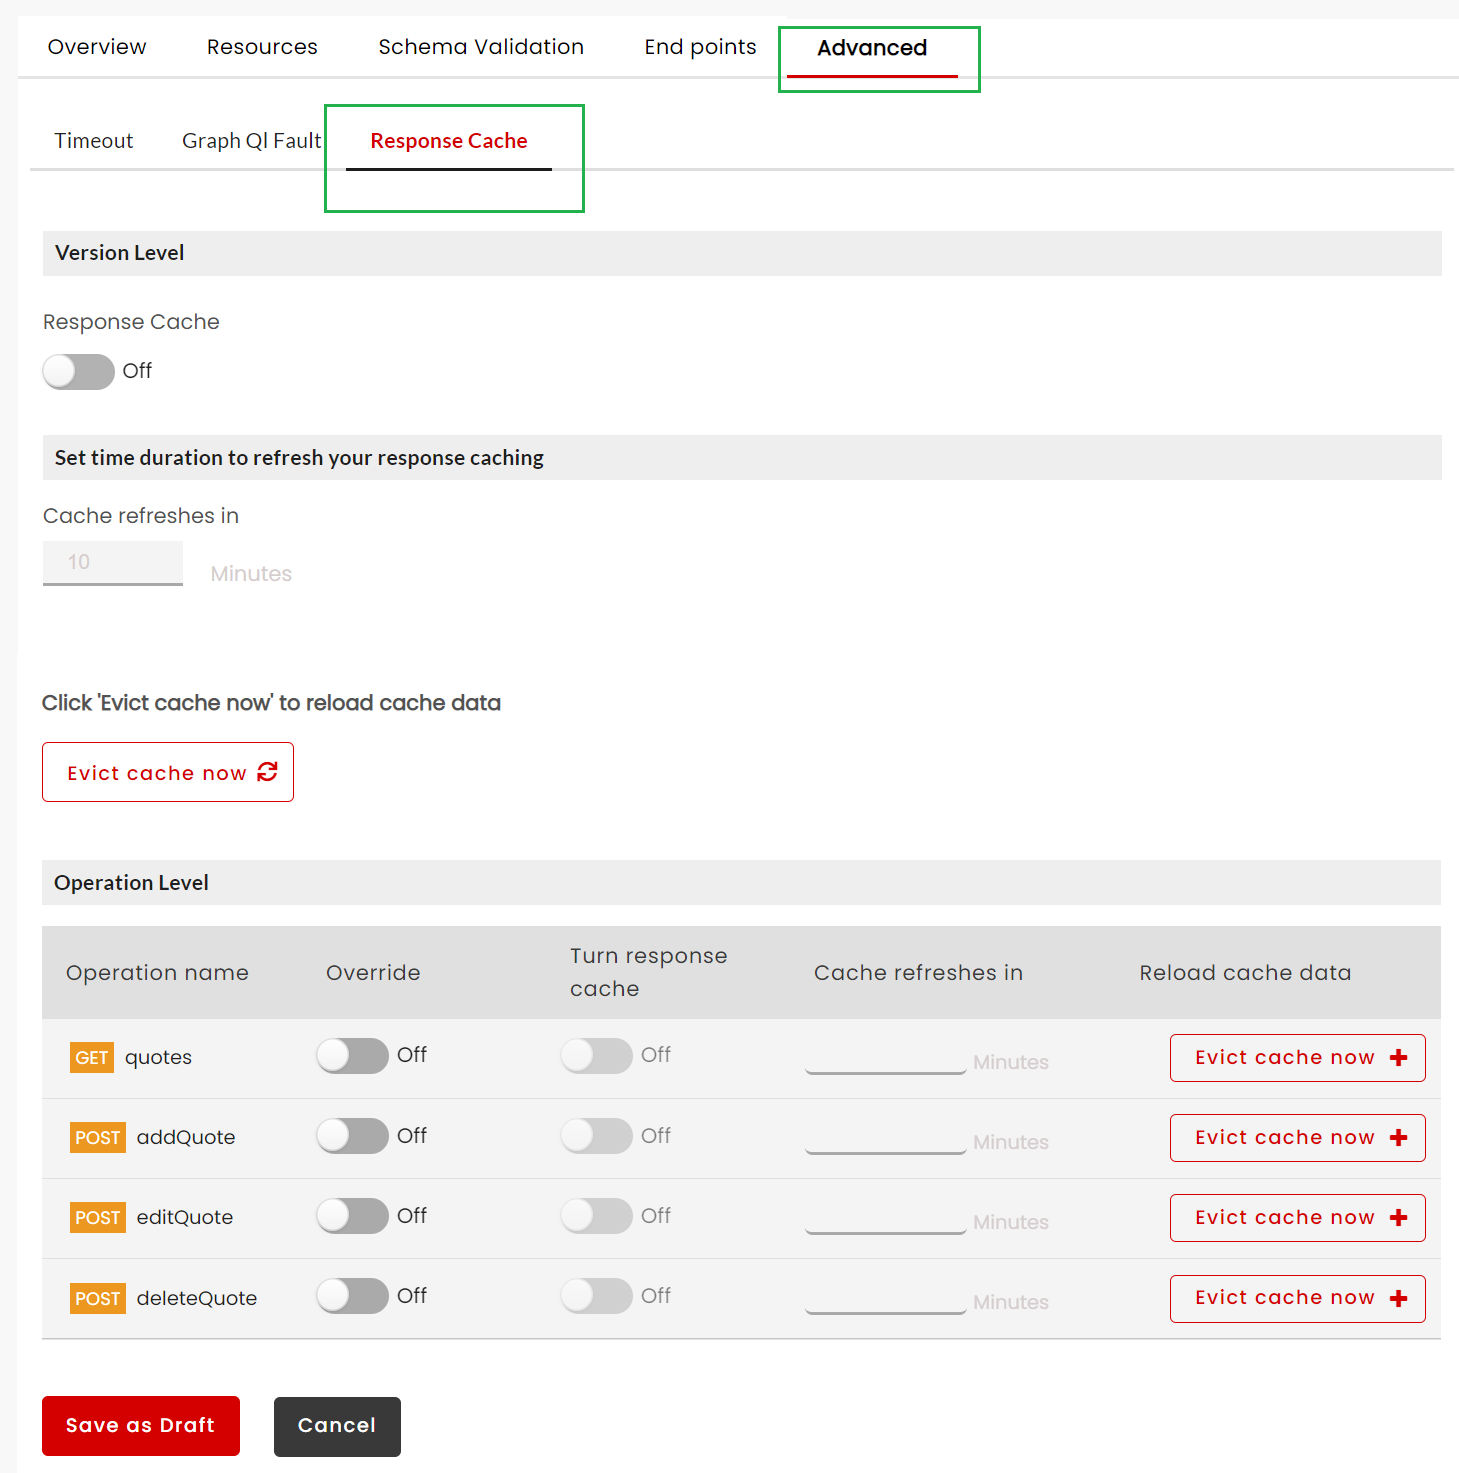
To set response cache for a GraphQL API:
Navigate to the GraphQL API Configuration screen.
Click the Advanced tab and then click Response Cache sub-tab. The Response Cache sub-tab displays the response cache settings at version level and resource level. For GraphQL API, only GET and POST resources will be displayed.
When you create an API, the response cache will be disabled by default. If you add a resource after enabling the response cache at version level, then the response cache will be enabled for the newly added resource. You can enable/disable response cache at version level for all resources. These settings can be overriden at resource level for specific resources.
Response cache at version level
To enable response cache at version level, click Response Cache toggle button. Inversely, click Response Cache toggle button again to disable it.
In the Cache refreshes in field, enter the time interval after which the response cache will be cleared.
Click Evict cache now to clear the cache at version level for all resources.
Any changes made to response cache settings at version level, will by default be applicable to all the resources. You can override the response cache settings configured at version level for specific resources at resource level.
Response cache at resource level
To override response cache at resource level, for the required resource, click Override toggle button. Inversely, click Override toggle button again to disable it.
If response cache is not set, click Turn response cache toggle button to enable it for a particular resource. Click it again to disable it.
In the Cache refreshes in field, for the required resource, enter the time interval after which the response cache will be cleared.
Click Evict cache now to clear the cache at resource level for a particular resource.
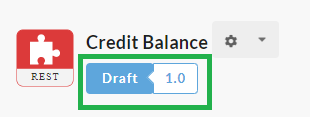
DigitMarket™ API Manager allows you to manage more than one version of an API. The Add Versions option provided in the API Action menu of the API Configuration screen enables you to create newer versions of an existing API. By default, DigitMarket™ API Manager displays the most recent version of an API in the API Configuration screen. A newly created API is automatically allotted the first version number, i.e., 1. You can find the version number displayed alongside the API State in the API Configuration screen.
In the Version Number box, type a version number. You can add version numbers in decimal increments, such as 8.1, 8.2, and so on, to denote minor revisions or increment it to the next number for major changes like version upgrades, say from Version 1.0 to 2.0.
Note
The Version number should be in the format 2.0, 3.0, 3.2, etc.
In the Version Notes box, type Version notes. The Version notes that you type here gets automatically populated in the Version Notes box in the Overview tab of the API Configuration screen.
Click the Copy From Version drop-down list to select an earlier version to copy content from.
The Copy From Version drop-down list displays all the previous versions of the API plus the currently open version. Alternatively, you can choose None to add a version without duplicating the data.
Click Add to finish adding a new version. In the Action menu, the new version gets added to the Versions list under VERSIONS. The API Configuration screen updates itself to display data from the newly created version.
If you have created a newer version by copying from an earlier version, the newly created version displays the content from the earlier version. In case you chose None while creating a version, an unedited/non-configured version of API displays, wherein you need to add fresh data.
Note
You can add newer Versions for an existing API irrespective of the State of the original API version, i.e., Draft, Approved, Published, Deprecated or Retired State.
You can switch versions to start working on a version other than the newly created version. You will learn more about switching API versions in the next topic.
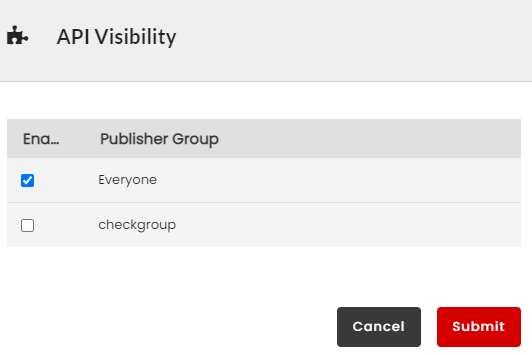
You can determine which Publisher Group(s) is allowed access to an API Version. This behavior is controlled using the Visibility settings of Publisher Groups.
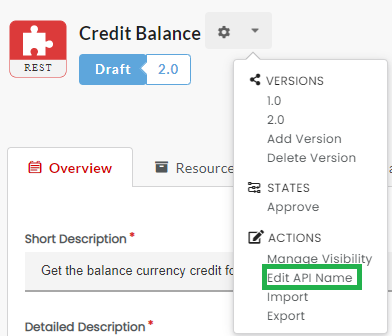
In the API Action menu, under ACTIONS, click Manage Visibility to open API Visibility dialog box. The API Visibility dialog box displays the current list of Publisher groups.
An API version that is newly created and edited is saved as a draft. This is indicated by its State displayed alongside the version number in the API Configuration screen.
A draft API has to be sent for approval. After the approval the API’s State changes to the Approved state, which can then be synced to the Gateways to turn it to the Published state. Only Approved and Published APIs are made available for bundling into API Packs.
To send an API for Approval:
Navigate to the API Configuration screen.
In the API Configuration screen, click the Action icon . The API Action menu displays.
If the logged-in user has the automatic workflows enabled, the API Action menu displays Approve under STATES as the API does not then need to be sent for approval.
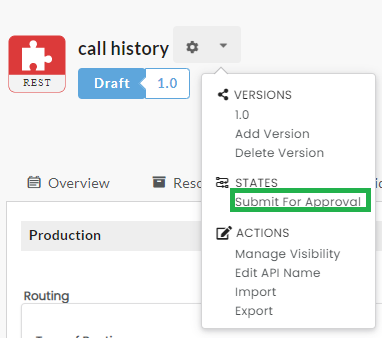
If the logged-in user has the automatic workflows disabled, the API Action menu displays Submit for Approval under STATES as the API goes through the manual approval workflow.
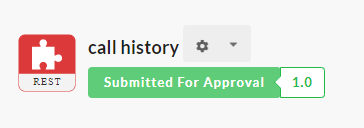
On the Action menu, under STATES, click Submit for Approval to submit the draft API for approval (for manual workflows) or click Approve to approve the draft API (for automatic workflows) .
The API’s State changes from Submitted for Approval to Approved when a Publisher user approves the API.
An approved API changes to a Published API once it is synced to the Gateways. You can select resources/operations from an approved or Published API for creating API Packs.
Note
Make sure you have filled all the required fields in the Overview, Resources, and Endpoints tabs before sending the API version for approval.
Note
You cannot directly make changes to an approved or Published API version. To make changes to an approved or Published API version, you must make use of the Submit Version For Edit option available from the Action menu of the API Configuration screen. You can avail this option only when the API version is in the approved or Published State.
You can deprecate an API version if you have added newer or better methods or changed fields in a newer version. However, you may need to keep the older API version operational and allow API calls to be made to the older API version. Ideally, you would want to keep a deprecated API version operational until the consumers make their transition to the newer version.
Deprecated APIs act as a forewarning to the Consumers to start upgrading to newer versions as Deprecated APIs are marked for Retirement and can be phased out of use.
Resources/Operations from a deprecated API are not available for adding into a new API Pack, although they continue to be available to consumers for making API calls.
The option for submitting an API for Deprecation becomes available once the State of the API changes to Approved or Published. In other words, you can only deprecate an Approved or Published API.
Note
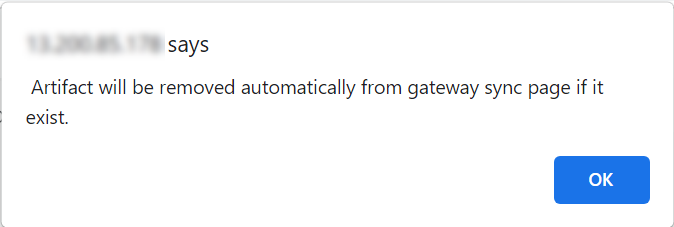
An API that is approved lies in the Gateway Sync to be propagated to the Gateway. To deprecate the API, you must first remove the API from the Gateway Sync.
To deprecate an API:
Navigate to the API Configuration screen.
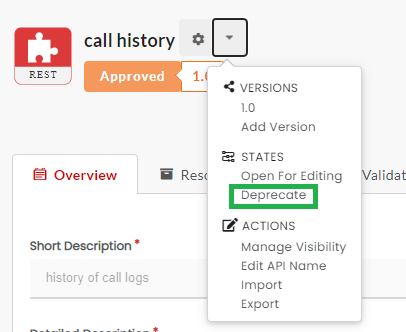
On the Action menu, under STATES, click the Action icon . The API Action menu displays.
The menu options will have the “Submit for Deprecation” (for manual Workflows) or “Deprecate” (for automatic Workflows) option if the API is approved or published and its state displays as Approved or Published.
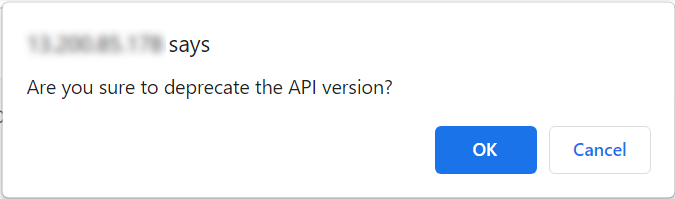
Click Submit for Deprecation (for manual Workflows) to send the API you want to Deprecate for approval or click Deprecate (for automatic Workflows) to deprecate the API.
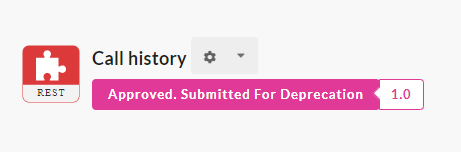
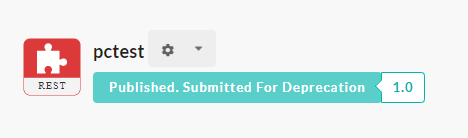
If automatic Approval Workflow for logged-in user role is disabled: For published APIs state changes from Published to Published.Submitted For Deprecation.
You can retire deprecated versions of APIs. The need to retire an API version may arise when an updated version of the API becomes available. Resources/Operations from a retired API are not available for bundling into API Packs, and hence do not get exposed for making API calls.
The option for submitting an API version for Retirement becomes available once the state of an API version changes to the Deprecated state.
Note
If any Resource/Operation from a Deprecated API version is being used in any of the Packs, the API version is not permitted to be retired.
To retire an API version that has its resources/operations added to an API Pack, you need to first unlink/remove these resources/operations from the Pack content before you can retire the API version.
To Retire an API:
Navigate to the API Configuration screen.
In the API Configuration screen, click the Action icon . The API Action menu displays.
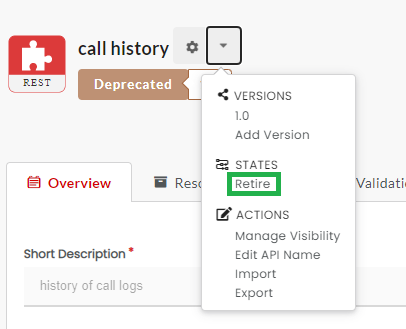
If the logged-in user has the automatic workflows enabled, the API Action menu displays Retire under STATES as the API does not then need to be sent for retirement.
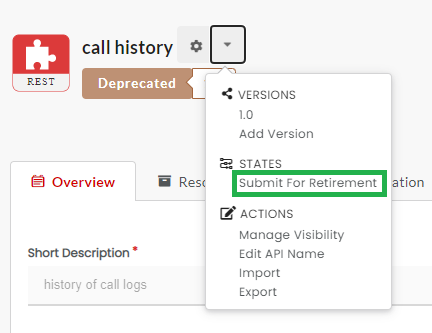
If the logged-in user has the automatic workflows disabled, the API Action menu displays Submit for Retirement under STATES as the API goes through the manual retirement workflow.
On the Action menu, under STATES, click Submit For Retirement to submit the deprecated API for retirement (for manual workflows) or click Retire to retire the deprecated API (for automatic workflows) .
The API’s State changes from Submitted For Retirement to Retired when a Publisher user retires the API.
Note
You are not allowed to make changes to a Retired API.
Note
A Retired API is not available for creating an API Pack.
3.5.16. Open an Approved or Published API for Editing
An API version that is in its approved or published state is locked for editing; meaning that you cannot make any direct changes to such API versions. To make changes to such APIs, you need to use an option from the API Action menu called Submit Version For Edit.
The Submit Version For Edit option allows the user to perform the task given below:
If Automatic Approval Workflow is disabled, send an Approved or Published API version for edit approval, which allows you to edit the API after the approval.
If Automatic Approval Workflow is enabled, change the API version to the Draft state, which allows you to edit the API right away.
To Submit an Approved or Published API for Edit:
Navigate to the API Configuration screen.
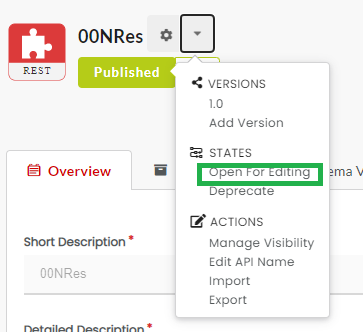
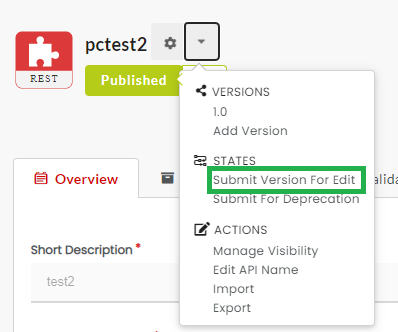
Click the Action icon . The API Action menu displays. The menu options will have the Submit Version For Edit option if the API is in its Approved or Published State.
In the Action menu, under STATES, click Submit Version For Edit. The API State changes to Approved, Awaiting Approval for Editing or Published, Awaiting Approval for Editing, as the case may be (Published, Awaiting Approval for Editing is applicable when automatic workflow is disabled).
If automatic Approval Workflow for logged-in user role is disabled: The API state changes from Published to Published. Awaiting Approval For Editing.
Fig. 3.184 Published. Awaiting Approval For Editing
Once approved, the state of the API changes back to the Draft state. You can now go ahead and edit the API.
When you are done with making changes to the API version, submit the API for approval. After the approval is done, the State of the API changes to the Approved State.
To put the changes into effect, complete the steps enumerated in the Gateway Sync section. Gateway Sync makes the changed APIs operational.
3.5.17. Discard Changes after opening an API for Editing
You can discard the draft changes made and revert to the earlier approved or published API Version. Doing this nullifies any change that has been made while revising the API version after opening it for Editing.
To Discard the Draft after opening an API for editing:
Navigate to the API Configuration screen.
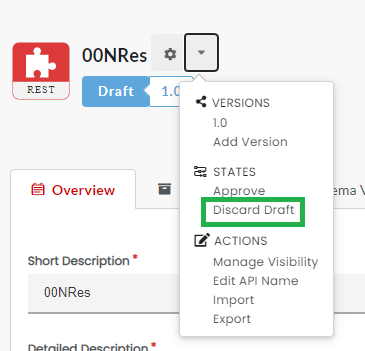
Click the Action icon . The API Action menu displays. The menu options will have the Discard Draft option if the API Version is in its Draft State after approval for Open for Editing.
In the Action menu, under STATES, click Discard Draft.
The API Version state reverts to the Approved or Published state and the approved or published API Version; before the last Open for Editing, is restored.
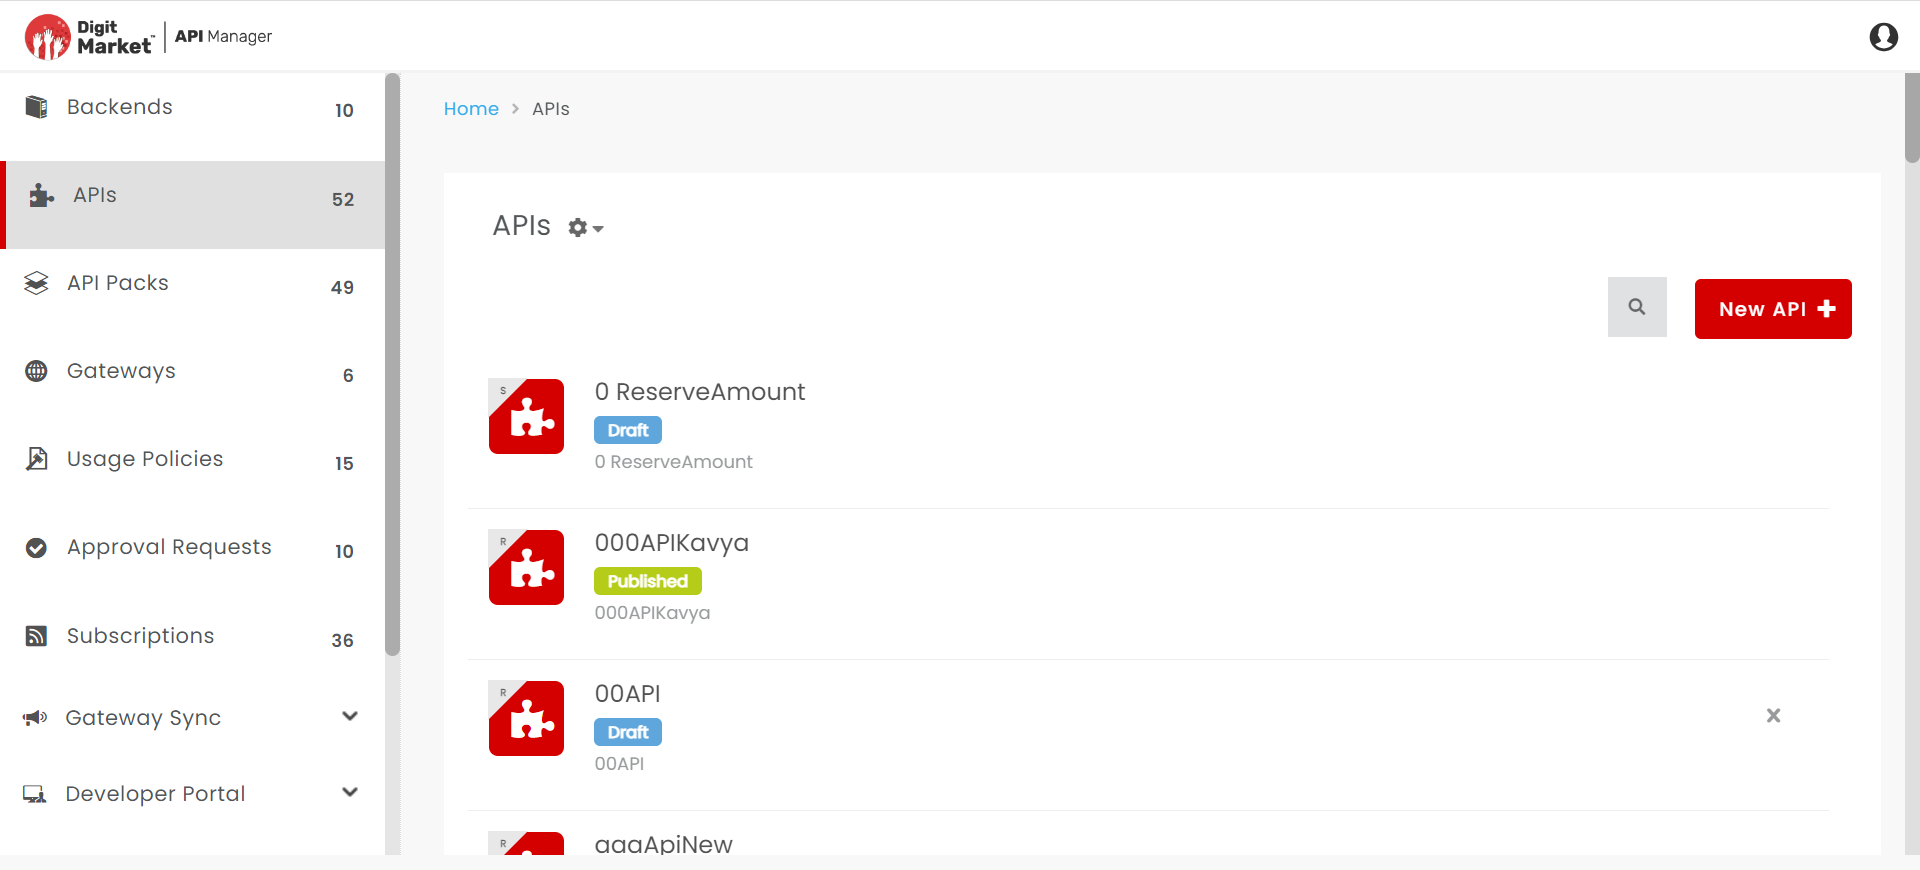
The user can search for an API using the Search feature present in the API list pages. To learn more about the Search feature, refer the topic: Search in Product Introduction>Key Concepts.
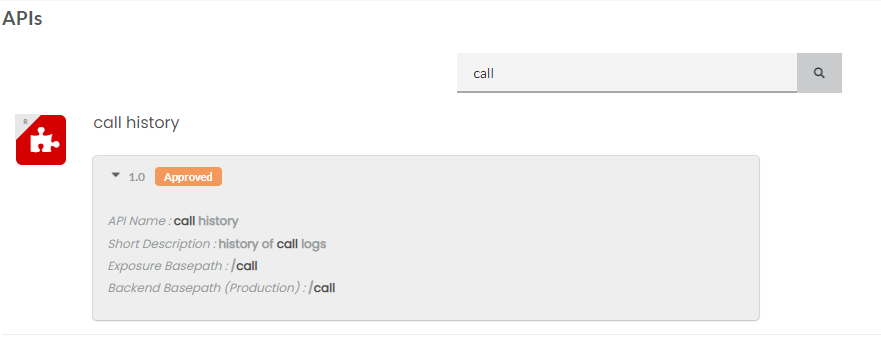
The search results page displays matches for the search from the following API components:
API Name
Overview (all components)
Resource Name
Resource Description
Resource Specification (Swagger or WSDL file name)
API Backend names
Version Names
Version Notes
API Endpoint details
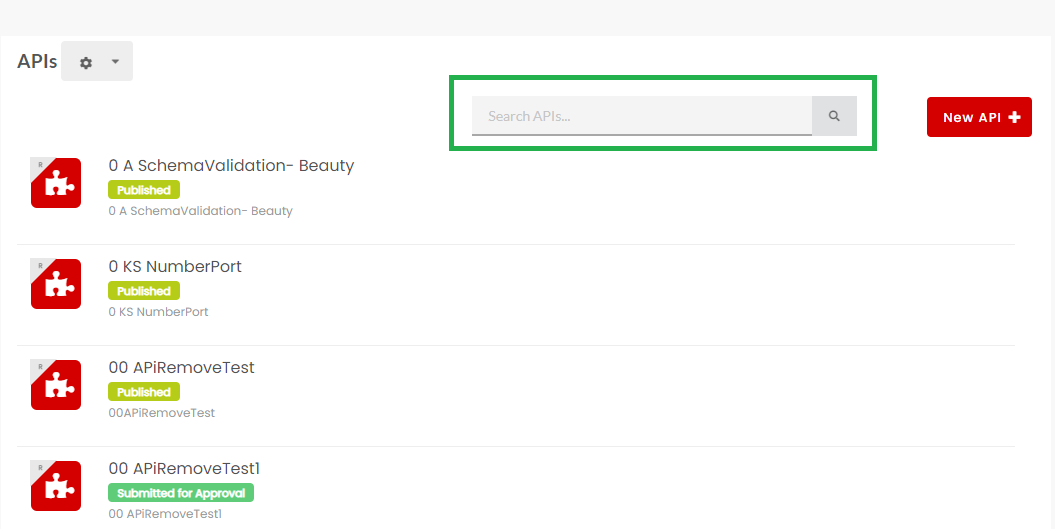
To search for an API:
Navigate to the API List page.
In the search box, type in the keyword(s) for starting a search on an API or one of its components.


 .
.

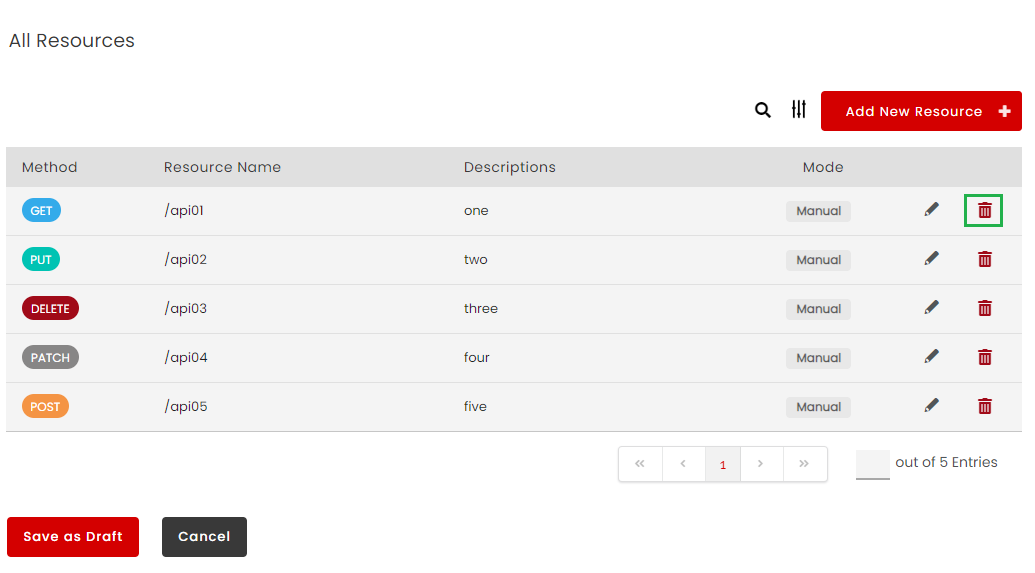
 corresponding to the row that has the Resource you want to delete. The Resource is removed from the Resource list.
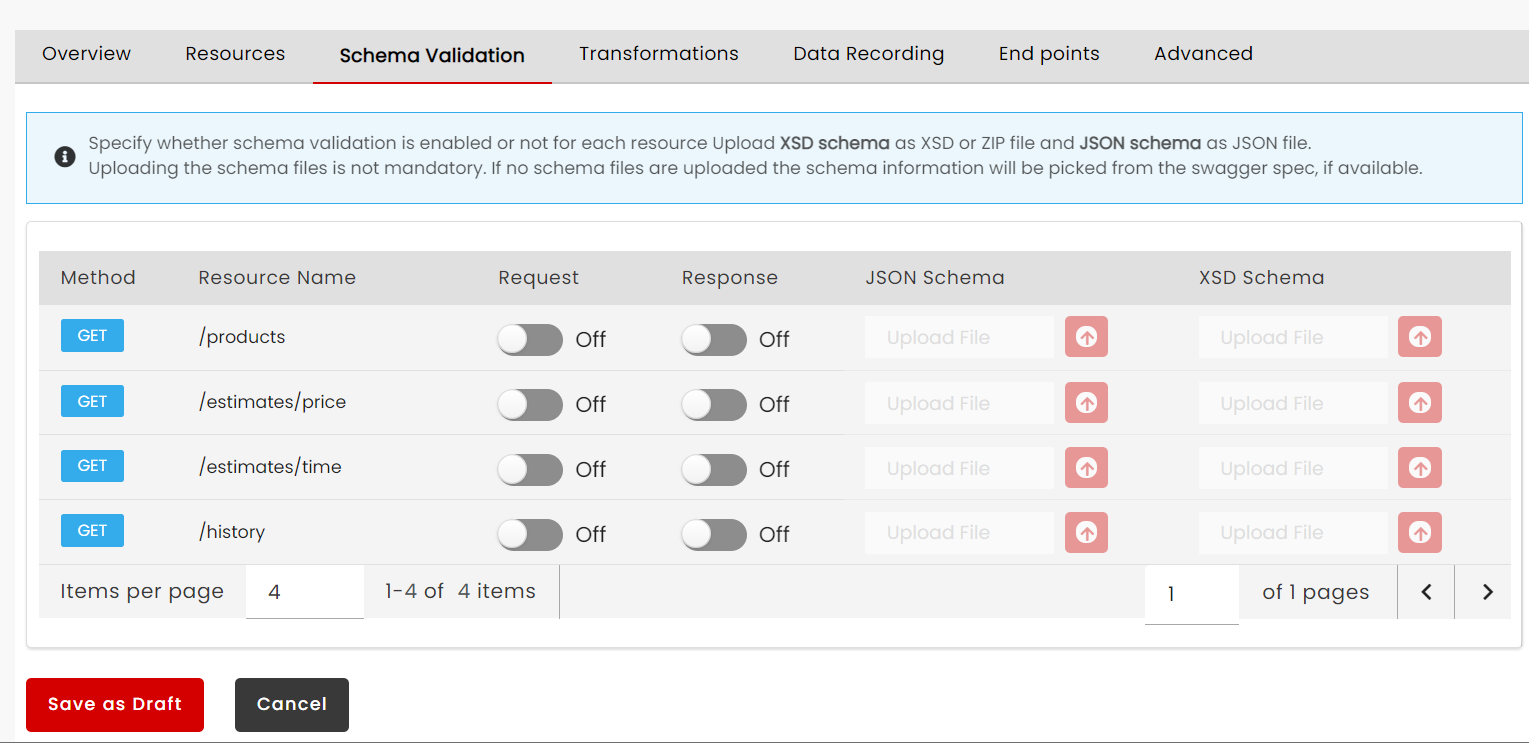
 to display the Resource level - Data Recording script/ Operation level - Data Recording Script dialog.
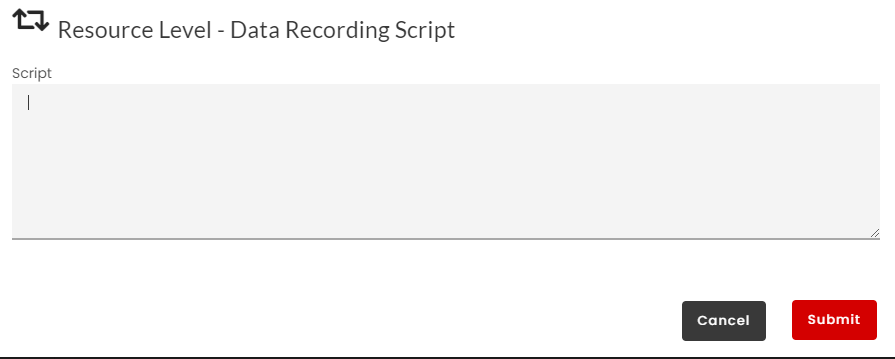
 .
.


 . The API Action menu displays.


 . The API Action menu displays.
The menu options will have the “Submit for Deprecation” (for manual Workflows) or “Deprecate” (for automatic Workflows) option if the API is approved or published and its state displays as Approved or Published.
. The API Action menu displays.
The menu options will have the “Submit for Deprecation” (for manual Workflows) or “Deprecate” (for automatic Workflows) option if the API is approved or published and its state displays as Approved or Published.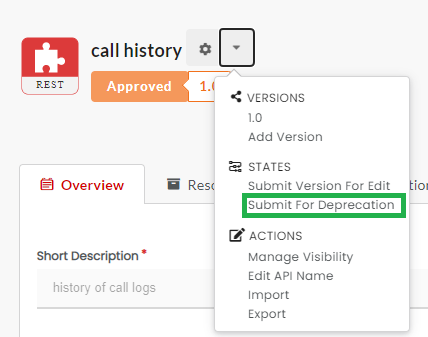


 to display the search results.