3.27. Customize Developer Portal
Through its Developer Portal menu option, DigitMarket™ API Manager provides you options to:
Manage the content of the Developer portal through its Content Management System. You can add multiple folders, and upload files into these folders. The uploaded files can be used to change the way the controls and other screen elements look on the Developer portal.
Categorize API Packs using the API Pack Categories option wherein you can add/edit/delete a category and decide where exactly you want each API Pack to go and the kind of Category structure you need to follow for the API Store.
Respond to Developer queries posted in Developer portal Discussion Forum
For more information on customizing Developer Portal, refer: Developer Portal - Overview.
In this Section:
Common Tasks
Navigate to the Content Management screen.
To navigate to the Content Management screen:
In the main Navigation menu, click Developer Portal.
In the sub-menu that appears, click Content Management.

Fig. 3.546 Content Management sub-menu
The Developer Portal Customization - Content Management screen displays.
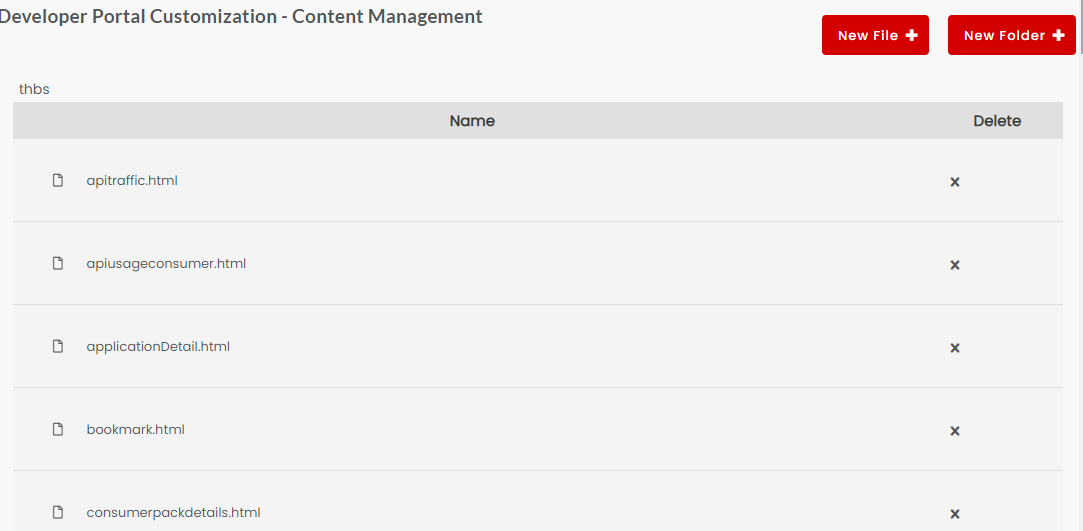
Fig. 3.547 Content Management screen
Navigate to the API Store Categories Master screen
To navigate to the API Store Categories Master screen:
In the main Navigation menu, click Developer Portal.
In the sub-menu that appears, click Categories Master.

Fig. 3.548 Categories Master sub-menu
The API Store Categories Master screen displays.
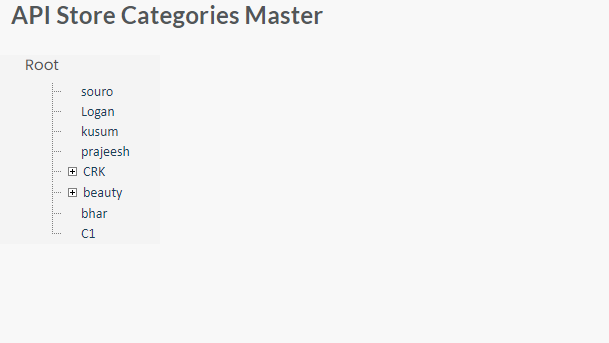
Fig. 3.549 API Store Categories Master screen
Navigate to the Discussion Forum screen
To navigate to the Discussion Forum screen:
In the main Navigation menu, click Developer Portal.
In the sub-menu that appears, click Discussion Forum.

Fig. 3.550 Discussion Forum sub-menu
The Discussion Forum screen displays.
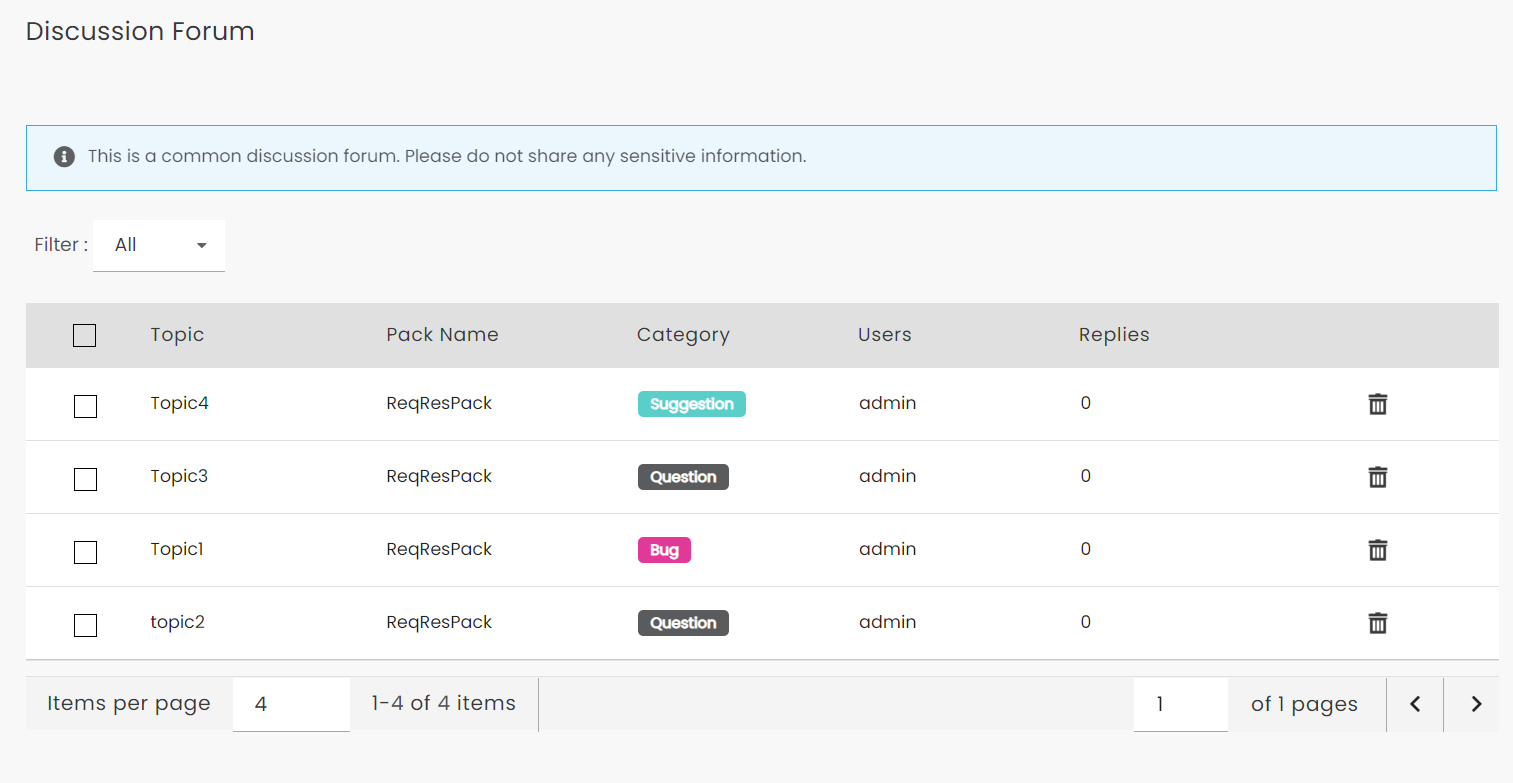
Fig. 3.551 Discussion Forum screen
3.27.1. Developer Portal Content Management
To add a folder:
Navigate to the Content Management screen.
Click New Folder to display the Add Folder dialog box.
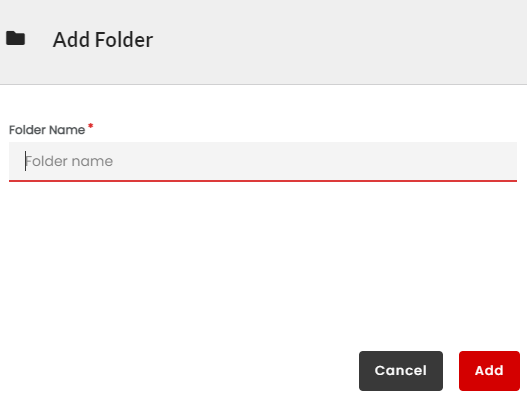
Fig. 3.552 Add Folder dialog
In the Folder Name box, type a folder name and then click Add. The folder is added to the Dev portal Customization - Content Management screen.
To upload a file to a folder:
Navigate to Content Management screen.
In the Dev portal Customization - Content Management screen, click to select the folder into which you want to upload a file.
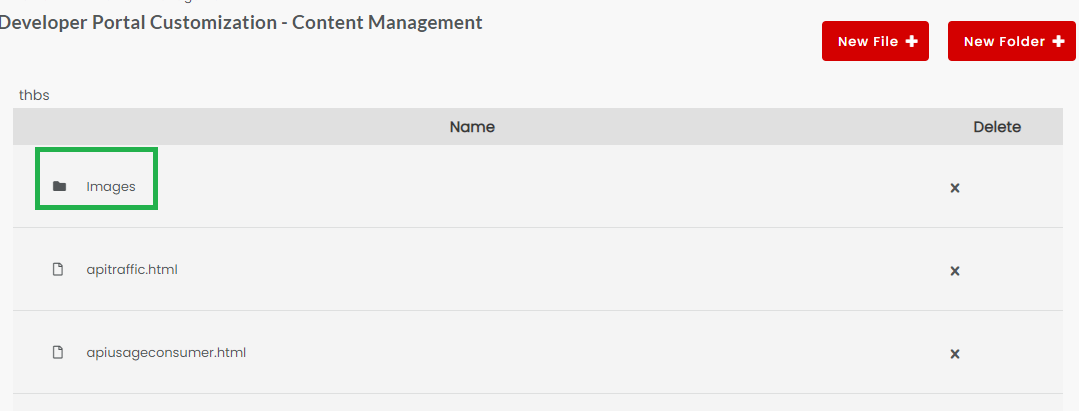
Fig. 3.553 Select a folder to upload file
Note
You can skip the second step if you want to upload a file to the root folder.
Click New File to display the Add Files dialog box.
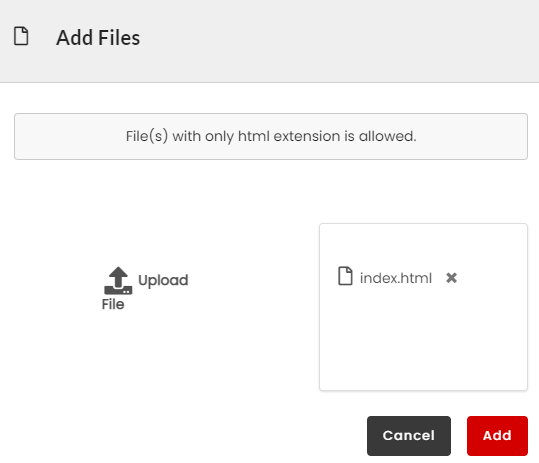
Fig. 3.554 Add Files dialog
Click Upload File to select a file from your machine. Alternatively, you can drag a file from your local folders into the Choose Files box to attach a file to be uploaded.
Click Add to finish uploading the files. The uploaded file displays in the selected folder
To delete a file/folder from a folder:
Navigate to Content Management screen.
Browse to the location of the file/folder that you want to delete.
In the row that has the file that you want to delete, click the delete icon
 . A notification message, “You are about to delete a file/folder ! Are you sure to proceed?” displays.
Click OK to finish deleting the file/folder.
3.27.2. Manage API Pack Categories
Categorization of API Packs is necessary for it allows you to group similar products together, which makes the task of finding an API in the Developer portal an easy one. The API Store Categories Master helps you define the structure of your API Category Tree - to define the way it should appear in the API store in the Developer portal. For instructions on how to assign an API Pack to a category, refer Brand an API Pack for Developer portal.
To add API Pack Categories:
Navigate to the API Store Categories Master screen.
Hover over the text: Root or any other category in the tree. A Plus Symbol displays alongside the text.
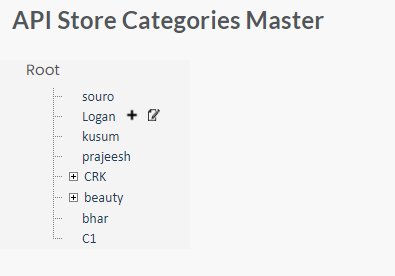
Fig. 3.555 Add Category symbol
Click the plus symbol (to the right of the text) to add a child category. An inline text box displays.
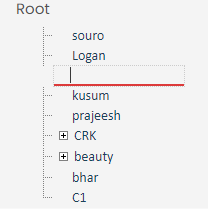
Fig. 3.556 Text box for category name
In the inline text box, type the name for your category.
Repeat steps 2 to 4 to add more categories on the same hierarchy level.
Hover over any of the newly created categories to start a new hierarchy and add child categories. Repeat steps 6, 3 and 4, in that order, to continue adding more child categories.
To edit an API Pack Category:
Navigate to the API Store Categories Master screen.
Hover over the Category you want to edit and click the boxed plus sign (to the left of the text) on the tree to display child categories. Navigate to the desired Category and hover over it. A set of three icons displays in the right of the text.
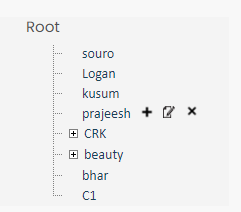
Fig. 3.557 Edit Icons
Click the notepad icon.
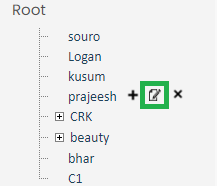
Fig. 3.558 Edit Icons
The category name goes into edit mode.
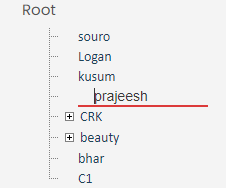
Fig. 3.559 Edit mode
Make the changes and then click anywhere in the blank area of the screen to save changes.
To delete an API Pack Category:
Navigate to the Developer Portal Configuration screen.
Click API Store Categories Master to display the API Store Categories Master screen.
Click the boxed plus symbols (in the left of the text) on the tree to display an expanded view with child categories. Navigate to the Category that you want to delete and hover over it. A set of three icons displays.

Fig. 3.560 Edit Icons
Click the delete icon. The category name is deleted from the category tree.
Note
You are allowed to delete a Category only if there are no API Packs assigned to the Category. Refer Brand an API Pack for Developer portal, for more information on API Pack Category.
3.27.3. Manage Discussion Forum
The Discussion forum serves as a medium that enables the Publisher user to answer Developer queries posted in the Developer portal Discussion Forum.
To view posts in the Developer Discussion Forum:
Navigate to the Discussion Forum screen.
Click the Filter drop down box to select a category for which you want to view the posts. Available categories are Bug, Question, Suggestion, and Uncategorized. Alternatively, select All to view all posts.
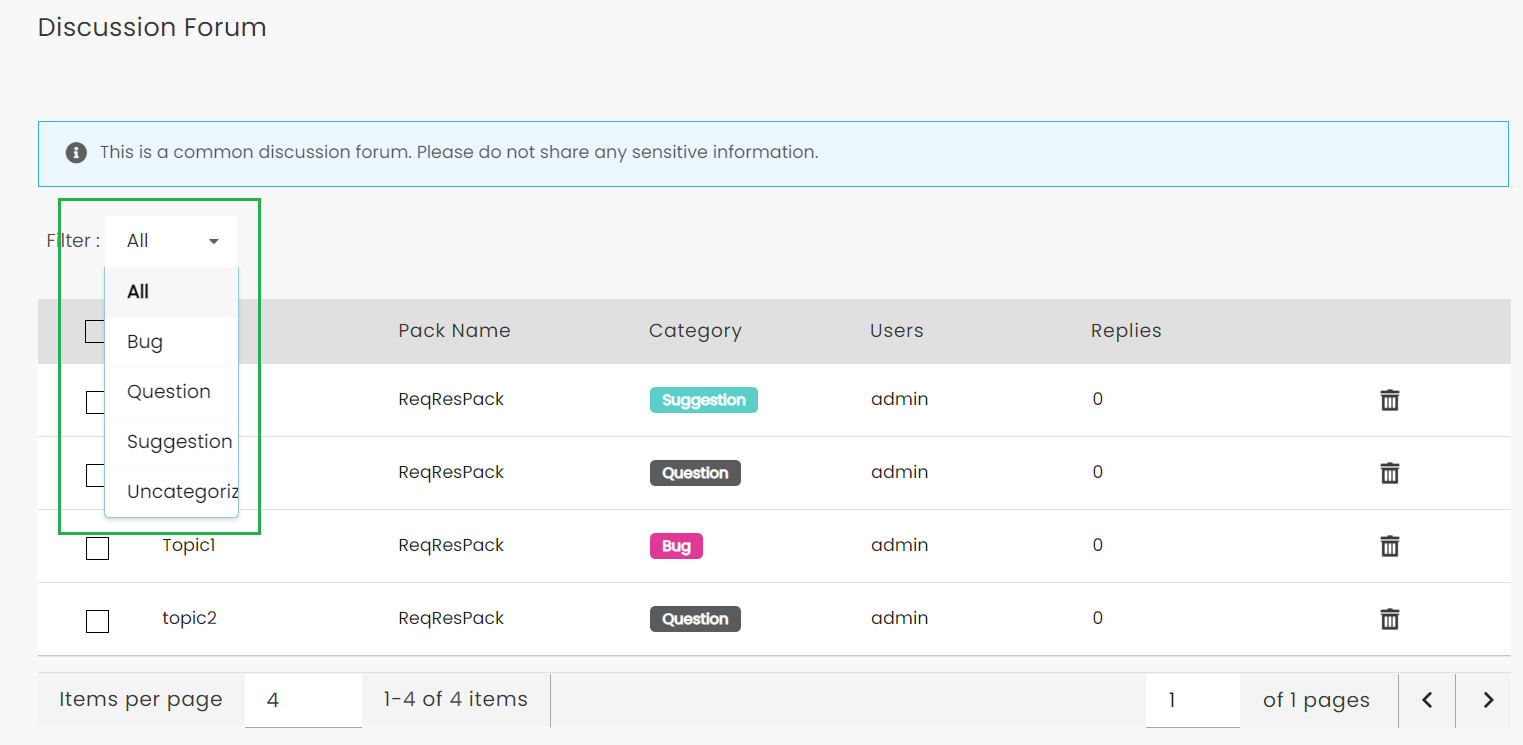
Fig. 3.561 Filter Category
To reply to a post in the Developer Discussion Forum:
Navigate to the Discussion Forum screen.
Click the row that has the post you want to reply to. The post details display.
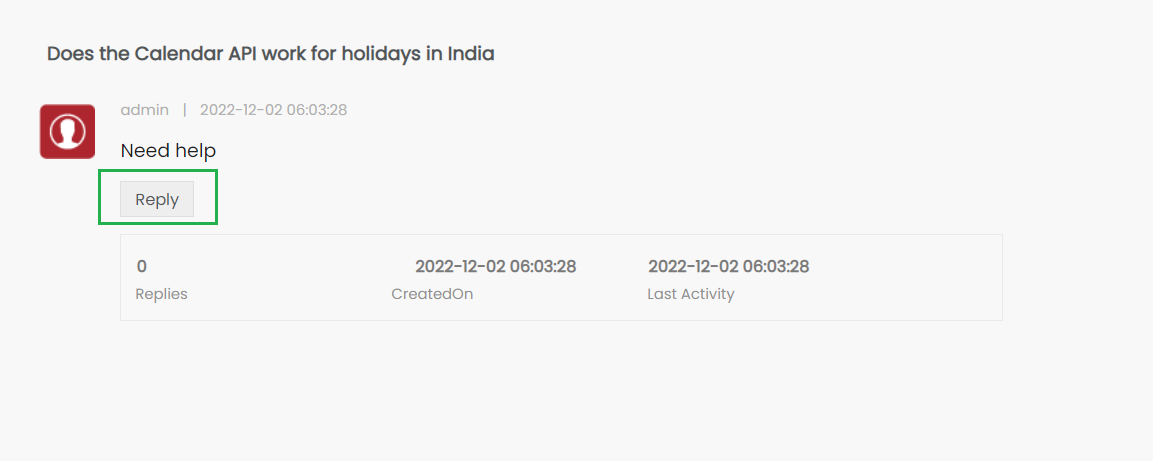
Fig. 3.562 Post details
Click Reply to display a reply box.
In the reply box, type your reply and then click Add Reply to post the reply.
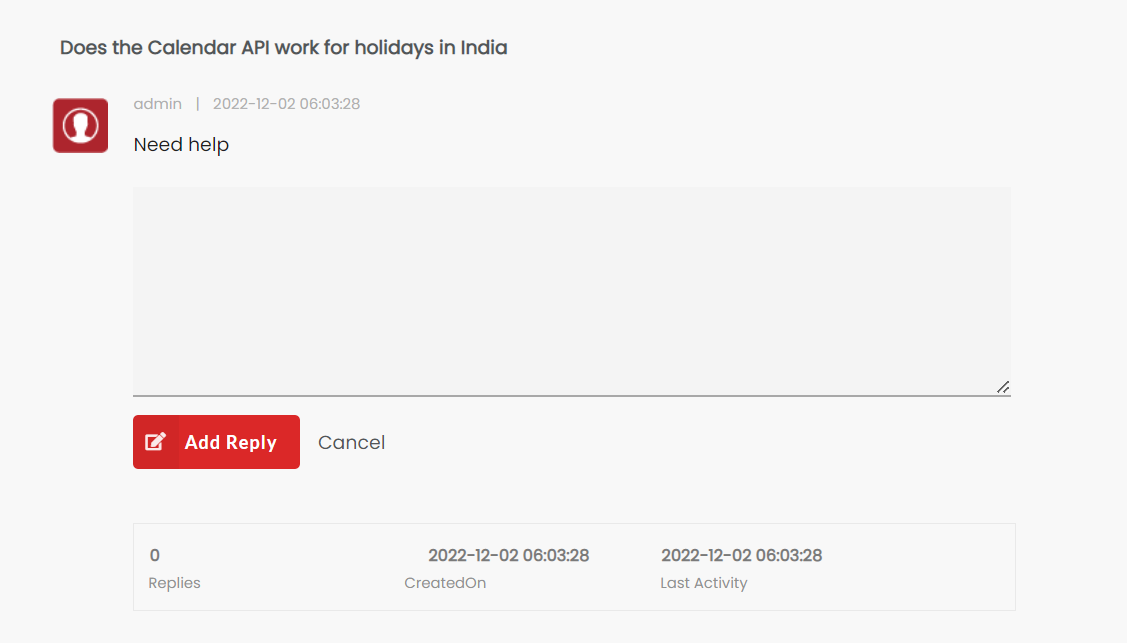
Fig. 3.563 Post reply
The reply displays below the post. The reply has its own reply button that allows another user to post a counter reply. Repeat steps 3 and 4 to post more replies to the forum.
The Pagination feature at the bottom-right corner of the page allows you to choose the number of items to display per page. Five entries per page is displayed by default, but you can customize it by entering your required value in the text box at the bottom-right corner of the page. Use the previous ![]() and next
and next ![]() icons to navigate between the pages.
icons to navigate between the pages.
To delete a post in the Developer Discussion Forum:
Navigate to the Discussion Forum screen.
To delete a single post, click the delete icon
 .
.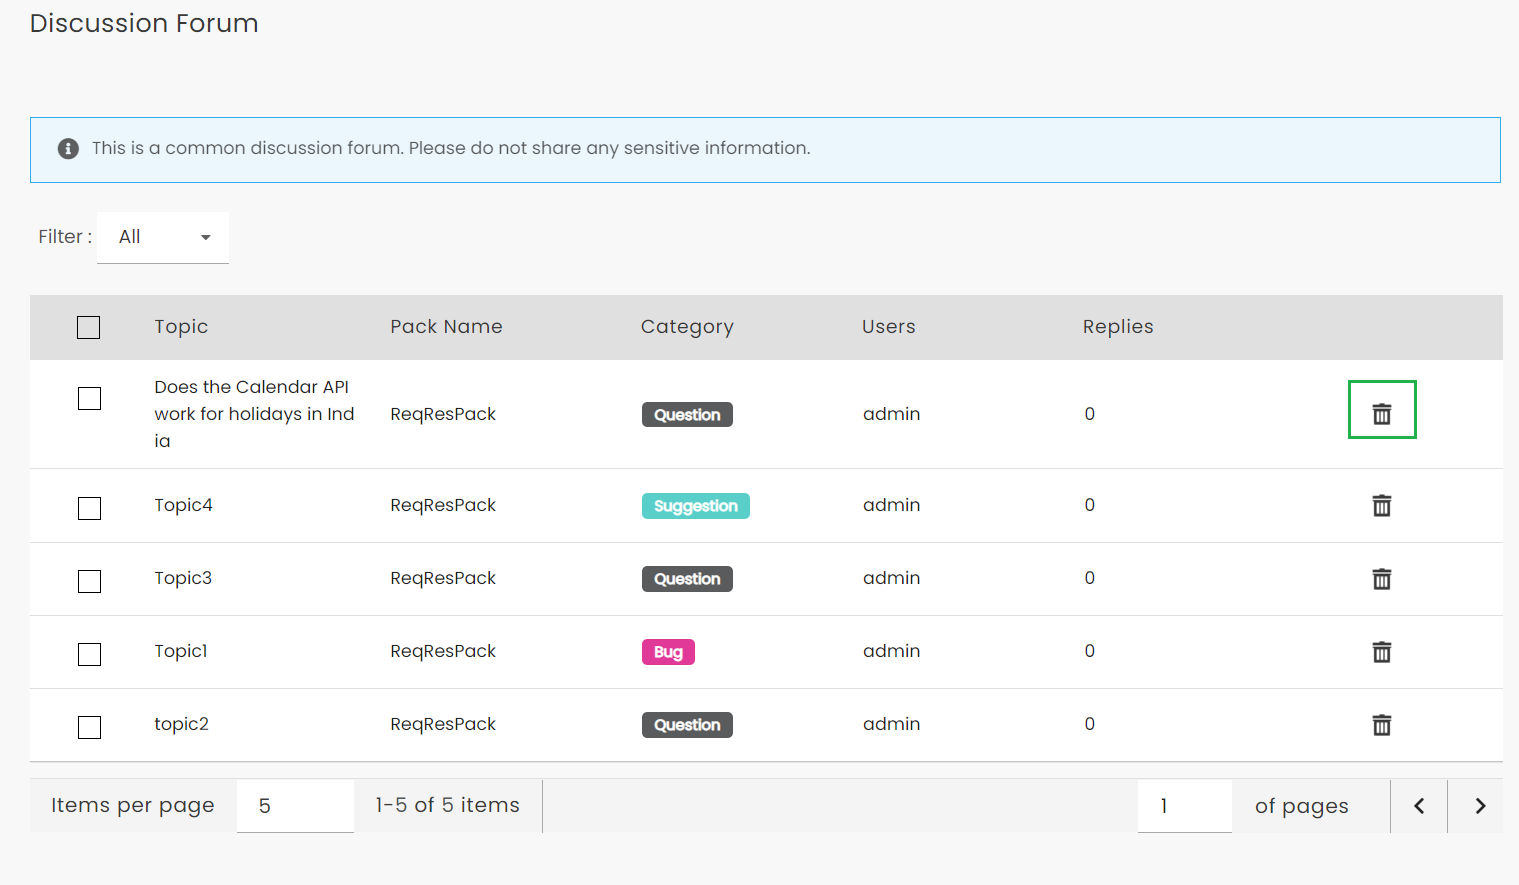
Fig. 3.564 Post reply
To delete multiple posts, click the check-box on the rows that have the post you want to delete and then click Delete.
A confirmation message is displayed asking you to confirm your action. Click Yes to delete.

Fig. 3.565 Post reply
Next Steps
In the next section, we will take you through the tasks related to configuring Subscription-level Settings.