4.4. Manage Applications
To integrate your application with Publisher APIs, and allow your application to make API calls, as an App Developer, you need to register your Application with the Developer portal. Registering your Application allows you to get an Application Client ID and Secret Key that you can then use to authorize your calls. For more information on Applications, refer: Developer Portal.
Multi-Scope OAuth Support:
DigitMarket™ API Manager provides Multi-Scope OAuth support for applications registered under the Developer portal. Multi-Scope OAuth support allows the user to choose the subscription (defined with the plan id) that can be consumed by the application from the available list of subscriptions. When enabled, certain restrictions will prevent the user from using the same subscription key to access all the subscriptions under that user for a particular application.
Using an access token, an application can consume all or selective number of subscribed plans. Suppose an application A1 has subscribed to Plan P1, Plan P2 and Plan P3. Using the access token, by default the application A1 will be able to consume all the three plans - P1, P2, P3. With multi-scope OAuth support, the application will have the option to choose which plans to consume among the three(for eg. application can choose to consume Plan P1 and P2 but not P3). DMAPIM also allows Open Scope support (also known as Read scope) that lets users access all the scope under them for a given application without any restrictions.
Multi-Scope OAuth support for applications is useful when there are multiple users accessing a single application, and certain services need to be allowed/restricted to some of those users. Let us suppose that two users namely an Admin and a Developer are accessing the same application to consume certain services. The roles and capabilities of both these users are different. The scope of both these users may vary according to their roles. In such cases defining a scope will allow/restrict services to the application users (Admins and Developers) based on their roles. If a Developer wants to consume a service, they need to define a scope along with their credentials to generate a token to consume the services. Similarly a different scope can be defined for the Admin users. The user who wants to access the service, will provide their user credentials along with the scope. If the provided credentials are valid, they need to pass the scope details to generate an Access Token. The Gateway will validate the scope along with the Access Token. If the token and scope is valid, the user can access the required services. If the scope is invalid (for eg. trying to access a service with the wrong scope), the Gateway will throw an error.
In this section:
- Add an Application
- Edit an Application
- Deactivate an Application
- Reactivate an Application
- View Application Details
- Filter Application view
4.4.1. Add an Application
The My Application page provides a list of all applications that the Developer user adds to the Developer portal, including information about how many of them have been accepted, rejected, and cancelled.
To add an Application:
Click the hamburger menu and then click My Application.
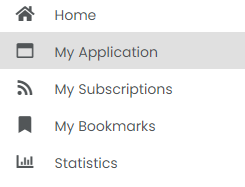
Fig. 4.16 My Applications
The My Application screen displays.
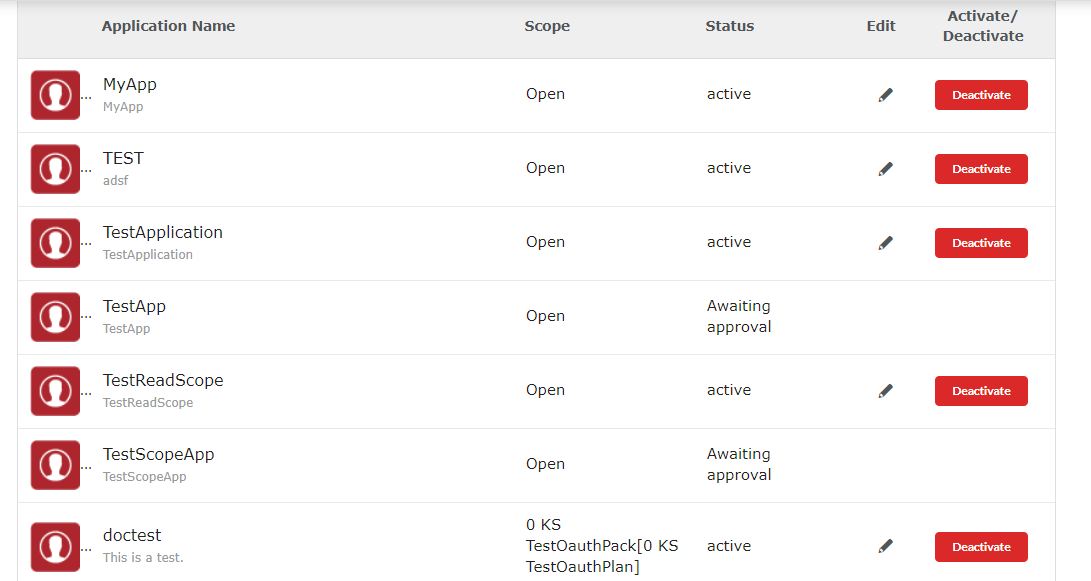
Fig. 4.17 My Applications
Click New Application to display the Add Application dialog box.
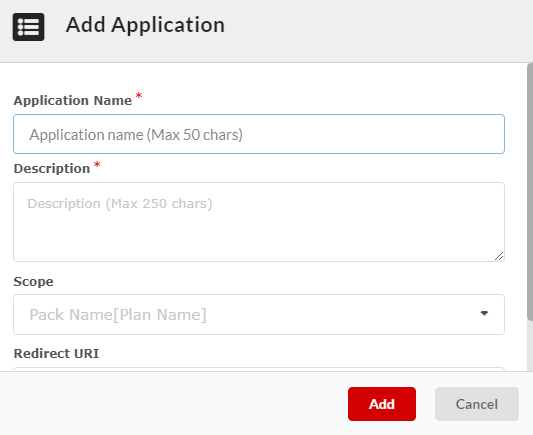
Fig. 4.18 Add Application dialog
In the Application Name box, type the Application name, in the Description box, type a description for your Application, and in the Redirect URI, type the URI that is required for the application.
The Scope drop-down list displays the list of scopes that are available for mapping to the application. From the Scope drop-down list, select the scope to map to the application. You can choose single, multiple or all scopes to be mapped. The scope you select will appear at the top of the drop-down. You can remove the selected scope by clicking
 .
.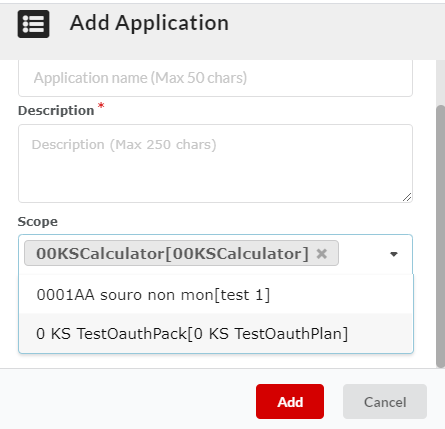
Fig. 4.19 Scope
Note
Application Name and Description are mandatory fields. Redirect URI is not a mandatory field for registration. However, if you want to enter the redirect URL, specify it in the following format:
http(s)://<Redirect URL>. User has to select the scope while creating the application else Open scope will be considered by default.Click Add to finish adding the application. The newly created App displays in the My Application list with the status as Awaiting approval.
On the My Application page, you can edit an application, know the status of an application, scope of an application and activate/deactivate the application using the Activate or Deactivate button.
When you add an Application, the following events occur:
- The Application is sent for approval to the API Publishers
- The API Publishers approve or reject the Application.
- If approved, the Application developer receives an Application-specific Client ID and Client Secret. Before approval, the Application’s Status in the My Applications page displays as Awaiting approval. Once the Publisher approves the Application, its Status changes to Active. If it is rejected, the Status displays as Rejected.
To know more on how to view the Application Details page, visit: View Application Details
4.4.2. Edit an Application
To edit an Application:
On the My Application page, in the row that has the Application you want to edit click the edit icon
 .
.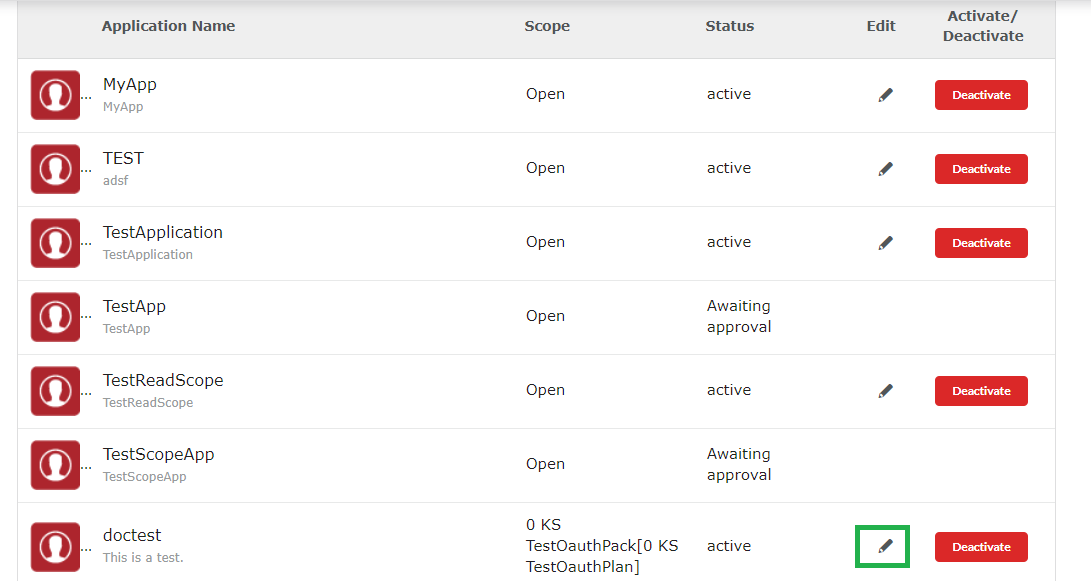
Fig. 4.20 My Application
The Edit Application dialog box displays.
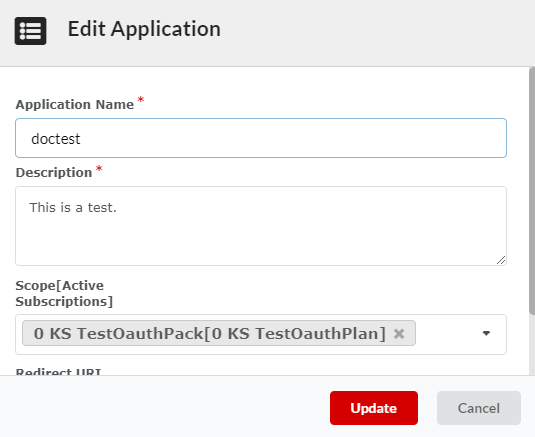
Fig. 4.21 Edit Application dialog
- Make the required changes and click Update to finish editing the Application.
Note
You cannot edit an Application when it has the Awaiting approval or Rejected status.
4.4.3. The Application Workflow
Application has four workflow states: Awaiting approval, Active, Rejected and Inactive.
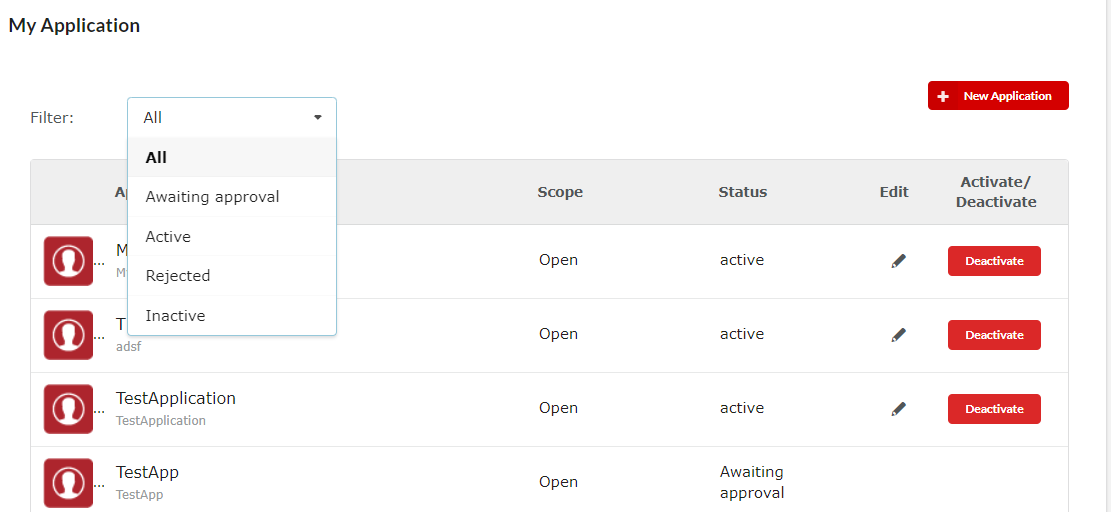
Fig. 4.22 Application States
For a workflow state to change, the Admin or Approver user must approve the approval request. This is done from the Publisher Portal.
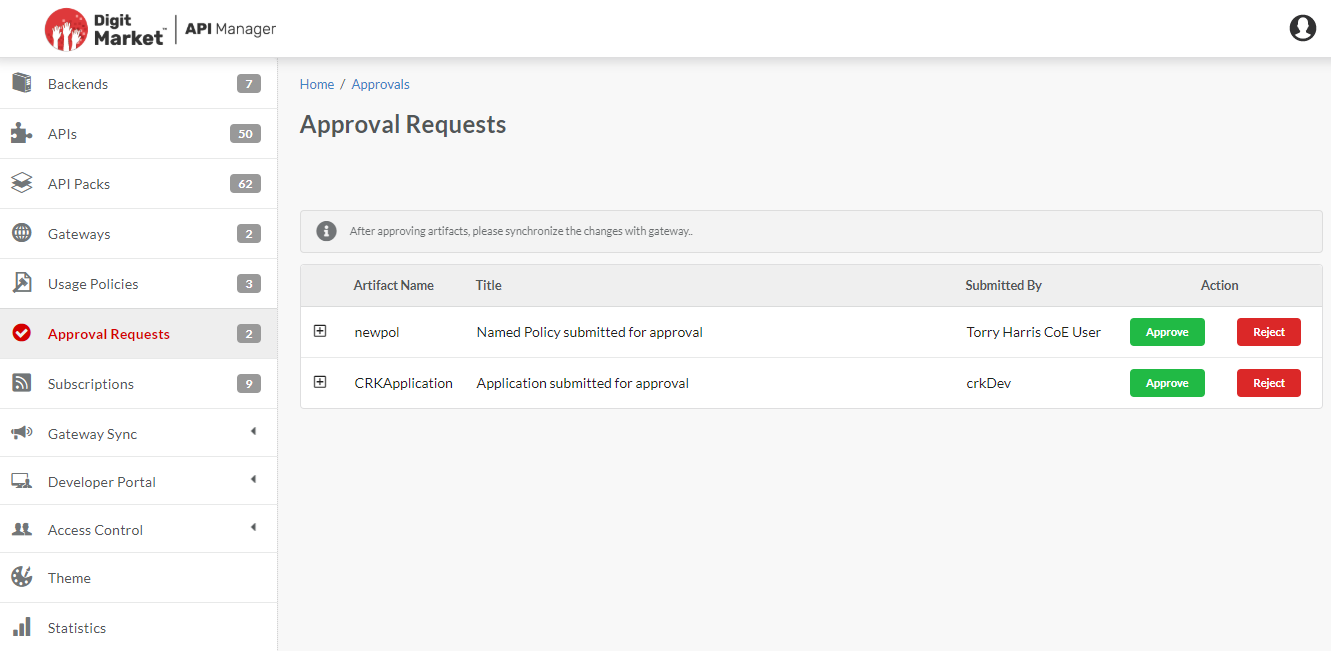
Fig. 4.23 Approval Requests in Publisher
When the user creates an application, the status of created Application will be in Awaiting approval state.
If the Application is approved (from publisher portal), status of the application will change to Active.
If the Application is rejected (from publisher portal), status of application will change to Rejected.
If the Application deactivation request is accepted (from publisher portal), status of application will change to Inactive. If the deactivation request is rejected, the status of the application remains unchanged.
4.4.4. Deactivate an Application
To deactivate an Application:
Deactivate option will be available for the active applications.
On the My Application page, in the row that has the Application you want to deactivate, click Deactivate.
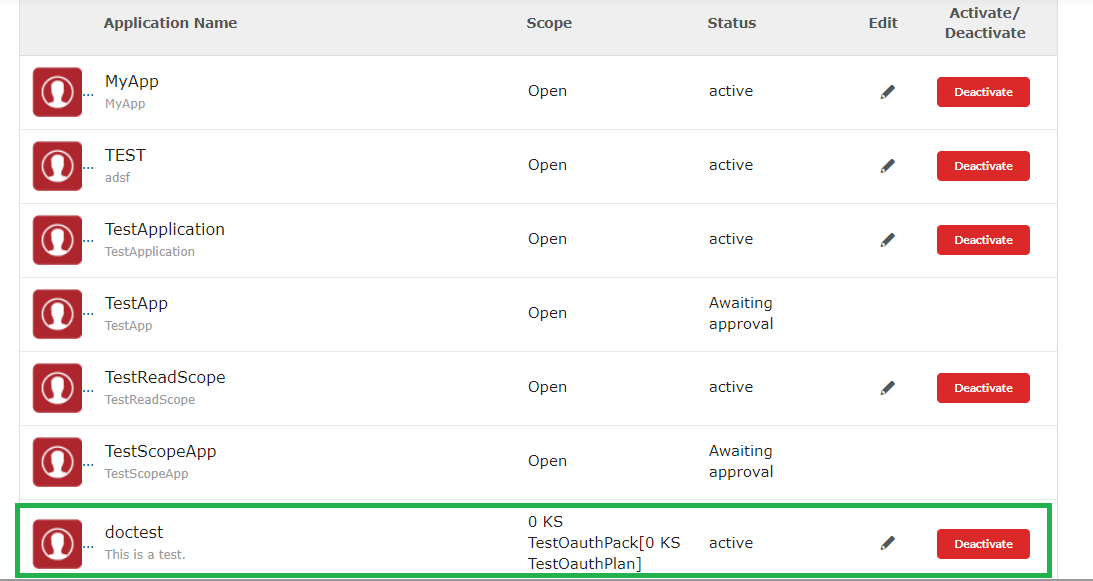
Fig. 4.24 Deactivate
Click Yes when a notification displays asking you to confirm your action.
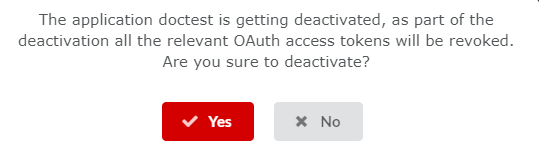
Fig. 4.25 Deactivation Message
An approval request is sent to the publisher and the Deactivate button text will be changed to “Deactivation Requested”.
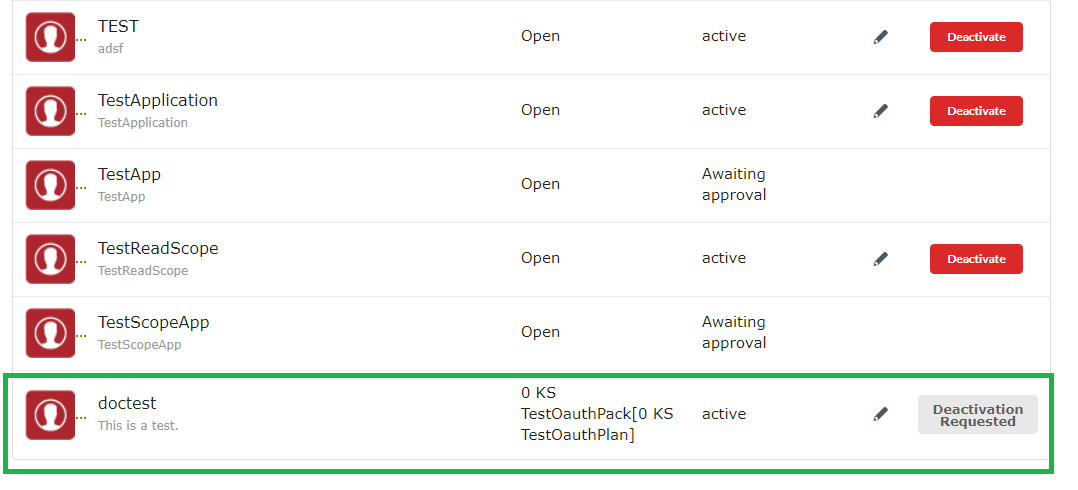
Fig. 4.26 Deactivation Requested
The publisher can either approve or reject the application deactivation request. If the publisher approves the request, then the status of the application changes from active to inactive, and vice versa. If the publisher rejects the request then status of the application remains unchanged.
Note
- An Application can only be deactivated and not deleted. This precautionary measure is taken in case an application is compromised.
- The deactivated application can be re-activated by sending an approval request to the publisher.
4.4.5. Reactivate an Application
Inactive applications can be reactivated.
To reactivate an Application:
On the My Application page, in the row that has the Application you want to reactivate, click Activate.
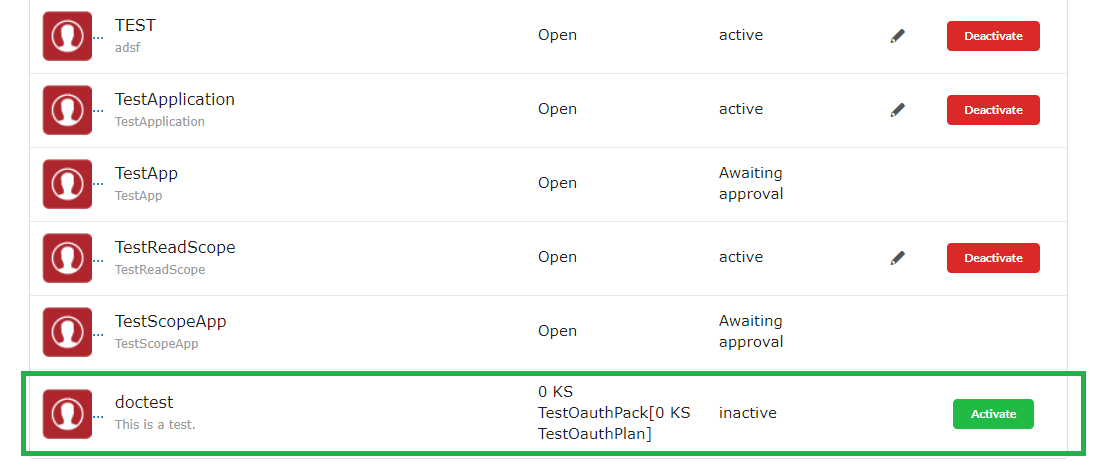
Fig. 4.27 Hamburger menu
Click Yes when a notification displays asking you to confirm your action.

Fig. 4.28 Reactivate Application
An approval request is sent to the publisher. The publisher can either approve or reject the application reactivation request. If the publisher approves the request, then the status of the application changes from inactive to active, and vice versa. If the publisher rejects the request then status of the application remains unchanged.
4.4.6. View Application Details
To view Application Details:
On the My Application page, in the row that has the Application for which you want to see the details, click the Application Name. The Application Details screen displays.
Fig. 4.29 Application Details
4.4.7. Generate an Access Token
The Application Details page has four panels:
- Overview - provides the overview for the application,
- Keys - displays the Client ID and Client Secret key values to use when the Application makes request to the APIs subscribed under a Plan. The Client Secret key is masked by default. You can view it by clicking on the mask icon
 . Click the mask icon again
  to hide it.
 - Generate Access token - allows the user to generate OAuth access tokens based on Grant Types
- Active Access Tokens - displays the list of access token that are active. The Active Access Tokens are masked by default. You can view it by clicking on the mask icon . Click the mask icon again to hide it.
1.. In the Generate Access Token section, in the Choose Grant Type field, click to select the OAuth Authorization type for which you wish to generate access token. You can choose from Client Credentials, Password, Refresh Token.
To learn more about OAuth Types, visit: Authentication.
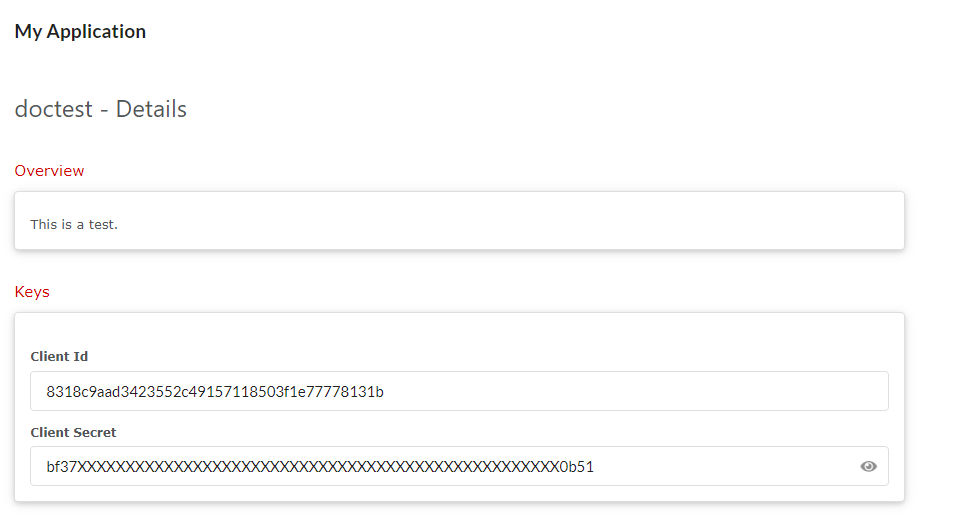
Fig. 4.30 Application Details screen
When you select any of the OAuth Authorization type for which you wish to generate access token, you are also required to define the OAuth scope. The Scope drop-down list displays the list of subscriptions that are available the application.
Note
The scope that was selected while creating the application should be used while generating Access Token, else the token will not be generated.
In case of Client Credentials Grant Type:
From Choose Grant Type drop-down list, select Client Credentials Grant Type.
From the Scope drop-down list, choose the scope to map to the application. The scope that is selected will appear at the top of the drop-down. The selected scope can be removed by clicking the
.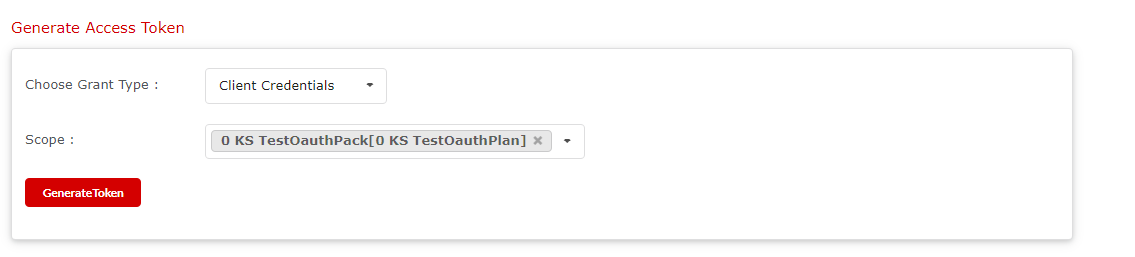
Fig. 4.31 Client Credentials Grant Type
Click Generate Token to start generating the access token.
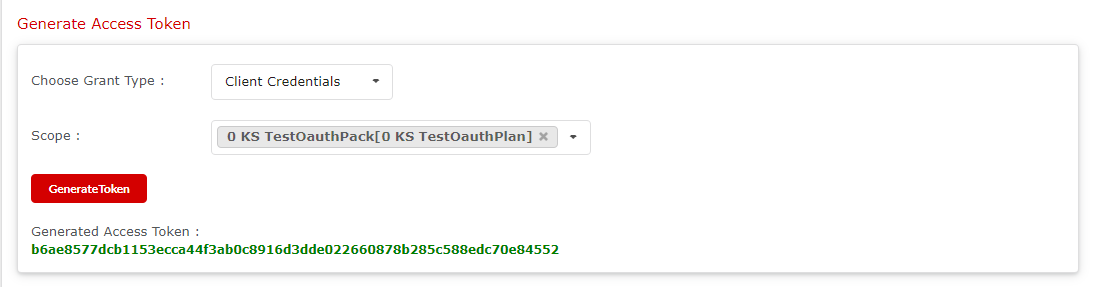
Fig. 4.32 Client Credentials Grant Type - Generate Access Token
In case of Password Grant Type:
Enter the User Name and Password in the boxes provided.
From the Scope drop-down list, choose the scope to map to the application. The scope that is selected will appear at the top of the drop-down. The selected scope can be removed by clicking the
.Click Generate Token to start generating the access token.
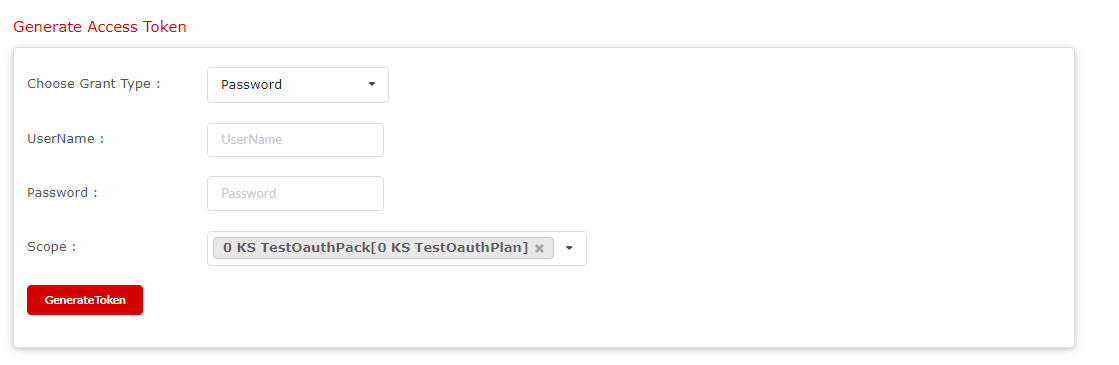
Fig. 4.33 Password Grant Type - Generate Access Token
The Refresh Token Grant Type generates an Access Token and a Refresh Token. You can use the Refresh Token when the Access Token expires; thus enabling you to generate fresh Access Token using the Refresh Token Grant Type.
In case of Refresh Token Grant Type:
Enter the refresh token that is generated from Password Grant Type in the box provided.
From the Scope drop-down list, choose the scope to map to the application. The scope that is selected will appear at the top of the drop-down. The selected scope can be removed by clicking the
.Click Generate Token to start generating the access token.
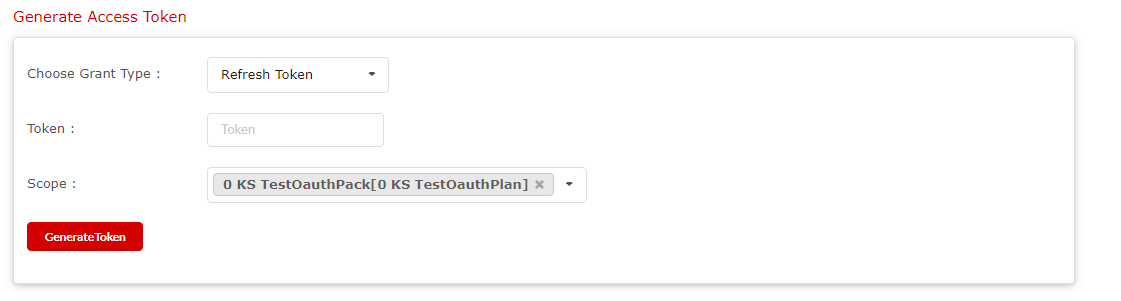
Fig. 4.34 Refresh Token Grant Type - Generate Access Token
4.4.7.1. Revoke an access token
To revoke an active access token:
In the Active Access Tokens section, click Revoke against the access token that you wish to revoke.
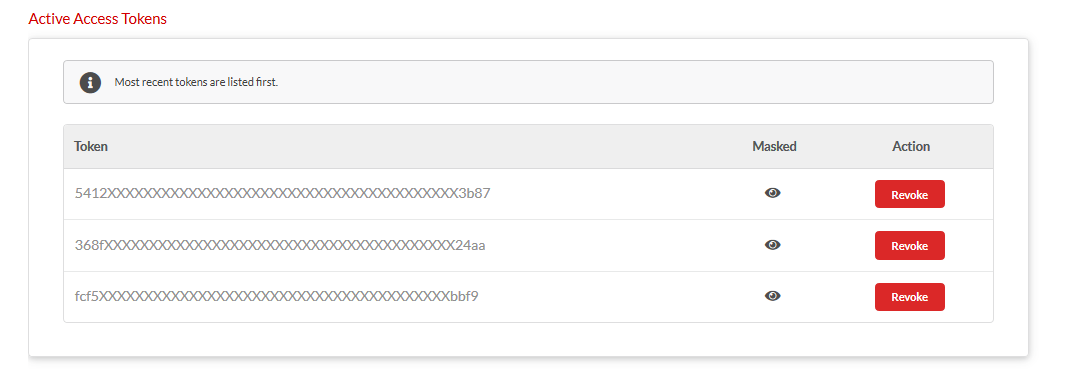
Fig. 4.35 Revoke active Access Token
Revoking an access token renders it invalid and the client application cannot use the token again for making calls to exposed APIs.
To reveal a masked access token:
In the Active Access Tokens section, click Unmask against the access token that you wish to reveal.
Note
You can view the details of an application only if the application status is active.
4.4.8. Filter Application view
To filter the way Applications are displayed:
Click the hamburger menu and then click My Application.
Fig. 4.36 Hamburger menu
In the hamburger menu, click My Applications.
Click the Filter drop-down menu at the top of the screen to display filtering options: Awaiting approval, Active and Rejected.
Fig. 4.37 Filtering options
Click Awaiting approval to view applications that are waiting for approval, Active to view applications that are currently operational, and Rejected to view applications that are rejected by the Publisher and Inactive to view applications that are currently not operational.
Next Steps
In the next section, you will learn about the steps necessary to manage Subscriptions.