4.7. Test using Sandbox
Developers use the Sandbox environment to test and find how their Apps could be integrated with the APIs that they want to use. The Sandbox allows you to make a sample API call from within the documentation page.
The Sandbox uses industry-standard Swagger to describe the REST API service, Resource/Operation name, Resource/Operation Description, Resource/Operation methods, parameters (covering parameter types: form/path/query) - whether parameters are required or are optional, Expected Response Content type (JSON or XML), Response message, HTTP response code or Error code depending on whether the response was a success or failure.
To learn more about Sandbox environment, refer ‘Sandbox’ under Developer Portal. Refer Sandbox to understand how to configure and use Sandbox.
Given below is a typical workflow that you can use as a checklist prior to and while using Sandbox:
- Create an Application profile
- Generate Access Tokens
- Invoke the API using the Try-it feature
- Generate Client code with SDK
- Develop Apps and integrate them with Sandbox Endpoints
- Perform integration tests with data provided in Sandbox
- Validate token Expiry scenarios and simulate errors
Common Tasks
Navigating to API Packs Details screen
To navigate to API Packs Details screen:
- In the API Stores screen, browse/search through the API Packs to find the API Pack that interests you.
- In the API Stores screen, click the API Pack to display the API Pack Details screen.
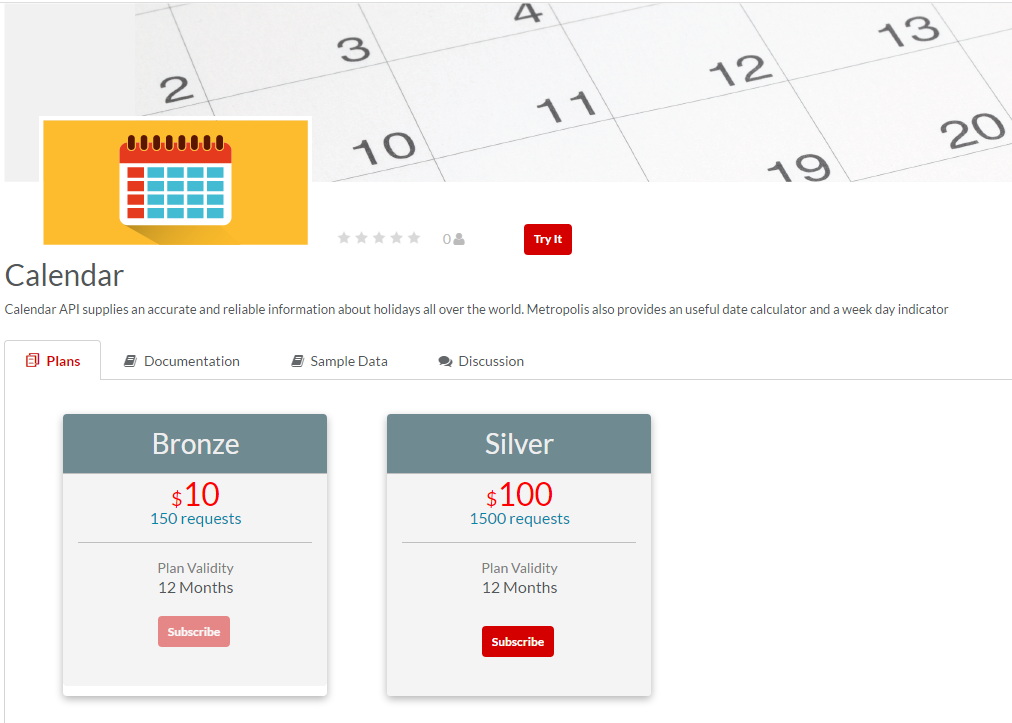
Fig. 4.69 API Pack Details
To invoke an API using the Try it feature:
Navigate to API Packs Details screen.
The API Pack Details page displays.
Fig. 4.70 API Pack Details
Click Try it
 . The API Pack Sandbox page displays with the API Pack Resource list in a Swagger UI.
Note
Some of the APIs might require authorization. Scopes are used to grant an application different levels of access to data on behalf of the end user. Each API may declare one or more scopes. You can select the scope that you want to grant to Swagger UI.
Click the
 /
/  icon to toggle between showing/hiding the Resource details - Resource names, methods, parameters and other details.
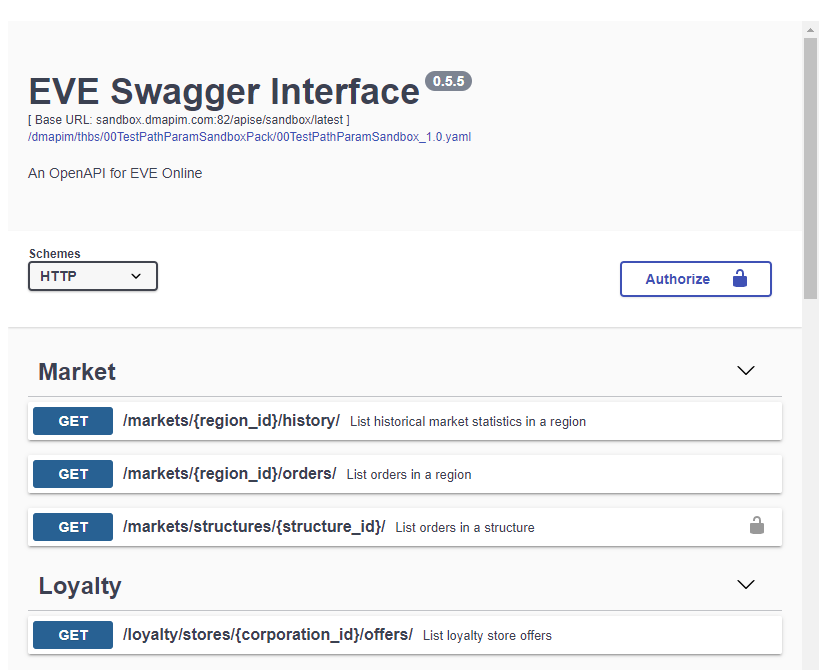
Fig. 4.71 Resource details
Click the resource method to display an expanded view.
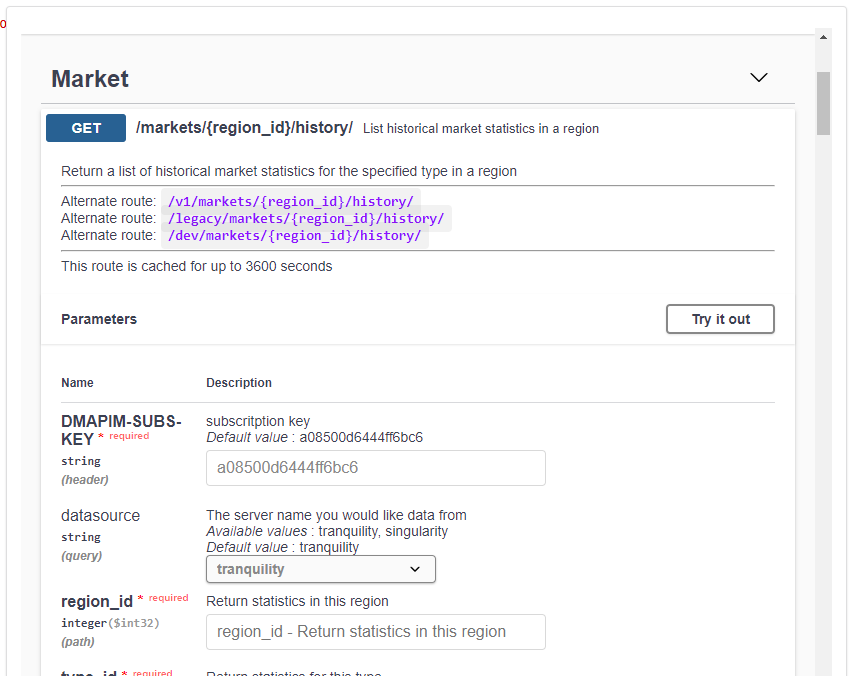
Fig. 4.72 List view of Resources
Click Try it Out.
On clicking Try it out it will swtich to Cancel and Excute tab will enable, user can execute API pack.
Note
Cancel is for switching between Try it out and Execute and not for stop executing if user hit on Execute Tab.
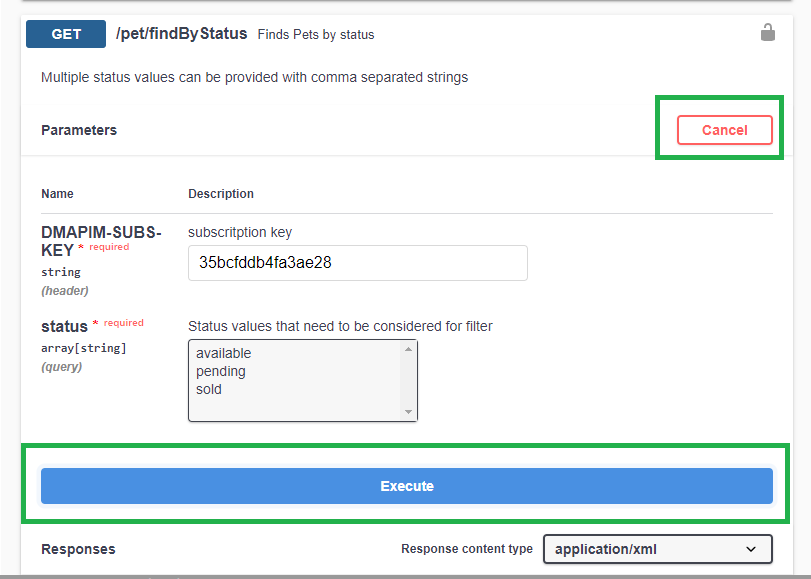
Fig. 4.73 Execute
In the mandatory parameter fields, type the required parameters and click Execute to test invoke the API. Response message will be displayed based on the value of the parameters entered.
Note
Users must keep in mind the points listed below while using the Sandbox feature to test the APIs:
- Sandbox “Try it” feature shows only REST resources configured using swagger specifications file.
- Sandbox “Try it” feature, doesn’t support storing transaction details and analytics.
- Sandbox doesn’t support auto propagation to linked plans for API propagation.
- Plan level security policies will not be applicable.
- Plan defined with oAuth security policy doesn’t validate the access token on Sandbox.
- Sandbox doesn’t support rollback functionality.
- Sandbox doesn’t support two-way SSL between Portal and Nginx.
- All service calls to the Sandbox backend must implement URL encoding.
- IP Black listing, White listing and MCT limit are not applicable for sandbox.
- URI encoding containing any of the following characters will not work: # [ ] { } ~ | %
- Only the following special characters are tested as working for path and query parameters: @ ! # $ % ^ & * - _ = + [] {} | : ; , . `
- Only the following special characters are tested as working for Resource name - @ $ space ! * - _ = + . ,
Next Steps
In the next section, you will learn about how to add Ratings and Reviews for API Packs.