5. Sandbox
As an app Developer, when you learn about an API that you wish to use in your app, you’ll first want to test it out to see if the responses can be integrated to make them work with your application. DigitMarket™ API Manager provides the Sandbox environment that enables the user to do test runs on an API.
DigitMarket™ API Manager makes use of Swagger for its Sandbox UI. Swagger has a UI framework that accepts parameters and demonstrates in a Sandbox environment how an API behaves when a request is placed through its interface. Since the UI used for Sandbox testing uses standards used in Swagger Specifications as the mode for listing out resources and descriptions, the user has all the Resource descriptions that is required to start trying out APIs. The documentation that accompanies the listings allows the user to make calls from within the documentation. The API resources list presented in the Sandbox UI is extracted from JSON/YAML files (created and updated from API resources list defined by API Publishers using swagger specification) based on Swagger Specification. The JSON/YAML file contains descriptions of the REST service like Resource paths, HTTP methods, parameters of path or query, response/fault codes and types, and HTTP/fault error codes.
5.1. Configuring Sandbox Gateway
The first step for working with Sandbox requires users to configure a Sandbox Gateway. DigitMarket™ API Manager allows users to configure a Sandbox Gateway that serves as a control hub for Sandbox APIs. It decides which traffic is authorized to access the back-end services that are exposed via APIs.
- Navigate to the Gateways screen.
- Click New Gateway. The Add Gateway dialog box displays.
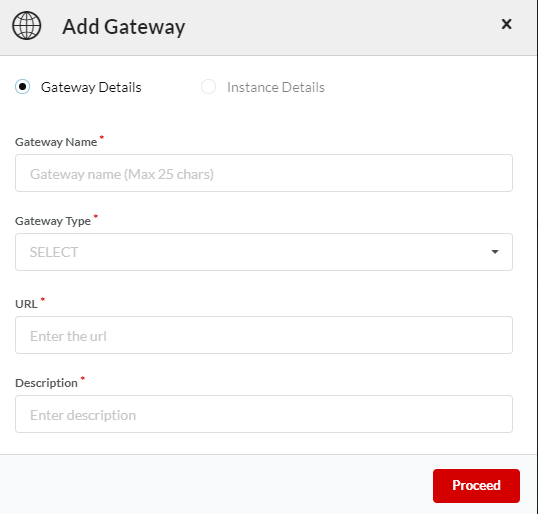
Fig. 5.1 Add Gateway dialog
In the Gateway Name box, type the Sandbox Gateway name.
Click the Gateway Type drop-down list to choose whether the Gateway is designated to Sandbox environment.
In the URL box, enter the URL for accessing the gateway. Gateway URL is a combination of the IP address and host name for the new Gateway.
In the Description box, type the description to describe the API Gateway.
After entering the Gateway details, click Proceed to enter the Instance details. The Instance Details dialog box displays.
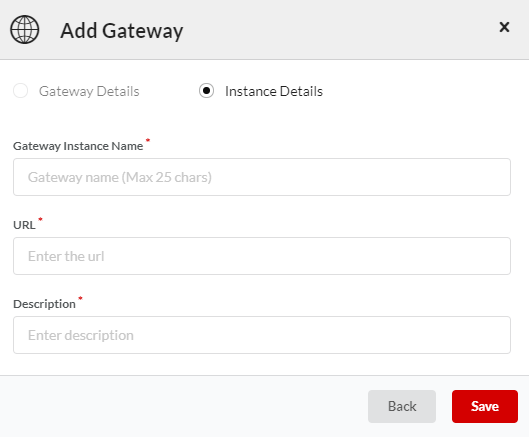
Fig. 5.2 Add Gateway Instance dialog
Note
A Gateway can have multiple instances but one Gateway must have at least one instance. At the time of its creation, only one Gateway instance can be created.
In the Gateway Instance Name box, enter the Gateway Name.
In the URL box, enter the URL for accessing the main gateway instance.
In the Description box, enter the description to describe the API Gateway instance.
Click Save to finish adding the new Gateway and close the New Gateway dialog box. The newly added Gateway is now included to the Gateways list.
Note
Only one Sandbox Gateway can be created.
5.2. Backend Point
Under the Backend Point tab, you can find the list of all the Backend Points that are under Sandbox Gateway.
The Backend Point tab displays all the Backends along with details such as:
- Server Name with details (Sandbox)
- IP and Port details
- Description
- Mapped Filter - This option allows you to display - all Backends/only mapped Backends/only unmapped Backends.
- Map to Gateways - Toggle button to map the unmapped Backends to the Gateway. Mapped Backends are displayed in green while unmapped Backends are displayed in red.
- Status (Propagated or not)
- Search box to search for a particular Backend. Enter the query in the search box and click the search icon
 to display the results.
 - Repropagate - This button allows users to repropagate propagated Backends.
To map the Backend to a Gateway:
Navigate to the Gateways screen.
From the list of Gateways, select the Sandbox Gateway and then click the Backend Point tab. The Backend Point tab displays a list of all the Backends under this particular Gateway.
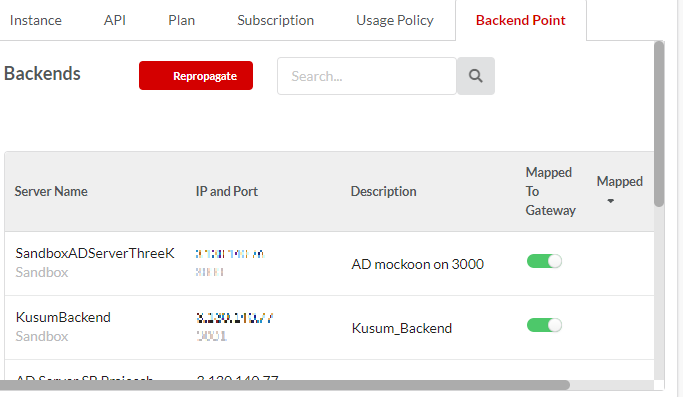
Fig. 5.3 Backends
Use the Mapped filter to filter Backends using the options: All, Mapped, Unmapped. You can also search for the required Backend using the Search box.
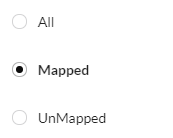
Fig. 5.4 Mapped Filter
In the row that has the Backend that you wish to map, click the Map to Gateways toggle button. Inversely, click the toggle button again to unmap.
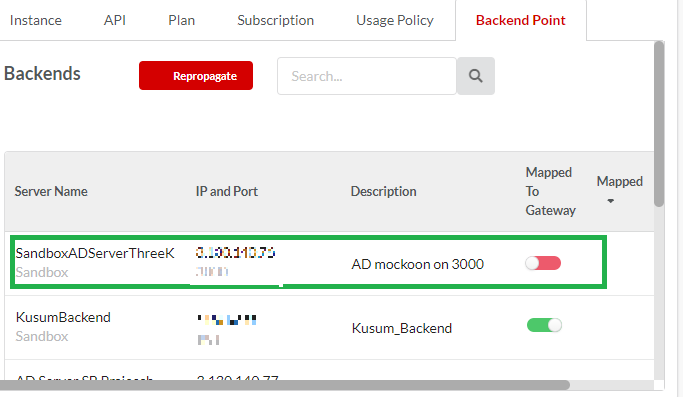
Fig. 5.5 Toggle to Map
A notification message appears asking you to confirm the mapping.
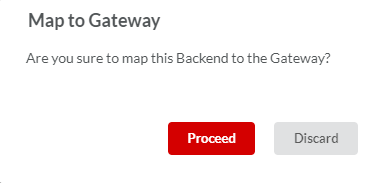
Fig. 5.6 Mapped Toggle
- Click Proceed to map. The Backend will be mapped. The toggle button will turn green.
Although the Backend is mapped, it is not yet propagated. The Backend will be available to propagate in the Gateways Sync page.
To repropagate the propagated Backend:
Navigate to the Backend Point tab.
Click Repropagate. The Propagate Plan dialog displays a list of already propagated Policies that are available for repropagation.
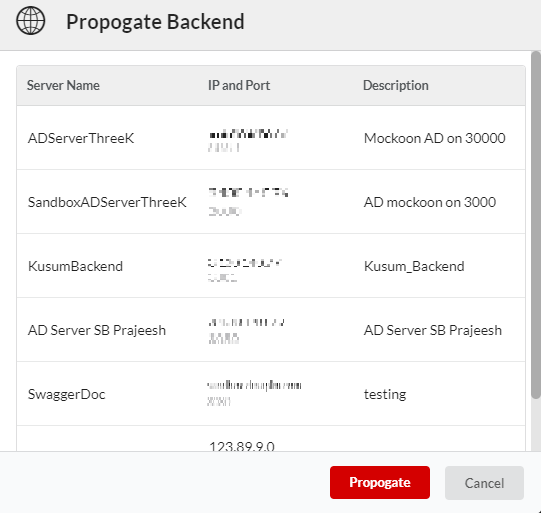
Fig. 5.7 Propagate Backend
Click Propagate. A success message displays upon successful propagation.

Fig. 5.8 Repropagation Successful
Next Steps: Once the Sandbox Gateway is configured, users are required to configure a Sandbox backend.
5.3. Configuring Sandbox Backend
A Backend server is where all the assets for API services exist, which then are exposed to the client via proxy. You can define the Sandbox backend where you can expose APIs configured for Sandbox.
Navigate to the Backends screen.
Click New Backend to display the Add Backend Server dialog box.
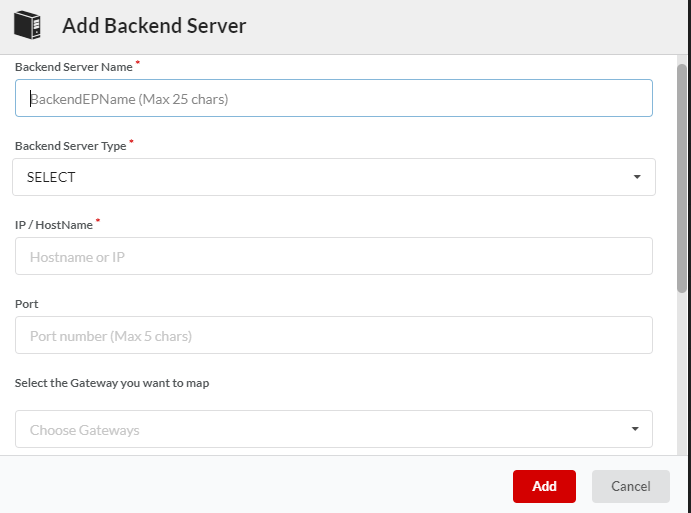
Fig. 5.9 Add Backend Server
In the Backend Server Name box, type a name for the Sandbox Backend Server.
Note
When you configure endpoints for an API using the Dynamic Routing scripts, use the Backend Server Name to route requests to the required Backend Server.
Click the Backend Server Type drop-down box to select Sandbox server type.
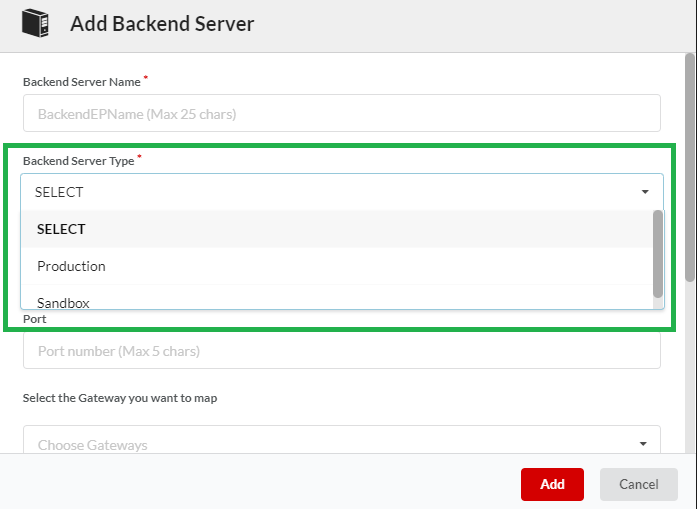
Fig. 5.10 Select Server types
In the IP/Hostname box, type the IP or host name for the Sandbox Backend Server.
In the Port box, type the port number for the Sandbox Backend Server.
In the Description box, type the details you want to add for the Sandbox Backend Server.
The Select the Gateway you want to map drop-down displays the list of Gateways that are configured for the publisher organization. From the Select the Gateway you want to map drop-down, choose the Gateway to which you want to map the Backend Server. The Gateways you select will appear at the top of the drop-down. You can remove the selected Gateways by clicking the
 .
.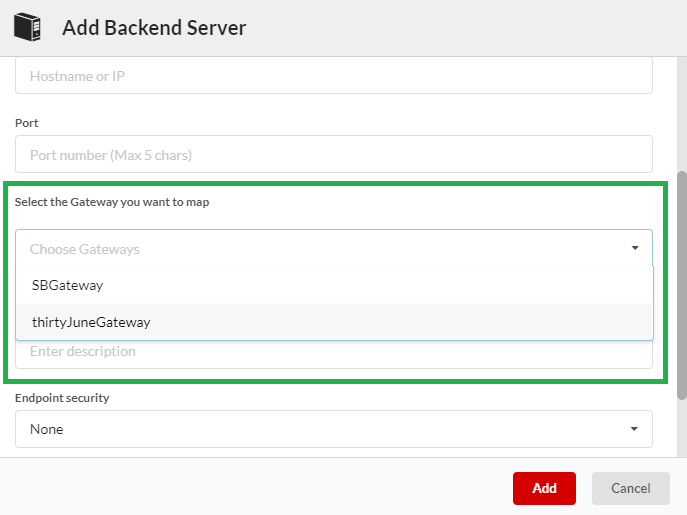
Fig. 5.11 Gateway to Map
Note
The Backend will be mapped only to the selected Gateways.
You can also map the backend from the Backend Point tab of the selected Gateway. Refer Backend Point
- Click the Endpoint security drop-down box to select None as Sandbox environment doesn’t support Endpoint security.
- Click Submit to save changes and exit the Add Backend Server dialog box. The newly added Sandbox backend displays in the Backends screen.
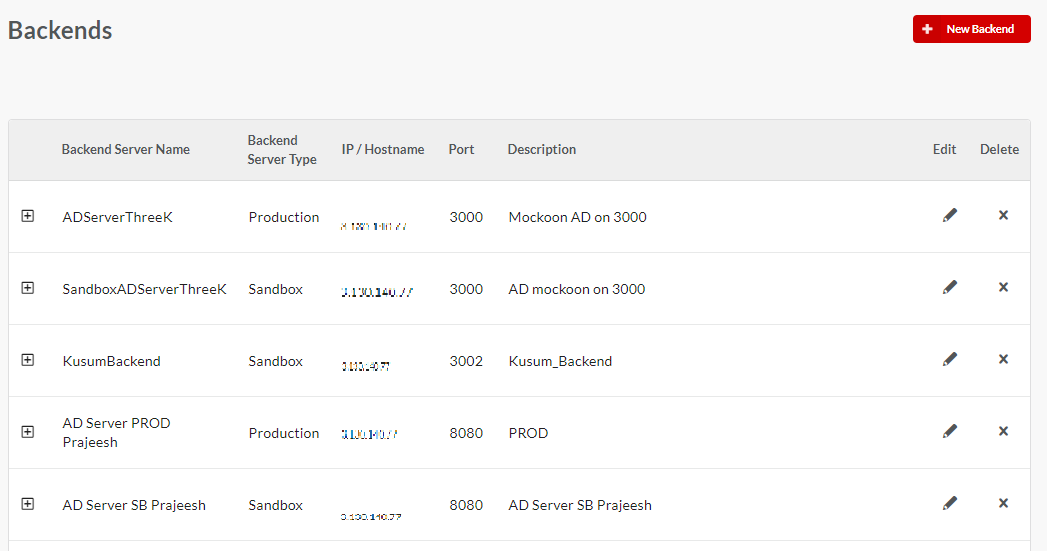
Fig. 5.12 Sandbox Backend
Note
An Admin user can view the Sandbox backend that has been enabled for propagation to Sandbox Gateway.
Next Steps: Propagate the Sandbox backend endpoints to Sandbox Gateway.
5.4. Propagating Backend Endpoints to SandBox Gateway
After the Sandbox backend is configured, it needs to be propagated to the Sandbox Gateway to be made operational.
To propagate backend endpoints:
- Navigate to the Gateway Synchronization - Changes screen.
- Click the Sandbox tab, and then Changes to Backend Endpoint accordion tab to display an expanded view of the list of backend that need propagation.
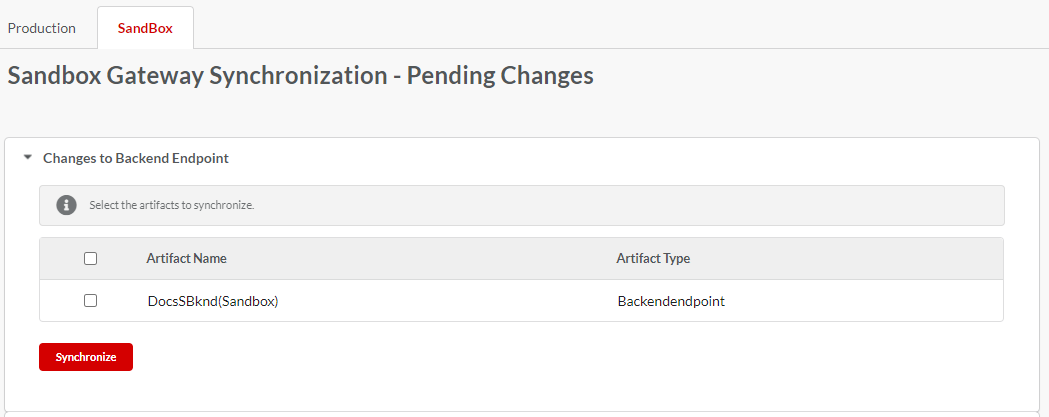
Fig. 5.13 Gateway Sync
- In the displayed list, click to select the check box(es) corresponding to the backend that you want to propagate to the Gateway to make them operational in the Sandbox environment.
- Click Synchronize to start the synchronization process. The Gateway Sync dialog displays.
- In the Gateway Sync dialog box, click Sync to start the propagation process.
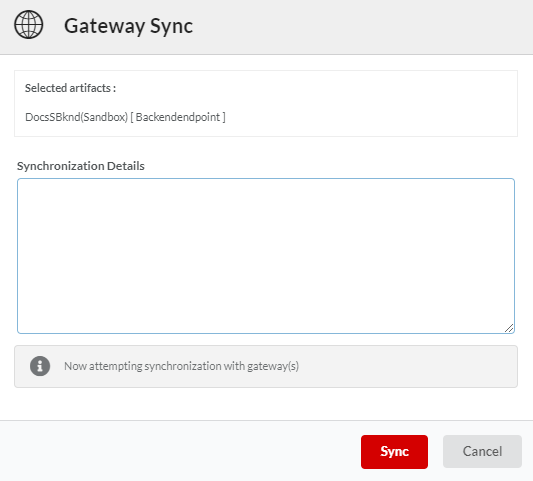
Fig. 5.14 Gateway Sync dialog
In the Gateway Sync dialog box, in the Synchronization Details box, type the details related to the Synchronization and click Finish to complete the sync process.
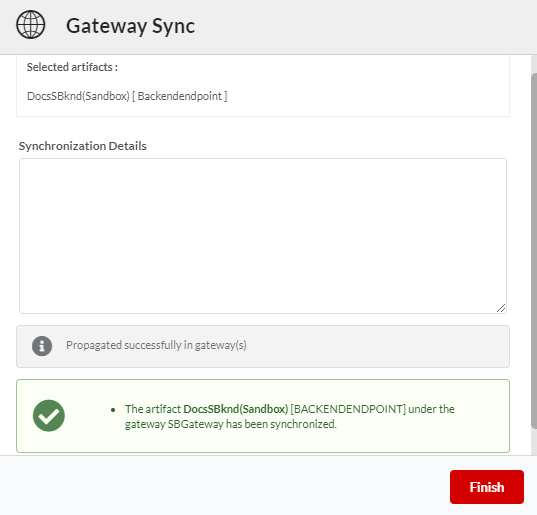
Fig. 5.15 Gateway Sync dialog
The Backend Endpoint is successfully synced to the Sandbox Gateway and no longer appears in the Changes to Backend Endpoint tab.
Next Steps: Configure API Endpoint for Sandbox.
5.5. Configuring API Endpoint for Sandbox
You can have an API Endpoint for Sandbox environment along with Production environment. The Sandbox environment is meant solely for testing the APIs with the intent of learning how to use them. You can call it the “Try-it Out” version of the Production environment. The Sandbox environment, nevertheless, has production-like data and capabilities. Sandbox allows the Consumers to try out APIs via the Sandbox Endpoints before going live and start using the APIs via the Production Endpoints. It is, however, important to know that the Usage Policies set for Sandbox environment are comparatively more rigid.
Before you begin:
It is assumed that you have a basic knowledge about how to create a REST API and add/edit API resources, configure endpoints, and manage REST API Versions and their Visibility. If not, visit these sections: Create an API and Edit an API.
To configure API Endpoints for Sandbox environment:
Navigate to the REST API Configuration screen.
In the REST API Configuration screen, click the Endpoints tab.
In the Sandbox panel, click and drag the Sandbox toggler to the right to enable Sandbox feature. Inversely, click and drag the Sandbox toggler to the left to disable it.
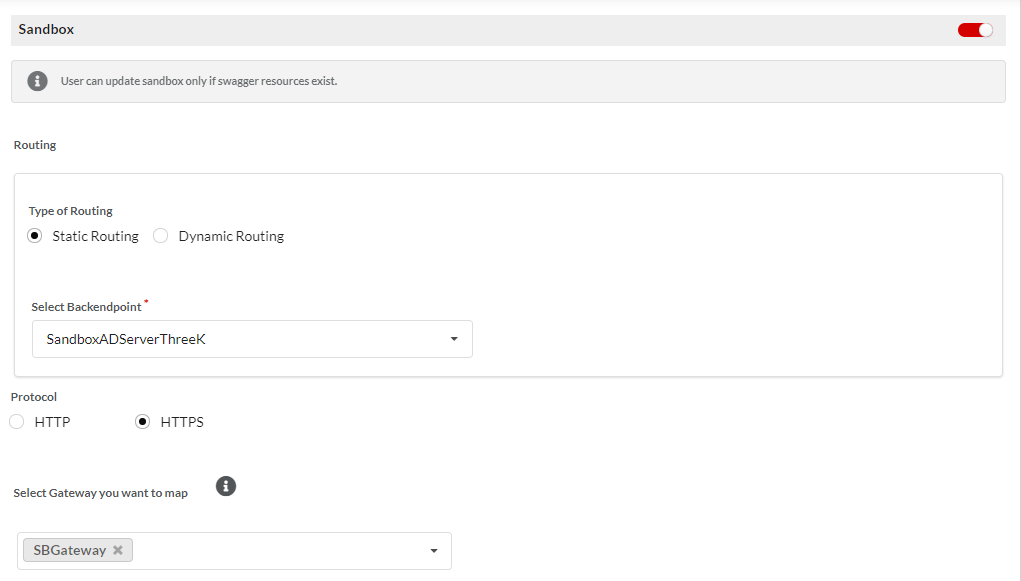
Fig. 5.16 Sandbox Endpoint
Note
APIs will not be propagated to Sandbox environment unless the Sandbox toggler is enabled.
In the Sandbox panel, under Types of Routing, you can find two radio buttons namely, Static Routing and Dynamic Routing.
In Routing, in Type of Routing, click to select the Static Routing radio button to display the Static Routing screen (Static Routing radio button is selected by default, displaying the Static Routing screen).
Note
Sandbox environment allows both static and dynamic routing.
In Routing, in Type of Routing, click to select the Dynamic Routing radio button to display the Dynamic Routing script box. In the Script for Dynamic Routing box, type the script that will be used to dynamically route messages to the required Endpoint(s).
If you have selected Static Routing, click the Select Backendpoint drop-down box to select a Real Endpoint you want to use for the Sandbox environment. The Select Backendpoint drop-down box displays all Real Endpoints added to the Sandbox environment from the Backends main menu option. In Protocol, click to select between radio buttons HTTP and HTTPS. Selecting HTTPS implies that you want to use SSL security over HTTP.
The Select the Gateway you want to map drop-down displays the Sandbox Gateway configured for the publisher organization. From the Select the Gateway you want to map drop-down, choose the Sandbox Gateway to map the API. The Sandbox Gateway you select will appear at the top of the drop-down. You can remove the Sandbox Gateway by clicking the
.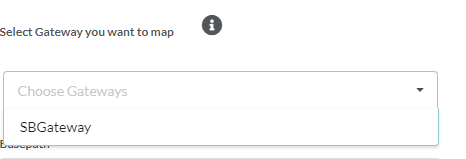
Fig. 5.17 Gateway to Map
You can also map the API Version from the API tab of the selected Gateway. Refer API.
In the Basepath box, type the base path to be used with the Sandbox Endpoint. The base path is the root path of the Real Endpoint.
Note
- Sandbox Basepath has “Production basepath” as the default value.
- Sandbox Exposure Path should be configured uniquely on API Endpoint.
- Sandbox Basepath needs to be configured same as Sandbox backend basepath.
In the Exposure Path, type the exposure path to be used with the Sandbox Endpoint. The exposure base path is the root path that is visible to API consumers.
Note
Sandbox Exposure Path has a default value that is a combination of Publisher Sandbox Base Path and Production Exposure Path (
PublisherSandboxBasePath+ProductionExposurePath) that can be modified by the user.Click the Select EndPoint security drop-down box to select security options as Pass-through.
Pass-through: When the user selects pass-through authentication as the API endpoint security, the message is allowed to pass through the Gateway without any processing or alterations and the backend server then authenticates the credentials passed in the message before sending the response back to the client.
Note
As the Sandbox environment is for testing case, Sandbox gateway doesn’t process any security authentications.
- Click Save as Draft to save changes.
- On the REST API Configuration screen, click the drop-down list and select Send for Approval(or Approve, if you have the approval rights) option to submit the API for propagation.
Note
You can add endpoints configurations to a Sandbox API only if the API is in its Draft State.
Note
An Admin user can view the REST APIs that have been enabled for propagation to Sandbox Gateway
Next Steps: Propagate the APIs that were configured to Sandbox Gateways.
5.6. Propagating APIs to Sandbox Gateways
After the Sandbox APIs are configured, it needs to be propagated to the Sandbox Gateway to be made operational.
To propagate APIS to Sandbox Gateways
Navigate to the Gateway Synchronization - Changes screen.
Click the Sandbox tab, and then Changes to Global Config, API, Usage Plan, Policy accordion tab to display an expanded view of the list of APIs that need propagation.
In the displayed list, click to select the check box(es) corresponding to the APIs that you want to propagate to the Gateway to make them operational in the Sandbox environment.

Fig. 5.18 Gateway Sync
Click Synchronize to start the synchronization process. The Gateway Sync dialog displays.
In the Gateway Sync dialog box, click Sync to start the propagation process.

Fig. 5.19 Gateway Sync dialog
In the Gateway Sync dialog box, in the Synchronization Details box, type the details related to the Synchronization and click Finish to complete the sync process.
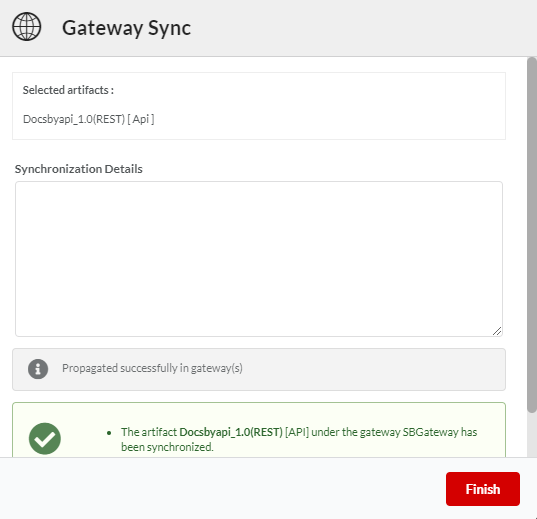
Fig. 5.20 Gateway Sync dialog
The API(s) is successfully synced to the Sandbox Gateway and no longer appears in the Changes to Global Config, API, Usage Plan, Policy tab.
Next Steps: Once the APIs are propagated to Sandbox, you need to create an API Pack and add the resources and other artifacts to the API Pack.
5.7. Configuring API Pack for Sandbox
Before you begin, it is assumed that:
- The states of the APIs that you plan to add to the Pack is “Published”.
- You have basic knowledge regarding API Pack creation and the editing process for an API Pack. If not, visit these sections: Create an API Pack and Edit an API Pack.
Once the APIs are propagated to Sandbox, you need to add the resources and other artifacts to the API Pack.
5.7.1. Add Resources from Approved or Published REST APIs to a REST API Pack
You created/edited resources for Sandbox-enabled APIs when we was in the topic: Configuring API Endpoint for Sandbox. These resources can now be added to a Pack. All the resources from Approved and Published API Versions are available for forming Pack Contents for an API Pack.
Navigate to the API Packs Configuration screen.
In the API Packs Configuration Screen, click the Pack Contents tab. The Pack Contents tab displays a list of all resources that have been added to the Pack. In case you are adding Pack contents to the API Pack for the first time, an empty list with the message: “There are no pack contents added yet” displays.
Click Add Resources to Pack to add new resources to the Pack.
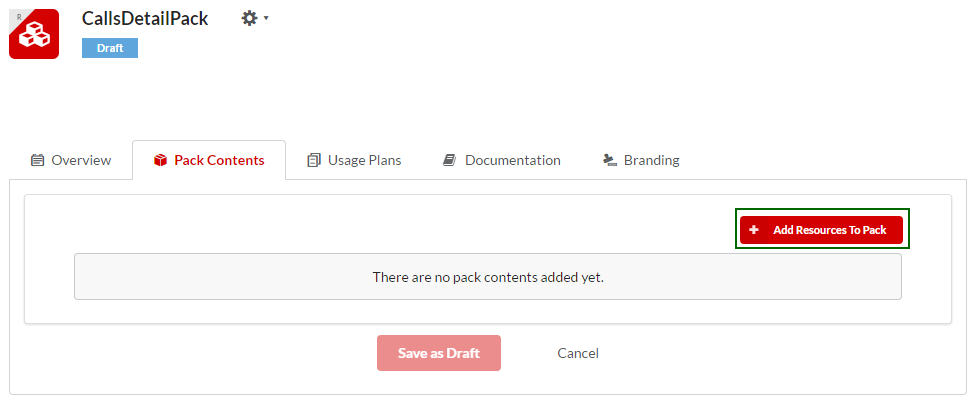
Fig. 5.21 Add Resources to Pack
The Add Resources to Pack dialog box displays.
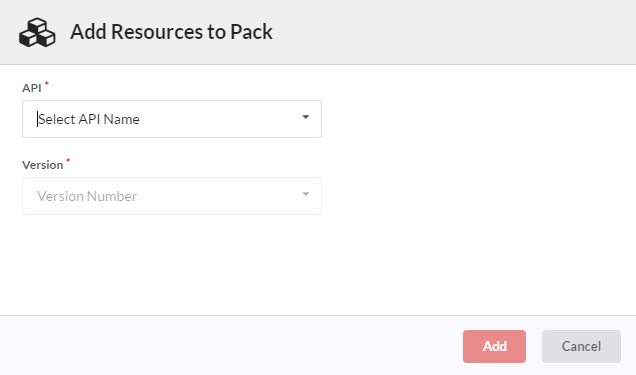
Fig. 5.22 Add Resources to Pack dialog
Click the API drop-down list to select the Sandbox-enabled REST API that has the resource(s) you want to add to the Pack Contents list. The latest version number of the selected API auto-fills in the Version box and the list of resources from that API Version displays under Select Resources For Pack below. Click the API box to display the drop-down list if you need to view the drop-down list again after selection.
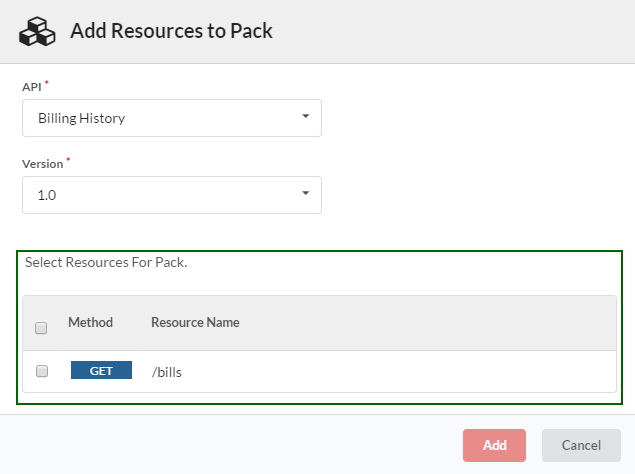
Fig. 5.23 Add Resources to Pack dialog - Select API
Note
If there are no Approved or Published version of the selected API, the Version drop-down displays a “No Matches” message
Click to select the check boxes corresponding to Resource names that you want to add to the API Pack. Alternatively, you can click the header check box to select all resources in one go.
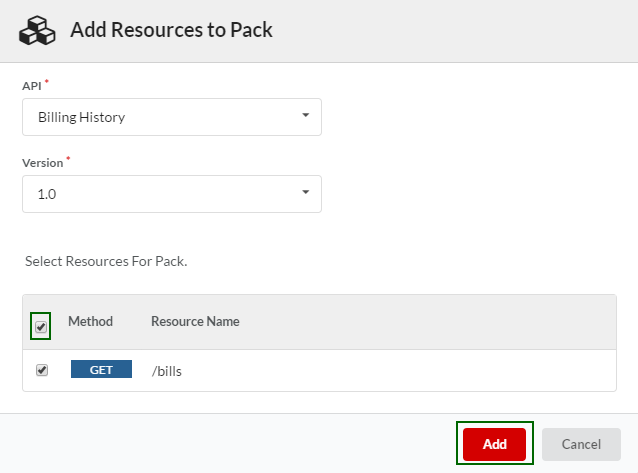
Fig. 5.24 Add Resources to Pack dialog - Select all Resources
Note
By default, the Version drop-down box displays the most recent version of the Approved and Published API. To choose a different Version, click the Version drop-down box.
Click Add to add the selected resources to the API Pack. The Add Resources to Pack dialog box closes. The newly added Resource(s) now displays in the Pack Contents list.
Click Save as Draft to save the newly added Pack Contents. A notification message “API Pack details were updated successfully” displays indicating that the newly added Pack contents are saved successfully.
Note
The Add Resources to Pack option is enabled and hence available for API Pack versions that are in Draft State.
5.7.2. View and modify a Sandbox Plan
A Sandbox Plan is a set of policies that defines the level of Sandbox service that is offered to the subscriber. If a Sandbox-enabled API is added to a pack, a Sandbox plan is created by default for that API pack. You can also add a regular usage plan apart from the Sandbox plan for an API Pack. Vist this section for more details: Create a Usage Plan.
Navigating to the API Packs screen.
In the API Packs Configuration screen, click the Usage Plans tab. Sandbox plan in draft state is displayed by default.
Note
Sandbox plan will change into draft state automatically while updating/inserting/deleting the API Pack contents of sandbox-enabled API version resources.
Note
The name Sandbox is restricted to the plan created for Sandbox. A User cannot modify Sandbox Plan name, Visibility, can not delete or use the name Sandbox for any other usage plan.
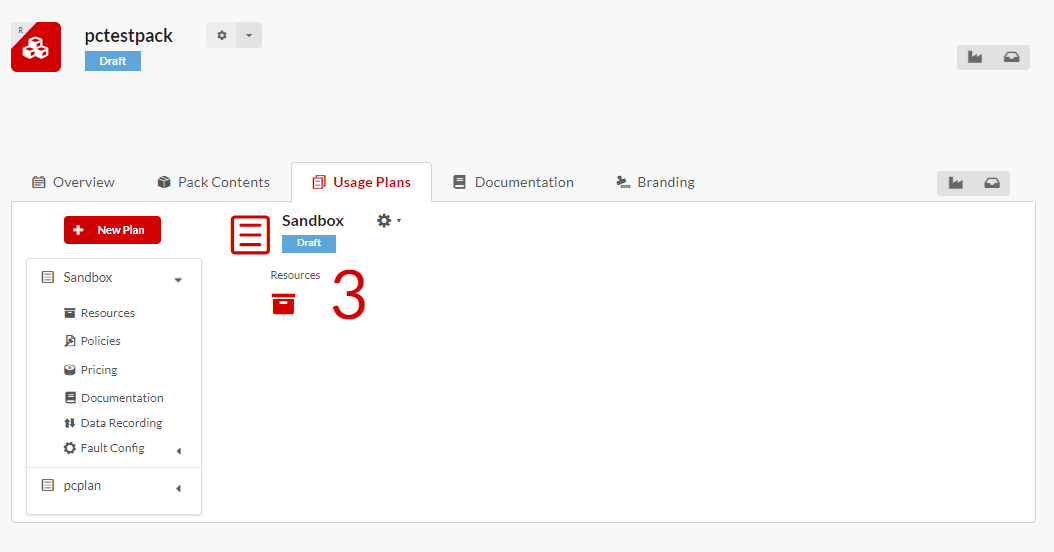
Fig. 5.25 Sandbox API Pack sandbox_usage_policy
Click Sandbox Plan name to display the menu items under it such as:
- Resources
- Policies
- Pricing
- Documentation
- Data Recording
- Fault Config
Resources
A user cannot add or modify resource details of a Sandbox plan. This will be a view-only section for users as all options will be disabled.
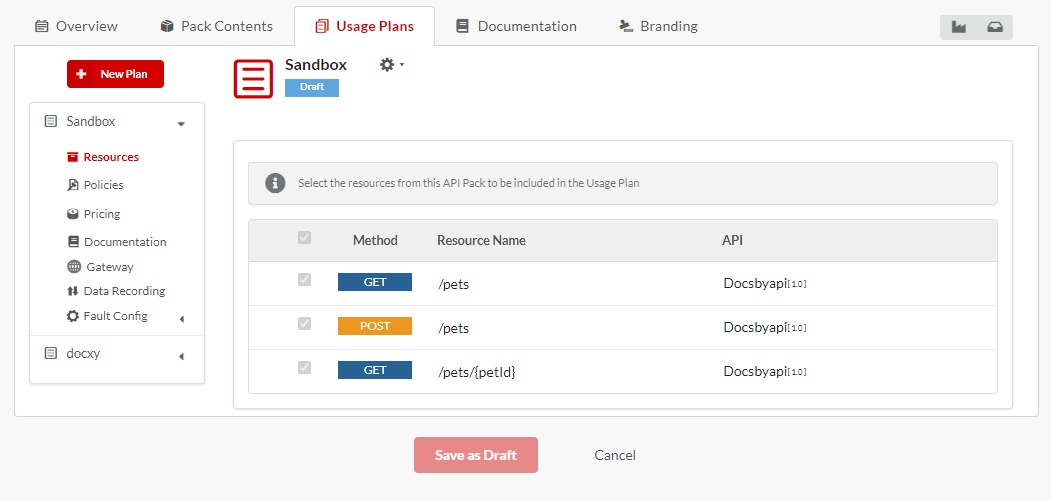
Fig. 5.26 Sandbox Resource
Attach a Plan Level Usage Policy to a Sandbox Plan
Plan-level Usage Policies are Usage Policies that are applied commonly to all the resources present in a Plan unless overriden at resource level.
Navigate to the Usage Plans tab of API Packs Configuration screen.
In the Usage Plans tab, click the Sandbox Plan name to display collapsible sub-tabs and the Plan Summary panel.
From the collapsible sub-tabs, click Policies to display the Policies configuration options.
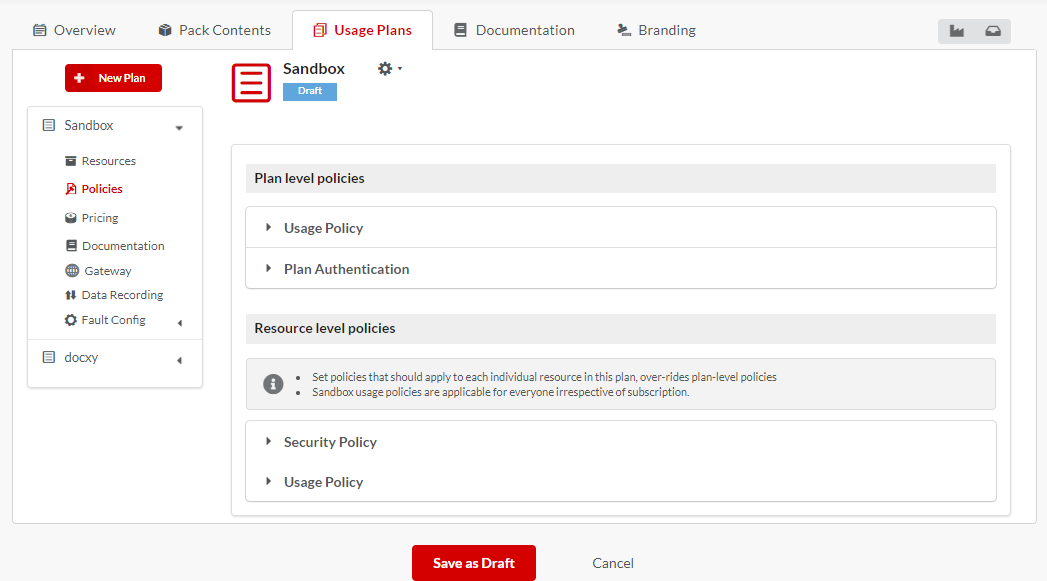
Fig. 5.27 Policies
Under Plan level policies, click Usage Policy accordion tab to open the Usage Policy section. A list of usage Policies attached to the Plan displays. In case you are attaching policies newly to a Plan, the message, “There are no policies added yet’ displays.
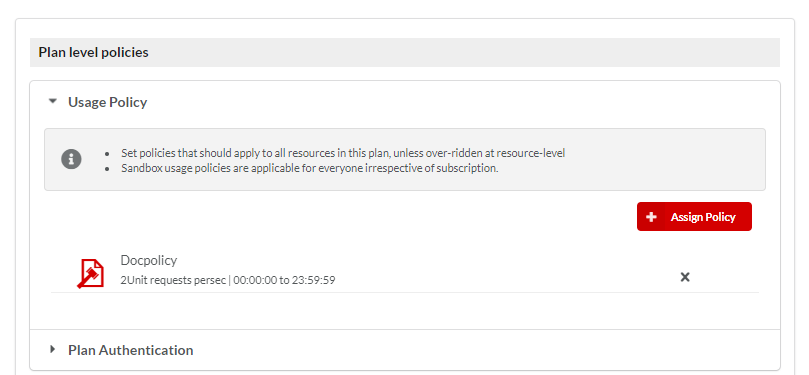
Fig. 5.28 Plan level Policies
Note
Sandbox usage policies are applicable for everyone irrespective of subscription.
Click the Assign Policy button
 to assign a new policy to the Plan. The Plan Level - Select Existing Usage Policies dialog box displays.
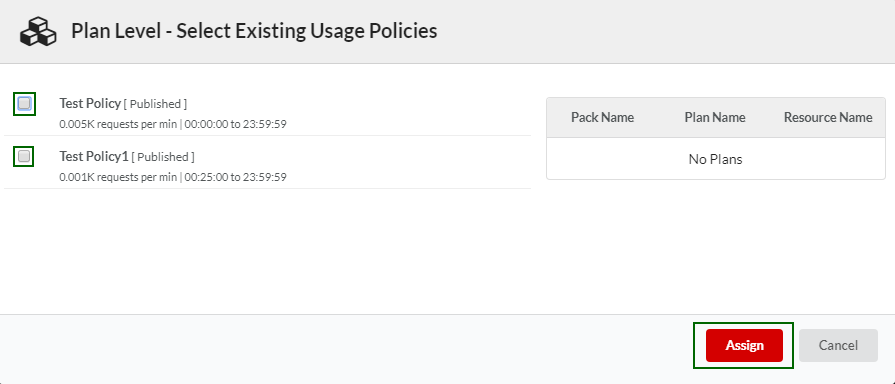
Fig. 5.29 Select Existing Usage Policies dialog
Click to select the check box corresponding to the Usage Policy you want to apply to the Plan as a whole.
Note
Usage Policies that are in Approved and Published states appear in the Plan Level - Select Existing Usage Policies dialog box for selection but you can only send a plan for approval that has an Approved or Published Usage Policy attached to it and does not have any Usage Policy in Draft State.
Click Assign to add the Plan-level Usage Policy to the Plan and close the Plan Level - Select Existing Usage Policies dialog box. The Plan name displays in the Usage Policy section indicating that the Policy has been attached to the Plan.
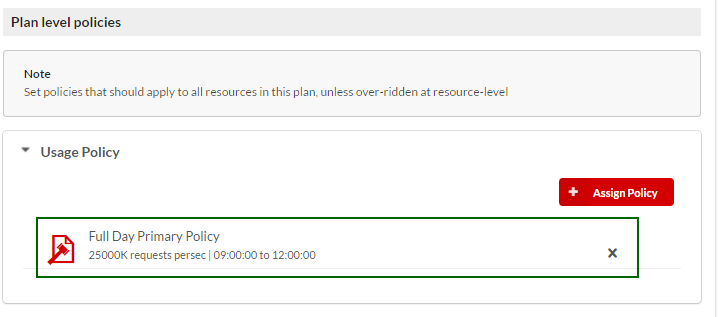
Fig. 5.30 Usage Policy section
Plan Authentication
A user cannot add or modify details of Sandbox plan authentication. This will be a view-only section for users as all options will be disabled. Subscription authentication will be the default plan authentication for Sandbox plans.
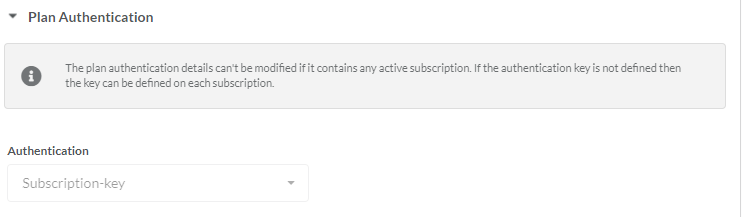
Fig. 5.31 Sandbox Plan Authentication
Click Save as Draft to finish adding the Plan level Usage Policy to a Sandbox Plan.
To add a Resource-level Usage Policy, visit ‘Attach a resource level policy to a usage plan’ below.
Note
When you have the same policy as the Plan-level and Resource level Policy, the Resource level Policy is applied at runtime.
Attach a Resource Level Policy to a Sandbox Plan
The policies that are attached to a Sandbox Plan shall be copied and applied as is to all the resources that fall under the Sandbox Plan. A Usage Policy is applied to only those resources that are added to the Sandbox Plan.
The Policies tab has accordion tabs for each Policy, wherein clicking a Policy tab toggles between expanding and collapsing relevant tab details.
To display the resources that are covered by the Usage Policy, click Resource level Policies tab.
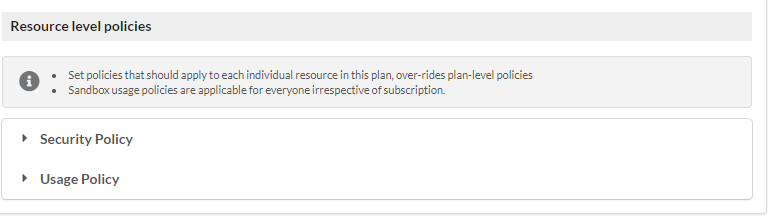
Fig. 5.32 Sandbox Resource level Policies
A user cannot add or modify the security policy of a Sandbox plan.
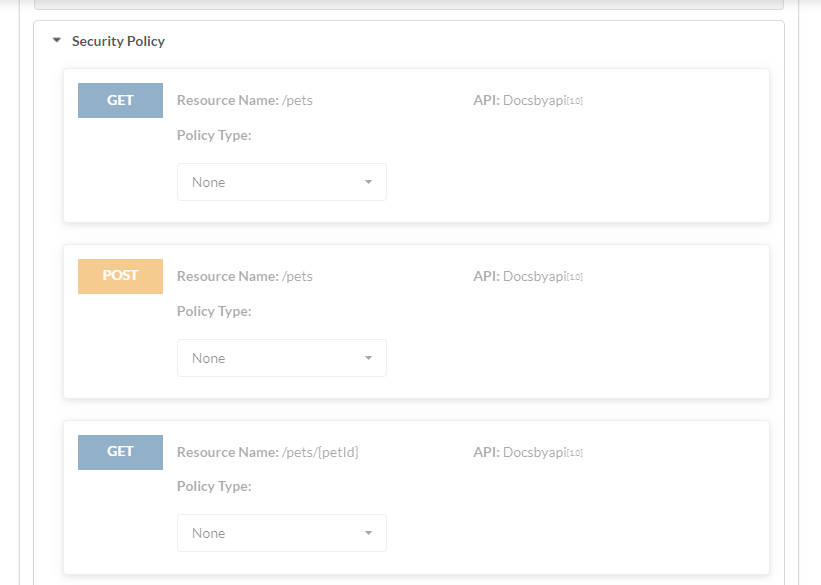
Fig. 5.33 Sandbox Resource Security Policy
To attach an existing Usage Policy to a Resource in a Sandbox plan:
Navigate to the Usage Plans tab of Resource level Policies tab.
Click Usage Policy accordion tab to open the Usage Policy section. The list of resources added to the Sandbox Plan displays. Each row represents a Resource.
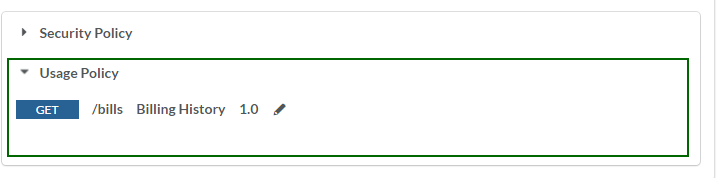
Fig. 5.34 Usage Policy tab
Click the edit icon
 next to the Resource name to attach an existing policy to the Resource. The Resource Level – Select Existing Usage policies dialog box displays.
Click the check box(es) corresponding to the Usage policy(ies) that you want to attach to the Resource. You can attach multiple policies to a Resource provided there are no runtime overlaps with respect to the time duration for which they are enforced.
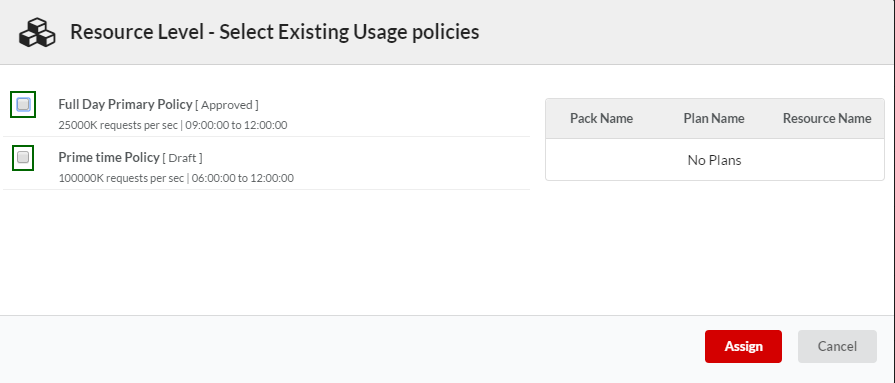
Fig. 5.35 Select Resource-level policy
In the adjoining panel on the right, the Plans that are impacted by the selected policy display.
Click Assign to finish assigning the Usage Policy to the Plan. The assigned Policy displays underneath the Resource name.
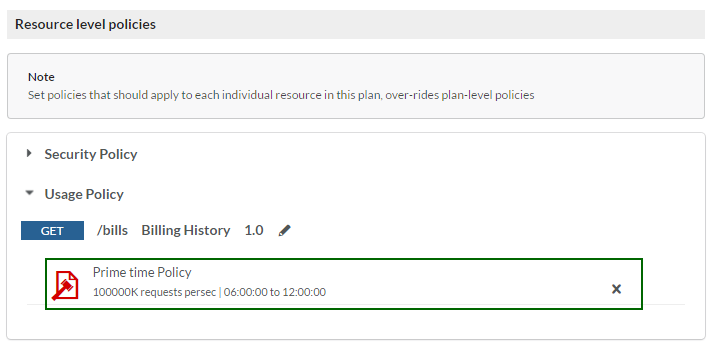
Fig. 5.36 Assign Usage Policy
Note
When you have the same policy as the Plan-level and Resource level Policy, the Resource level Policy is enforced.
Note
An Admin user can view the Usage policies that has been enabled for propagation to Sandbox Gateway and Production.
Unlink a Usage Policy from Sandbox Plan
Repeat steps 1 to 4 from the earlier task: Attach a Resource Level Policy to a Sandbox Plan*
If Usage Policies are attached to a Resource, you will find a delete icon
 against each Usage Policy.
Click the Delete icon
to remove the Usage Policy from the Resource. This unlinks the Usage Policy from the Resource.Click Save as Draft to save changes.
Pricing
A user cannot add or modify pricing details of a Sandbox plan. This will be a view-only section for users as all options will be disabled.
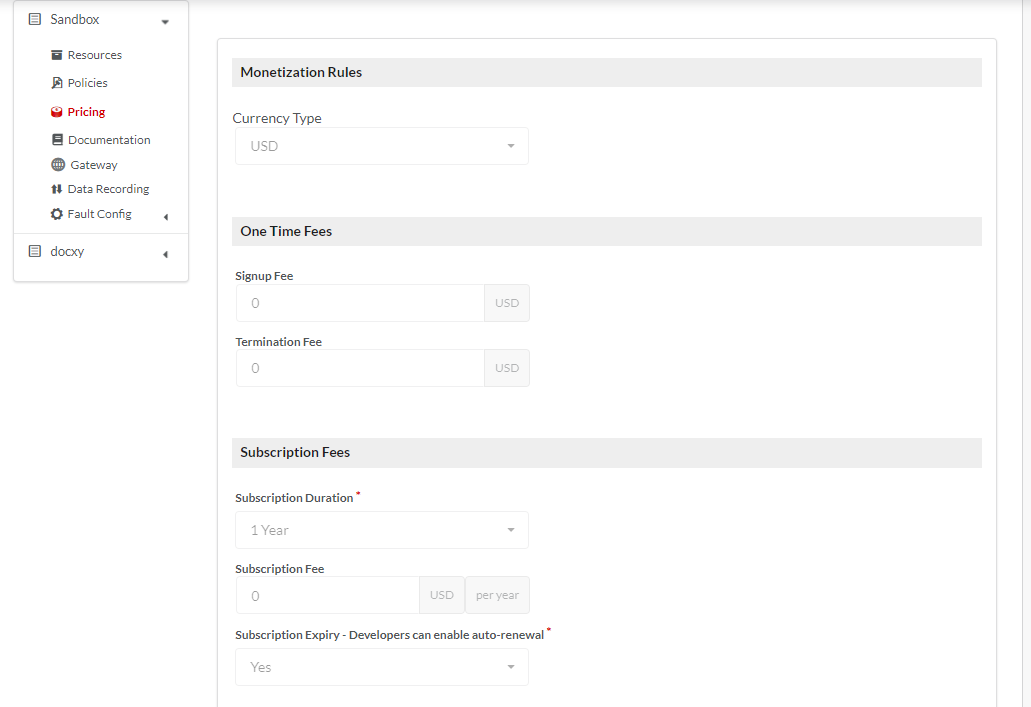
Fig. 5.37 Sandbox Pricing
Attach Documentation to a Sandbox Plan
Documentation that you attach to a Sandbox Plan is made available in the Developer portal at the Plan-level.
Note
The documentation file can be an HTML or Zip file. If you are using a Zip file, make sure you include an index.html file in the root folder.
Navigate to the Usage Plans tab of API Packs Configuration screen.
In the Usage Plans tab, click the Sandbox Plan name to display collapsible tabs and the Sandbox Plan Summary panel.
In the collapsed tabs, click Documentation to display the Sandbox Plan Documentation screen.
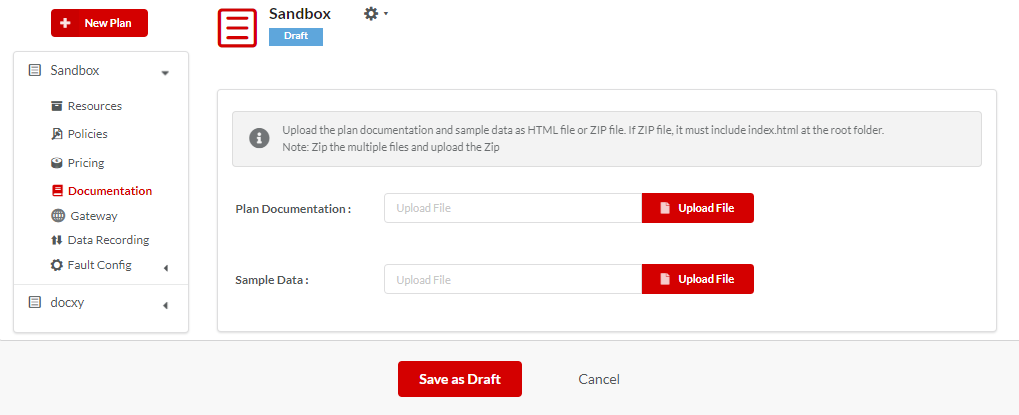
Fig. 5.38 Documentation
In Plan Documentation, click Choose File to attach a file from your computer that has the documentation related to APIs covered under the Sandbox Plan.
In Sample Data, click Choose File to attach a file from your computer that has the examples and samples for trying out APIs covered under the Sandbox Plan.
Click Save as Draft to save changes.
Map to Gateway
In the Map to Gateway section, you can map the Usage Plans to Sandbox Gateways.
Note
Only Sandbox Gateway will be available in the drop-down list.
The Select the Gateway you want to map drop-down displays the Sandbox Gateways that are configured for the publisher organization. From the Select the Gateway you want to map drop-down, choose the Sandbox Gateway to map the Usage Plan. The Sandbox Gateway will appear at the top of the drop-down. You can remove the Gateway by clicking the
.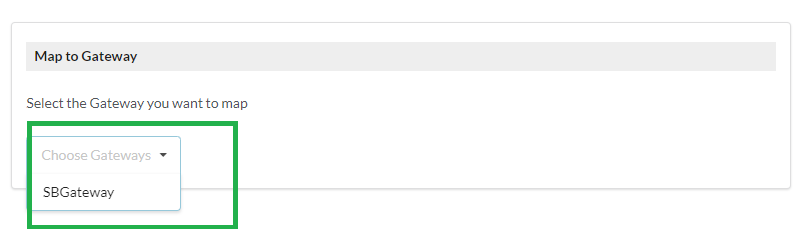
Fig. 5.39 Gateway to Map
You can also map the Usage Plan from the Plan tab of the selected Gateway. Refer Plan.
Enable Data Recording for a Sandbox Plan
The Data Recording sub-tab allows the user to manage data recording activities for each resource that is added to the Sandbox Plan. By default, the script is copied from the default script entered in the resource when creating the Sandbox API. The script that is included in a Usage Plan for each Resource is editable independent of the script at the API-level. If enabled, the script used in data recording of Resource at the Sandbox plan level is processed for that Resource and the resultant output data is logged for that Resource only. In case a particular Resource is found in more than one usage plan, scripts in each of such cases are processed and data logged in each case separately.
Navigate to the Usage Plans tab of API Packs Configuration screen.
In the Usage Plans tab, in the left panel, click the Sandbox Plan name to display collapsible Plan tabs.
Click the Data Recording tab to display the Data Recording screen.
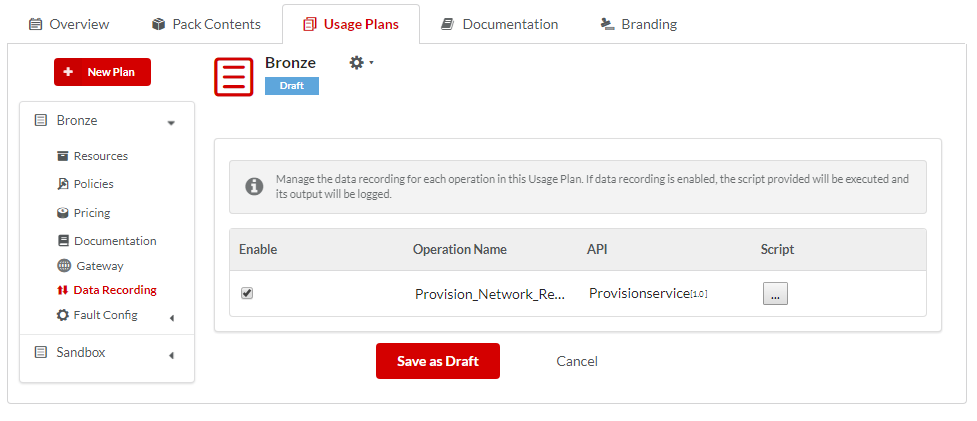
Fig. 5.40 Data Recording tab
Click to select the check box(es) under column head Enable corresponding to a Resource name(s) to allow transaction recording for the Resource(s).
Under Script, click the three-dotted button
 to display the Resource level - Data Recording script dialog box.
Edit the script to make changes, if required, and then click Submit.
Click Save as Draft to save changes.
Setting the REST Fault Configuration at Plan Level for a Sandbox Plan
Fault Configurations can be set for REST APIs at plan level for Sandbox plans.
Navigate to the REST API Configuration page.
Click Usage Plans tab and then click the Plan Name.
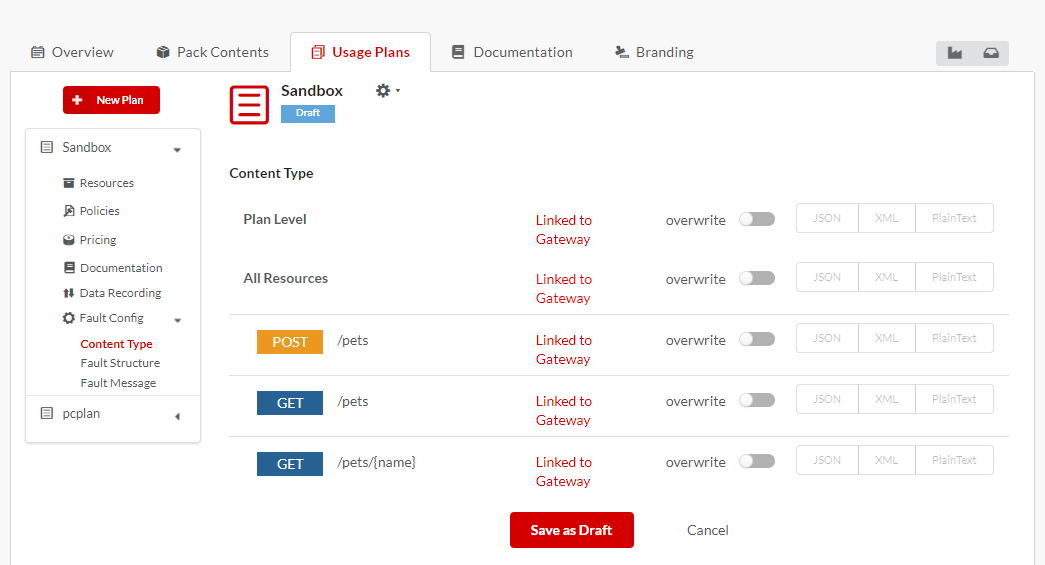
Fig. 5.41 Fault Configuration
Note
Fault configuration can be set only for Plans in Draft state.
Click Fault Configuration accordion tab and then click Content Type. You can overwrite the configured Content Type at Plan level and for all/individual Resources. Move the Overwrite toggler to the right to activate overwrite and do the inverse to retain the default Content Type settings. Upon enabling Overwrite, the Content Type options at Plan Level and for all/individual Resources will be enabled.
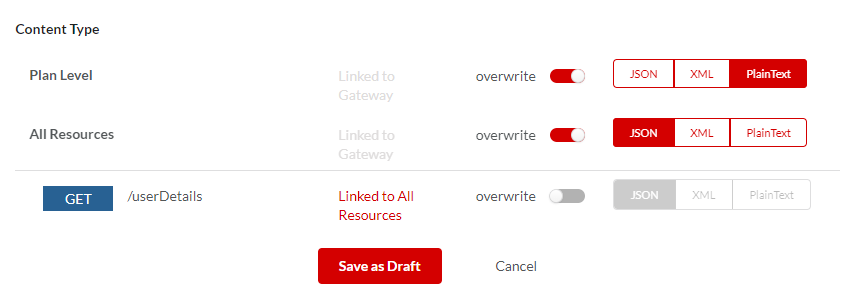
Fig. 5.42 Content Type
Click to select the required Content Type (JSON/XML/PlainText) option to be configured at Plan Level and for each all/individual Resources and then click Save as Draft. This will overwrite the default Content Type settings.
Next, click Fault Structure accordian tab. You can overwrite the configured Fault Structure at Plan level and for all/individual Resources. Move the Overwrite toggler to the right to activate overwrite and do the inverse to retain the default Fault Structure settings. Upon enabling Overwrite, the Fault Structure options at Plan Level and for all/individual Resources will be enabled.
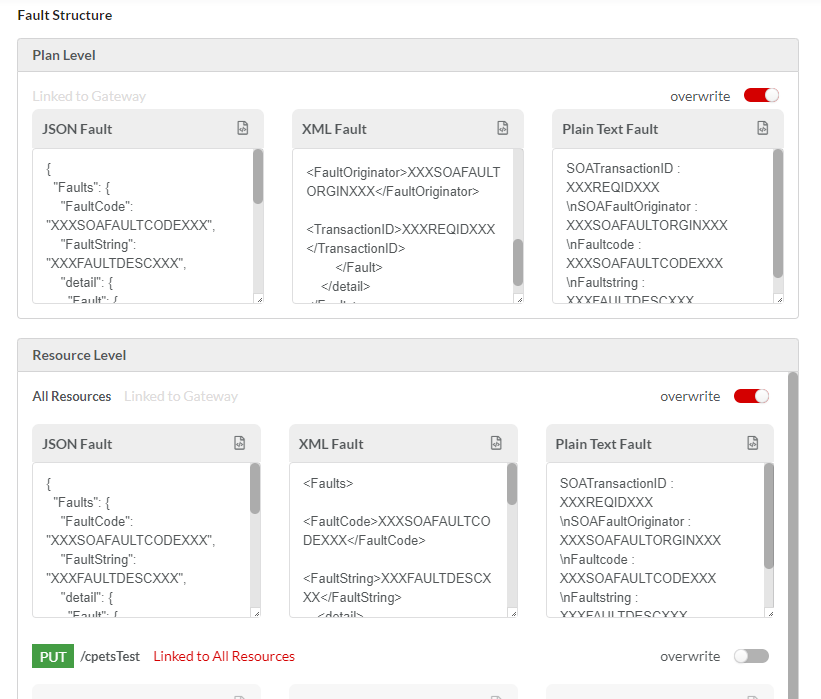
Fig. 5.43 Fault Structure
(Optional) Edit the JSON/XML/PlainText Fault box to make any required changes to the Fault template at Plan Level and for all/individual Resources and then click Save as Draft to save the changes.
Next, click Scenario-wise Fault Message. You can overwrite the configured Fault Message at Plan Level and for all/individual Resources. Move the Overwrite toggler to the right to activate overwrite and do the inverse to retain the default Fault Message settings. Upon enabling Overwrite, the Fault Message options at Plan Level and for all/individual resources will be enabled.
Note
If Fault Configuration is overwritten for All Resources of a Plan, then the fault configuration of All Resources will be applicable for each Resource.
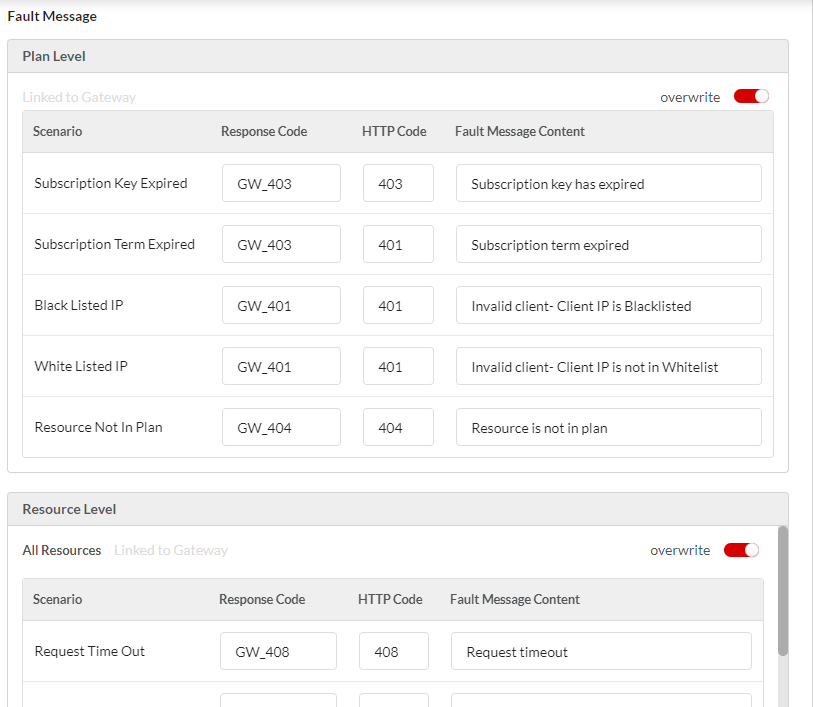
Fig. 5.44 Fault Message
(Optional) Click the Response Code box corresponding to the Fault scenario to type in a different fault code in the box.
(Optional) Click the HTTP Code box corresponding to the Fault scenario to type in a different HTTP code in the box.
(Optional) Click the Fault Message Content box corresponding to the Fault scenario to type in a different Fault Message in the box.
Click Save as Draft. This will overwrite the default Fault Message settings.
5.7.3. Send a Sandbox Plan for Approval
Once you are through with adding resources, attaching Usage Policies, setting fault configuration etc. the Plan is ready to be send for approval.
Navigate to the Usage Plans tab of API Packs Configuration screen.
In the Usage Plans tab, click the Sandbox Plan name to display the collapsible sub-menu and Sandbox Plan Summary screen.
In the Sandbox Plan Summary screen, click the Sandbox Plan Action icon
 to display the Sandbox Plan Action menu.
Click Submit for Approval to send the Sandbox Plan for approval, if Automatic Approval Workflow is not enabled. Click Approve to approve the Sandbox Plan, if Automatic Approval Workflow is enabled.
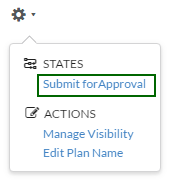
Fig. 5.45 Usage Plan for approval
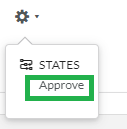
Fig. 5.46 Usage Plan for approval
The State of the Sandbox Plan changes from Draft to Submitted for Approval if Automatic Approval Workflow is not enabled. The state of the Sandbox Plan changes automatically from Draft to Approved if Automatic Approval Workflow is enabled.
Note
All the Plans (including the Sandbox plan) under an API pack have to be in the Approved or Published State for you to be able to send the Pack for approval.
Once the Sandbox Plan is approved, if Automatic Approval Workflow is not enabled, the Sandbox Plan’s State changes from Submitted for Approval to Approved. If Automatic Approval Workflow is enabled, the Sandbox Plan’s State changes from Draft to Approved. An Approved Sandbox Plan displays in the Gateway Sync page, from where it needs to be propagated and made operational in the Gateway. Once the Plan is propagated to the Gateway, the State of the Plan changes to the Published state. The Published state of the Plan (and other plans in the case of Usage-based strategy) allows you to send the Pack for approval.
5.7.4. Send an API Pack for Approval for Sandbox
You need to publish the Sandbox plan and all the Usage Plans that have been created within a API Pack for you to be able to publish the API Pack. An API Pack is restricted from being send for approval if Sandbox/Usage Plan remains in the Draft or Approved State, which means that all the Plans under the Pack must be in the Published State.
Navigate to the API Packs Configuration screen.
Click the Action icon
 . The API Pack Action menu displays.
In the API Pack Action menu, click Submit For Approval to send the Draft API Pack for approval, if Automatic Approval Workflow is not enabled.
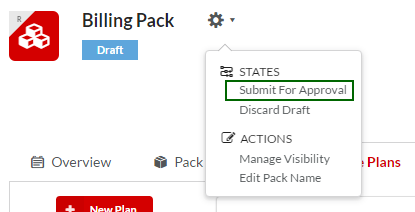
Fig. 5.47 Submit API Pack for approval
If Automatic Approval Workflow is not enabled, the State of the API Pack changes from Submit for Approval to Submitted for Approval and after the Pack is approved, the state of the API Pack changes to Published.
In the API Pack Action menu, click Publish to publish the Sandbox plan in the Production Gateway, if Automatic Approval Workflow is enabled.
Note
An API Pack must first be published on Production Gateway before it can be published for Sandbox.
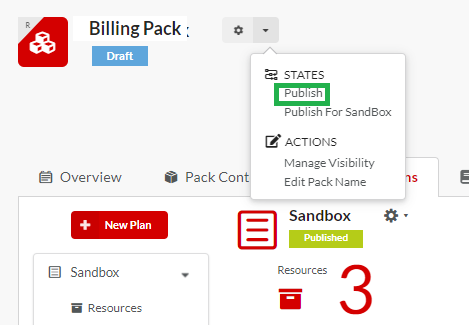
Fig. 5.48 Publish API Pack on Production
If Automatic Approval Workflow is enabled, the State of the API Pack changes from Draft to Published.
Once the API Pack is published on Production Gateway, click Publish for Sandbox to publish the API Pack on Sandbox.
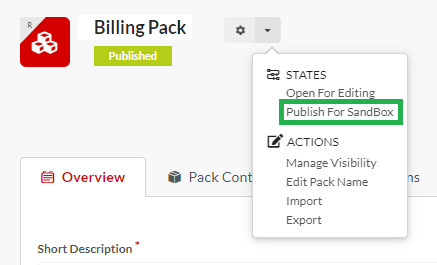
Fig. 5.49 Publish API Pack on Sandbox
If Automatic Approval Workflow is not enabled, the State of the API Pack changes from Publish for Sandbox to Submitted for Approval and after the Pack is approved, the state of the API Pack changes to Published.
Once the API Pack is published on Production Gateway, click Publish for Sandbox to publish the API Pack on Sandbox, if Automatic Approval Workflow is enabled. The State of the API Pack changes automatically to Published after clicking Publish for Sandbox.
API, API packs and Usage plans that have been published on Production and Sandbox are indicated by  and
and  symbols respectively. API, API packs and Usage plans that have not been published on Production and Sandbox are indicated by
  and
and  symbols respectively.
Note
In case any of the mandatory fields in the tabs is not filled or Sandbox/Usage Plan is not Approved, a notification message displays, and you are not allowed to send the Pack for approval.
Note
An Admin user can view the Sandbox Gateway Fault Configuration changes that has been enabled for propagation to Sandbox Gateway.
Note
Sandbox plans will not be visible on Production Gateway sync.
Once the artifacts are added to the pack, and the plan is defined, the artifacts needs to be propagated for Production and then for Sandbox.
Next Steps: Propagate the Sandbox Plans to SandBox Gateways.
5.8. Propagating Sandbox Plans to SandBox Gateways
Navigate to the Gateway Synchronization - Changes screen.
Click the Sandbox tab, and then Changes to Global Config, API, Usage Plan, Policy accordion tab to display an expanded view of the list of Usage Plans that need propagation.
In the displayed list, click to select the check box(es) corresponding to the Approved Usage Plan(s) that you want to propagate to the Sandbox Gateway to make them operational.
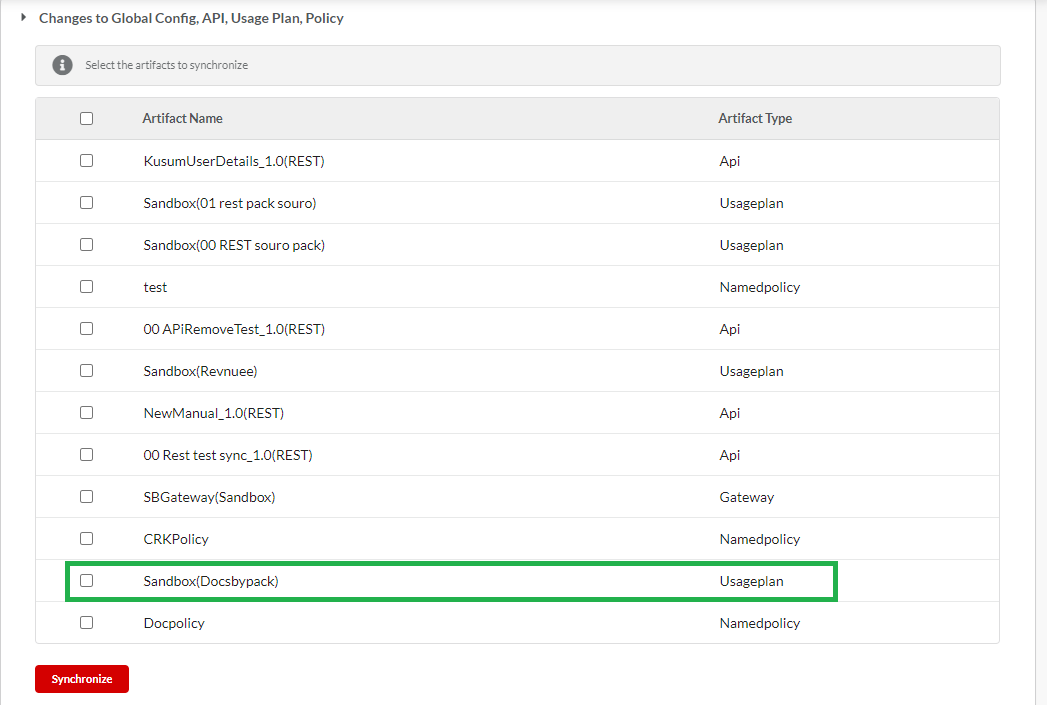
Fig. 5.50 Artifacts for propagation
Click Synchronize to start the synchronization process. A Gateway Sync dialog box displays.
In the Gateway Sync dialog box, click Sync to start synchronizing the selected Usage Plans.
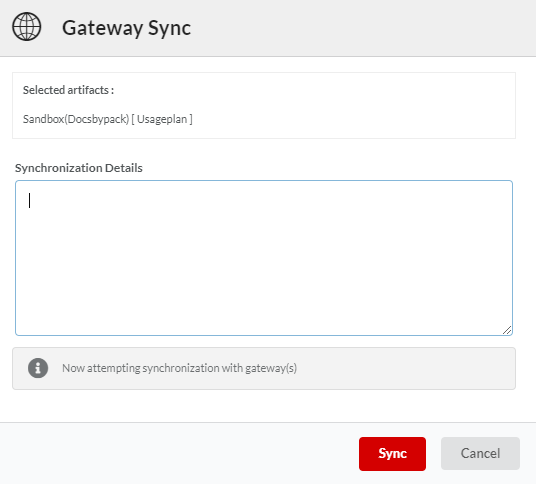
Fig. 5.51 Gateway Sync
All selected Usage Plans and Sandbox plans become operational in all the Gateways.
Note
All APIs linked to the Sandbox/Usage Plan being propagated must be in the Published state.
In the Gateway Sync dialog box, in the Synchronization Details box, type the details related to the Synchronization, and then click Finish to complete the Synchronization process.
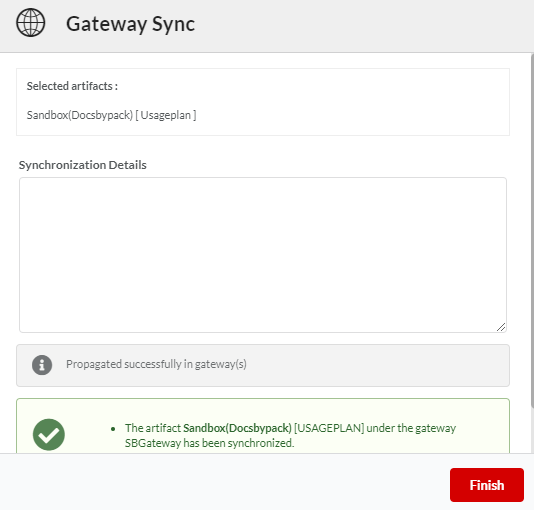
Fig. 5.52 Synchronization Details box
The Sandbox Plan is successfully synced to the gateways and no longer appears in the Changes to Global Config, API, Usage Plan, Policy tab. Similarly, you can also propagate other Usage Plan.
Next Steps: Propagate Usage Policies of a Sandbox Plan to Sandbox Gateway.
5.9. Propagating Usage Policies of a Sandbox plan to SandBox Gateway
Navigate to the Gateway Synchronization - Changes screen.
Click the Sandbox tab, and then Changes to Global Config, API, Usage Plan, Policy accordion tab to display an expanded view of the Usage Policies that need propagation.
In the displayed list, click to select the check box(es) corresponding to the Approved Usage Policies that you want to propagate to the Sandbox Gateway to make them operational.
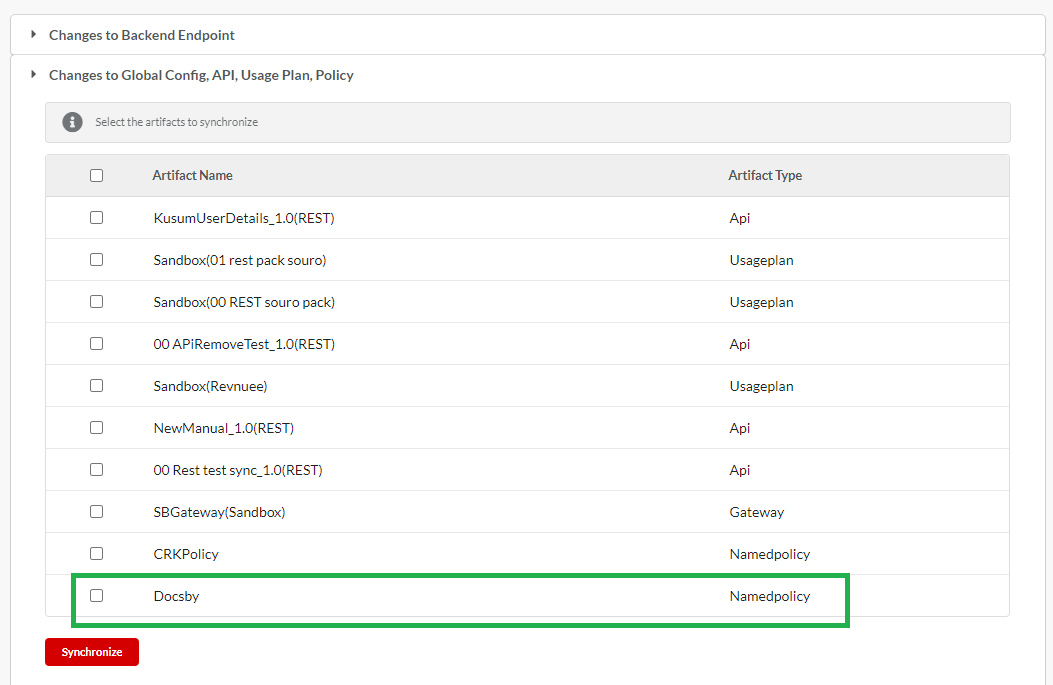
Fig. 5.53 Artifacts for propagation
Click Synchronize to start the synchronization process. A Gateway Sync dialog box displays.
In the Gateway Sync dialog box, click Sync to start synchronizing the selected Usage Policies.

Fig. 5.54 Gateway Sync dialog
All selected Usage Policies become operational in all the Gateways.
In the Gateway Sync dialog box, in the Synchronization Details box, type the details related to the Synchronization, and then click Finish to complete the Synchronization process.

Fig. 5.55 Synchronization Details box
The Usage Policies are successfully synced to the gateways and no longer appear in the Changes to Global Config, API, Usage Plan, Policy tab.
5.10. Edit an Existing Gateway
To edit a Gateway:
Navigate to the Gateways screen.
From the list of Gateways, select the Gateway that you want to edit.
Click the edit icon
next to the Gateway name. The Edit Gateway dialog box displays with populated data.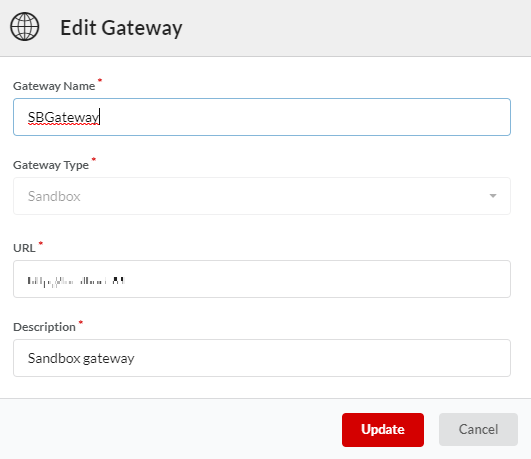
Fig. 5.56 Edit Gateway dialog
Make the necessary changes and then click Update to save changes and close the Edit Gateway dialog box.
5.11. Delete a Gateway
You can delete a Gateway only if any of the artifacts are not mapped.
To delete a Gateway:
Navigate to the Gateways screen.
From the list of Gateways, select the Gateway that you want to delete.
Click the delete icon
next to the Gateway name.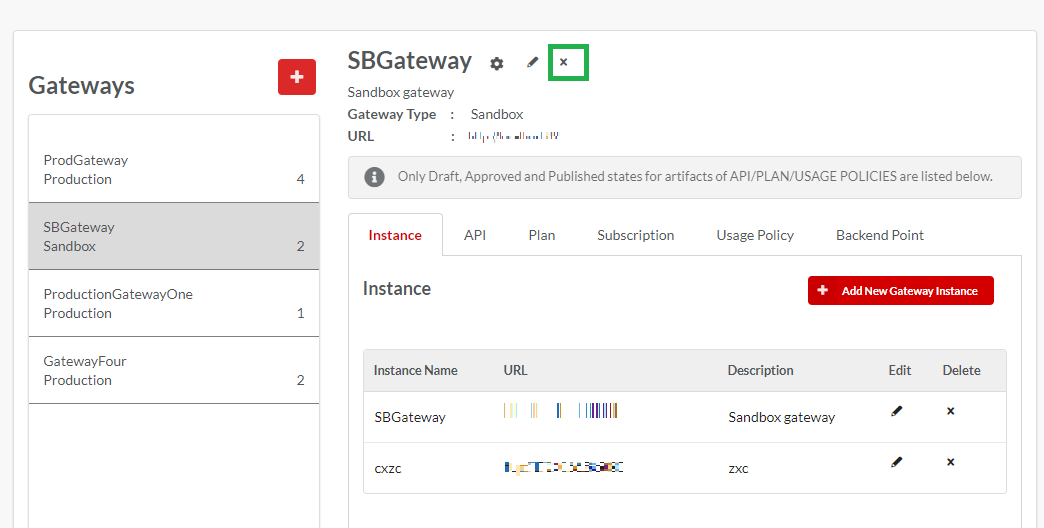
Fig. 5.57 Gateway - delete
The Gateway is removed from the Gateways list.
5.12. Instance
Under the Instance tab, you can find the list of all the instances that are mapped to this particular Gateway.
5.12.1. Add an New Instance
Navigate to the Gateways screen.
From the list of Gateways, select the Gateway under which you want to add an instance. The Instance tab displays.
Click Add new Instance. The Add new Instance dialog box displays.
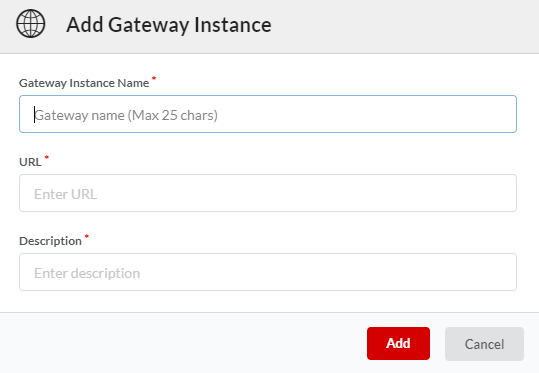
Fig. 5.58 Add Instance dialog
To fill the instance details, follow steps – 8 to 10 from the Configuring Sandbox Gateway section.
Click Add. The newly added Gateway Instance is now included to the Instances list.
5.12.2. Edit an Existing Instance
To edit an Instance:
Navigate to the Instance tab.
In the row that has the Instance that you want to edit, click the edit icon
. The Edit Instance dialog box displays with populated data.Click the edit icon
next to the Instance name. The Edit Instance dialog box displays with populated data.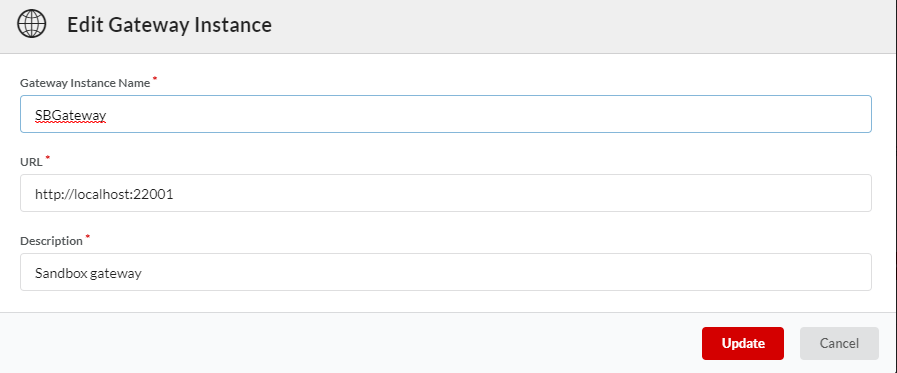
Fig. 5.59 Edit Instance dialog
Make the necessary changes and then click Update to save changes and close the Edit Instance dialog box.
5.12.3. Delete an Instance
To delete an Instance:
Navigate to the Instance screen.
In the row that has the Instance that you want to delete, click the delete icon
.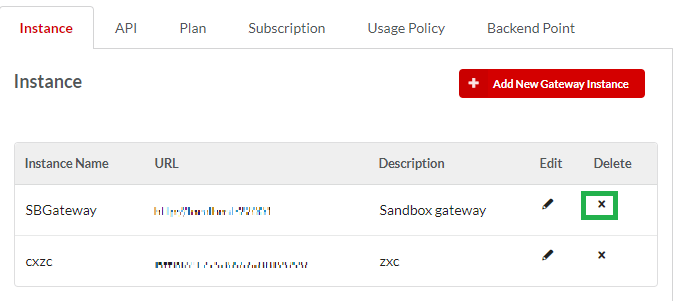
Fig. 5.60 Instance - delete
A confirmation message displays. Click OK to delete.
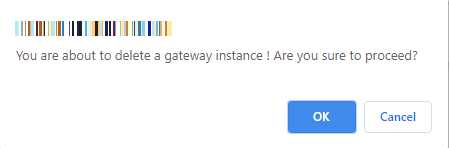
Fig. 5.61 Instance - delete
The Instance is removed from the Instance list.
5.13. API
Under the API tab, you can find the list of all the APIs that are under this particular Gateway.
The API tab displays all the API along with details such as:
- API Name with details (REST or SOAP API)
- API Version with details about the status(Draft/Approved/Published)
- API Status (Propagated or not)
- Mapped Filter - This option allows you to display - all API versions/only mapped API versions/only unmapped API versions.
- Map to Gateways - Toggle button to map the unmapped API versions to the Sandbox Gateway and unmap mapped API versions. Mapped API Versions are displayed in green while unmapped API Versions are displayed in red.
- Search box to search for a particular API version. Enter the query in the search box and click the search icon to display the results.
- Repropagate - This button allows users to repropagate propagated API versions.
To map the API Versions to a Gateway:
Navigate to the Gateways screen.
From the list of Gateways, select the Sandbox Gateway and then click the API tab. The API tab displays a list of all the API Versions under this particular Gateway.
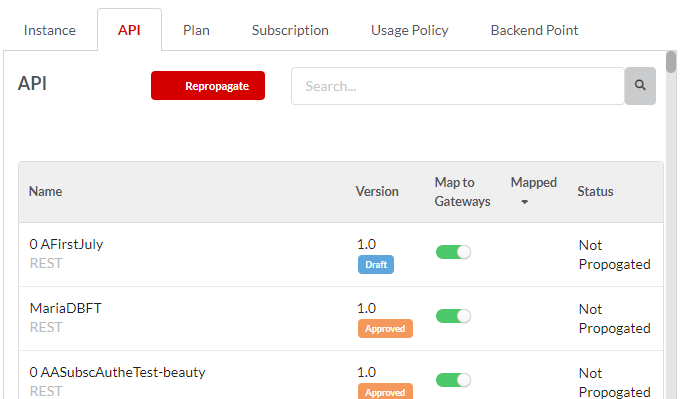
Fig. 5.62 API
Use the Mapped filter to filter API Versions using the options: All, Mapped, Unmapped. You can also search for the required API Version using the Search box.
Fig. 5.63 Mapped Filter
Note
Only draft, published or approved API versions are available to map.
In the row that has the API Version that you wish to map, click the Map to Gateways toggle button. Inversely, click the toggle button again to unmap.

Fig. 5.64 Toggle to Map
A notification message appears asking you to confirm the mapping.
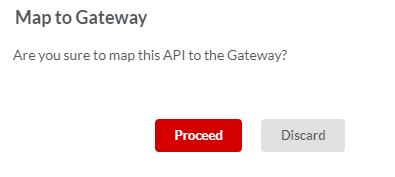
Fig. 5.65 Mapped Toggle
- Click Proceed to map. The API version will be mapped. The toggle button will turn green.
Although the API version is mapped, it is not yet propagated. The API version will be available to propagate in the Gateways Sync page.
To repropagate the propagated API Versions:
Navigate to the API tab.
Click Repropagate. The Propagate API dialog displays a list of already propagated APIs that are available for repropagation.
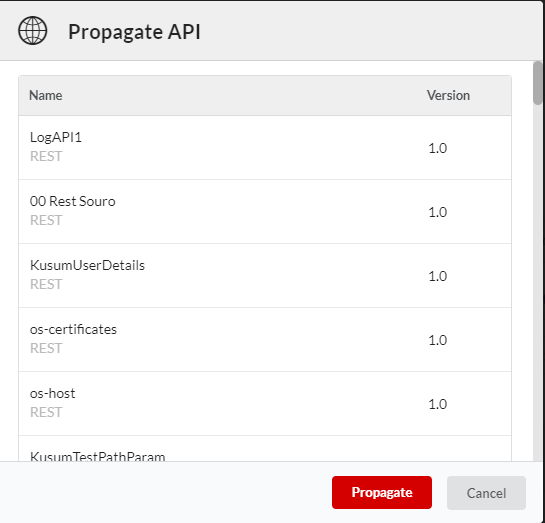
Fig. 5.66 Propagate API
Click Propagate. A success message displays upon successful propagation.
Fig. 5.67 Repropagation Successful
5.14. Plan
Under the Plan tab, you can find the list of all the plans that are under this particular Gateway.
The Plan tab displays all the plans along with details such as:
- Plan Name with details (Monetization Strategies)
- Pack Name with details (REST Plan) and status of the Plan (Draft/Approved/Published)
- Mapped Filter - This option allows you to display - all Plans/only mapped Plans/only unmapped Plans.
- Map to Gateways - Toggle button to map the unmapped Plans to the Sandbox Gateway. Mapped Plans are displayed in green while unmapped Plans are displayed in red.
- Plan Status (Propagated or not)
- Search box to search for a particular Plan. Enter the query in the search box and click the search icon to display the results.
- Repropagate - This button allows users to repropagate propagated Plans.
To map the Plans to a Gateway:
Navigate to the Gateways screen.
From the list of Gateways, select the Sandbox Gateway and then click the Plan tab. The Plan tab displays a list of all the Plans under this particular Gateway.
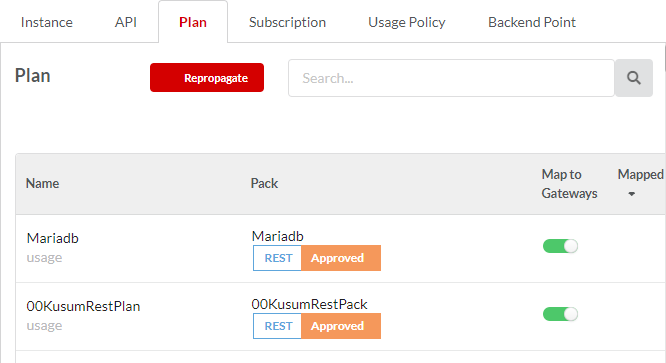
Fig. 5.68 Plan
Use the Mapped filter to filter Plans using the options: All, Mapped, Unmapped. You can also search for the required Plan using the Search box.
Fig. 5.69 Mapped Filter
Note
Only draft, published or approved Plans are available to map.
In the row that has the Plan that you wish to map, click the Map to Gateways toggle button. Inversely, click the toggle button again to unmap
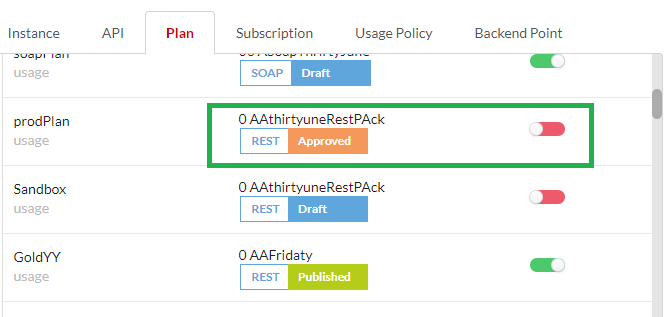
Fig. 5.70 Toggle to Map
A notification message appears asking you to confirm the mapping.
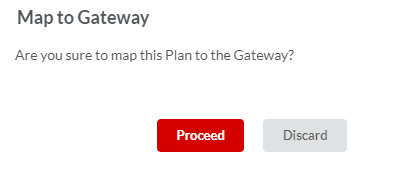
Fig. 5.71 Mapped Toggle
- Click Proceed to map. The Plan will be mapped. The toggle button will turn green.
Although the Plan is mapped, it is not yet propagated. The Plan will be available to propagate in the Gateways Sync page.
To repropagate the propagated Plan:
Navigate to the Plan tab.
Click Repropagate. The Propagate Plan dialog displays a list of already propagated Plans that are available for repropagation.
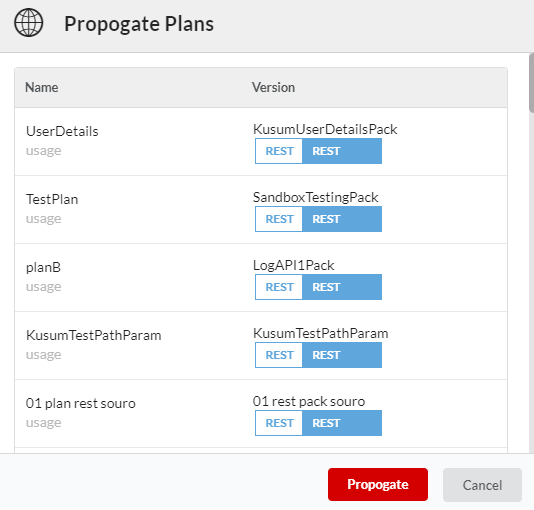
Fig. 5.72 Propagate Plan
Click Propagate. A success message displays upon successful propagation.
Fig. 5.73 Repropagation Successful
5.15. Subscription
Under the Subscription tab, you can find the list of all the Subscriptions that are under this particular Gateway.
The Subscription tab displays all the plans along with details such as:
- Developer Name with subscription status details (active)
- Pack Name
- Subscription Status (Propagated or not)
- Search box to search for a particular Plan. Enter the query in the search box and click the search icon to display the results.
- Repropagate - This button allows users to repropagate propagated Plans.
Navigate to the Gateways screen.
From the list of Gateways, select the Sandbox Gateway and then click the Subscription tab. The Subscription tab displays a list of all the Subscription under this particular Gateway.
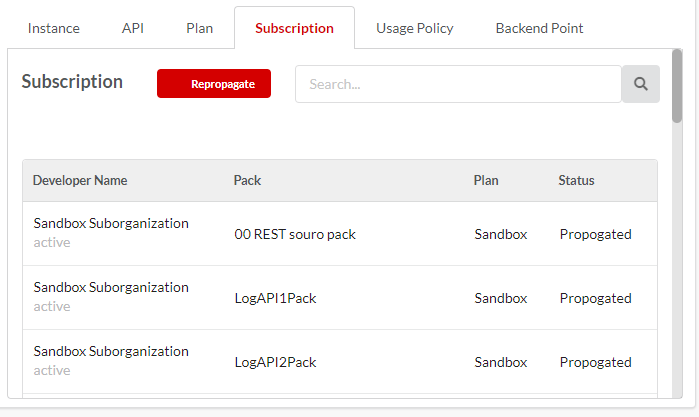
Fig. 5.74 Subscription
Note
If all the subscriptions under this tab are already mapped to the Gateway, then Mapped Filter option and Map to Gateways toggle button column will not be visible to the user.
Although the Subscription is mapped, it is not yet propagated. The Subscription will be available to propagate in the Gateways Sync page.
To repropagate the propagated Subscription:
Navigate to the Subscription tab.
Click Repropagate. The Propagate Subscription dialog displays a list of already propagated Subscriptions that are available for repropagation.
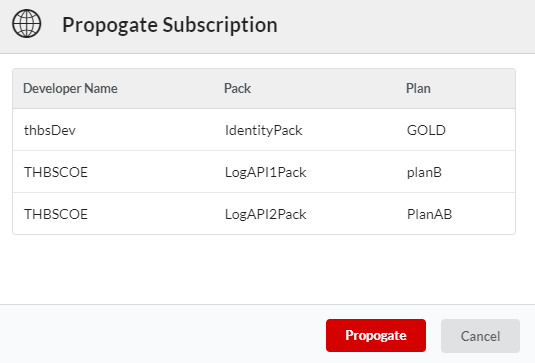
Fig. 5.75 Propagate Subscription
Click Propagate. A success message displays upon successful propagation.
Fig. 5.76 Repropagation Successful
5.16. Usage Policy
Under the Usage Policy tab, you can find the list of all the Usage Policies that are under the Sandbox Gateway.
The Usage Policy tab displays all the Usage Policies along with details such as:
- Policy Name with status details (Draft/Approved/Published)
- Policy Type
- Mapped Filter - This option allows you to display - all Policies/only mapped Policies/only unmapped Policies.
- Map to Gateways - Toggle button to map the unmapped Policies to the Sandbox Gateway. Mapped Policies are displayed in green while unmapped Policies are displayed in red.
- Search box to search for a particular Policy. Enter the query in the search box and click the search icon to display the results.
- Repropagate - This button allows users to repropagate propagated Policies.
To map the Policies to a Gateway:
Navigate to the Gateways screen.
From the list of Gateways, select the Sandbox Gateway and then click the Policies tab. The Policies tab displays a list of all the Policies under this particular Gateway.
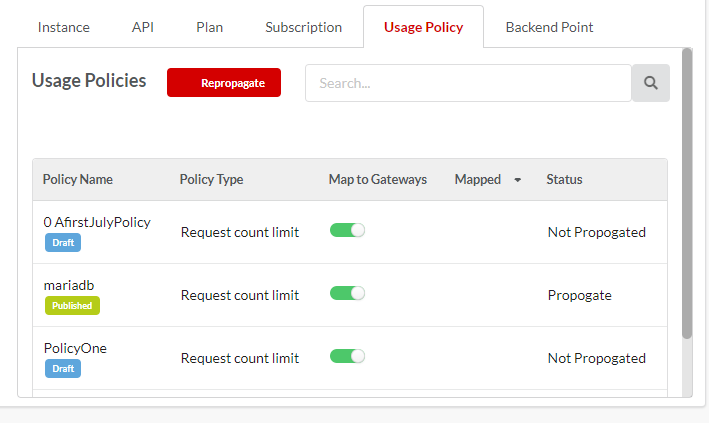
Fig. 5.77 Policies
Use the Mapped filter to filter Policies using the options: All, Mapped, Unmapped. You can also search for the required Policy using the Search box.
Fig. 5.78 Mapped Filter
Note
Only draft, published or approved Policies are available to map.
In the row that has the Policy that you wish to map, click the Map to Gateways toggle button. Inversely, click the toggle button again to unmap.
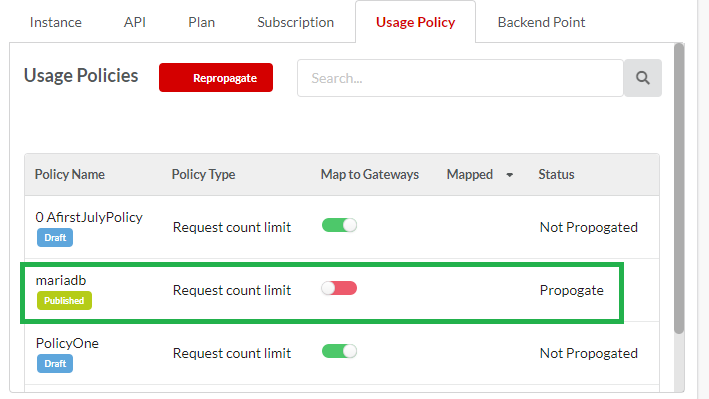
Fig. 5.79 Toggle to Map
A notification message appears asking you to confirm the mapping.
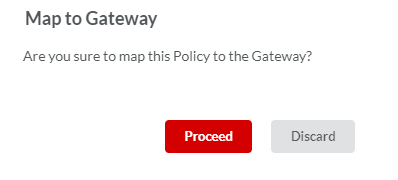
Fig. 5.80 Mapped Toggle
- Click Proceed to map. The Policy will be mapped. The toggle button will turn green.
Although the Policy is mapped, it is not yet propagated. The Policy will be available to propagate in the Gateways Sync page.
To repropagate the propagated Policy:
Navigate to the Usage Policy tab.
Click Repropagate. The Propagate Plan dialog displays a list of already propagated Policies that are available for repropagation.
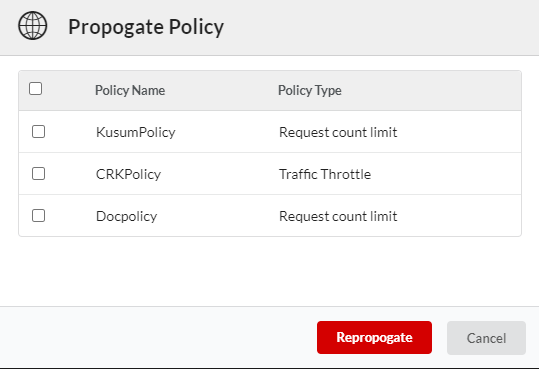
Fig. 5.81 Propagate Plan
Click Propagate. A success message displays upon successful propagation.
Fig. 5.82 Repropagation Successful
5.17. Propagating SandBox Gateway
Navigate to the Gateway Synchronization - Changes screen.
Click the Sandbox tab, and then Changes to Global Config, API, Usage Plan, Policy accordion tab to display an expanded view of the Sandbox Gateway that needs propagation.
In the displayed list, click to select the check box corresponding to the Sandbox Gateway that you want to propagate.
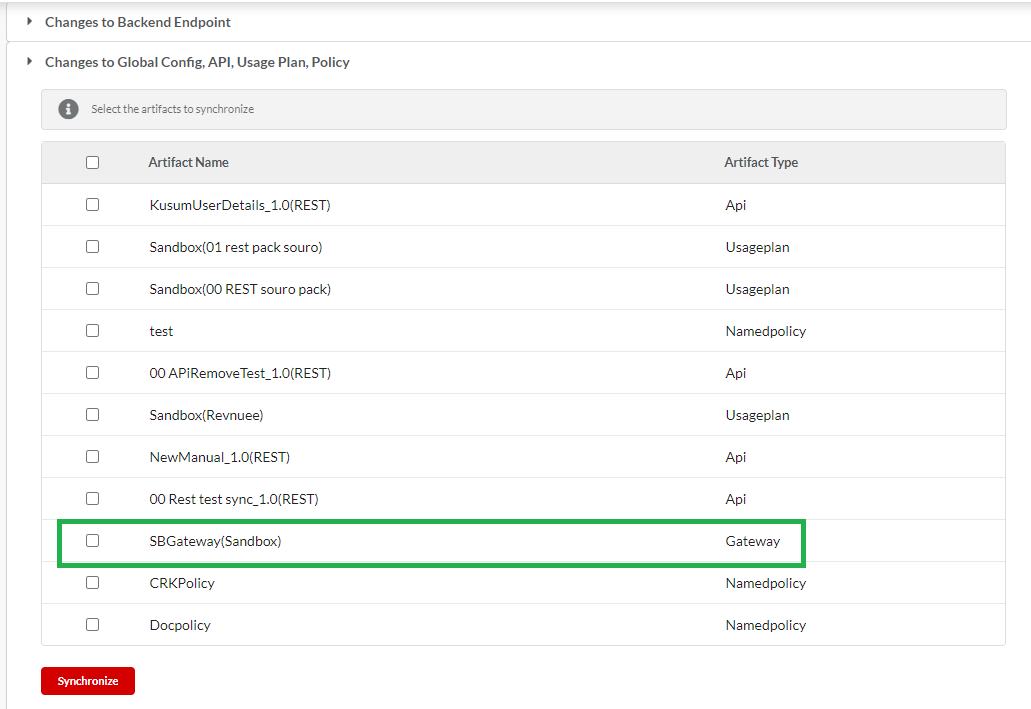
Fig. 5.83 Gateway Sync dialog
Click Synchronize to start the synchronization process. A Gateway Sync dialog box displays.
In the Gateway Sync dialog box, click Sync to start synchronizing the selected Sandbox Gateway.
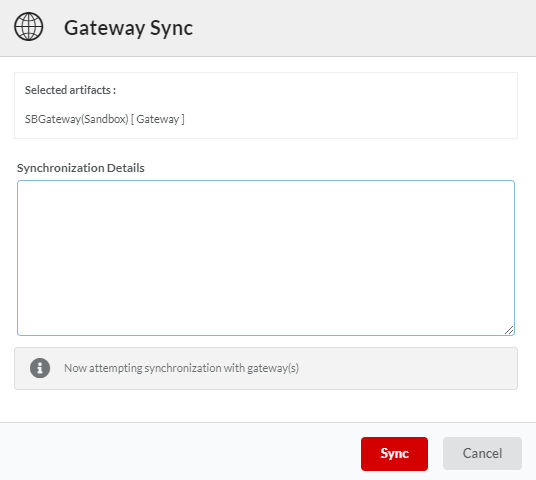
Fig. 5.84 Gateway Sync dialog
In the Gateway Sync dialog box, in the Synchronization Details box, type the details related to the Synchronization, and then click Finish to complete the Synchronization process.
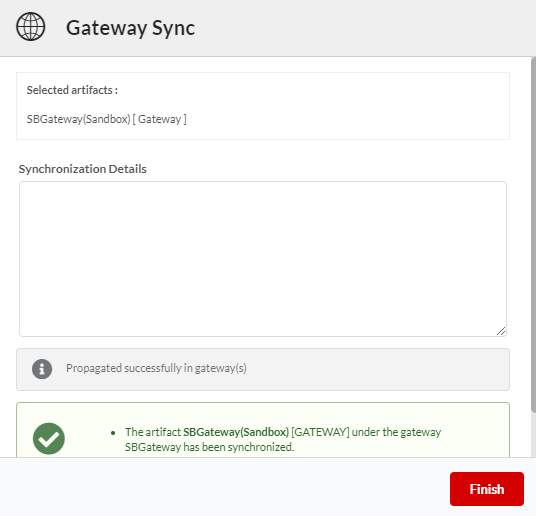
Fig. 5.85 Synchronization Details box
The Sandbox Gateway is successfully synced to the gateways and no longer appear in the Changes to Global Config, API, Usage Plan, Policy tab.
Note
Rollback feature is not available for Sandbox Gateway.
Next Steps: Test using Sandbox.
5.18. Test using Sandbox
Developers use the Sandbox environment to test and find how their Apps could be integrated with the APIs that they want to use. The Sandbox allows you to make a sample API call from within the documentation page. This will help the developers to choose the appropriate subscription for their API plans as it allows them to know the number of APIs in a plan and how to consume those APIs.
The Sandbox uses industry-standard Swagger to describe the REST API service, Resource name, Resource Description, Resource methods, parameters (covering parameter types: form/path/query) - whether parameters are required or are optional, Expected Response Content type (JSON or XML), Response message, HTTP response code or Error code depending on whether the response was a success or failure.
To learn more about Sandbox environment, refer ‘Sandbox’ under Developer Portal.
Given below is a typical workflow that you can use as a checklist prior to and while using Sandbox:
- Create an Application profile
- Generate Access Tokens
- Invoke the API using the Try-it feature
- Generate Client code with SDK
- Develop Apps and integrate them with Sandbox Endpoints
- Perform integration tests with data provided in Sandbox
- Validate token Expiry scenarios and simulate errors
To invoke an API using the Try it feature:
Log in to the Developer portal.
Navigate to API Packs Details screen.
The API Pack Details page displays.
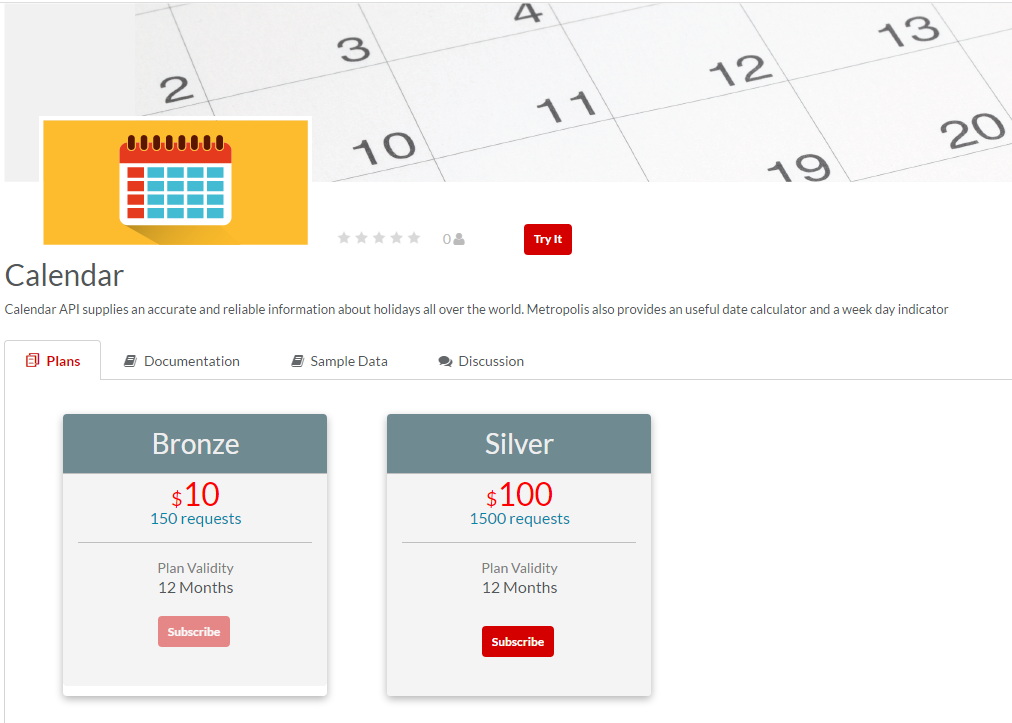
Fig. 5.86 API Pack Details
Click Try it
 . The API Pack Sandbox page displays with the API Pack Resource list in a Swagger UI.
Note
Some of the APIs might require authorization. Scopes are used to grant an application different levels of access to data on behalf of the end user. Each API may declare one or more scopes. You can select the scope that you want to grant to Swagger UI.
Click the
 /
/  icon to toggle between showing/hiding the Resource details - Resource names, methods, parameters and other details.
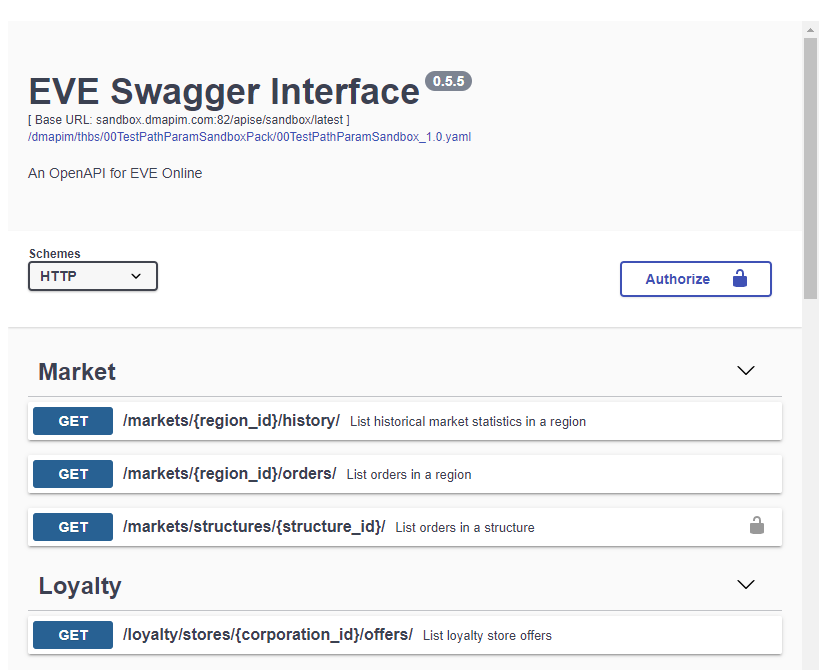
Fig. 5.87 Resource details
Click the resource method to display an expanded view.
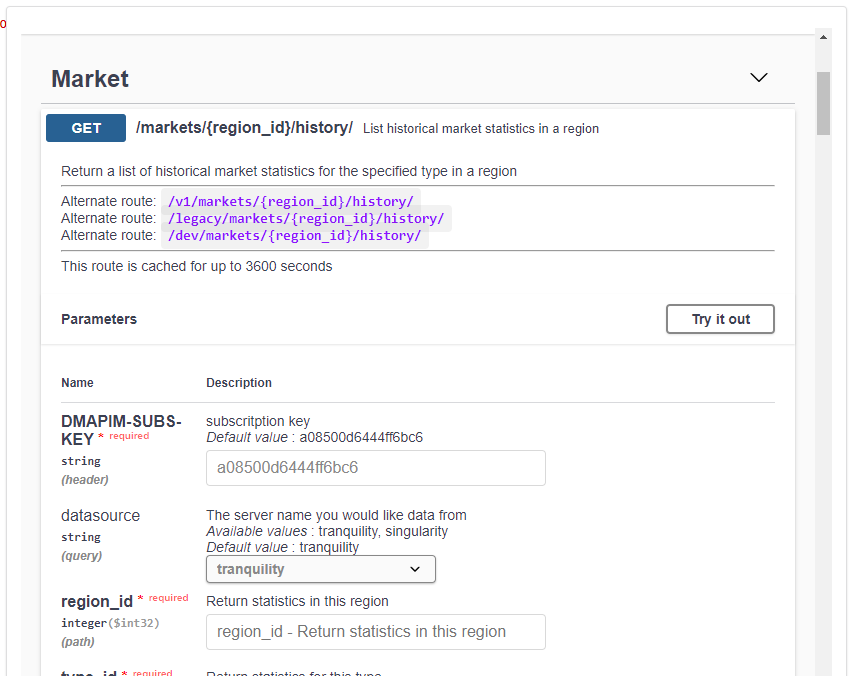
Fig. 5.88 List view of Resources
Click Try it Out.
In the mandatory parameter fields, type the required parameters and click Execute to test invoke the API. Response message will be displayed based on the value of the parameters entered.
Note
Users must keep in mind the points listed below while using the Sandbox feature to test the APIs:
- Sandbox “Try it” feature shows only REST resources configured using swagger specifications file.
- Sandbox “Try it” feature, doesn’t support storing transaction details and analytics.
- Sandbox doesn’t support auto propagation to linked plans for API propagation.
- Plan level security policies will not be applicable.
- Plan defined with oAuth security policy doesn’t validate the access token on Sandbox.
- Sandbox doesn’t support rollback functionality.
- Sandbox doesn’t support two-way SSL between Portal and Nginx.
- All service calls to the Sandbox backend must implement URL encoding.
- IP Black listing, White listing and MCT limit are not applicable for sandbox.
- URI encoding containing any of the following characters will not work: # [ ] { } ~ | %
- Only the following special characters are tested as working for path and query parameters: @ ! # $ % ^ & * - _ = + [] {} | : ; , . `
- Only the following special characters are tested as working for Resource name - @ $ space ! * - _ = + . ,
- Only one Sandbox Gateway is allowed per publisher account.
- Sandbox plan can support only subscription-key authentication model.