3.18. Gateway Sync
The Gateway Sync menu comprises two screens, namely the Gateway Synchronization - Pending Changes screen and Gateway Synchronization - History screen. Gateway Synchronization - Pending Changes screen allows you to manually sync configurations from the portal to the Gateway. The Gateway Synchronization - History screen allows the user to choose to roll back to a backed-up instance of artifacts from a list of backed-up instances. DigitMarket™ API Manager also automatically rolls back to the previous state if during the sync process the system encounters an issue.
Gateway Synchronization - Pending Changes
All artifacts that are approved display in the Gateway Synchronization - Pending Changes screen ready to be deployed to the servers. You can select the artifacts that you want to propagate to the Gateway to make them operational at runtime.
Gateway Synchronization - History
The Gateway Synchronization - History screen displays a list of backed-up versions of data with the date and time of backup. A working instance is stored before the user manually initiates synchronization from the Gateway Synchronization - Pending Changes screen. This allows the user to roll back to an earlier backed-up version of the artifact instance.
To learn more about Gateway Synchronization, refer: Gateway Synchronization.
3.18.1. Synchronize Changes
Before you begin:
- The Gateway Sync menu item is available only to the admin-level users.
- The fields marked with asterisks are mandatory.
Common Tasks
Navigating to the Gateway Synchronization - Pending Changes screen
To navigate to the Gateway Synchronization - Pending Changes screen:
- In the main Navigation menu, click Gateway Sync and then in the submenu that appears, click Changes.
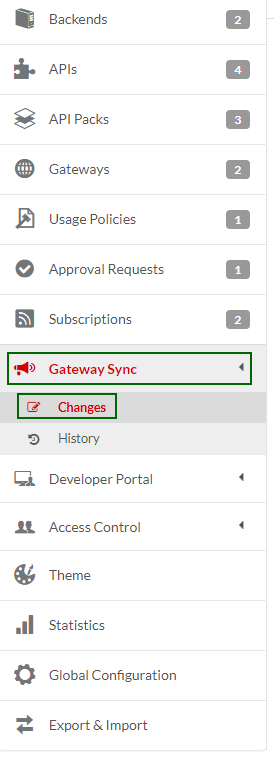
Fig. 3.390 Navigation menu - Gateway sync - changes
The Gateway Synchronization - Pending Changes screen displays. The Gateway Synchronization - Pending Changes screen has Production and SandBox tabs. The Production tab has three accordion tabs namely, Changes to Backend Endpoint, Changes to Global Config, API, Usage Plan, Policy and Changes to Subscriptions.
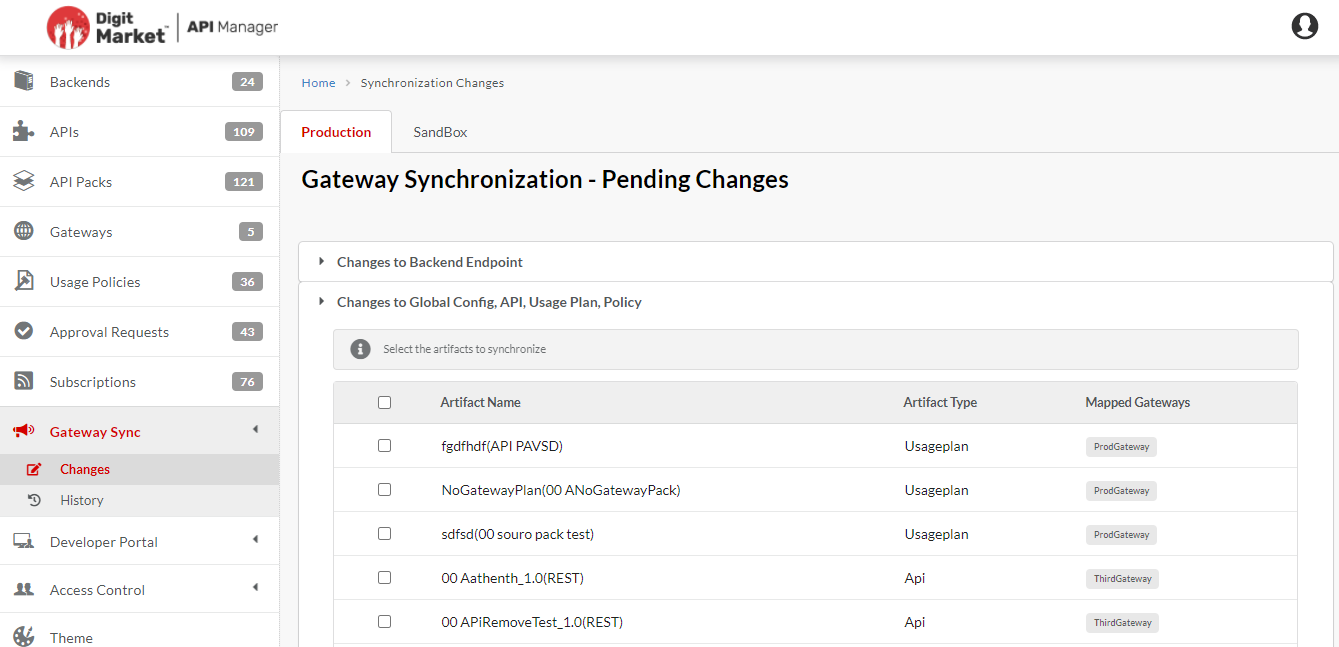
Fig. 3.391 Gateway Synchronization - Pending Changes
3.18.1.1. Synchronize Changes to Production Gateways
Propagating Backend Endpoints to Production Gateways
Navigate to the Gateway Synchronization - Pending Changes screen.
Click the Production tab, and then Changes to Backend Endpoint according tab to display an expanded view of the list of Backend Endpoints that need propagation.
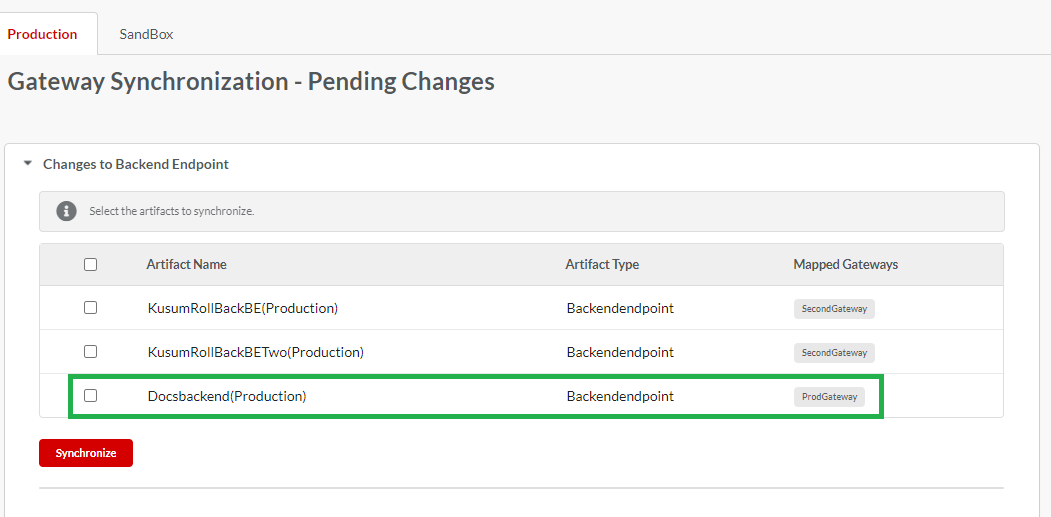
Fig. 3.392 Gateway Sync dialog
In the displayed list, click to select the check box(es) corresponding to the Backend Endpoint(s) that you want to propagate to the Gateways to make them operational in the runtime environment.
Click Synchronize to start the synchronization. A Gateway Sync dialog box displays.
In the Gateway Sync dialog box, click Sync to start synchronizing the selected Backend Endpoints.
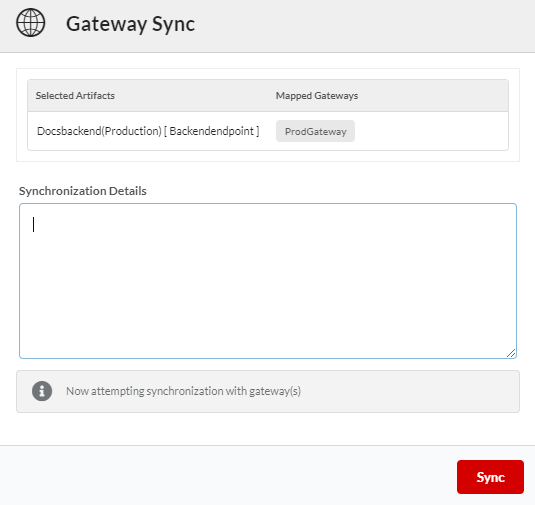
Fig. 3.393 Gateway Sync dialog
All selected Backend Endpoints become operational in all the mapped Gateways.
In the Gateway Sync dialog box, in the Synchronization Details box, type the details related to the Synchronization, and click click Finish to complete the Synchronization process.
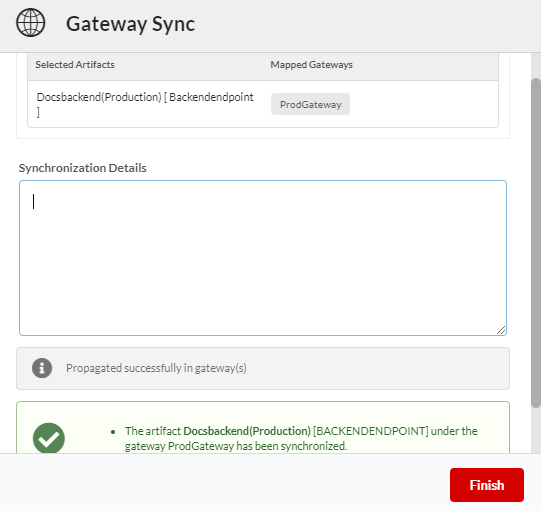
Fig. 3.394 Synchronization Details box
The Backend Endpoint(s) is successfully synced to all the mapped gateways and no longer appears in the Changes to Backend Endpoint tab. If the propagation of the backend to any Gateway is unsuccessful then that backend and Gateway will once again be listed under the Changes to Backend Endpoint tab.
Note
Users cannot propagate artifacts that are associated to a backend that is present in the Gateway Sync page.
Propagating Approved APIs to Production Gateways
Navigate to the Gateway Synchronization - Pending Changes screen.
Click the Changes to Global Config, Backends, API, Usage Plan, Policy tab to display an expanded view of the artifacts that need propagation.
In the displayed list, click to select the check box(es) corresponding to the Approved API(s) that you want to propagate to the Gateways to make them operational in the runtime environment.
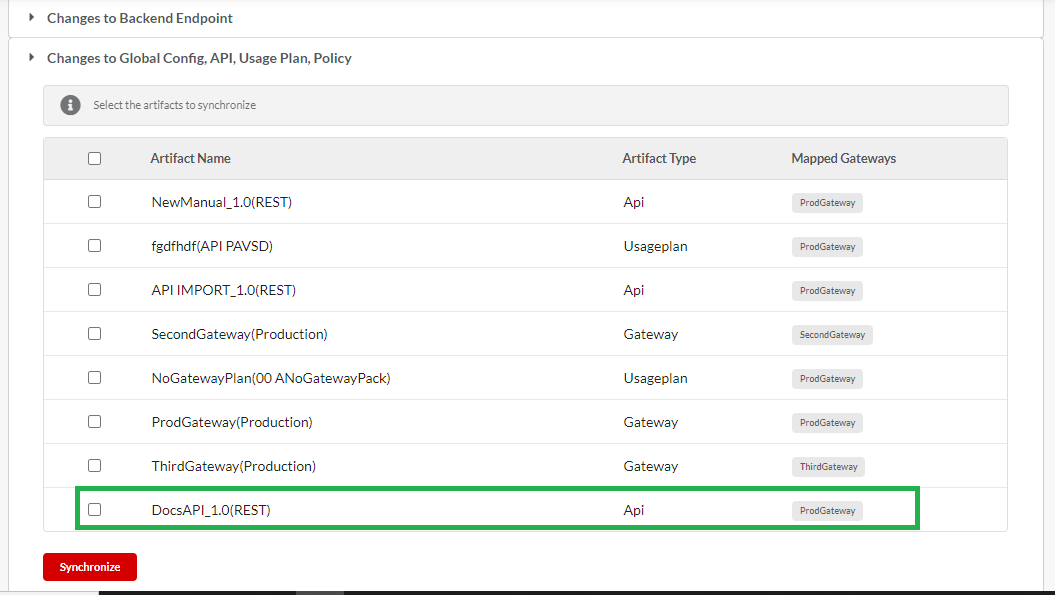
Fig. 3.395 Artifacts for propagation
Click Synchronize to start the synchronization process. A Gateway Sync dialog box displays.
In the Gateway Sync dialog box, click Sync to start synchronizing the selected APIs.
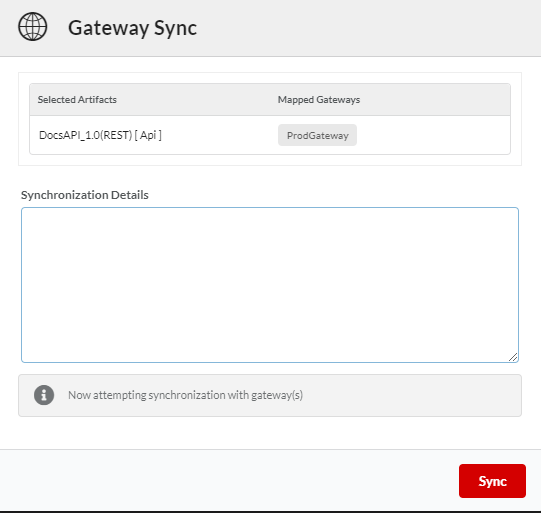
Fig. 3.396 Gateway Sync
All selected APIs become operational in all the mapped Gateways. The dependa
In the Gateway Sync dialog box, in the Synchronization Details box, type the details related to the Synchronization, and then click Finish to complete the Synchronization process.
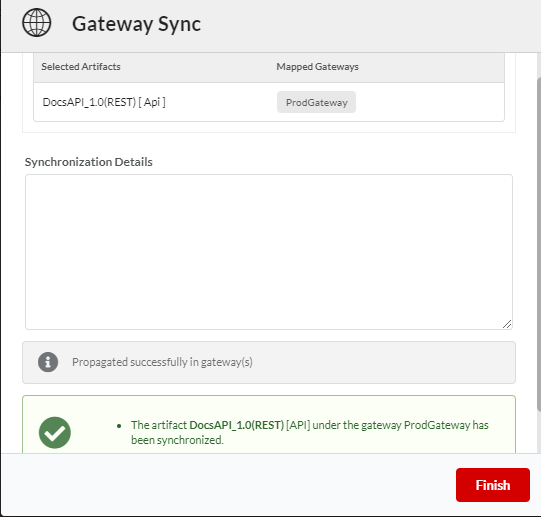
Fig. 3.397 Synchronization Details box
The API(s) are successfully synced to the mapped gateways and no longer appears in the Changes to Global Config, API, Usage Plan, Policy tab. If the propagation of the API to any Gateway is unsuccessful then that API and Gateway will once again be listed under the Changes to Global Config, API, Usage Plan, Policy tab.
Note
Users cannot propagate APIs that are associated to a backend that is present in the Gateway Sync page.
Propagating Approved Usage Plans to Production Gateways
Navigate to the Gateway Synchronization - Pending Changes screen.
Click the Changes to Global Config, Backends, API, Usage Plan, Policy tab to display an expanded view of the artifacts that need propagation.
In the displayed list, click to select the check box(es) corresponding to the Approved Usage Plan(s) that you want to propagate to the Gateways to make them operational in the runtime environment.
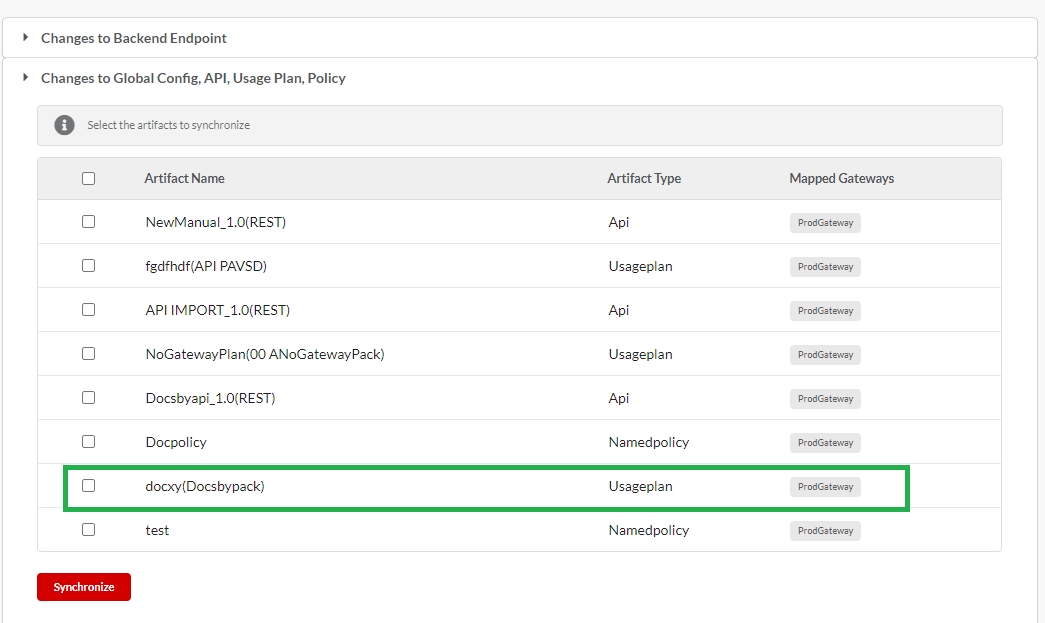
Fig. 3.398 Artifacts for propagation
Click Synchronize to start the synchronization process. A Gateway Sync dialog box displays.
In the Gateway Sync dialog box, click Sync to start synchronizing the selected Usage Plans.
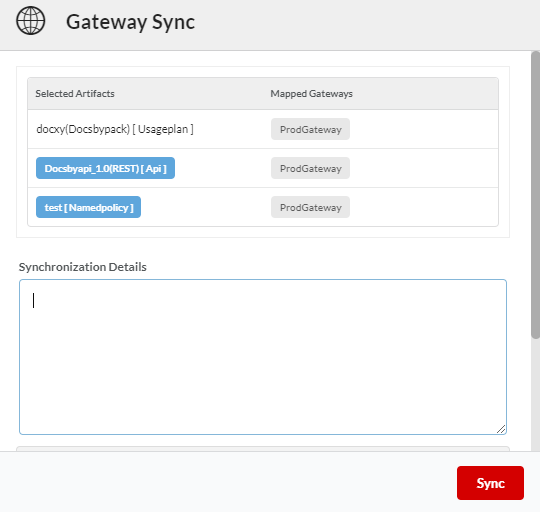
Fig. 3.399 Gateway Sync
All selected Usage Plans become operational in all the mapped Gateways.
Note
All APIs linked to the Usage Plan being propagated must be in the Approved or Published state.
In the Gateway Sync dialog box, in the Synchronization Details box, type the details related to the Synchronization, and then click Finish to to complete the Synchronization process.
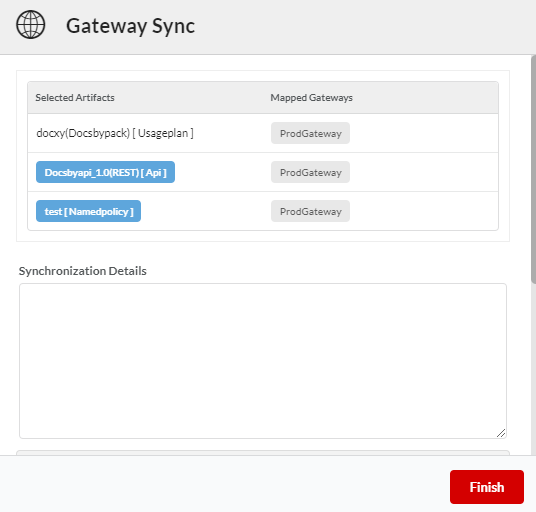
Fig. 3.400 Synchronization Details box
The Usage Plan(s) is successfully synced to the gateways and no longer appears in the Changes to Global Config, API, Usage Plan, Policy tab. If the propagation of the Usage Plan to any Gateway is unsuccessful then that Usage Plan and Gateway will once again be listed under the Changes to Global Config, API, Usage Plan, Policy tab.
Note
Users cannot propagate Usage Plans that are associated to a backend that is present in the Gateway Sync page.
Propagating Approved Usage Policies to Production Gateways
Navigate to the Gateway Synchronization - Pending Changes screen.
Click the Changes to Global Config, Backends, API, Usage Plan, Policy tab to display an expanded view of the artifacts that need propagation.
In the displayed list, click to select the check box(es) corresponding to the Approved Usage Policies that you want to propagate to the Gateways to make them operational in the runtime environment.
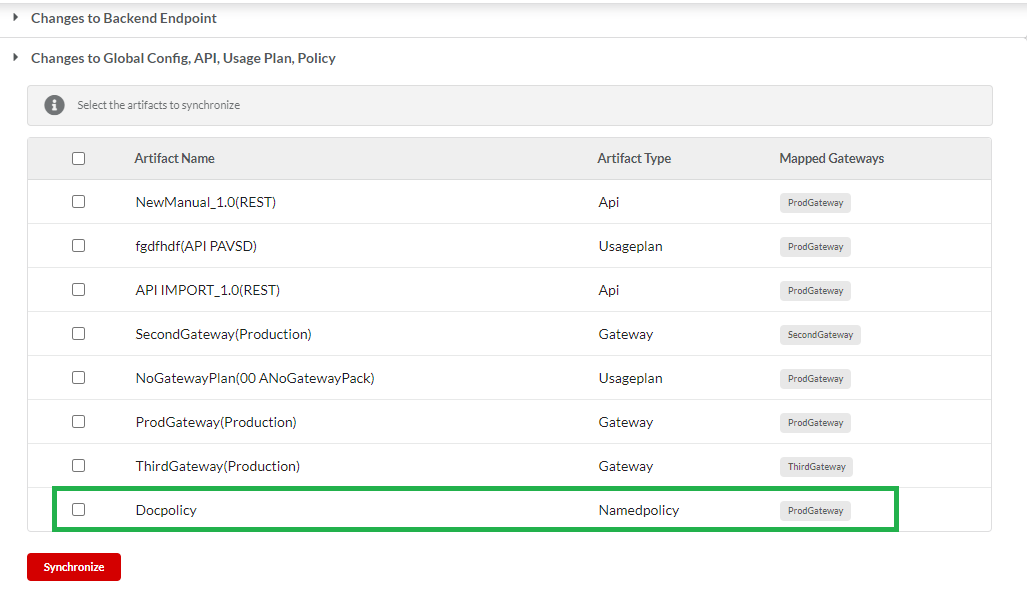
Fig. 3.401 Artifacts for propagation
Click Synchronize to start the synchronization process. A Gateway Sync dialog box displays.
In the Gateway Sync dialog box, click Sync to start synchronizing the selected Usage Policies.
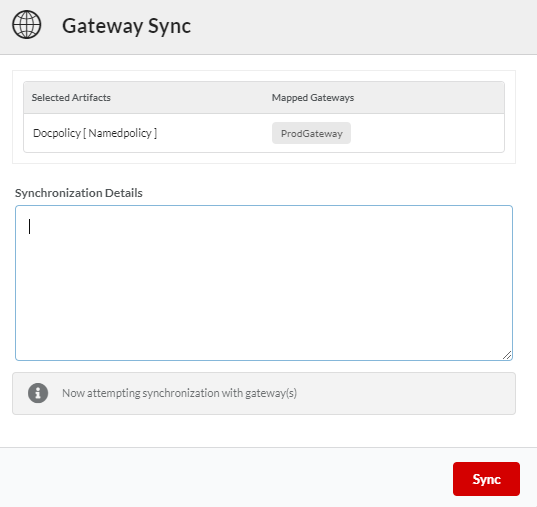
Fig. 3.402 Gateway Sync dialog
All selected Usage Policies become operational in all the mapped Gateways.
In the Gateway Sync dialog box, in the Synchronization Details box, type the details related to the Synchronization, and then click Finish to complete the Synchronization process.
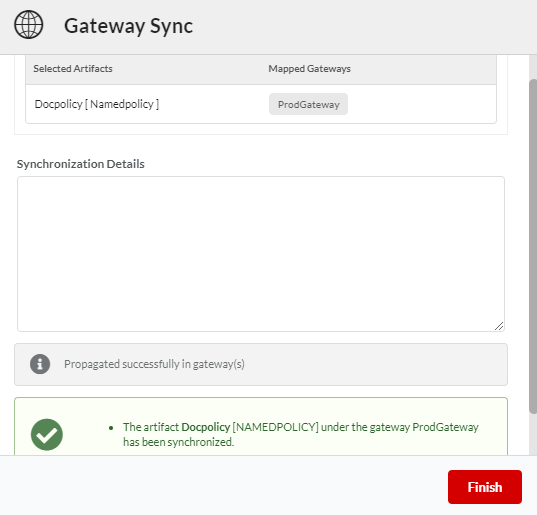
Fig. 3.403 Synchronization Details box
The Usage Policies are successfully synced to the gateways and no longer appear in the Changes to Global Config, API, Usage Plan, Policy tab. If the propagation of the Usage Policies to any Gateway is unsuccessful then that Usage Policies and Gateway will once again be listed under the Changes to Global Config, API, Usage Plan, Policy tab.
Propagating Global Configurations to Production Gateways
Navigate to the Gateway Synchronization - Pending Changes screen.
Click the Changes to Global Config, Backends, API, Usage Plan, Policy tab to display an expanded view of the artifacts that need propagation.
In the displayed list, click to select the check box(es) corresponding to the Global Configurations that you want to propagate to the Gateway to make them operational in the runtime environment.
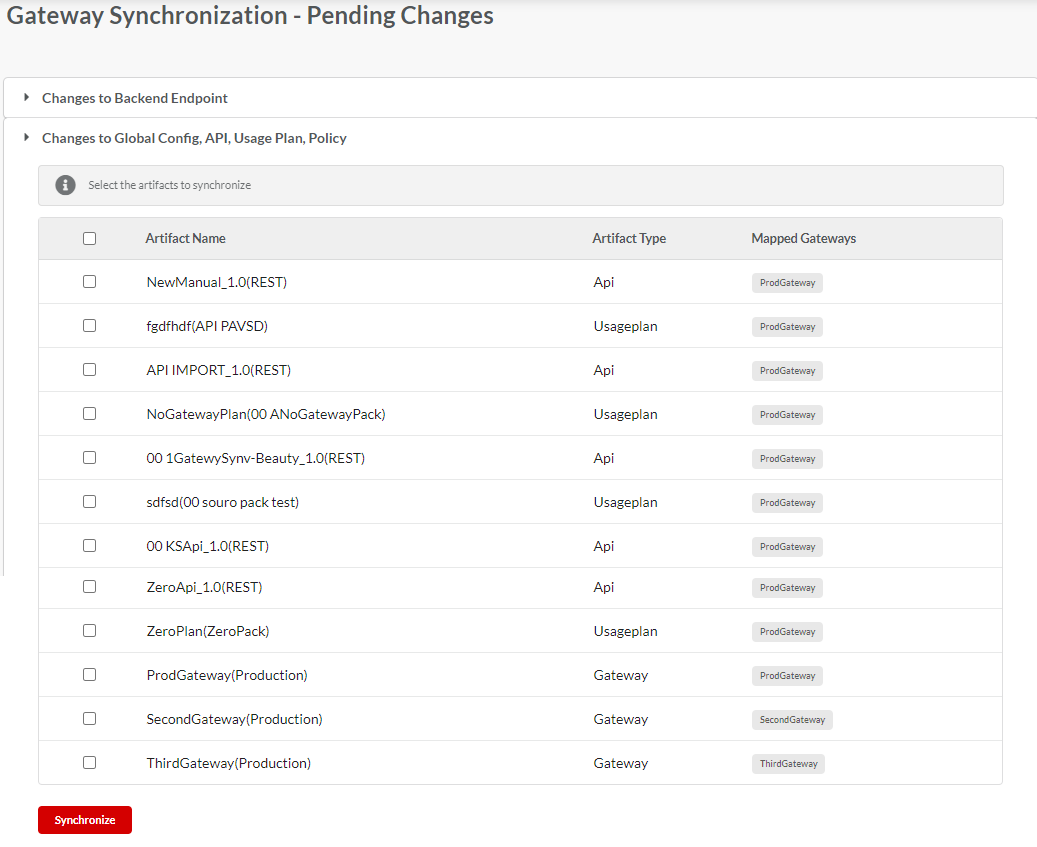
Fig. 3.404 Artifacts for propagation
Click Synchronize to start the synchronization process. A Gateway Sync dialog box displays.
In the Gateway Sync dialog box, click Sync to start synchronizing the selected Global Configurations.
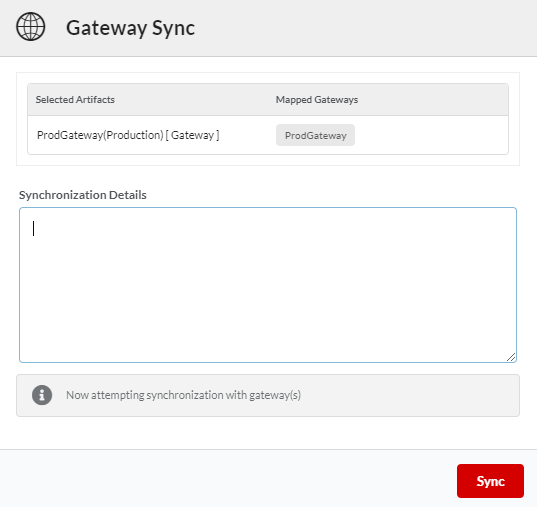
Fig. 3.405 Gateway Sync dialog
All selected Global Configurations become operational in all the Gateways.
In the Gateway Sync dialog box, in the Synchronization Details box, type the details related to the Synchronization, and then click Finish to complete the Synchronization process.
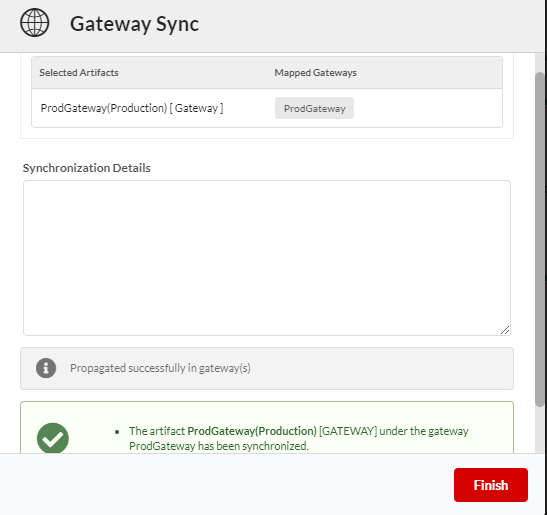
Fig. 3.406 Synchronization Details box
The Global Configurations are successfully synced to the gateways and no longer appear in the Changes to Global Config, API, Usage Plan, Policy tab.
Propagating Subscriptions to Production Gateways
Navigate to the Gateway Synchronization - Pending Changes screen.
Click the Changes to Subscriptions tab to display an expanded view of the subscriptions that need propagation.
In the displayed list, click to select the check box(es) corresponding to the Subscriptions that you want to propagate to the Gateway to make them operational in the runtime environment.
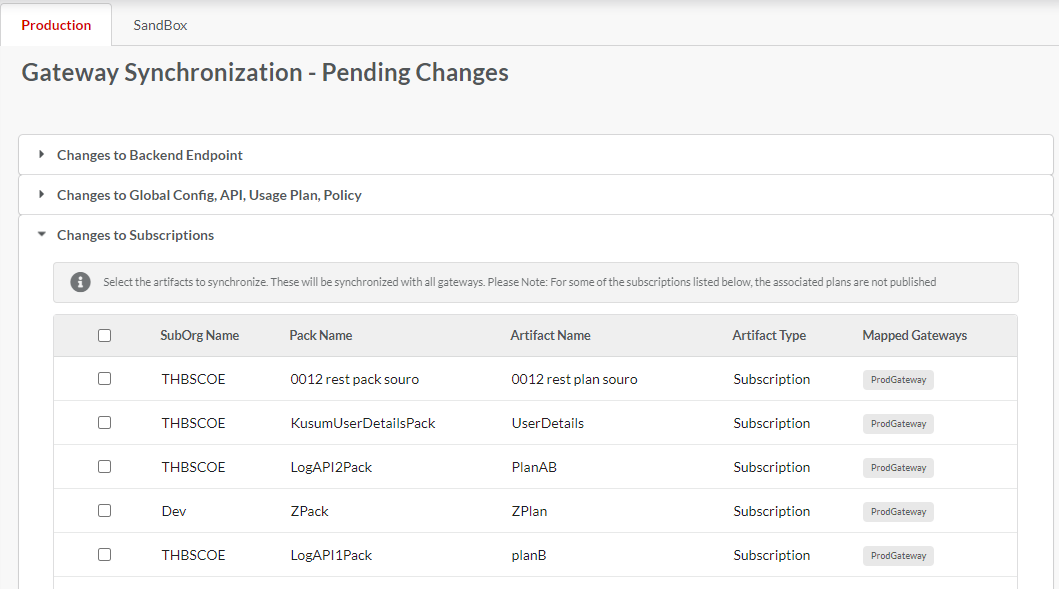
Fig. 3.407 Artifacts for propagation
Click Synchronize to complete the synchronization process.
3.18.2. View Synchronization History and Rollback
DigitMarket™ API Manager preserves backups of data for the artifacts that have been changed and for which synchronization is performed. When the user executes synchronization for an artifact, the system stores the current state of the artifact(s) in its history files before allowing the sync to happen. The rollback feature allows the user to restore the gateway to its earlier state from the history. The user can roll back to the earlier version of the artifacts through the Gateway Synchronization - History screen. Rollback allows the user to restore data to its previous state before the propagated data is made operational on all available Gateways. The rollback history displays the synchronization date along with the rollback point details.
Note
To achieve the rollback for a particular propagation, all the relevant Gateways should be up and running.
To roll back to an earlier version:
In the main Navigation menu, click Gateway Sync and then in the submenu that appears, click History. The Gateway Synchronization - History page displays.
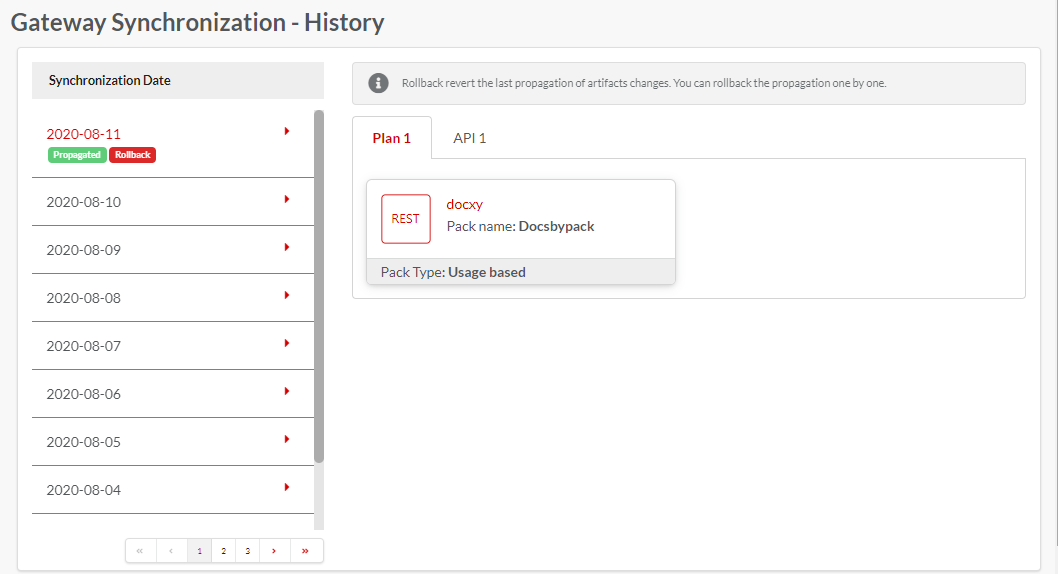
Fig. 3.408 Gateway Sync History
On the Gateway Synchronization - History page, on the left side of the page, you can see the synchronization date history of the most recent propagations. The date, time and details of propagation is displayed for each propagation history. The artifacts that have been propagated are displayed in a card format. The card displays details about the artifact.
Click on each Synchronization Date collapsible tab to view the number of propagations occured on that particular date. If many propagations have occurred on the same day, the propagations will be listed in chronological order according to the time of propagation. The most recent propagation will be displayed at the top. The Pagination feature at the bottom-right corner of the Gateway Synchronization History page displays the number of propagation history to per page. Use the previous
 and next
  icons to navigate between the pages.
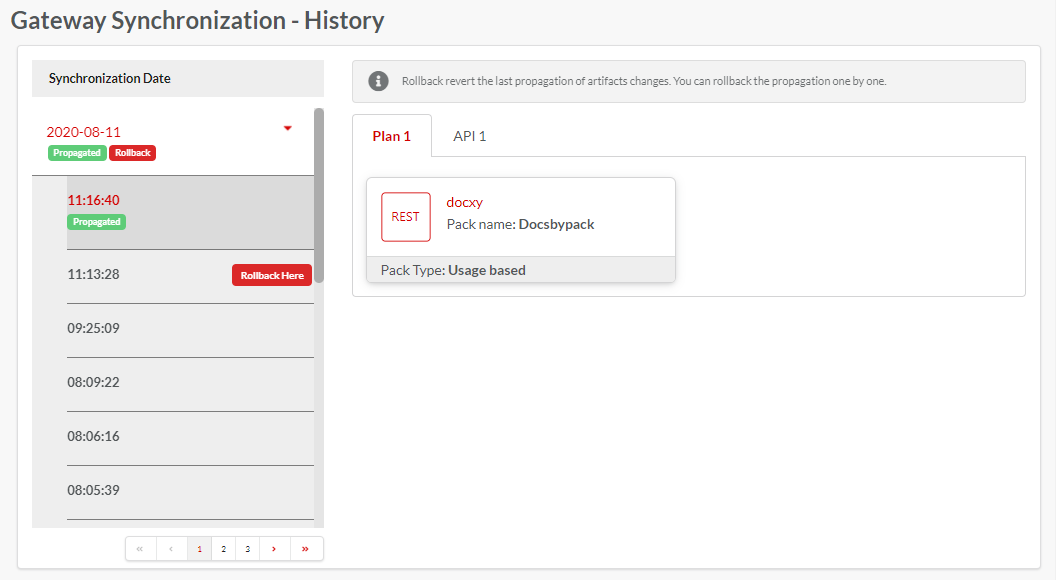
Fig. 3.409 Gateway Sync History
To roll back to an earlier version, click the Rollback Here button.
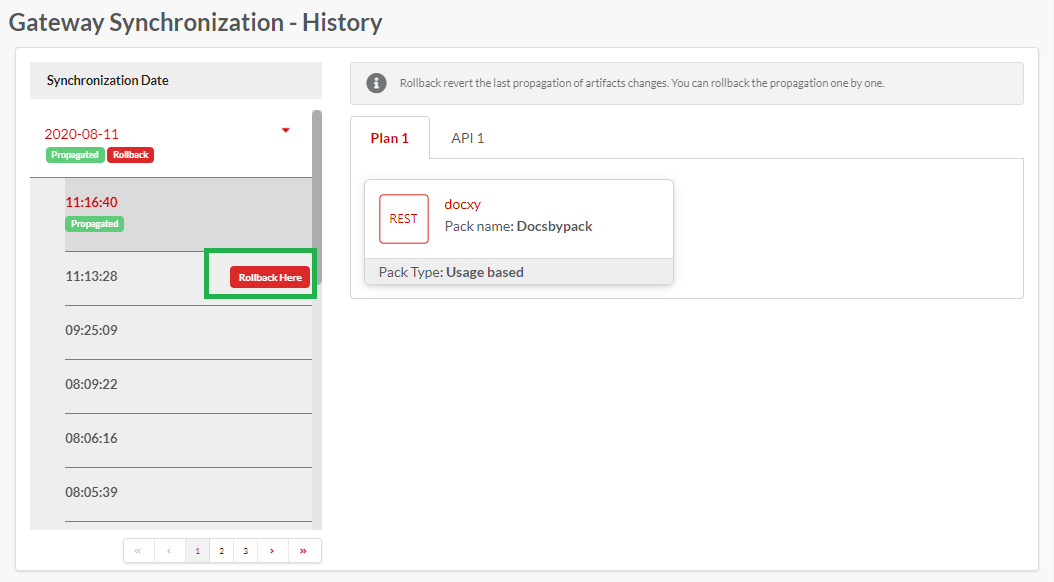
Fig. 3.410 Rollback Here
The Gateway Sync dialog opens. Click Rollback to start the rollback process.
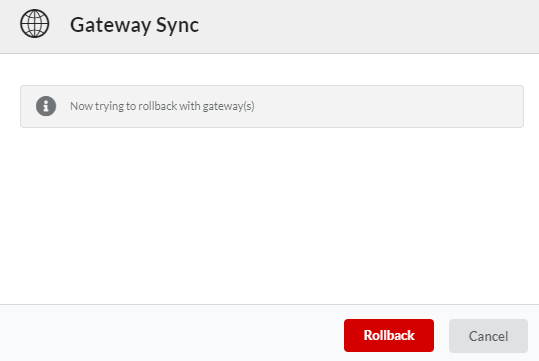
Fig. 3.411 Rollback
In the Gateway Sync dialog box, click Finish to complete the rollback.
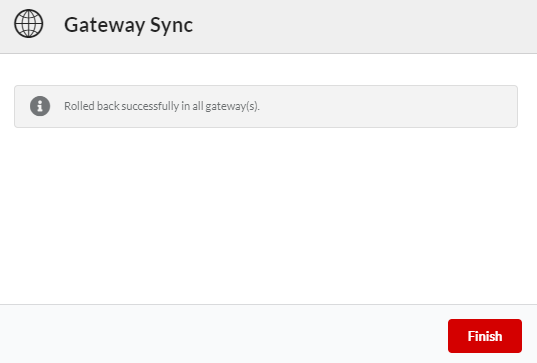
Fig. 3.412 Finish
Rollback reverts the last propagation of artifacts changes and will be available in the Gateway Sync - Changes page.
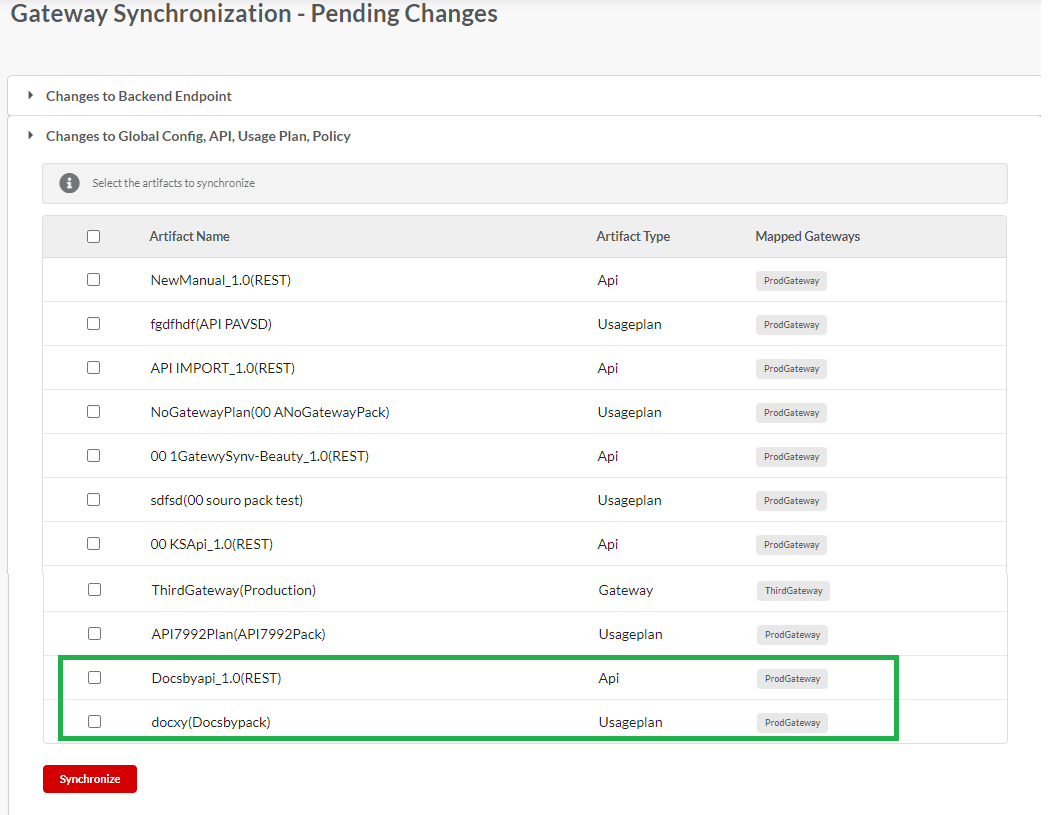
Fig. 3.413 Gateway Sync - Changes page
Note
- You can only rollback the propagation one by one.
- Plan level details (i.e. plan_name, pricing_type, signup_fee, termly_fee, termination_fee, currency, term_validity, auto_renew and other pricing details) willl not be rolled back.
Next Steps
In the succeeding three sections, you will learn about managing LDAP users, Publisher users and Developer users.