3.17. Configuring Gateway
The DigitMarket™ API Manager Gateway serves as a control hub for APIs. It decides which traffic is authorized to access the back-end services that are exposed via APIs. It manages server loads by enforcing policies such as, Rate Limiting and Throttling. It logs all transactions passing though it and sends them to the servers for analytics and billing purposes.
To learn more about how the Gateway functions, refer the topic: Gateway.
3.17.1. Microgateway
DigitMarket™ API Manager also supports the Microgateway feature. With Microgateway an artifact like Backend, API, Usage Plan, Usage Policy, API Pack, as well as Subscriptions for a pack can be propagated to all or selective gateways.
DMAPIM users have the option to define multiple gateways under a publisher organization with multiple Gateway instances. Whenever any artifact such as a backend, API, API pack, Usage Plan, Usage Policy etc. is configured, by default it will be propagated to the default gateway that is configured on the publisher organization. With the Microgateway feature, users have the option to define their own Gateway. Users can change this setting in the publisher portal by choosing the Gateways to which they want to propagate their desired artifact. The artifact can either be propagated to a single Gateway, multiple Gateways or all Gateways.
Note
Multiple Production Gateways can be created but only one Sandbox Gateway can be created.
For example, let us assume that there are three production gateways: Gateway 1 (G1), Gateway 2 (G2), Gateway 3 (G3). Let us also assume that a user creates two artifacts, say a Backend (B1) and a Usage Plan (P1). The default settings allow the user to propagate both artifact B1 and P1 to all Gateways- G1, G2, G3. With Microgateway feature, the user can choose to configure which Gateway the respective artifact needs to be propagated, such as-Backend B1 to Gateway G1 and Usage Plan P1 to Gateway G3. Backend B1 can also be propagated to Gateways G1 and G2, or all three Gateways – G1, G2, and G3. Similarly, Usage Plan P1 can be propagated to only Gateway G3, Gateways G2 and G3, or all three Gateways – G1, G2, G3.
Microgateway also allows automatic mapping of dependant artifacts. If any of the artifacts have a dependency on other artifacts then the dependant artifacts will also be mapped along with the original artifact.
An API has dependency on Backend. A Plan has dependency on API and Usage Policy. If a Plan is created and mapped to one of the Gateways, but the Usage Policy under that Plan is not mapped to the Gateway, then it is automatically mapped to when the Plan is mapped to that Gateway.
For better understanding, let us assume that for an API 1, the dependency is Backend 1. Plan 1 also has dependency on API 1. Plan 1 and its dependencies are propagated to Gateway 1. Let us suppose that for a Gateway 2 which has no API mapped to it, a user tries to map API 1 to Gateway 2. The application analyzes that API 1 has dependency on Backend 1. But as the Backend 1 is not mapped to Gateway 2, it too needs to be mapped to Gateway 2. So in this case, it automatically maps both Backend 1 and API 1 to Gateway 2.
The following can be mapped to Gateways:
Note
An artifact can be propagated to multiple Gateways but a Subscription can be propagated only to one Gateway.
Only Draft, Approved and Published states for artifacts of API/Plan/Usage Policies are listed under each Gateway.
Common Tasks
Following is the common task identified for this section:
Navigating to the Gateways screen
To navigate to the Gateways screen:
- In the main Navigation menu, click Gateways. The Gateways list screen displays.
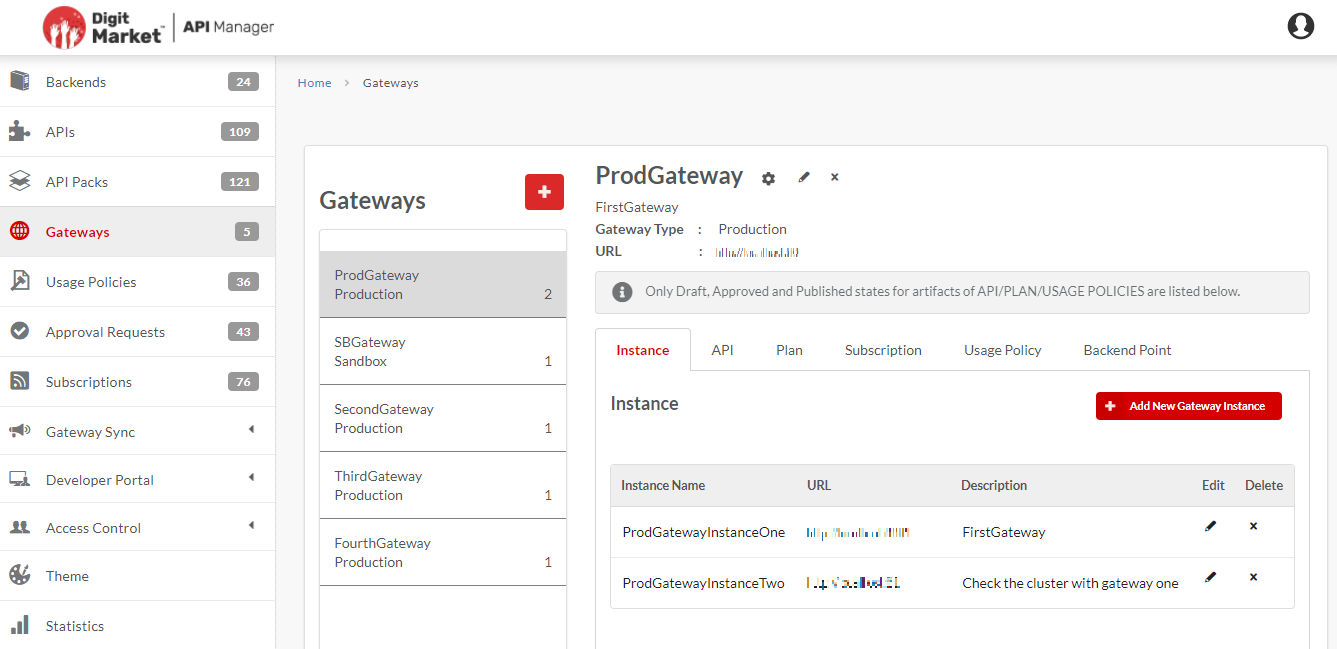
Fig. 3.345 Gateways list screen
3.17.1.1. Add a New Gateway
To add a new Gateway:
Navigate to the Gateways screen.
Click the plus icon
 to add new Gateway. The Add Gateway dialog box displays.
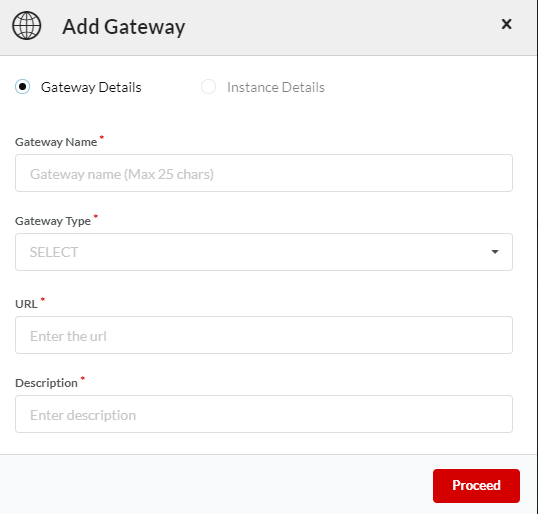
Fig. 3.346 Add Gateway dialog
In the Gateway Name box, type the new Gateway name.
Click the Gateway Type drop-down list to choose whether the Gateway is designated to the Production or Sandbox environment.
In the URL box, enter the URL for accessing the gateway. Gateway URL is a combination of the IP address and host name for the new Gateway.
In the Description box, type the description to describe the API Gateway.
After entering the Gateway details, click Proceed to enter the Instance details. The Instance Details dialog box displays.
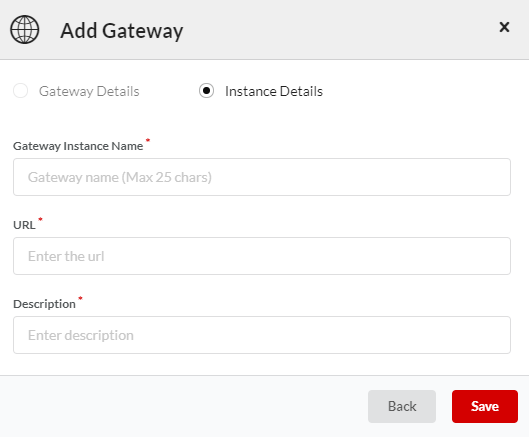
Fig. 3.347 Add Gateway Instance dialog
Note
A Gateway can have multiple instances but one Gateway must have at least one instance. At the time of its creation, only one Gateway instance can be created.
In the Gateway Instance Name box, enter the Gateway Name.
In the URL box, enter the URL for accessing the main gateway instance.
In the Description box, enter the description to describe the API Gateway instance.
Click Save to finish adding the new Gateway. The newly added Gateway will be included in the Gateways list.
Note
Users can also configure a Sandbox Gateway to test APIs in a Sandbox environment. For details visit: Configuring Sandbox Gateway.
3.17.1.2. Edit an Existing Gateway
To edit a Gateway:
Navigate to the Gateways screen.
From the list of Gateways, select the Gateway that you want to edit.
Click the edit icon
 next to the Gateway name. The Edit Gateway dialog box displays with populated data.
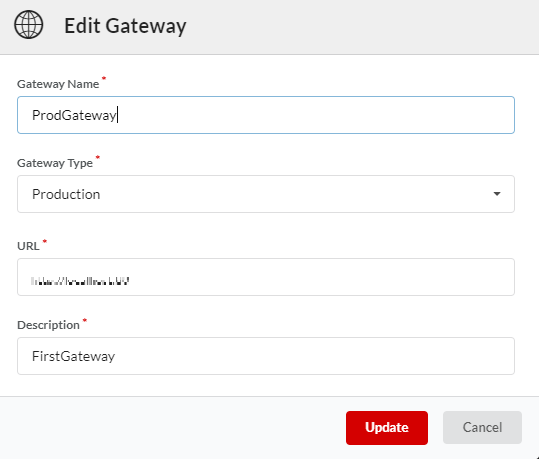
Fig. 3.348 Edit Gateway dialog
Make the necessary changes and then click Update to save changes. The user will be navigated to Gateways page and updated changes will get reflected.
3.17.1.3. Delete a Gateway
You can delete a Gateway only if any of the artifacts are not mapped.
To delete a Gateway:
Navigate to the Gateways screen.
From the list of Gateways, select the Gateway that you want to delete.
Click the delete icon
 next to the Gateway name.
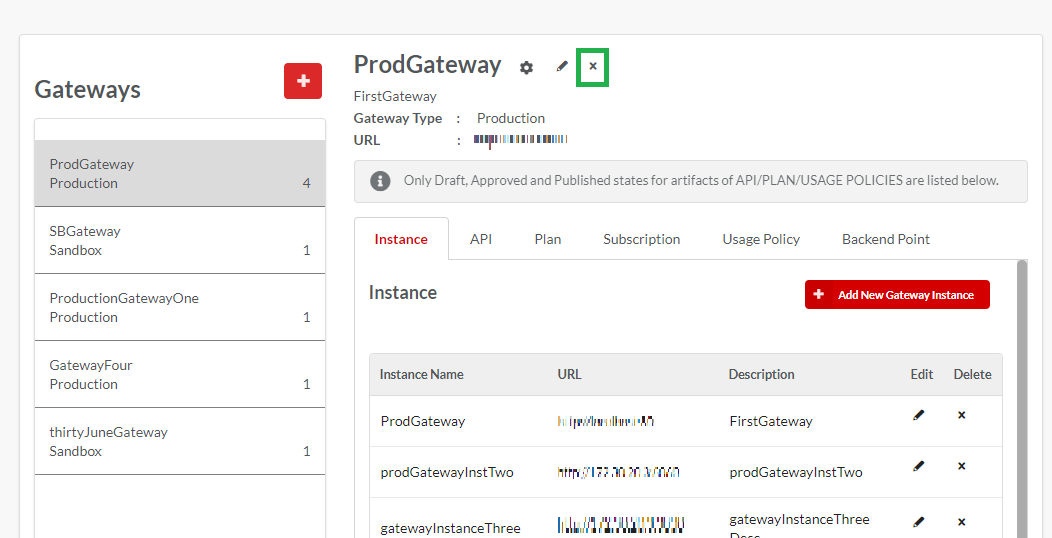
Fig. 3.349 Gateway - delete
A confirmation message displays.
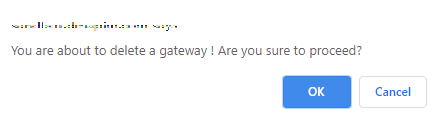
Fig. 3.350 Gateway - delete
- Click OK to proceed.
The Gateway is removed from the Gateways list.
3.17.1.4. Instance
Under the Instance tab, you can find the list of all the instances that are mapped to this particular Gateway.
3.17.1.4.1. Add an New Instance
Navigate to the Gateways screen.
From the list of Gateways, select the Gateway under which you want to add an instance. The Instance tab displays.
Click Add new Instance. The Add new Instance dialog box displays.
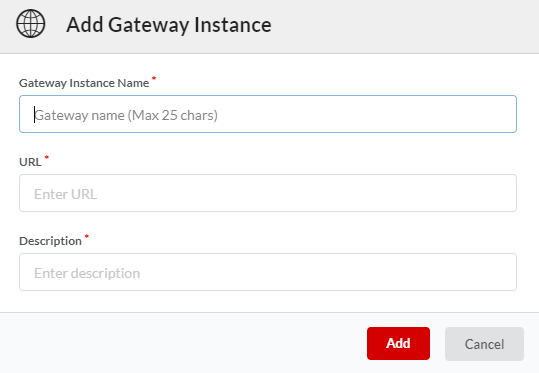
Fig. 3.351 Add Instance dialog
To fill the instance details, follow steps – 8 to 10 from the Add a New Gateway section.
Click Add. The newly added Gateway Instance is now included to the Instances list.
3.17.1.4.2. Edit an Existing Instance
To edit an Instance:
Navigate to the Instance tab.
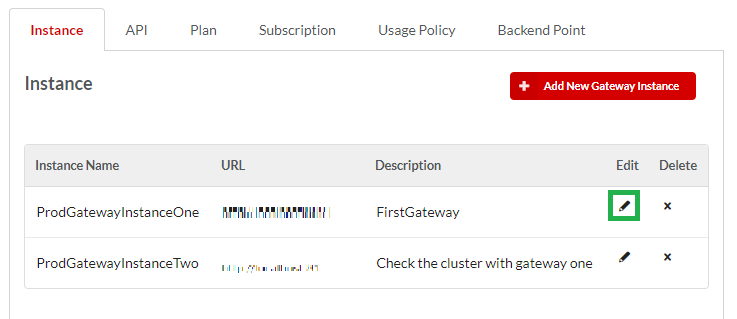
Fig. 3.352 Edit Instance
In the row that has the Instance that you want to edit, click the edit icon
. The Edit Instance dialog box displays with populated data.Click the edit icon
next to the Instance name. The Edit Instance dialog box displays with populated data.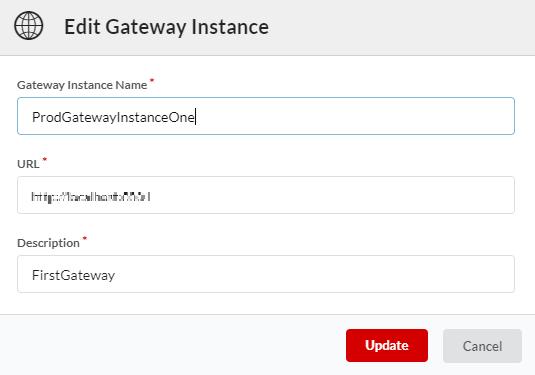
Fig. 3.353 Edit Instance dialog
Make the necessary changes and then click Update to save changes. The user will navigate to the Gateways tab and the updated instance details will get reflected.
3.17.1.4.3. Delete an Instance
To delete an Instance:
Navigate to the Instance screen.
In the row that has the Instance that you want to delete, click the delete icon
.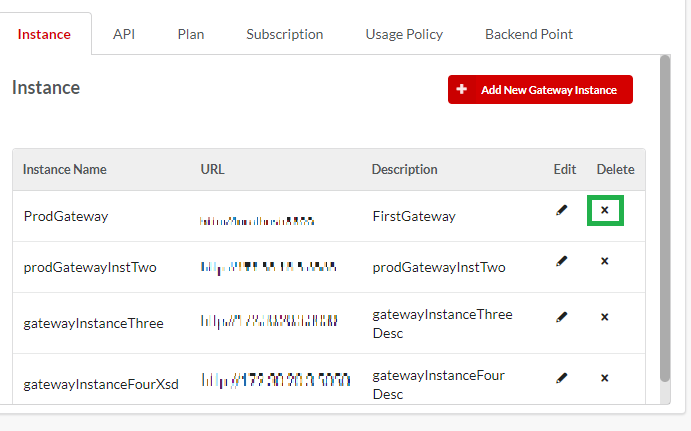
Fig. 3.354 Instance - delete
A confirmation message displays. Click OK to delete.
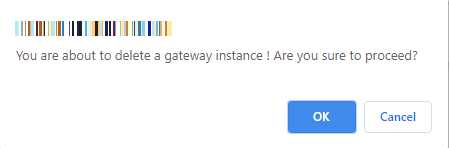
Fig. 3.355 Instance - delete
The Instance is removed from the Instance list.
Note
Atleast one instance should be present under each Gateway.
3.17.1.5. API
Under the API tab, you can find the list of all the APIs that are mapped to this particular Gateway.
The API tab displays all the API along with details such as:
- API Name with details (REST or SOAP API)
- API Version with details about the status(Draft/Approved/Published)
- API Status (Propagated or not)
- Mapped Filter - This option allows you to display - all API versions/only mapped API versions/only unmapped API versions.
- Map to Gateways - Toggle button to map the unmapped API versions to the Gateway and unmap mapped API versions. Mapped API Versions are displayed in green while unmapped API Versions are displayed in red.
- Search box to search for a particular API version. Enter the query in the search box and click the search icon
 to display the results.
 - Repropagate - This button allows users to repropagate propagated API versions.
To map the API Versions to a Gateway:
Navigate to the Gateways screen.
From the list of Gateways, select the required Gateway and then click the API tab. The API tab displays a list of all the API Versions under this particular Gateway.
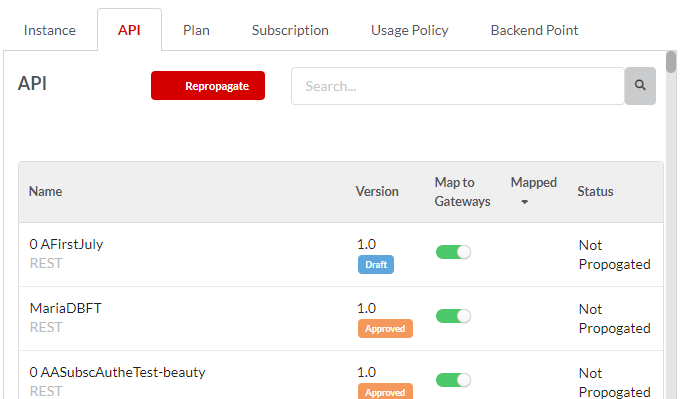
Fig. 3.356 API
Use the Mapped filter to filter API Versions using the options: All, Mapped, Unmapped. You can also search for the required API Version using the Search box.
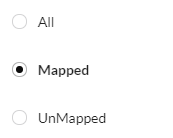
Fig. 3.357 Mapped Filter
Note
Only draft, published or approved API versions are available to map.
In the row that has the API Version that you wish to map, click the Map to Gateways toggle button. Inversely, click the toggle button again to unmap.

Fig. 3.358 Toggle to Map
A notification message appears asking you to confirm the mapping.
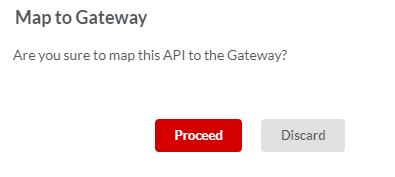
Fig. 3.359 Mapped Toggle
- Click Proceed to map. The API version will be mapped. The toggle button will turn green.
Although the API version is mapped, it is not yet propagated. The API version will be available to propagate in the Gateways Sync page.
Note
Gateway mapped API’s which are consumed in a plan cannot be unmapped.
To repropagate the propagated API Versions:
Navigate to the API tab.
Click Repropagate. The Propagate API dialog displays a list of already propagated APIs that are available for repropagation.
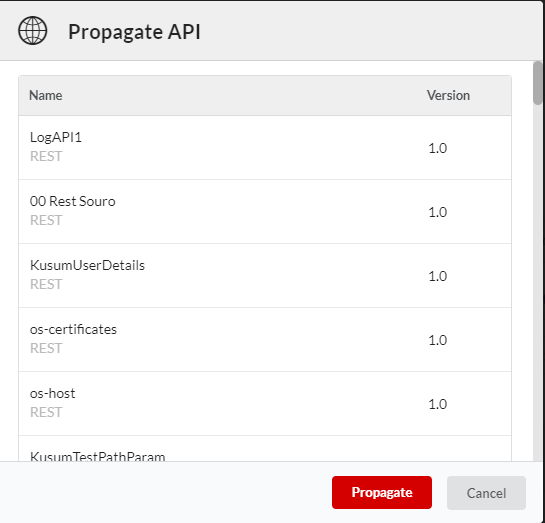
Fig. 3.360 Propagate API
Click Propagate. A success message displays upon successful propagation.

Fig. 3.361 Repropagation Successful
3.17.1.6. Plan
Under the Plan tab, you can find the list of all the Plans that are mapped to this particular Gateway.
The Plan tab displays all the mapped plans along with details such as:
- Plan Name with details (Monetization Strategies)
- Pack Name with details (REST or SOAP Plan) and status of the Plan (Draft/Approved/Published)
- Mapped Filter - This option allows you to display - all Plans/only mapped Plans/only unmapped Plans.
- Map to Gateways - Toggle button to map the unmapped Plans to the Gateway. Mapped Plans are displayed in green while unmapped Plans are displayed in red.
- Plan Status (Propagated or not)
- Search box to search for a particular Plan. Enter the query in the search box and click the search icon to display the results.
- Repropagate - This button allows users to repropagate propagated Plans.
To map the Plans to a Gateway:
Navigate to the Gateways screen.
From the list of Gateways, select the required Gateway and then click the Plan tab. The Plan tab displays a list of all the Plans under this particular Gateway.
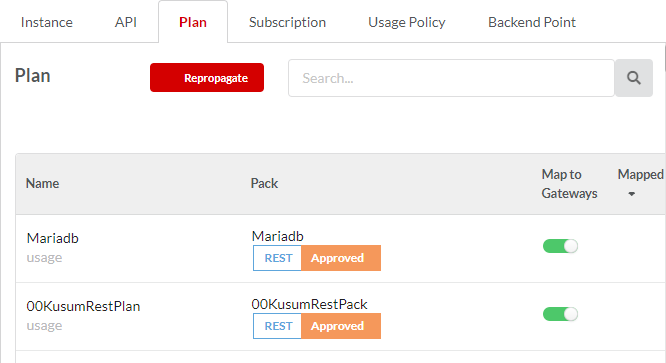
Fig. 3.362 Plan
Use the Mapped filter to filter Plans using the options: All, Mapped, Unmapped. You can also search for the required Plan using the Search box.
Fig. 3.363 Mapped Filter
Note
Only draft, published or approved Plans are available to map.
In the row that has the Plan that you wish to map, click the Map to Gateways toggle button. Inversely, click the toggle button again to unmap
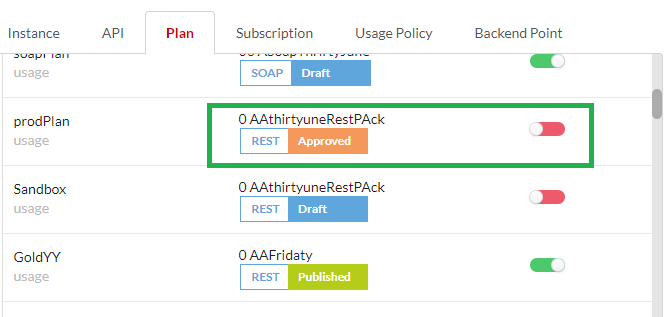
Fig. 3.364 Toggle to Map
A notification message appears asking you to confirm the mapping.
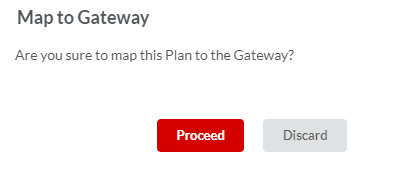
Fig. 3.365 Mapped Toggle
- Click Proceed to map. The Plan will be mapped. The toggle button will turn green.
Although the Plan is mapped, it is not yet propagated. The Plan will be available to propagate in the Gateways Sync page.
Note
Gateway mapped plan which has an active subscription cannot be unmapped.
To repropagate the propagated Plan:
Navigate to the Plan tab.
Click Repropagate. The Propagate Plan dialog displays a list of already propagated Plans that are available for repropagation.
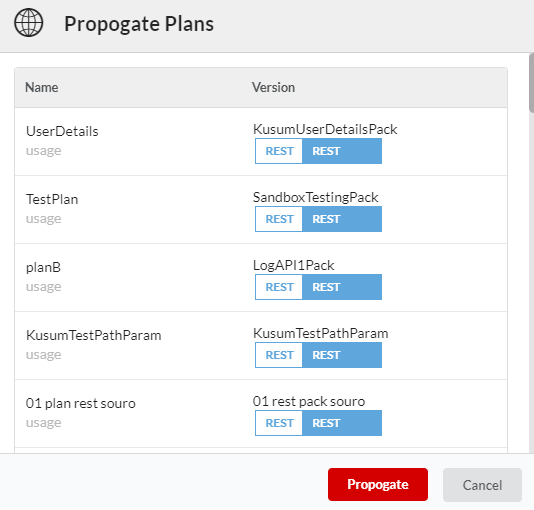
Fig. 3.366 Propagate Plan
Click Propagate. A success message displays upon successful propagation.
Fig. 3.367 Repropagation Successful
3.17.1.7. Subscription
Under the Subscription tab, you can find the list of all the Subscriptions that are mapped to this particular Gateway.
The Subscription tab displays all the mapped subscription along with details such as:
- Developer Name with subscription status details (active)
- Pack Name
- Plan Name
- Subscription Status (Propagated or not)
- Search box to search for a particular Plan. Enter the query in the search box and click the search icon to display the results.
- Repropagate - This button allows users to repropagate propagated Plans.
Navigate to the Gateways screen.
From the list of Gateways, select the required Gateway and then click the Subscription tab. The Subscription tab displays a list of all the Subscription under this particular Gateway.
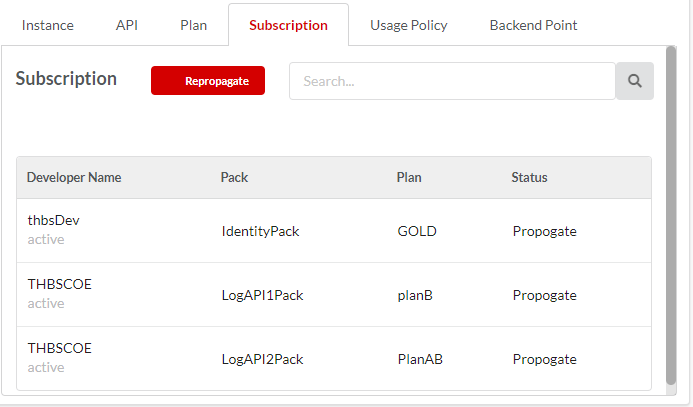
Fig. 3.368 Subscription
Note
If all the subscriptions under this tab are already mapped to the Gateway, then Mapped Filter option and Map to Gateways toggle button column will not be visible to the user.
Note
A Subscription can be mapped to only one Gateway and not multiple Gateways.
Although when a Subscription is mapped, it is not yet propagated. The Subscription will be available to propagate in the Gateways Sync page.
To repropagate the propagated Subscription:
Navigate to the Subscription tab.
Click Repropagate. The Propagate Subscription dialog displays a list of already propagated Subscriptions that are available for repropagation.
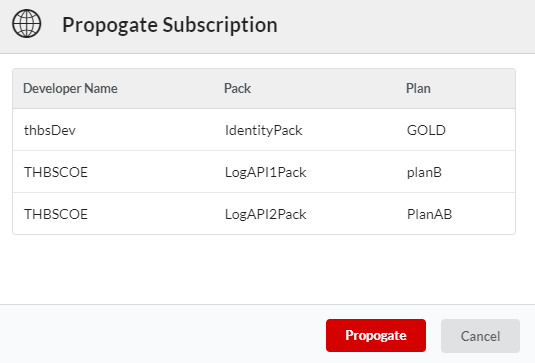
Fig. 3.369 Propagate Subscription
Click Propagate. A success message displays upon successful propagation.
Fig. 3.370 Repropagation Successful
3.17.1.8. Usage Policy
Under the Usage Policy tab, you can find the list of all the Usage Policies that are mapped to this particular Gateway.
The Usage Policy tab displays the mapped Usage Policies along with details such as:
- Policy Name with status details (Draft/Approved/Published)
- Policy Type
- Mapped Filter - This option allows you to display - all Policies/only mapped Policies/only unmapped Policies.
- Map to Gateways - Toggle button to map the unmapped Policies to the Gateway. Mapped Policies are displayed in green while unmapped Policies are displayed in red.
- Policy Status (Propagated or not)
- Search box to search for a particular Policy. Enter the query in the search box and click the search icon to display the results.
- Repropagate - This button allows users to repropagate propagated Policies.
To map the Policies to a Gateway:
Navigate to the Gateways screen.
From the list of Gateways, select the required Gateway and then click the Policies tab. The Policies tab displays a list of all the Policies under this particular Gateway.
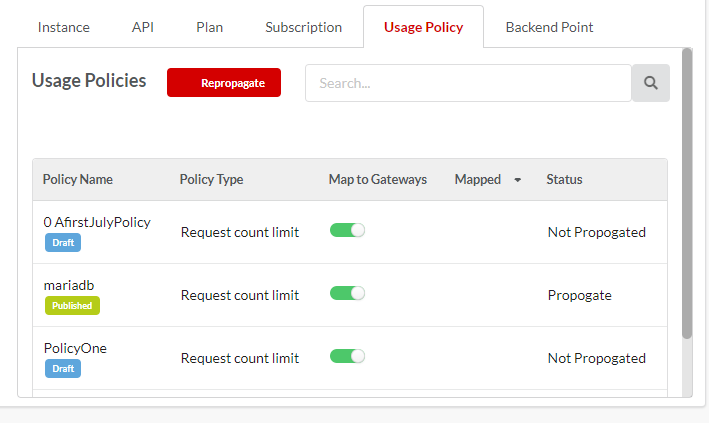
Fig. 3.371 Policies
Use the Mapped filter to filter Policies using the options: All, Mapped, Unmapped. You can also search for the required Policy using the Search box.
Fig. 3.372 Mapped Filter
Note
Only draft, published or approved Policies are available to map.
In the row that has the Policy that you wish to map, click the Map to Gateways toggle button. Inversely, click the toggle button again to unmap.
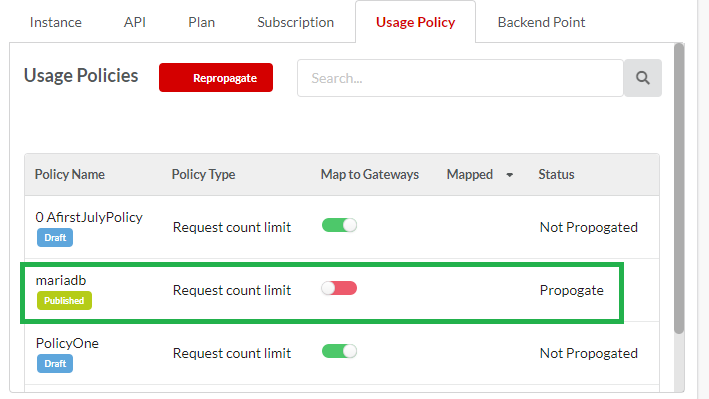
Fig. 3.373 Toggle to Map
A notification message appears asking you to confirm the mapping.
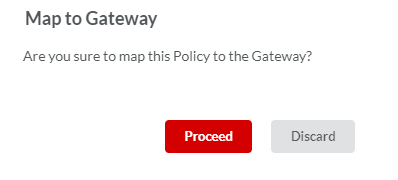
Fig. 3.374 Mapped Toggle
- Click Proceed to map. The Policy will be mapped. The toggle button will turn green.
Although the Policy is mapped, it is not yet propagated. The Policy will be available to propagate in the Gateways Sync page.
Note
Gateway mapped Usage policy which is consumed in a plan having active subscription cannot be unmapped.
To repropagate the propagated Policy:
Navigate to the Usage Policy tab.
Click Repropagate. The Propagate Plan dialog displays a list of already propagated Policies that are available for repropagation.
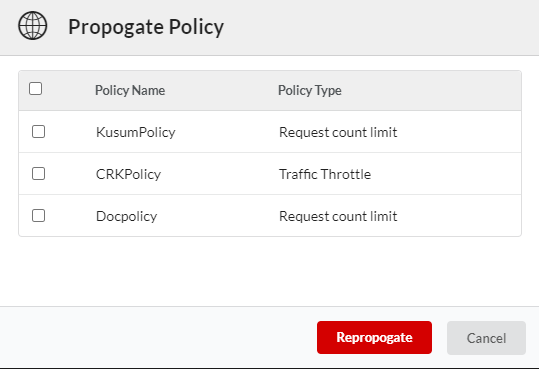
Fig. 3.375 Propagate Policy
Click Propagate. A success message displays upon successful propagation.
Fig. 3.376 Repropagation Successful
3.17.1.9. Backend Point
Under the Backend Point tab, you can find the list of all the Backend Points that are mapped to this particular Gateway.
The Backend Pointtab displays all the mapped Backends along with details such as:
- Server Name with details (Production/Sandbox)
- IP and Port details
- Description
- Mapped Filter - This option allows you to display - all Backends/only mapped Backends/only unmapped Backends.
- Map to Gateways - Toggle button to map the unmapped Backends to the Gateway. Mapped Backends are displayed in green while unmapped Backends are displayed in red.
- Status (Propagated or not)
- Search box to search for a particular Backend. Enter the query in the search box and click the search icon to display the results.
- Repropagate - This button allows users to repropagate propagated Backends.
To map the Backend to a Gateway:
Navigate to the Gateways screen.
From the list of Gateways, select the required Gateway and then click the Backend Point tab. The Backend Point tab displays a list of all the Backends under this particular Gateway.
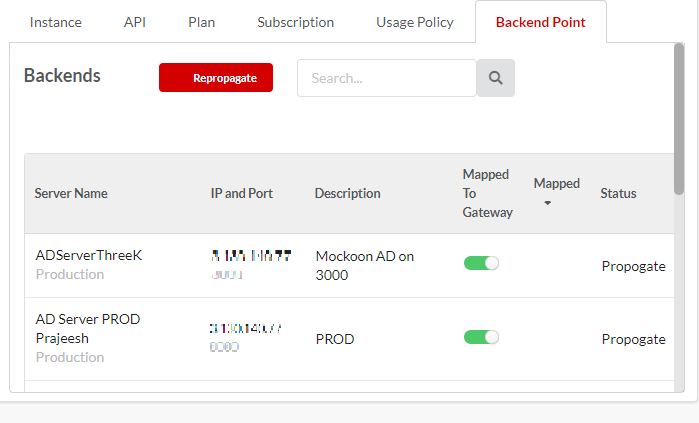
Fig. 3.377 Backends
Use the Mapped filter to filter Backends using the options: All, Mapped, Unmapped. You can also search for the required Backend using the Search box.
Fig. 3.378 Mapped Filter
In the row that has the Backend that you wish to map, click the Map to Gateways toggle button. Inversely, click the toggle button again to unmap.
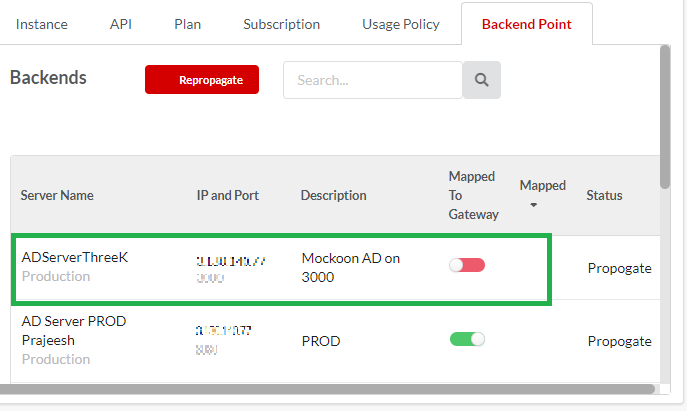
Fig. 3.379 Toggle to Map
A notification message appears asking you to confirm the mapping.
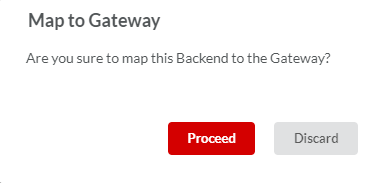
Fig. 3.380 Mapped Toggle
- Click Proceed to map. The Backend will be mapped. The toggle button will turn green.
Although the Backend is mapped, it is not yet propagated. The Backend will be available to propagate in the Gateways Sync page.
Note
Gateway mapped backend when associated with an API or any artifact cannot be unmapped.
To repropagate the propagated Backend:
Navigate to the Backend Point tab.
Click Repropagate. The Propagate Plan dialog displays a list of already propagated Policies that are available for repropagation.
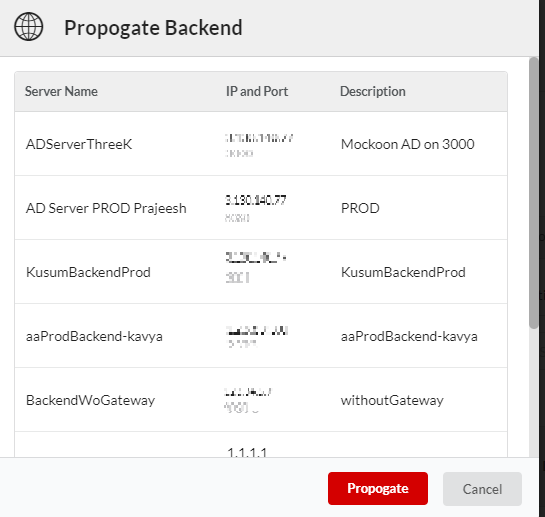
Fig. 3.381 Propagate Backend
Click Propagate. A success message displays upon successful propagation.
Fig. 3.382 Repropagation Successful
3.17.1.10. Editing the Fault Configuration at each Gateway
Fault Configuration for all Gateways is by default set at Global level. You can edit the Default Fault Configuration settings configured at Global level, at each Gateway, by following the steps below.
To edit the REST Fault Configuration at Gateway Level:
Navigate to the Gateways screen.
Click the Fault Configuration
 icon and then click the REST tab to open the Gateway Fault Configuration window.
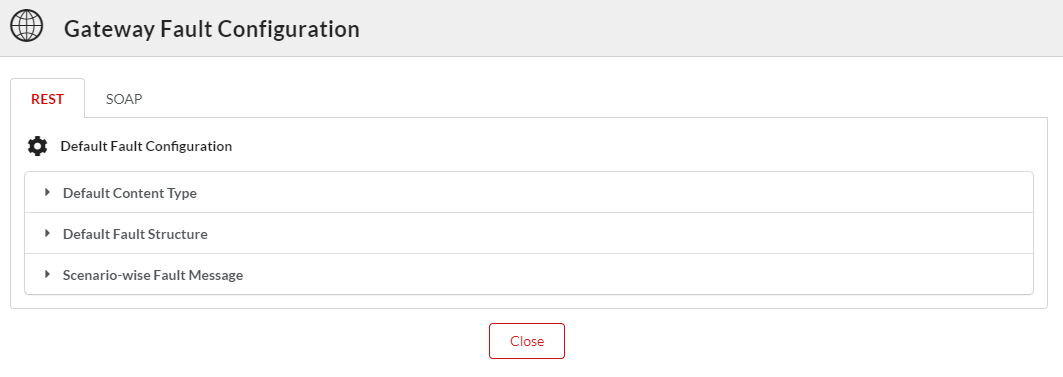
Fig. 3.383 Gateway Fault Configuration
Click to expand the Default Content Type accordion tab. At Gateway Level, you can overwrite the Gateway/Plan/Resource Level Content Type that was configured at Global level. Move the Overwrite toggler to the right to activate overwrite and do the inverse to retain the Default Content Type settings. Upon enabling Overwrite, the Content Type options for Gateway/Plan/Resource level will be enabled.
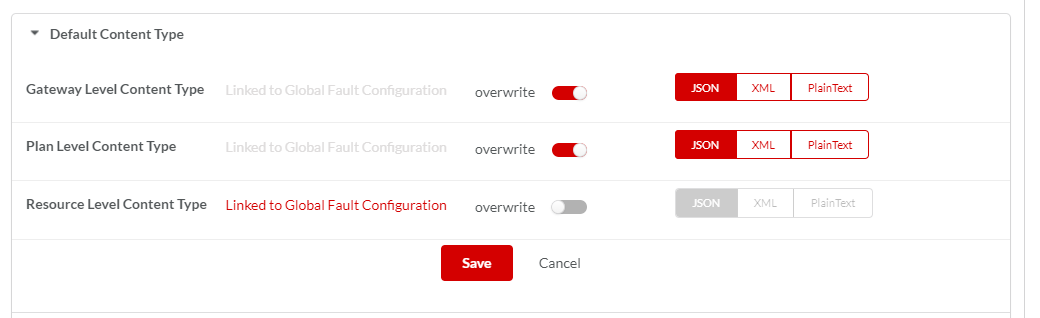
Fig. 3.384 Gateway Content Type
Click the required Content Type (JSON/XML/PlainText) option to select to be configured at Gateway/Plan/Resource Level and then click Save.
Next, click to expand the Fault Structure accordion tab. At Gateway Level, you can overwrite the Gateway/Plan/Resource Level Fault Structure that was configured at Global level. Move the Overwrite toggler to the right to activate overwrite and do the inverse to retain the Default Fault Structure settings. Upon enabling Overwrite, the Fault Structure options for Gateway/Plan/Resource level will be enabled.
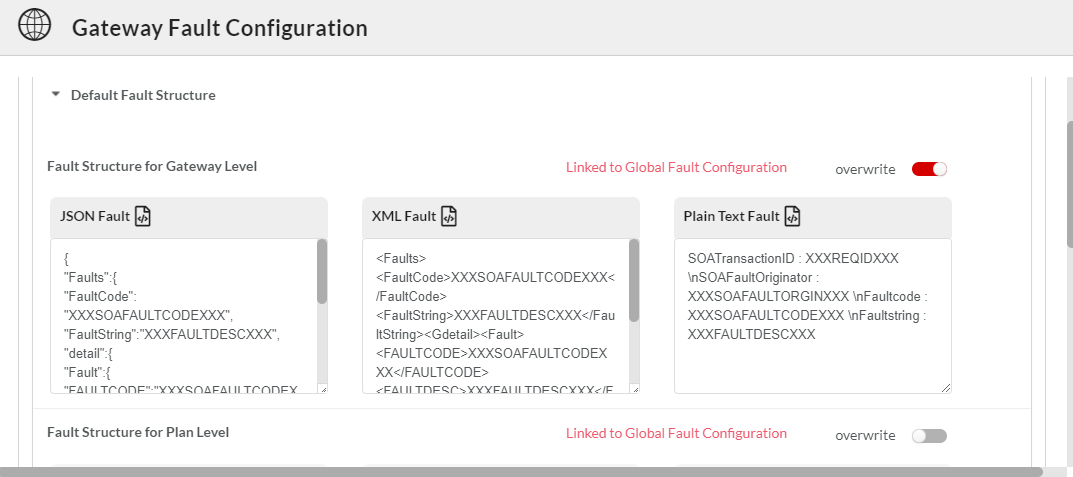
Fig. 3.385 Gateway Fault Structure
(Optional) Edit the JSON/XML/PlainText Fault box to make any required changes to the Fault template at Gateway/Plan/Resource Level and then click Save to save the changes.
Next, click to expand the Scenario-wise Fault Message accordion tab. At Gateway Level, you can overwrite the Gateway/Plan/Resource Level Fault Message that was configured at Global level. Move the Overwrite toggler to the right to activate overwrite and do the inverse to retain the default Fault Message settings. Upon enabling Overwrite, the Fault Message options for Gateway/Plan/Resource level will be enabled.
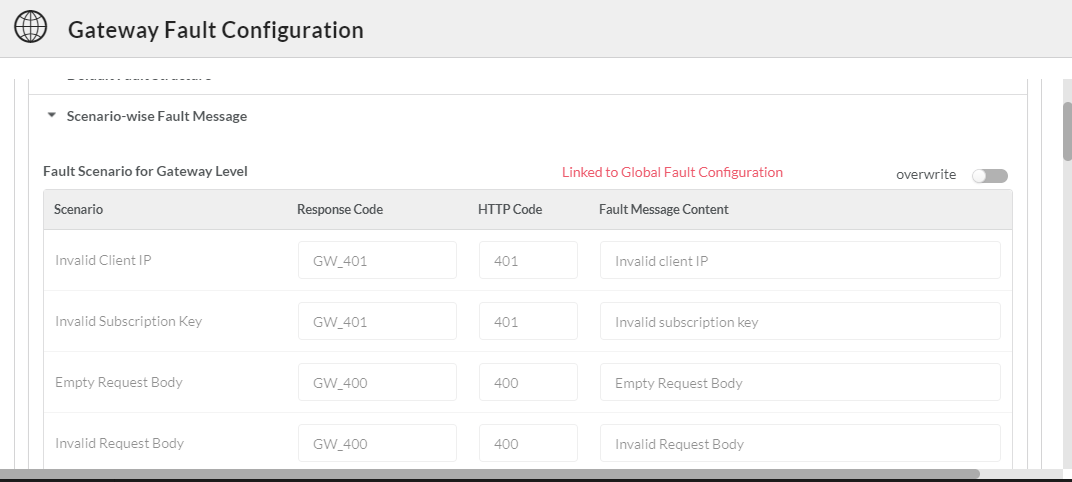
Fig. 3.386 Scenario-wise Fault Message
(Optional) Click the Response Code box corresponding to the Fault scenario to type in a different fault code in the box.
(Optional) Click the HTTP Code box corresponding to the Fault scenario to type in a different HTTP code in the box.
(Optional) Click the Fault Message Content box corresponding to the Fault scenario to type in a different Fault Message in the box.
Click Save. This will overwrite the default Fault Message settings.
Click Close to exit the Fault Configuration window.
To edit the SOAP Fault Configuration at Gateway Level:
Navigate to the Gateways page.
Click the Fault Configuration
icon and then click the SOAP tab to open the Gateway Fault Configuration window.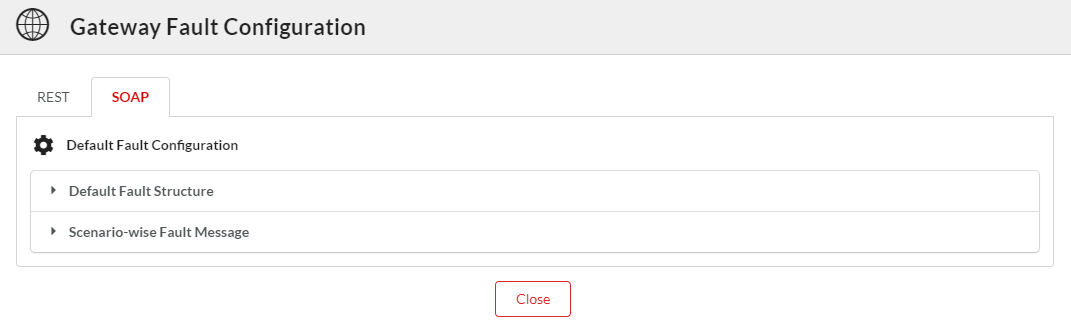
Fig. 3.387 Fault Configuration
Click to expand the Fault Structure accordion tab. At Gateway level, you can overwrite the Gateway/Plan/Operation level Fault Structure that was configured at Global level. Move the Overwrite toggler to the right to activate overwrite and do the inverse to retain the Default Fault Structure settings. Upon enabling Overwrite, the Fault Structure options for Gateway/Plan/Operation level will be enabled.

Fig. 3.388 Fault Structure
(Optional) Edit the XML Fault box to make any required changes to the Fault template at Gateway/Plan/Operation Level and then click Save to save the changes.
Next, click to expand the Scenario-wise Fault Message accordion tab. At Gateway level, you can overwrite the Gateway/Plan/Operation level Fault Message that was configured at Global level. Move the toggler to the right to activate Overwrite and do the inverse to retain the Default Fault Message settings. Upon enabling Overwrite, the Fault Message options for Gateway/Plan/Operation level will be enabled.
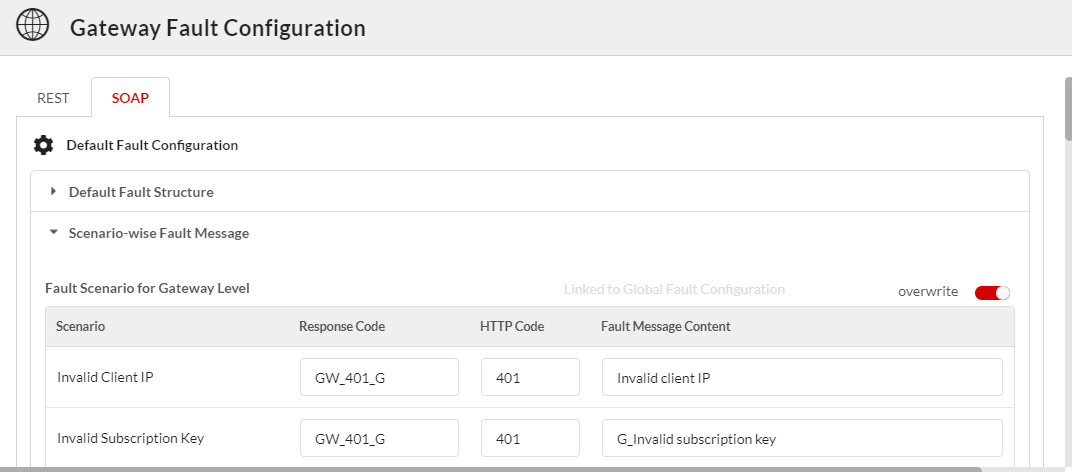
Fig. 3.389 Fault Message
(Optional) Click the Response Code box corresponding to the Fault scenario to type in a different fault code in the box.
(Optional) Click the HTTP Code box corresponding to the Fault scenario to type in a different HTTP code in the box.
(Optional) Click the Fault Message Content box corresponding to the Fault scenario to type in a different Fault Message in the box.
Click Save. This will overwrite the default Fault Message settings.
Click Close to exit the Fault Configuration window.
Next Steps
In the next section, we will learn about synchronizing Approved artifacts to the Gateway.