3.3. Create and Configure a Backend Server
A Backend server is where all the assets for API services exist, which then are exposed to the client via proxy. A proxy is an server application that sits between the gateway and the backend. Requests from the gateway passes through proxy before they hit the backend. You can define a single proxy for an organization. This proxy can be enabled or disabled based on your requirement. You can define the backends that you plan to use to expose assets via APIs. Setting up the backends allows you to associate APIs with backend servers and configure them for use. You can also map a backend to all, single or multiple gateways.
Before you begin:
- Make sure you are logged in to the DigitMarket™ API Manager Publisher Portal using your sub-organizational level credentials. To learn about how to log in to the Publisher portal, visit Log in to the Publisher Portal
- The fields marked in asterisks are mandatory
Common Tasks:
Following are the common tasks identified for this section:
Navigating to the Backends screen
To navigate to the Backends screen:
- In the main Navigation menu, click Backends
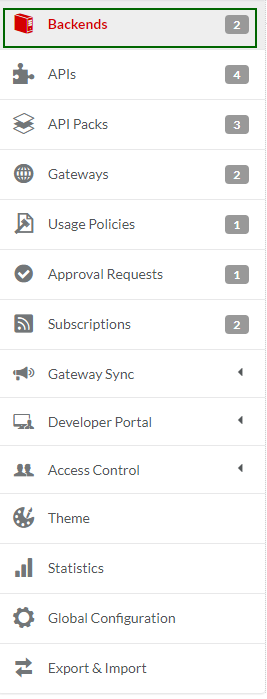
Fig. 3.36 Backend menu
The Backends screen displays with a list of Backend servers.

Fig. 3.37 Backend servers
3.3.1. Add a Backend Server
To add a new Backend:
Navigate to the Backends screen.
Click New Backend to display the Add Backend Server dialog box.
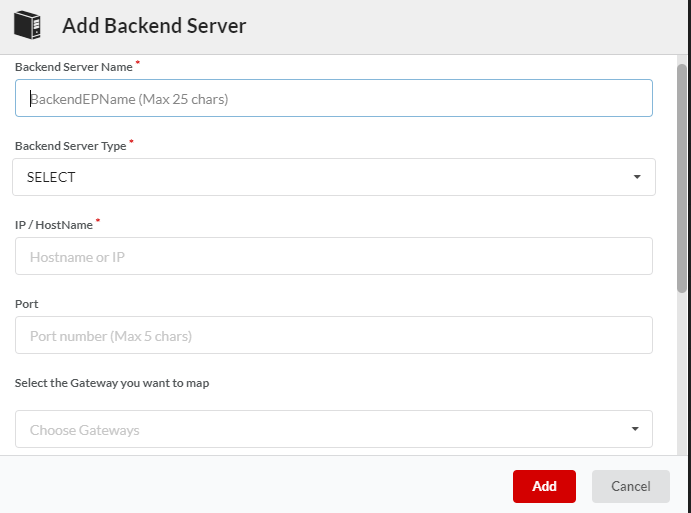
Fig. 3.38 Add Backend Server
In the Backend Server Name box, type a name for the Backend Server.
Note
When you configure endpoints for an API using the Dynamic Routing scripts, use the Backend Server Name to route requests to the required Backend Server.
Click the Backend Server Type drop-down box to select between Production and Sandbox server types.
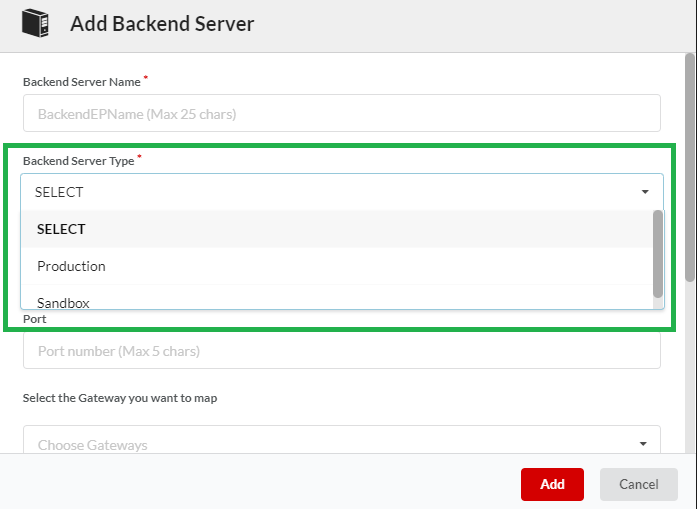
Fig. 3.39 Select Server types
In the IP/Hostname box, type the IP or host name for the Backend Server.
In the Port box, type the port number for the Backend Server.
In the Description box, type the details you want to add for the Backend Server.
The Select the Gateway you want to map drop-down displays the list of Gateways that are configured for the publisher organization and from where the user can choose the Gateway to which they want to map the Backend Server. Those selected gateways will be appear above the drop-down and these selected gateways can be removed by clicking
 .
.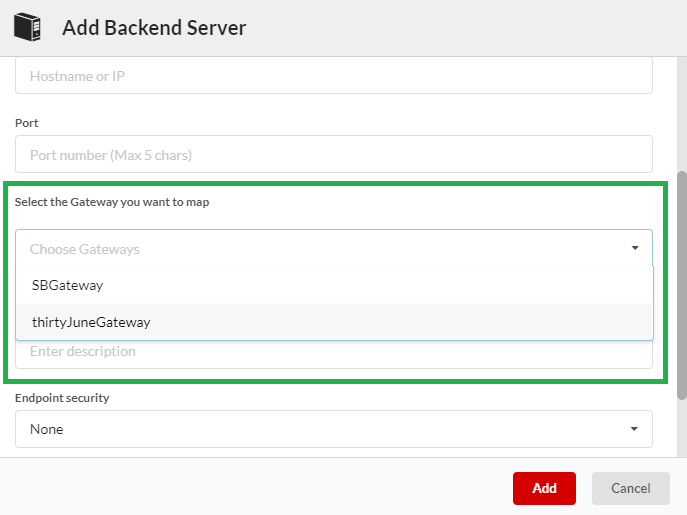
Fig. 3.40 Gateway to Map
Note
- The Backend will be mapped only to the selected Gateways.
- Production backend type for the respective production Gateway will be appear for mapping.
- Gateway mapping is optional and if no Gateway is mapped, the backend server will not be available in Gateway Synchronization - Pending Changes page to propagate.
- You can also map the backend from the Backend Point tab of the selected Gateway. Refer Backend Point
Click the Endpoint security drop-down box to select the kind of security required for the Real Endpoints.
You can select any one of the following:
- None: to have no security for the endpoint. If the request has passed the API subscription-level authentication, if in force, the request is processed as a valid one and a response is sent to the client.
- Basic Authentication: to prevent unauthorized access basic authentication requires the publishers to provide user name and password as credentials that is authenticated after the message has passed the API subscription-level authentication successfully.
- WS Security: to authenticate SOAP APIs using the encrypted basic authentication requires the publishers to provide user name and password as credentials that is authenticated once the subscription-level authentication is successful.
- Pass through: Under pass-through authentication, the Gateway delegates the message authentication directly to the backend server without making any alterations.
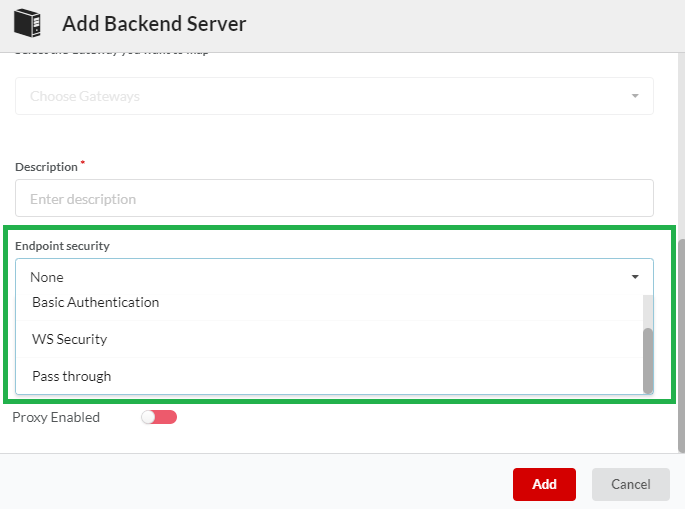
Fig. 3.41 Select Endpoint security
Selecting Basic Authentication displays two additional boxes alongside the Endpoint Security drop-down box.
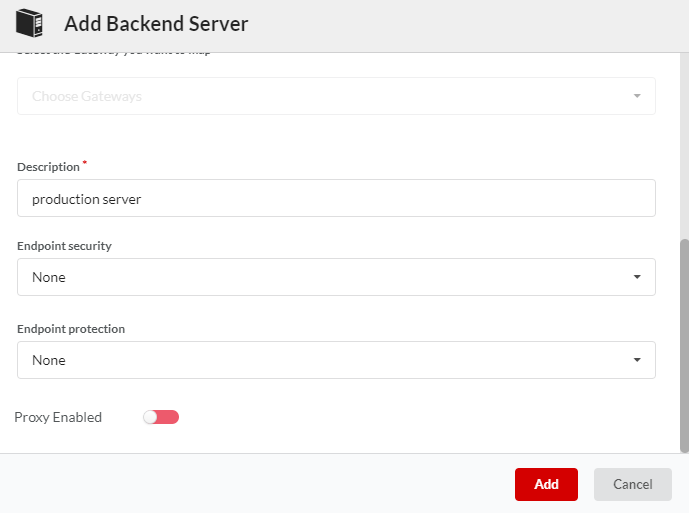
Fig. 3.42 Endpoint Security and End point Protection as None
Selecting Endpoint Security and End point Protection as None.
None value in Endpoint security and Endpoint protection says that user neither selectes a security nor protection. After selecting the value from drop click on Add to add the backend server. Click Cancel to cancel the addition.
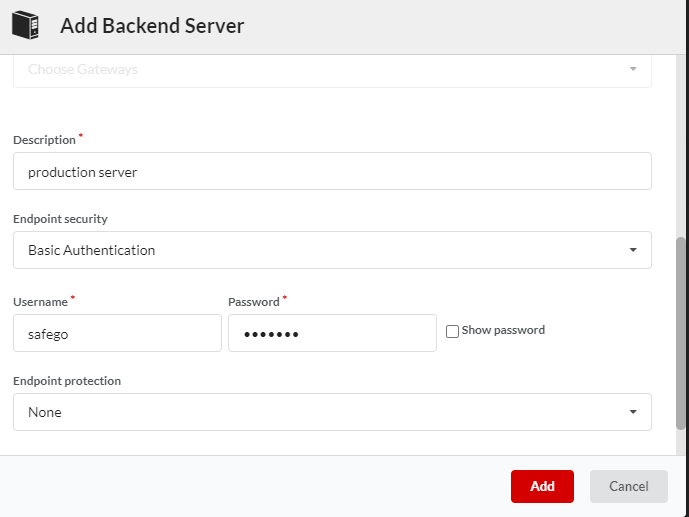
Fig. 3.43 Endpoint Security_Basic Authentication and End point Protection as None
Selecting Endpoint Security as Basic Authentication and Endpoint Protection as None.
After selcting the value from drop click on Add to add the backend server. Click Cancel to cancel the addition.
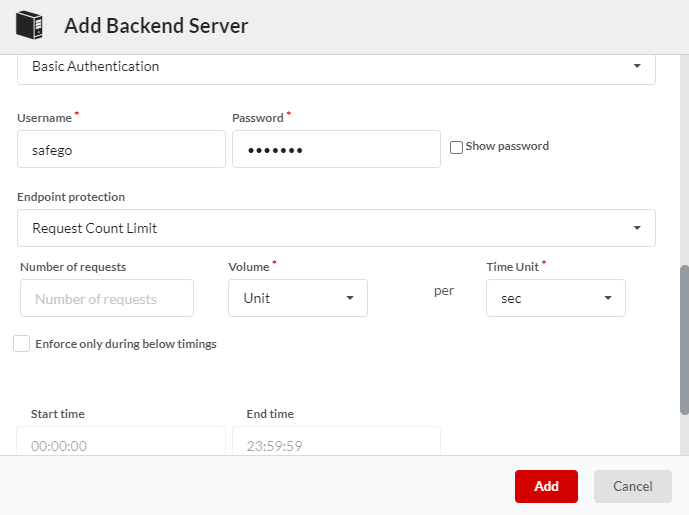
Fig. 3.44 Endpoint Security_Basic Authentication and Endpoint Protection as Request Count Limit
Selecting Endpoint Security as Basic Authentication Basic Authentication and End point Protection as Request Count Limit. It will again ask for Number of Requests, Volume in (Kilo/Million) and Timit Unit in seconds,minutes,and hours.
On checking the checkbox corresponds to Enforce only during below timings we can change change the start time and end time.
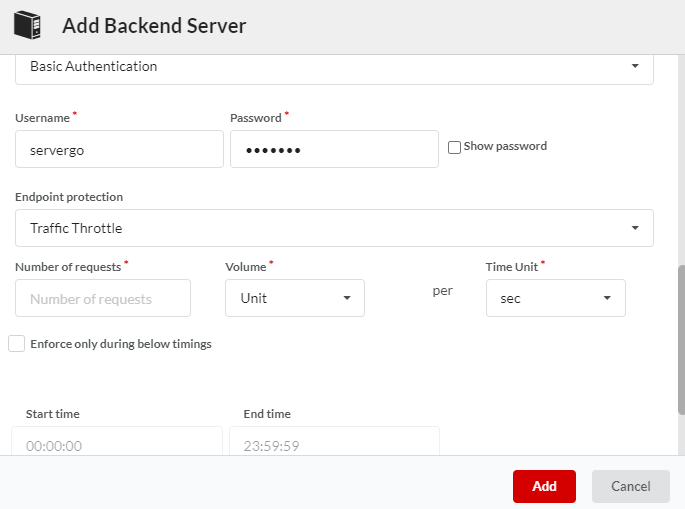
Fig. 3.45 Endpoint Security_WS Security and End point Protection as Traffic Throttle
Selecting Endpoint Security as WS Security and End point Protection as Traffic Throttle. It will again ask for Number of Requests, Volume in (Kilo/Million) and Timit Unit in seconds,minutes,and hours.
On checking the checkbox corresponds to Enforce only during below timings we can change change the start time and end time.
After selcting the value from drop click on Add to add the backend server. Click cancel to cancel the addition.
(In case of Basic Authentication and WS security) In the two boxes provided below the Endpoint Security drop-down box, type a User ID and Password.
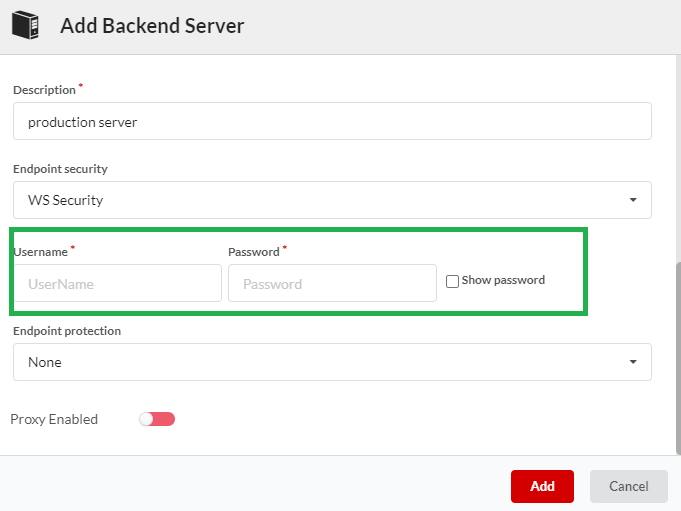
Fig. 3.46 Select User Credentials
- Click the Endpoint protection drop-down box to select the traffic protection you require for the Real Endpoints exposed through the Backend Server.
To enable Endpoint protection, you can select either Request Count Limit or Traffic Throttle. Select None if you do not want any protection for the Endpoint.
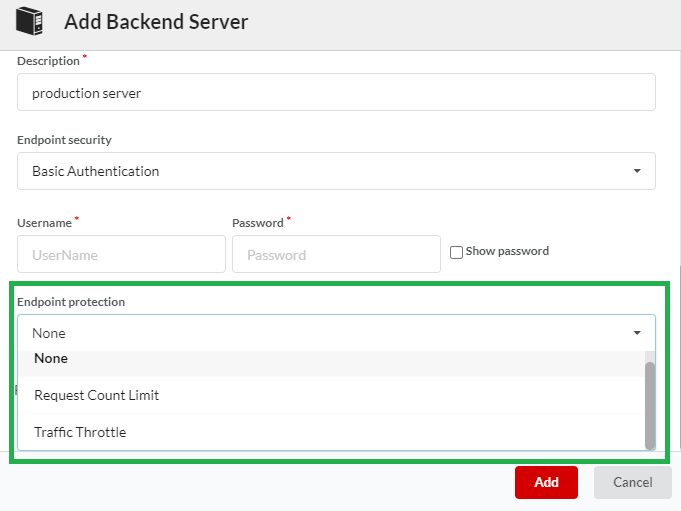
Fig. 3.47 User Credentials
Endpoint Protection helps the system from overloads due to excessive traffic. DigitMarket™ API Manager allows you to enable endpoint protection using Rate Limiting and Throttling.
An Endpoint, such as
https://api.xyz.com/v1.2/customer/, can expose multiple resources, for instance, Resource A -https://api.xyz.com/v1.2/customer/id/and Resource B -https://api.xyz.com/v1.2/CUSTOMER/NAME. An Endpoint Protection policy sets a usage limit for the endpoint and ensures that the number of requests made to all resources put together remains within that limit. For example, if you attach a Usage Policy to the API Endpoint for a request count Limit of 1000 requests per minute, the number of request calls made to Resource A and Resource B put together cannot exceed 1000 requests per minute.To learn about how Usage Policies work, visit: Create a Named Usage Policy and Edit a Named Usage Policy.
- Click the Proxy Enabled toggle button to turn it to green and enable the proxy. Inversely, click the toggle button again to turn it to red and disable the proxy. If a proxy has been enabled for a backend, all requests from the gateway will pass through the proxy before they hit the backend. If a proxy has been disabled for a backend, all requests from the gateway will directly hit the backend.
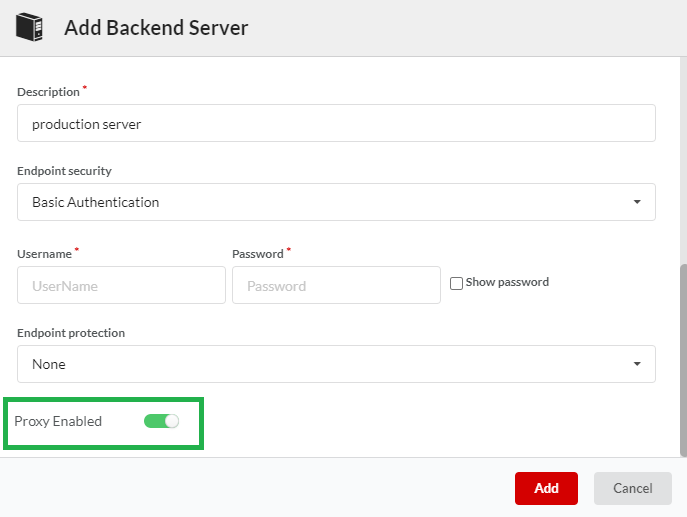
Fig. 3.48 Proxy
Note
- Only HTTP proxy type is supported.
- DMAPIM currently supports one proxy per environment.
- Click Add to save changes and exit the Add Backend Server dialog box. The newly added server displays in the Backends screen.
- Click Cancel to cancel all the modification done recently.
Note
Users can also configure a Sandbox backend to test APIs in a Sandbox environment. For details visit: Configuring Sandbox Backend.
3.3.2. Edit a Backend Server
To edit a Backend Server:
Navigate to the Backends screen.
In the row that has the Backend Server that you want to edit, click the edit icon
 . The Edit Backend Server dialog box displays with populated fields.
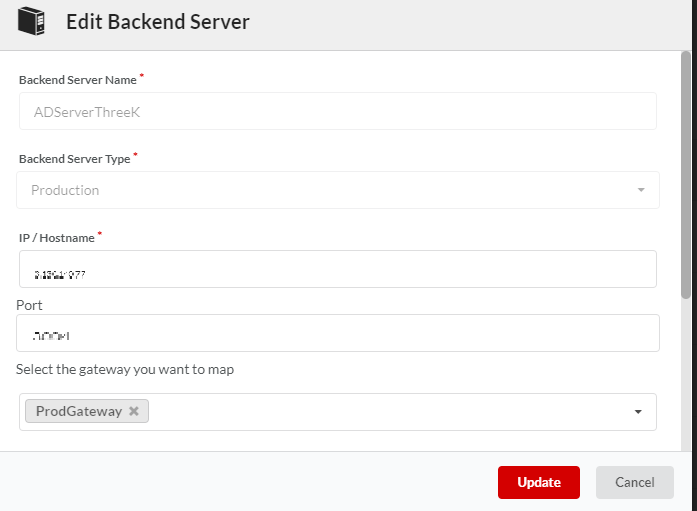
Fig. 3.49 Edit Backend Server
Edit the required fields and then click Update to save changes and close the Edit Backend Server dialog box.
Click Cancel to cancel all the modification done recently.
Note
Upon any changes in the artifacts, the artifacts needs to be repropagated.
3.3.3. Delete a Backend Server
You can delete a Backend Server if there are no API deployed on it.
To delete a Backend Server:
- Navigate to the Backends screen.
- In the row that has the Backend Server that you want to delete, click the delete icon
 .
.
case 1: If we trying to delete backend server which is associated to API’s a pop up message will shoot up ad in figure 2.51 on clicking ok User is not allowed sive it is associated as shown in Fig 2.52

Fig. 3.50 Delete Backend Associated with API
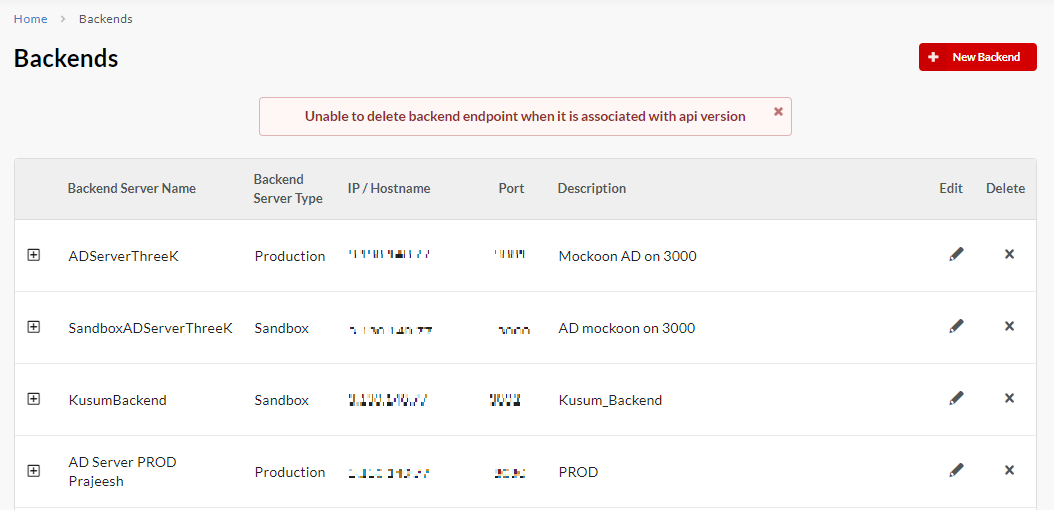
Fig. 3.51 Delete Backend Associated with API Not Deleted
Case 2: If we trying to delete backend server with any API’sandboxBackend
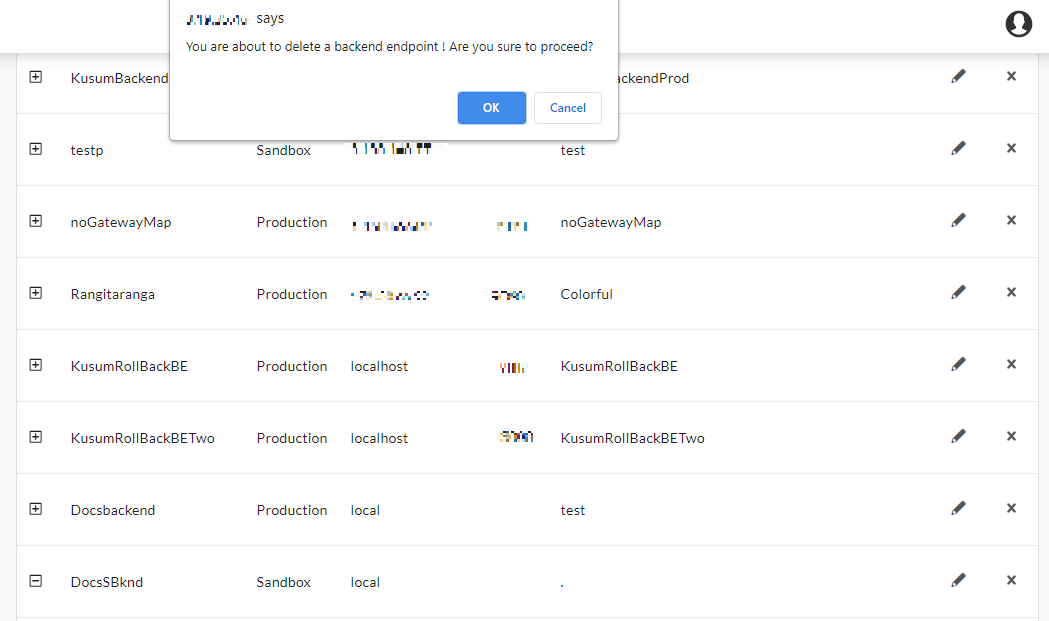
Fig. 3.52 Delete Backend Server
The Backend Server is removed from the Backend list.
- Click OK to delete a Backend Server.
- Click Cancel to cancel deletion.
3.3.4. View APIs on a Backend Server
To view APIs deployed on a Backend Server:
Navigate to the Backends screen.
In the row that has the Backend Server for which you want to view deployed APIs, click the plus icon
 . The row expands displaying details of the APIs deployed on the Backend server.
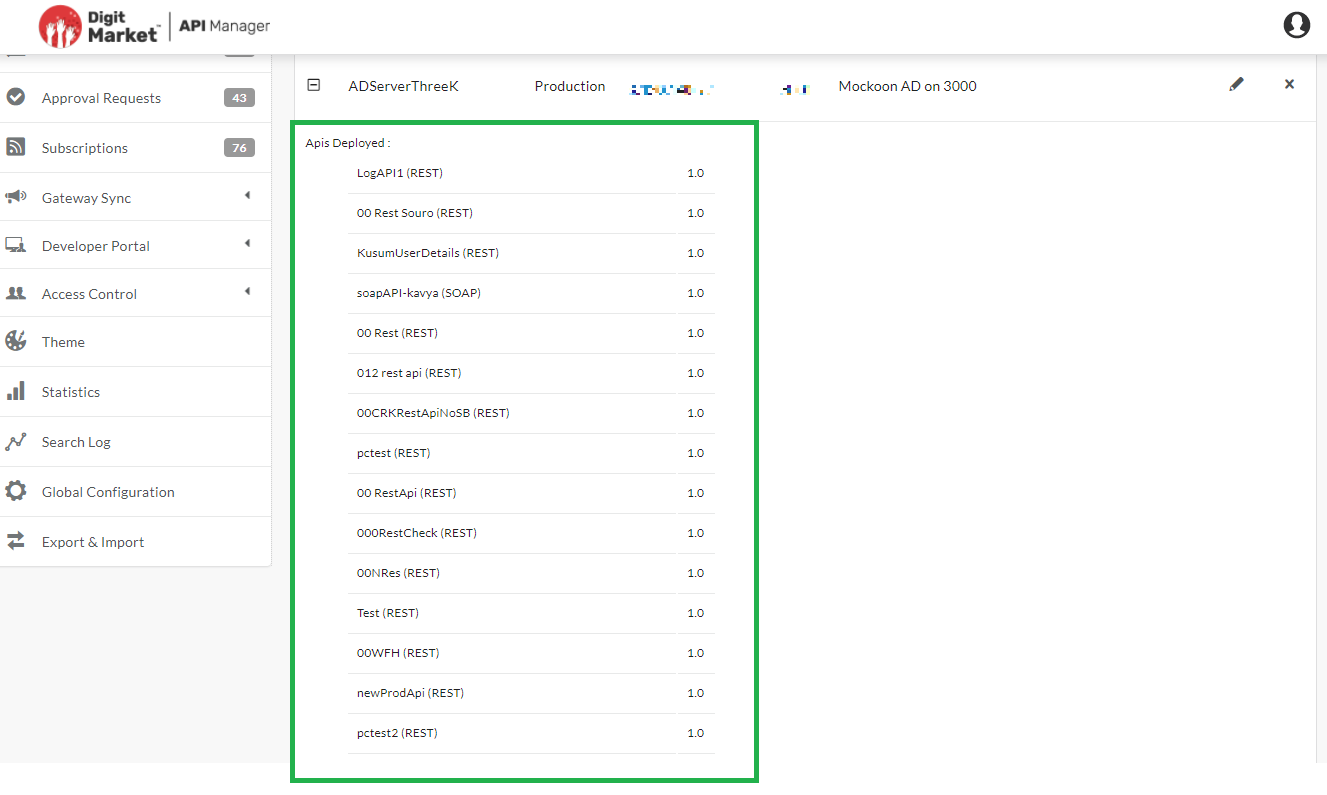
Fig. 3.53 View APIs on Backend Server
Next Steps
In the next section, you will learn how to create REST and SOAP APIs.