3.14. Export and Import Usage Policies
You can export and import data from Approved or Published Usage Policies. The exported file is saved in a Zip file called ‘Export.zip’. The Zip file contains the data.json file that contains data about the Usage Policy(ies) in JSON format.
There are two methods that you can use to export/import Approved or Published Usage Policy data:
Individually from the Usage Policy screen - Under this method, export/import is performed on the selected Approved or Published Usage Policies individually. The ‘Export_POLICY_(Usage Policy Name)_(Request_Request Type)_date(dd_mm_yyyy)-time(hh_mm_ss)’ file contains a folder structure as shown in the figure below:

Fig. 3.326 Individual Export Zip file folder structure
Collectively from the Usage Policies List screen - Under this method, Export is performed on all Approved or Published Usage Policies and Import on all Approved and Published Usage Policies and data is either stored into or retrieved from a single composite file. The ‘Export_POLICY_ALL_date(dd_mm_yyyy)-time(hh_mm_ss)’ file contains a folder structure as shown in the figure below:
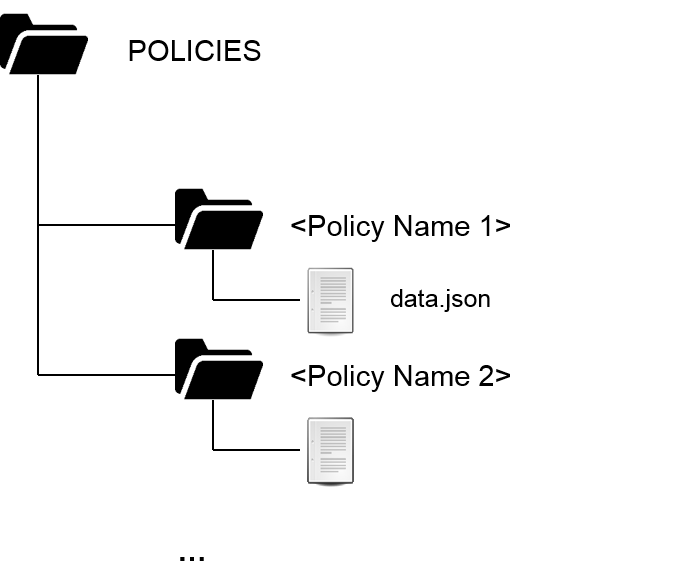
Fig. 3.327 Collective Zip file folder structure
There are two methods that you can use to import Approved or Published Usage Policy data:
Full Import - enables you to overwrite existing data
Delta Import - retains the existing data and only updates new data from the imported file
To learn more about export and import, refer the topic: Exporting and Importing Data.
Common Tasks
Following are the common tasks identified for this section:
Navigating to the Usage Policies List screen
To navigate to the Usage Policies List screen:
- In the main Navigation menu, click Usage Policies. The Usage Policies list screen displays.
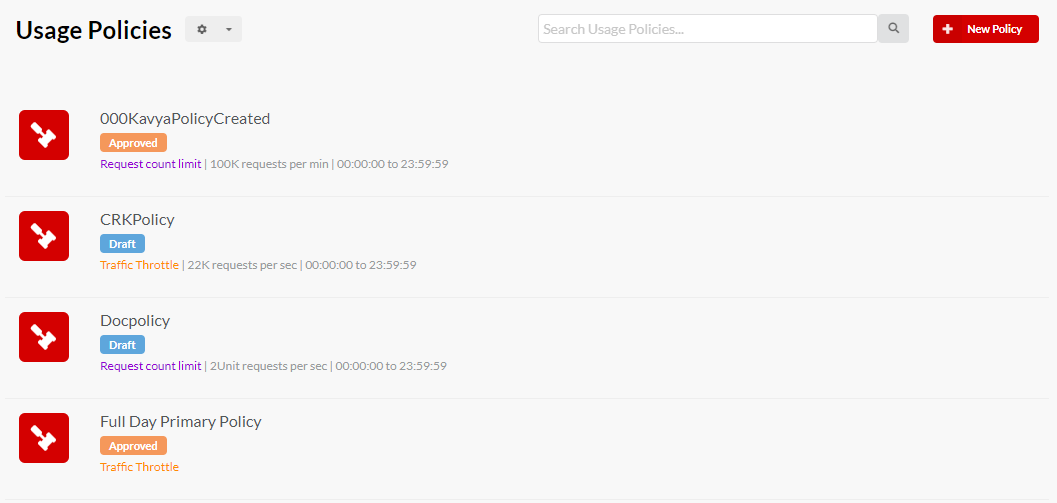
Fig. 3.328 Usage Policies List screen
Navigating to the Usage Policy screen
To navigate to the Usage Policy screen:
- Navigate to the Usage Policies List screen.
- In the Usage Policies list screen, click the row that has the Usage Policy that you want to edit. The Usage Policy screen displays. Being context-sensitive, the Usage Policy screen that displays are different for Request Count Limit and Traffic Throttle Usage Policies.
To export data for an Approved or Published Usage Policy:
Navigate to the Usage Policies List screen.
In the Usage Policies List screen, click the Approved or Published Usage Policy for which you want to export data. The Usage Policy screen displays.
In the Usage Policy screen, click the Usage Policy Action icon to display the Usage Policy Action menu.
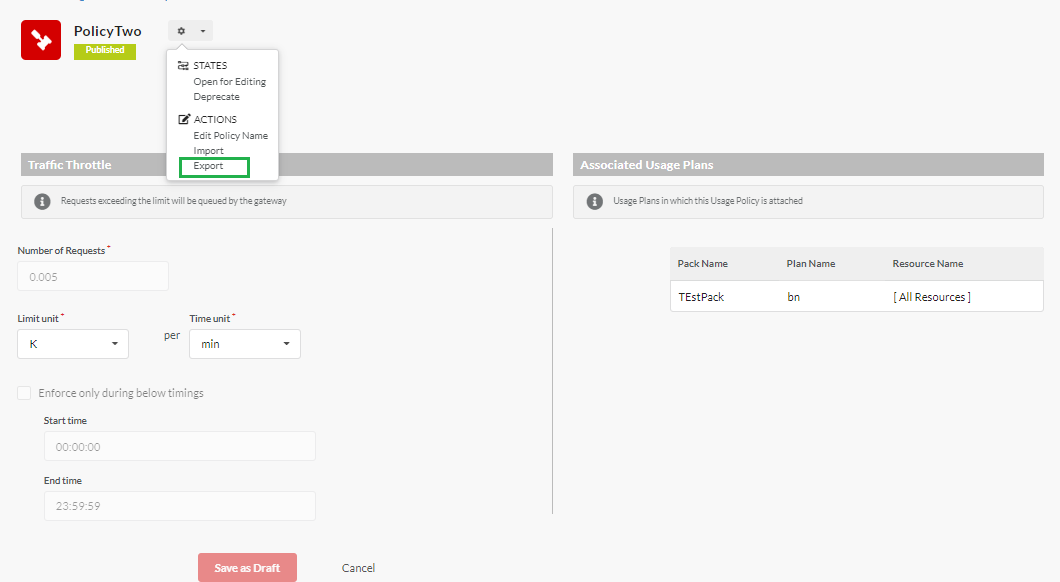
Fig. 3.329 Usage Policy Action menu
In the Usage Policy Action menu, click Export to export the Usage Policy data to a Zip file that has the format Export_POLICY_(Usage Policy Name)_(Request_Request Type)_date(dd_mm_yyyy)-time(hh_mm_ss).
To export all Approved and Published API Packs:
Navigate to the Usage Policies List screen.
In the Usage Policies List screen, click the Usage Policies Action icon
 . The Action menu displays.
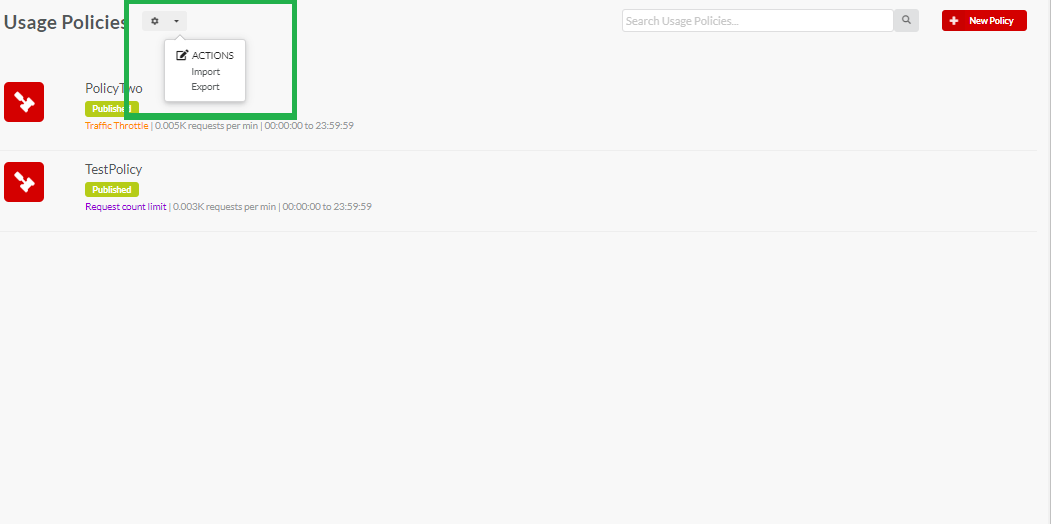
Fig. 3.330 Usage Policy Action menu
In the menu that appears, click Export to export data from all Approved and Published Usage Policies to a zip file whose format is Export_POLICY_ALL_date(dd_mm_yyyy)-time(hh_mm_ss).
Note
The Export menu option displays as enabled only if there is any Approved or Published Usage Policy in the Usage Policies list.
To import an Approved or Published Usage Policy:
Navigate to the Usage Policies screen.
In the Usage Policies List screen, click the row that has the Approved or Published Usage Policy for which you want to import data. The Usage Policy screen displays.
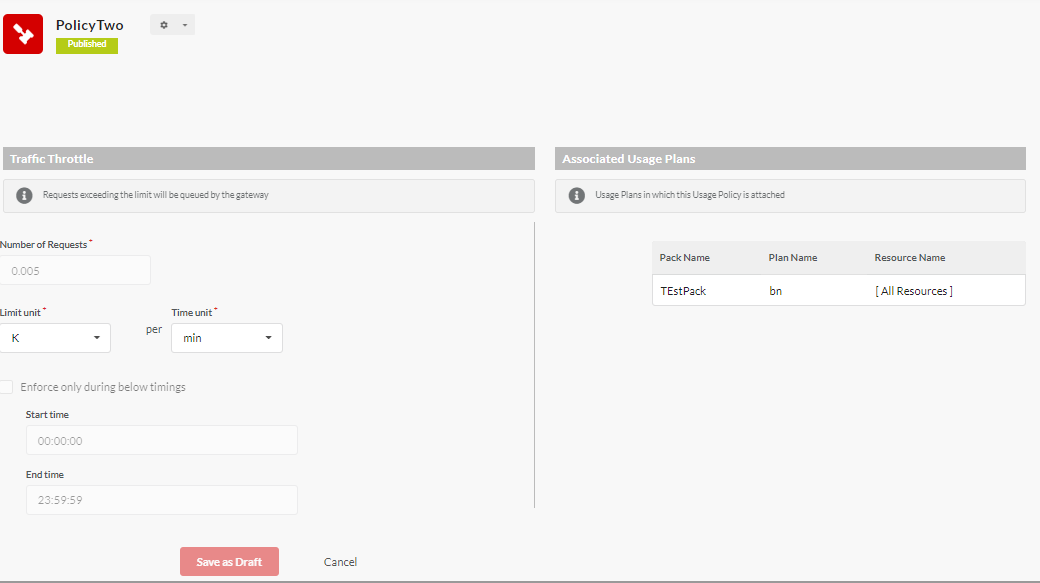
Fig. 3.331 Usage Policy screen
Click the Action icon
to display the Usage Policy Action menu.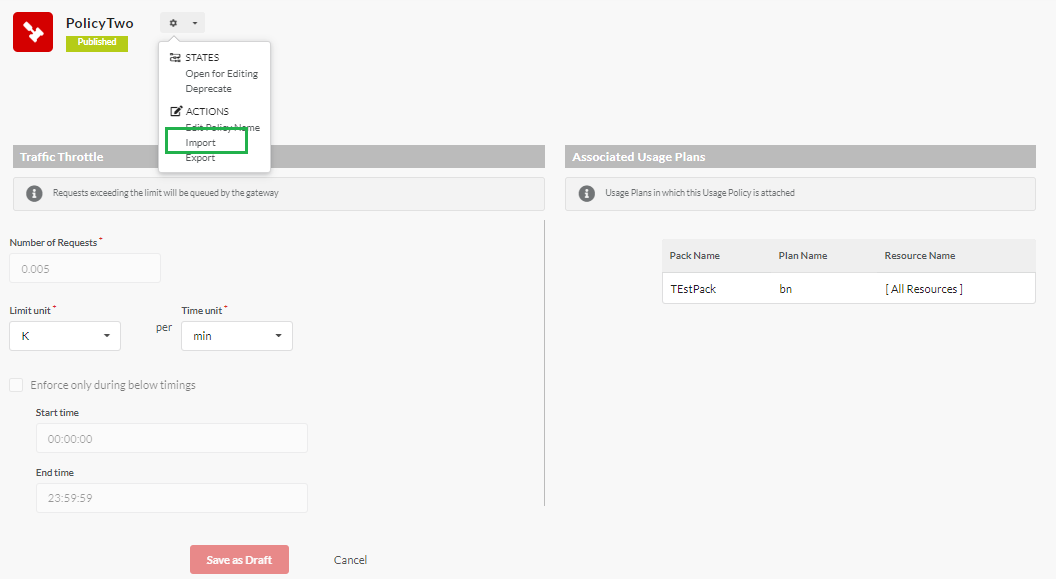
Fig. 3.332 Usage Policy Action menu
In the Usage Policy Action menu, click Import to display Import Usage Policies Details dialog box.
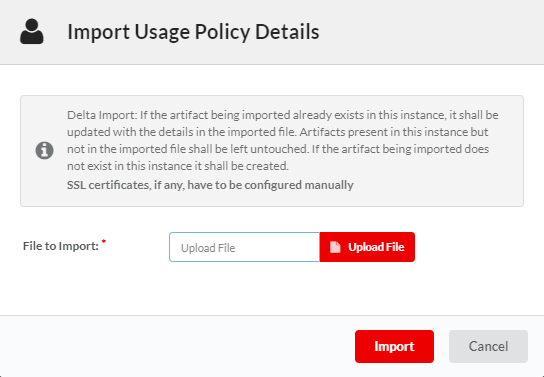
Fig. 3.333 Import Usage Policies Details dialog
Click Choose File against File Upload field to choose a file from which data has to be imported.
Browse your computer to locate and open the Zip file that contains data.json with Usage Policies details in JSON format. Once you have chosen the file, the file name displays alongside the Choose File button.
Click Import to start importing the Usage Policy data. The import overwrites the Usage Policy data with the new data from the imported file.
To import all Approved and Published Usage Policies:
Navigate to the Usage Policies screen.
In the Usage Policies screen, click the Usage Policies Action icon
to display the Action menu.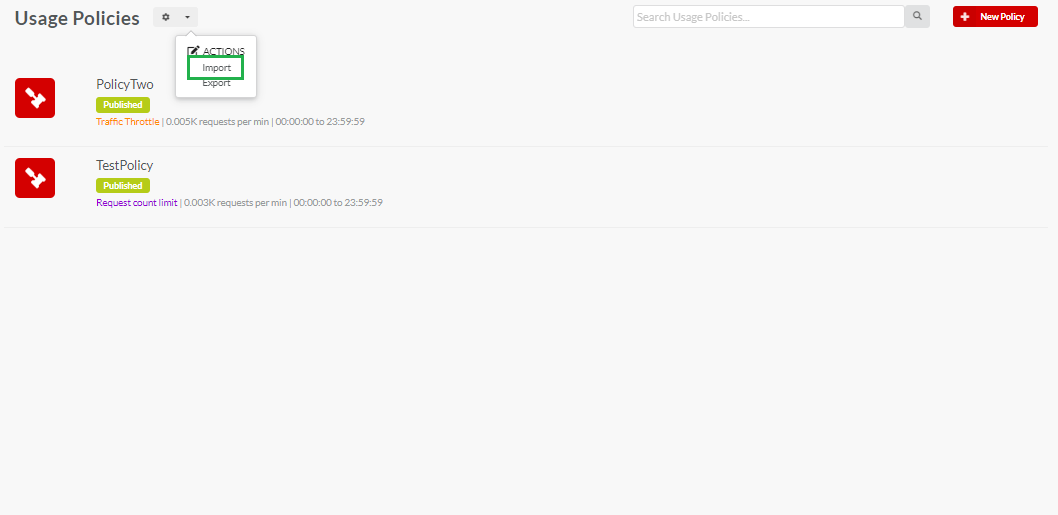
Fig. 3.334 Usage Policies Action menu
In Usage Plan Export/Import Action menu, click Import to display Import Usage Policies dialog box.
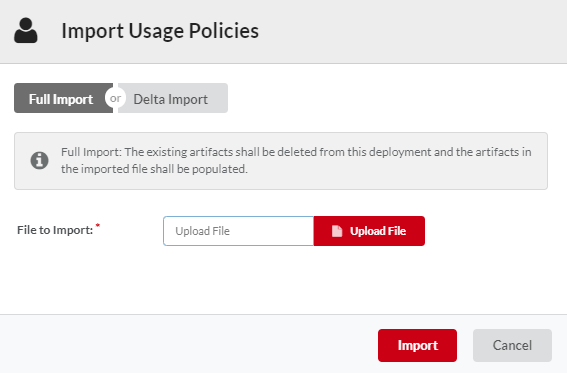
Fig. 3.335 Usage Policies Action menu
Click to select between radio buttons Full Import and Delta Import. Select Full Import to overwrite the existing data. Select Delta Import to retain the existing data and only update new data available from the imported file.
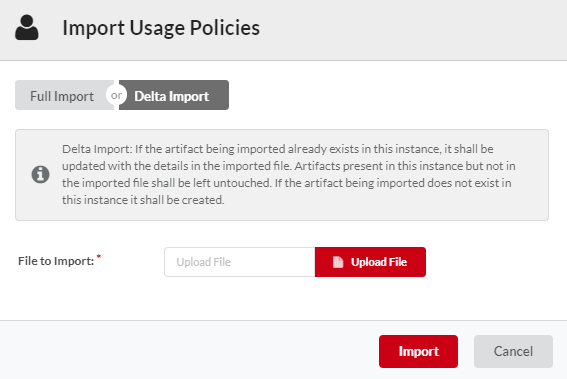
Fig. 3.336 Import type
Click Choose File against File Upload field to choose a file to import data from.
Browse your computer to locate and open the Zip file that contains data.json with Usage Policies details in JSON format. Once you have chosen the file, the file name displays alongside the Choose File button.
Click Import to start importing the Usage Policies data. Depending on the type of Import selected, the data in Approved or Published Usage Policies is overwritten (Full Import) or updated (Delta Import).
Next Steps
In the next section, we will take you through the steps necessary to delete a Named Usage Policy.