3.27. Configure Subscription-level Settings
DigitMarket™ API Manager allows subscriptions to be created in two ways; one from the Publisher portal and the other from the Developer portal.
- From the Publisher portal, DigitMarket™ API Manager allows publisher users (Business users, Approver users, and Admin users) to add a subscription on behalf of Developers. Publisher users can add a subscription from the Subscription menu of the Publisher portal.
- From the Developer portal, DigitMarket™ API Manager allows Developer users to subscribe to a Usage Plan by using the Subscription feature available in the Developer portal. For more information on how a Developer can subscribe to a plan, visit: Subscribe to a Plan.
The Subscription menu provides the Subscription-level configuration screen, from where the Publisher users (Business users, Approver users, and Admin users) can perform the following tasks:
- Configure settings to override the runtime behavior of APIs, which is set through Usage Plans.
- Add credentials for Basic Authentication and WS Security for resources and operations.
- Add authentication mechanisms for subscriptions.
- Add IP addresses to a blacklist and whitelist to specify the IPs that are disallowed and allowed to make calls.
- Add IP addresses and CIDR range for a subscription by choosing either Black List or White List options.
- Add the IP addresses range in CIDR format to minimize the difficulty of entering multiple IP’s.
The Subscriptions Configuration screen has three tabs. These tabs are described below:
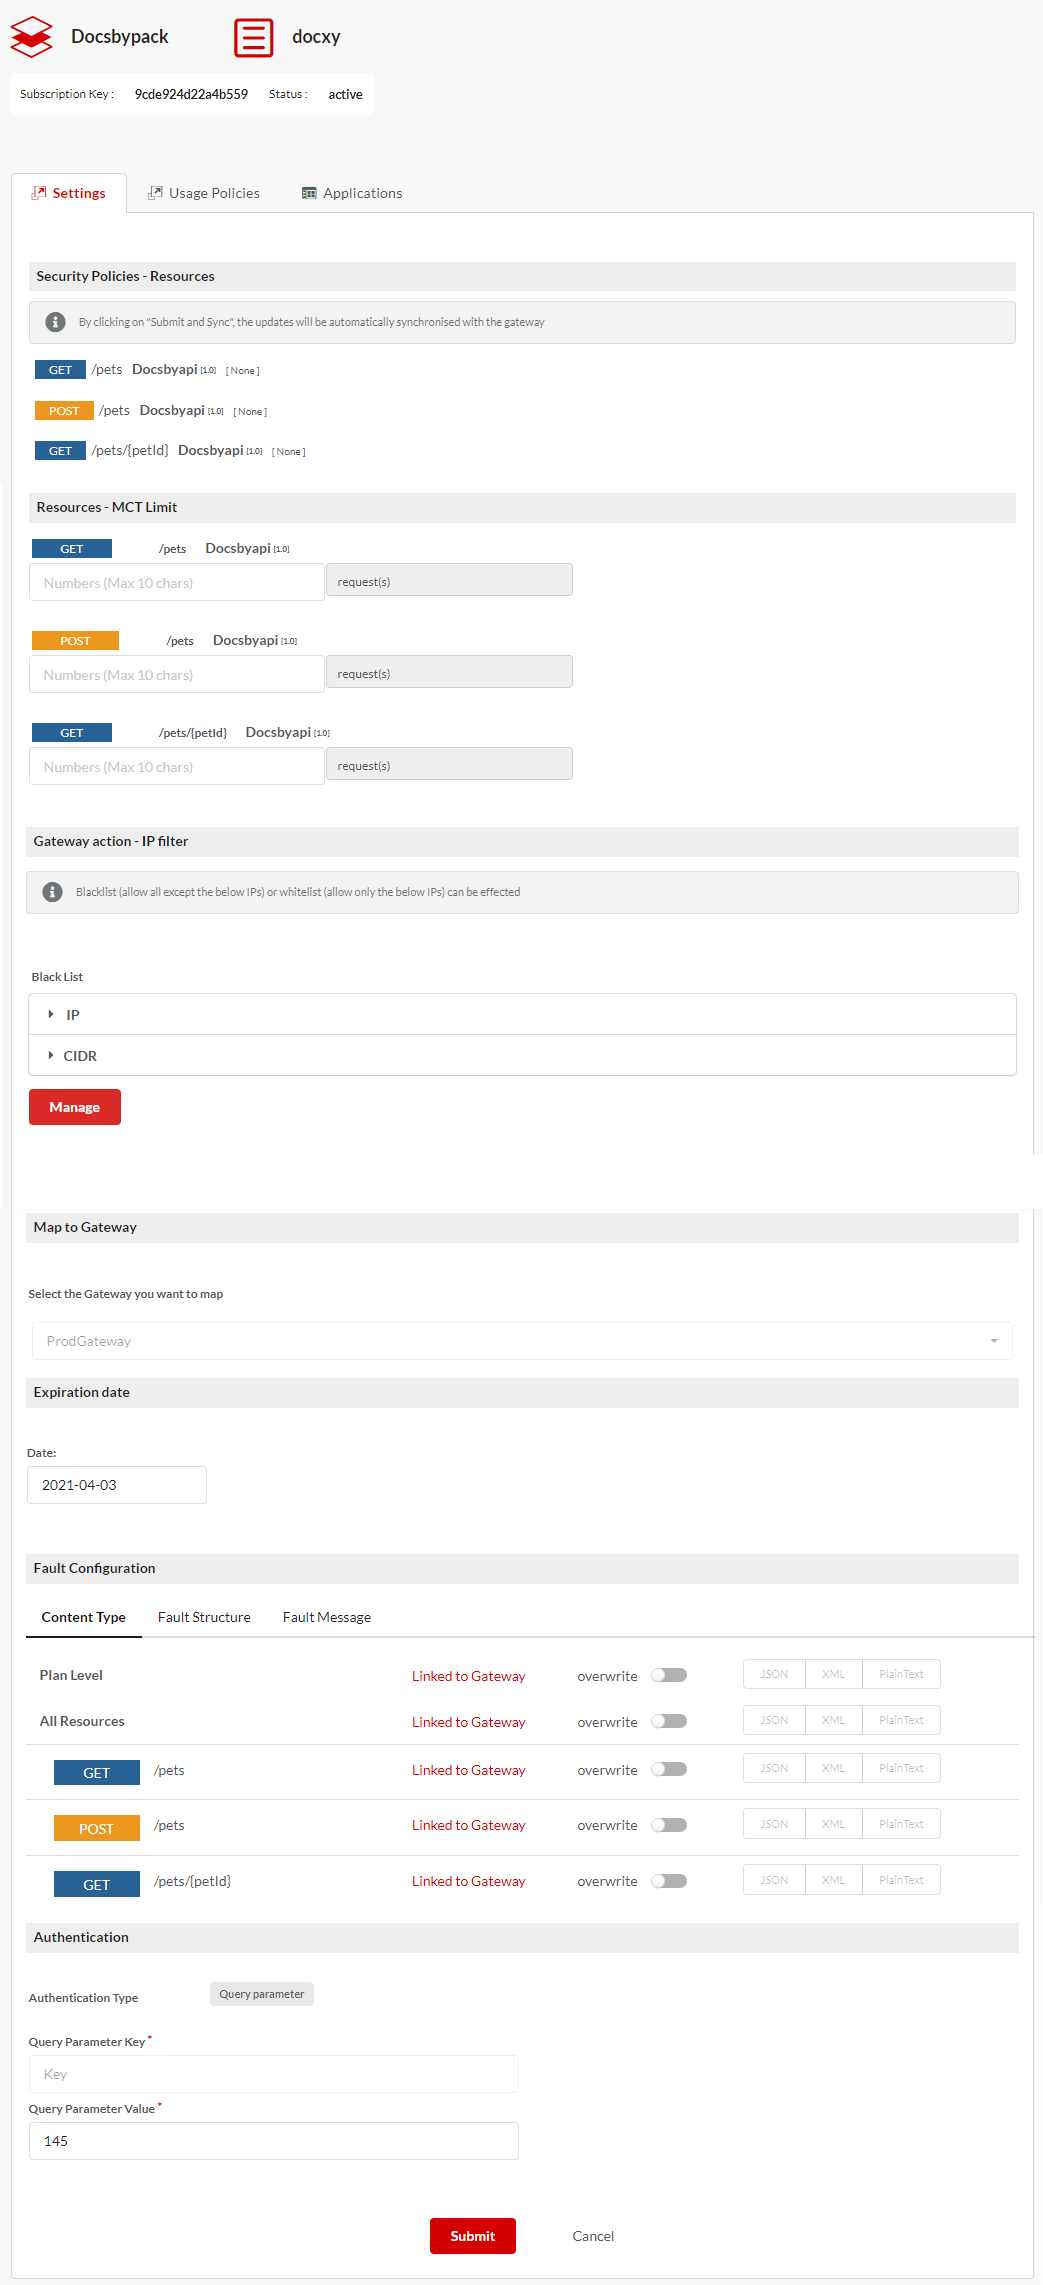
Fig. 3.482 Subscriptions Configuration screen
- Settings: The Settings tab displays the Subscription key and the Subscription status along with the Subscription expiration date, which is an editable field. It allows you to set credentials for Basic/ WS security/ Oauth Authentication security policy. You can blacklist/whitelist IPs and set MCT limits for each Resource and Operation covered under the subscription. Under the Settings tab, you can also select the gateway you want to map, set fault configuration and assign values for given authentication type.
The subscription advances from the Pending to Active status once the user clicks the Submit button and then completes the sync task from the Gateway Sync>Changes>Changes to Subscriptions.
- Usage Policies: The Usage Policies tab allows the user to override Usage Policies for a subscription plan as set for the Resource or Operation at the plan-level.
- Applications: The Applications tab lists down all the applications that are covered under a subscribed plan in an accordion tab.
Note
After submission, synchronize the Subscription from the Subscriptions Configuration screen or the Gateway Sync menu to make the changes operational on the gateway.
Common tasks:
Navigating to the Subscriptions screen
To navigate to the Subscriptions screen:
- In the main menu, click Subscriptions.
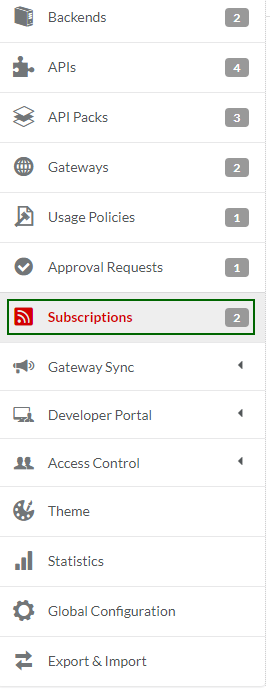
Fig. 3.483 Navigation menu - Subscriptions
The Subscriptions page is displayed.
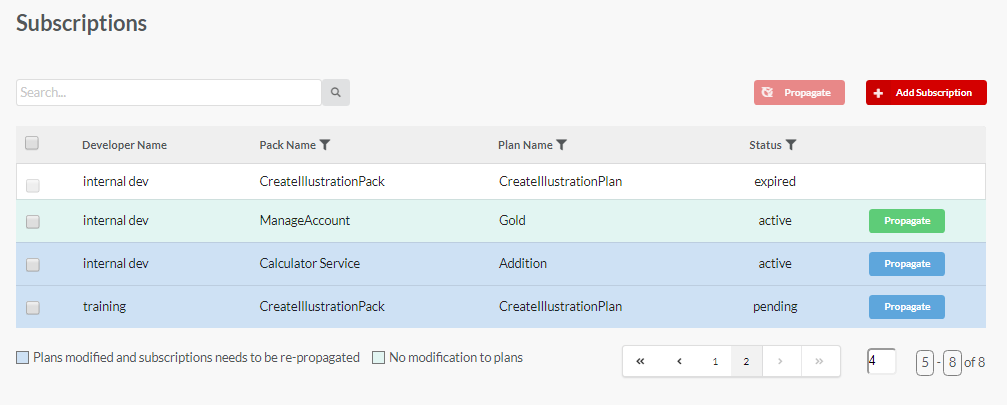
Fig. 3.484 Subscriptions screen
The Subscriptions page displays all the subscribed API plans along with their statuses. It also displays many other features as described below.
- Search
You can use the Search option to search for a particular Developer/Plan/Pack. Enter the query in the search box and click the search icon ![]() to display the results.
to display the results.
- Add Subscription
The Add Subscription button allows you to add a new subscription.
- Filters
The Pack Name, Plan Name and Status filters allow you to display results based on specific Pack/Plan/Status data.
To view the filter, click on the filter icon  .
.
You can enter your query in the Search Tags box and click Search.
OR
You can select the checkboxes corresponding to each Plan/Pack/Status.
Click Clear Filter to clear your filter selection.
Note
When you filter by Packs, only the Plans that exist under the selected Packs will be visible in the results.
Status Filter allows you to filter results based on statuses: Pending, Awaiting Approval, Active, Cancelled, and Awaiting Cancellation.
- Propagate
You can propagate a subscription or perform bulk propagation to bring the subscription up-to-date with the latest plan update.
- Pagination
The Pagination feature at the bottom-right corner of the Subscription page allows you to choose the number of subscriptions to display per page. Twenty entries per page is displayed by default, but you can customize it by entering your required value in the text box at the bottom-right corner of the page. Use the previous ![]() and next
and next ![]() icons to navigate between the pages.
icons to navigate between the pages.
3.27.1. Propagate a Subscription
Plans are propagated to bring it up-to-date with the latest release. As plans are propagated, subscriptions associated with it also need to be propagated in order to get the latest plan update. Users have the option to propagate their subscription using the Propagate option.
To propagate a subscription:
- On the Subscriptions page, click the blue Propagate button
 corresponding to each subscription. The blue Propagate button indicates that propagation is pending for that subscription, as plans associated with it have been modified. Hence the subscription needs to be re-propagated to be up-to-date with the latest plan revision. The green Propagate button
  corresponding to a subscription indicates that the subscription is up-to-date with the latest plan update.
 - Upon clicking Propagate, a confirmation window displays asking you to confirm the propagation. Click Yes, to propagate the subscription.
You can also propagate multiple subscriptions.
To propagate subscriptions in bulk:
Select the checkboxes corresponding to the subscriptions you wish to propagate. The Select All checkbox next to the Developer Name header allows you to select all the subscriptions.
At the top of the Subscriptions table, next to the Add Subscription button, click Propagate
 . A confirmation window is displayed asking you to confirm propagation. Click Yes, to propagate the subscription.
Note
Only subscriptions in Active state can be propagated.
3.27.2. Add a Subscription
Navigate to the Subscriptions screen.
Click Add Subscription to display the Add Subscription dialog box.
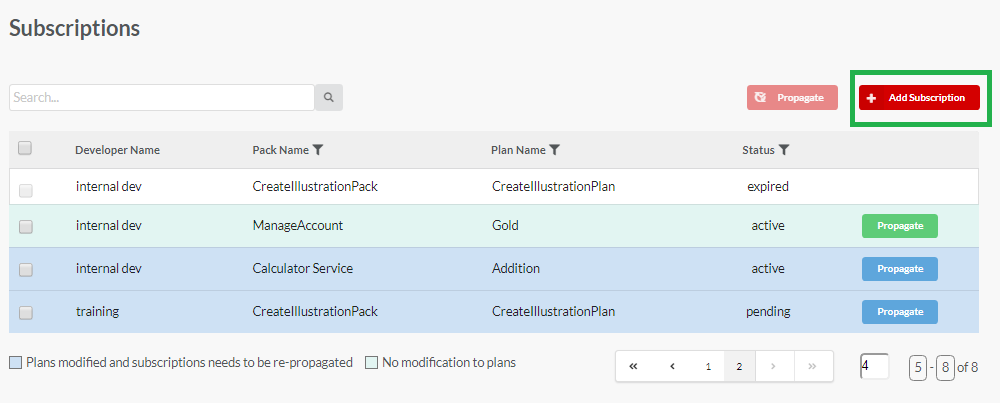
Fig. 3.485 Add Subscription dialog
Click the Developer Organization drop-down box to select a Developer organization for which you want to configure the Subscription.
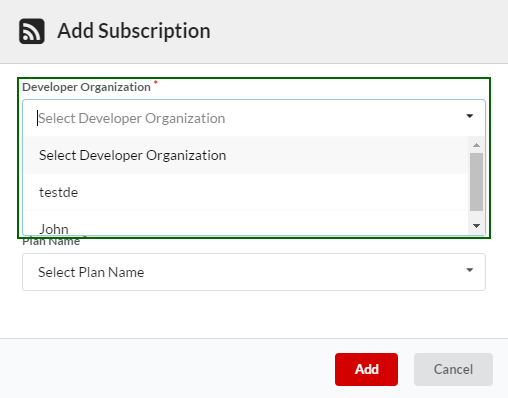
Fig. 3.486 Select a Developer organization
Click the API Pack Name drop-down box to select the API Pack name that has the subscription (subscribed plan) that you want to configure.
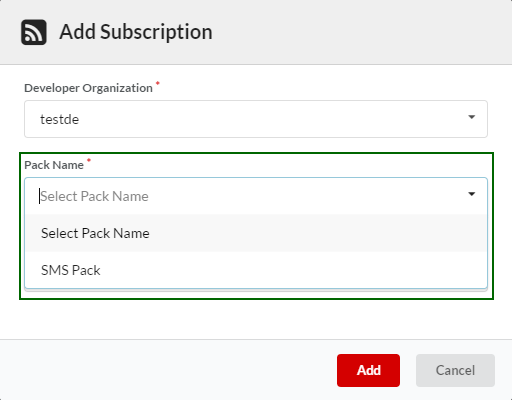
Fig. 3.487 Select API Pack name
Click the Plan Name drop-down box to select the Plan name that has the subscription you want to configure.
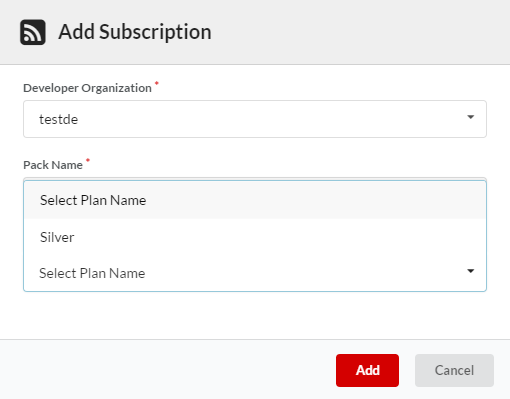
Fig. 3.488 Select Plan name
Configuring Subscription Authentication Values:
API Subscribers with Publisher rights (Publisher Users) can select an authentication type for a Subscription. This can be done from the Plan Authentication section under the Usage Plans tab of an API Pack. The Publisher user will define the Authentication Type for the Plan at Plan level, which a subscriber can subscribe. For the authentication configured at Plan level, the subscriber (with Publisher rights) can assign the values on this page. To know more about plan authentication types, refer Adding Plan Level Authentication section within Edit an API Pack.
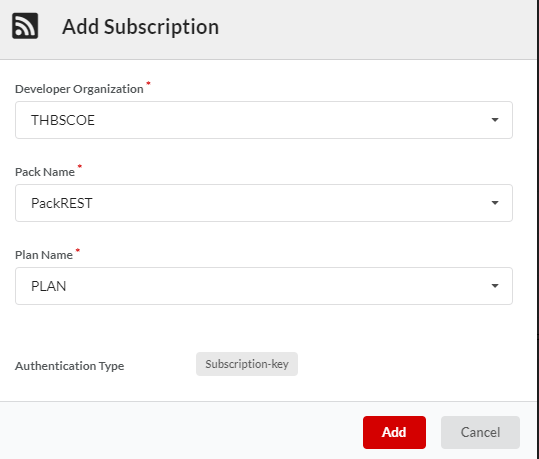
Fig. 3.489 Plan Authentication
At Plan level, the Publisher will configure one of these Authentication Types: Subscription key, IP Whitelisting, Header Key, Query Parameter.
- If Authentication Type is Subscription key, a subscription key will be generated once you add the subscription.

Fig. 3.490 Subscription key
Note
After a subscriber subscribes to a plan, a subscription key will be generated only if the plan authentication type is selected as Subscription-key.
If Authentication Type is Header key, you need to specify the header value. The header key name has already been configured at the time of selecting Plan Authentication type. In the Header Value box, enter the header key value.
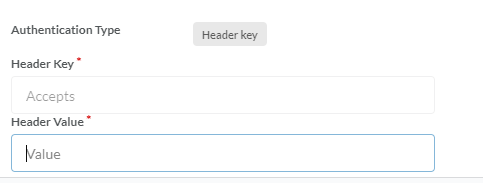
Fig. 3.491 Header key
Note
Reserved and extra reserved headers are not allowed.
If Authentication Type is selected as IP Whitelisting, you need to specify the IP address.
Under IP filter section, click IP. Enter the IP address and select Add IP. The IP Address is added.
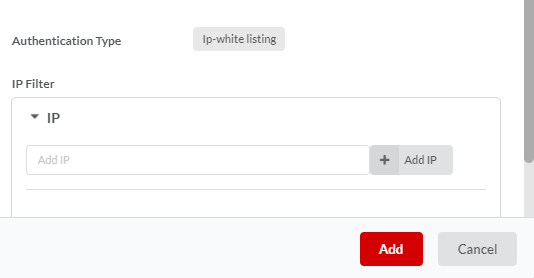
Fig. 3.492 IP
Under IP filter section, click CIDR. Enter the IP address range and click Add CIDR. The IP address range is added.

Fig. 3.493 CIDR
Note
IP and CIDR range should be valid.
If Authentication Type is selected as Query Parameter, you need to specify the query parameter value. The query parameter name has already been configured at the time of selecting Plan Authentication type. In the Query Parameter Value box, enter the query parameter value.
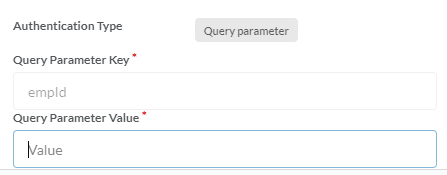
Fig. 3.494 Query Parameter
Note
Reserved special characters are not allowed in query parameters.
Publisher can choose to define the header and query value on the respective subscription model or not. If the Publisher defines the header and query value, the subscriber with developer rights can specify the value at the time of subscription from the developer portal, but that subscriber will not be able to override the header and query name.
It is advisable to have unique IP/Headers/query param for validation. For example, let us suppose that Subscription A created for Plan A contains header name ‘test’ and header value ‘1234’ then Subscription B for the Plan B cannot be created with same header name ‘test’ and header value ‘1234’ if both Plan A and Plan B contains common resources.
In case they are not unique, then the combination of resource and IP/CIDR or Headers or QueryParam should be unique. For example, let us suppose that Plan A with a header key authentication has header name ‘test’ and Plan B with a header key authentication also has header name as ‘test’. Subscription A is created for the Plan A with header value ‘1234’. Subscription B is created for the Plan B. This Subscription B for Plan B cannot have a header value ‘1234’ if both Plan A and Plan B contains common resources.
Note
It is mandatory to specify the Plan authentication values before adding the Subscription.
Click Add to submit the form. The added Subscription displays in the Subscription list.
3.27.3. Configure a Subscription
To navigate to the Subscription Configuration screen:
- Navigate to the Subscriptions screen.
- Click the row that has the Subscription that you want to configure for Policies. The Subscriptions configuration screen displays.
Fig. 3.495 Subscriptions configuration screen
The Security Policies - Resources/Operations section lists all the Resources/Operations under the Subscription Plan along with their corresponding security policies. For Basic Authentication/WS Security attached to a subscribed Usage Plan, the Resource/Operation panel displays Basic Authentication/ WS Security alongside the Resource/Operation field. You can add the credentials for Basic Authentication/WS Security in the relevant boxes.
3.27.3.1. Configure Security Policy Resources/Operations
To add credentials for the Security Policy for Resources/Operations in the Subscription:
Navigate to the Subscriptions Configuration screen. The Settings tab displays by default.
In the Security Policies - Resources section, User Name and Password boxes display if you have selected Basic Authentication as Security Policy for the Plan. If the subscribed Plan has operations from a SOAP API, WS Security User Name and WS Security Password boxes display.
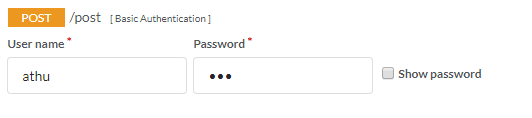
Fig. 3.496 Basic Authentication - REST API
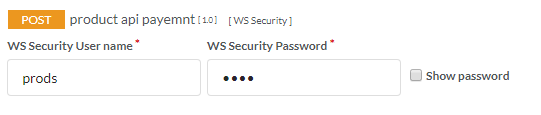
Fig. 3.497 Basic Authentication - SOAP API
In the User Name and Password boxes that appear below, type a User ID and Password
To display the password in clear text and verify the typed password, click to select the check box Show password.
Blank out the boxes if you do not want to have any security for the Endpoint.
Click Submit to save changes. A dialog with the message: ‘Do you want to propagate subscription’ displays. Click Yes to propagate the changes to the Gateway. Alternatively, click No if you wish to propagate later from the Gateway Sync menu.
Note
The subscription advances from the Pending status to the Active status once the user submits the changed settings for propagation right away or after the user syncs the same from the Gateway Sync menu.
3.27.3.2. Configure MCT Limit
You can set a Concurrency Limit for request calls at each Resource/Operation Endpoint wherein you can set the number of simultaneous requests that can be serviced at any given point in time. For more information on MCT, refer: Concurrency Limit.
To set Concurrency Limit for a Subscription under a REST/SOAP API Pack and Plan:
Navigate to the Subscriptions Configuration. The Settings tab displays by default.
Under Resources/Operations - MCT Limit, corresponding to the Resource/Operation listed therein, in the input box, type the number of concurrent requests calls that you want to allow for the Resource/Operation.

Fig. 3.498 Concurrency Limit
Click Submit to save and propagate changes to the Gateway.
3.27.3.3. Filter IPs
Filtering the IPs is a security feature used to limit and control the access only to trusted users. Filtering is acheived through Blacklisting and Whitelisting the IPs.
BlackList IPs
Blacklist IPs blocks the user to access the resources/ operations created under our Subscription.
Whitelist IPs
Whitelist IPs allows the user to access the resources/ operations created under the trusted IP addresses or IP ranges from which the users can access our Subscription.
To Blacklist/ Whitelist an IP:
Navigate to the Subscriptions Configuration screen.
Under Gateway action - IP filter, click Manage.
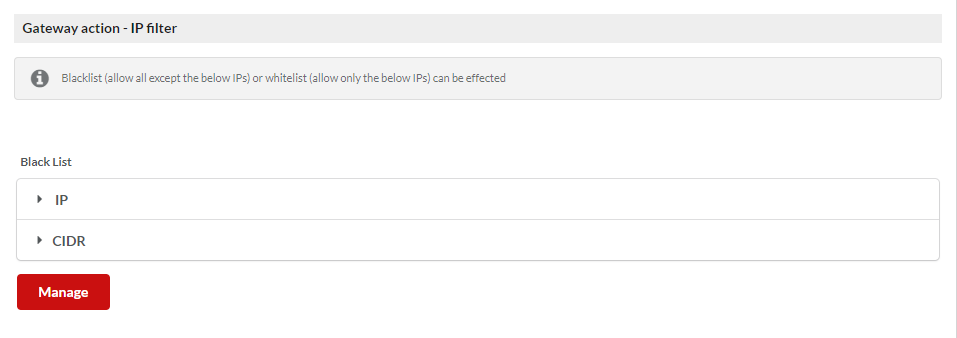
Fig. 3.499 IP Filter - Black List
The Manage IPs dialog box displays. Click the Privacy Type drop down and select the Privacy Type option for Black List or White List.

Fig. 3.500 Manage IP
Click IP option. Enter the IP address and select Add IP button. The IP Addresses are added. Click Update. If the Privacy Type is Black List add the Black Listed IP or If the Privacy Type is White List add the White Listed IP

Fig. 3.501 Add Black List IPs
Select the option IP under Gateway action - IP filter section, The Black list/ White List IPs are visible.
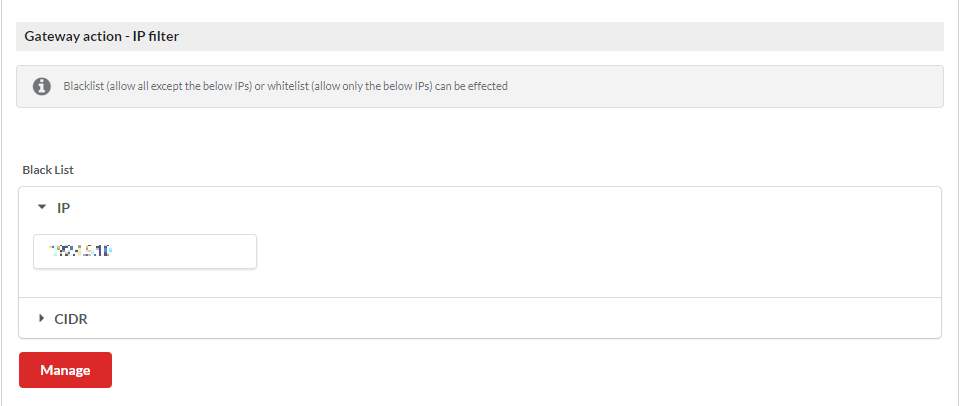
Fig. 3.502 Black List IPs
Add multiple IPs
APIConnect allows the users to add multiple IPs. The IPs can be added in Subscription page under Gateway action - IP Filter - IP section.
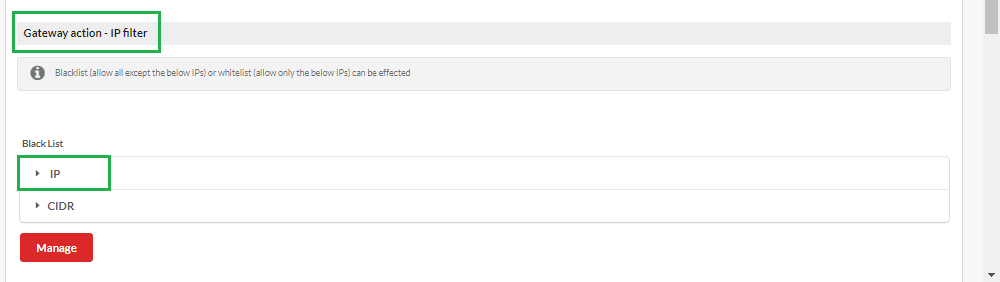
Fig. 3.503 Add Multiple IP Section
Click Manage to view the Manage IPs dialog window. Select the necessary Privacy Type option (BlackList/WhiteList) and click IP. A text box to add the IP’s and an Add IP button is displayed. Add IPs and select Update.
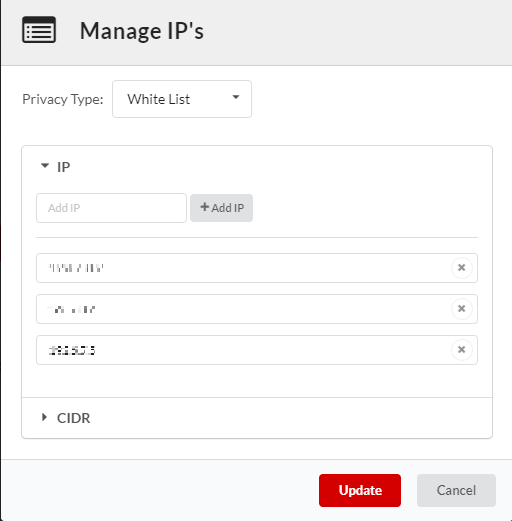
Fig. 3.504 Add Multiple IP
Click IP, the IPs are listed based on the selection of Privacy Type option.
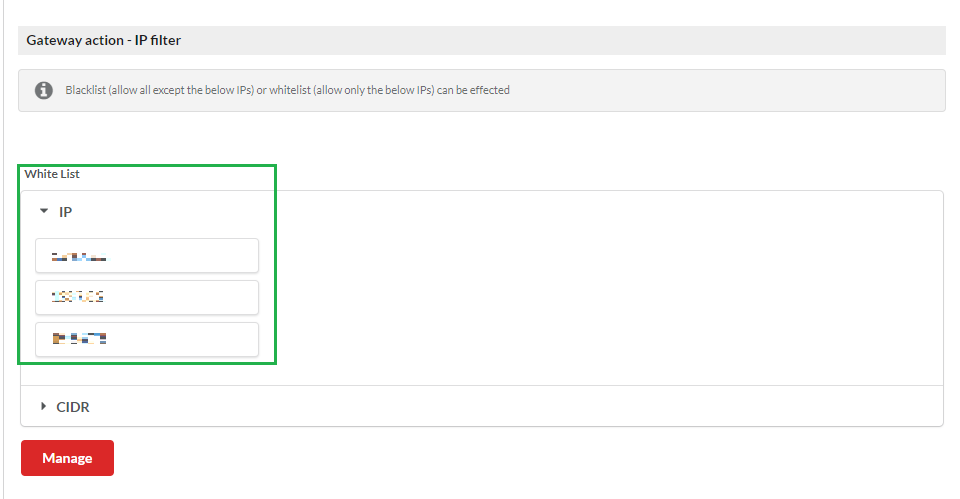
Fig. 3.505 Added Multiple IP
IPs can be added to Blacklist or Whitelist categories. All the added IPs are visible under IP section of Subscription page
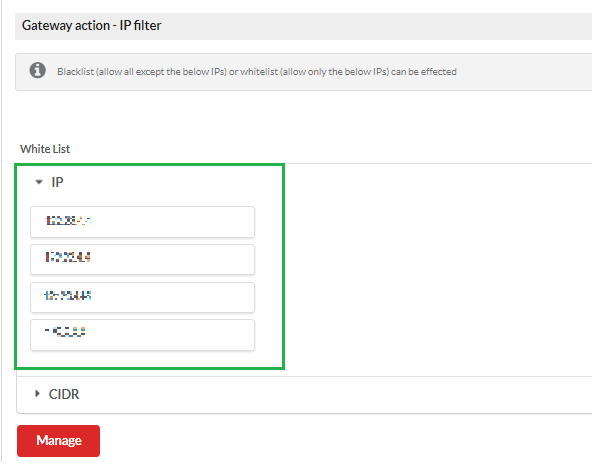
Fig. 3.506 Added Multiple IP
and Manage IPs dialog window, irrespective to selection of Privacy Options.
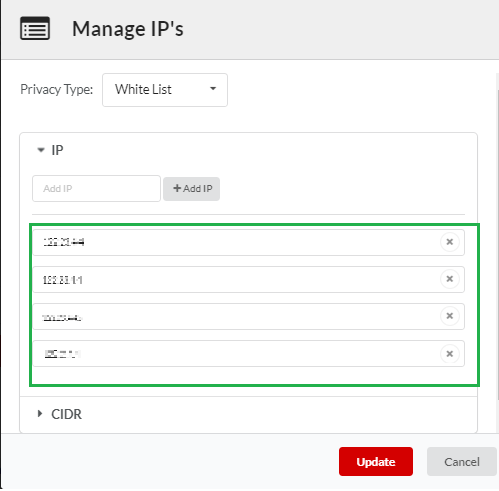
Fig. 3.507 Multiple IP on Manage IP window
Note
The default selection of Privacy Type drop down is Black List.
To Black List/ White List IPs using CIDR
CIDR is a shortname of Classless Inter-Domain Routing. It is an IP addressing procedure where a single IP address is used to assign many unique IP addresses.
CIDR Format
A CIDR IP address looks like a normal IP address along with a slash followed by a number, called the IP network or routing prefix.
Example format - 192.168.100.14/24
The format 192.168.100.14/24 represents the IPv4 address 192.168.100.14 and its associated routing prefix 192.168.100.0, or equivalently, its subnet mask 255.255.255.0, which has 24 leading 1-bits.
APIConnect eliminates the difficulty of entering many IP addresses for our customers. Instead of manually entering the IP, users can set the range of IP addresses.
CIDR option is available under Subscription page Gateway Action IP filter section.

Fig. 3.508 CIDR screen
Add CIDR to Black List the IPs - Default selection
You can blacklist IP ranges to block the access to calls originating from any IP to resources/operations within the range covered under the Subscription.
Blacklist IPs with CIDR :
Navigate to the Subscriptions Configuration screen. Under Gateway action - IP filter, click Manage.
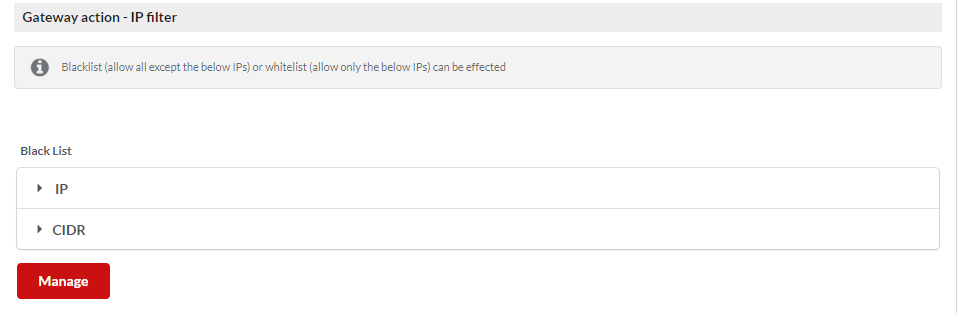
Fig. 3.509 Gateway Action IP Filter
Manage IP’s dialog box is displayed. Click CIDR, Add the IP address range in ‘192.0.0.1/32’ format and Click Add CIDR. The IP address range will be added. Select Update.
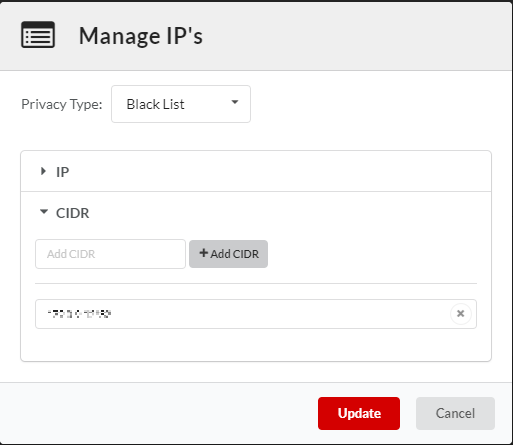
Fig. 3.510 Add CIDR
Select CIDR, the added IP is visible under the Privacy Type: Black List.
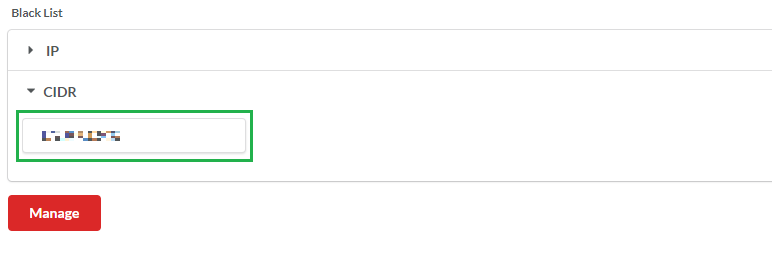
Fig. 3.511 Black List CIDR
Add CIDR to White List the IPs
You can Whitelist IP ranges to allow access to calls originating from that IP to resources/operations covered under the Subscription.
Whitelist IPs with CIDR :
Navigate to the Subscriptions Configuration screen. Under Gateway action - IP filter, click Manage.

Fig. 3.512 Gateway Action IP Filter
Manage IP’s dialog box is displayed. Select the option Privacy Type: White List.
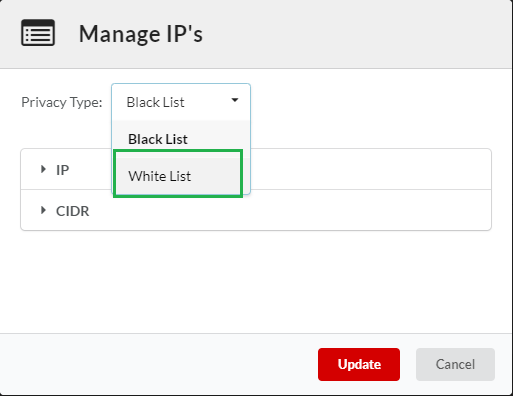
Fig. 3.513 WhiteList Option
Click CIDR. Enter the IP address range in ‘192.0.0.1/32’ format and Click ADD CIDR. The IP address range is added. Select Update.
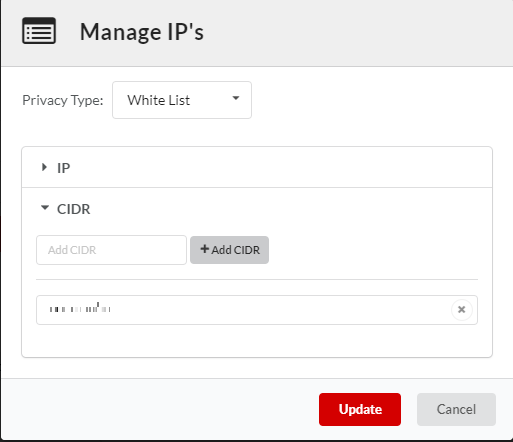
Fig. 3.514 WhiteList CIDR
Select CIDR, the added IP is visible under the Privacy Type: White List.
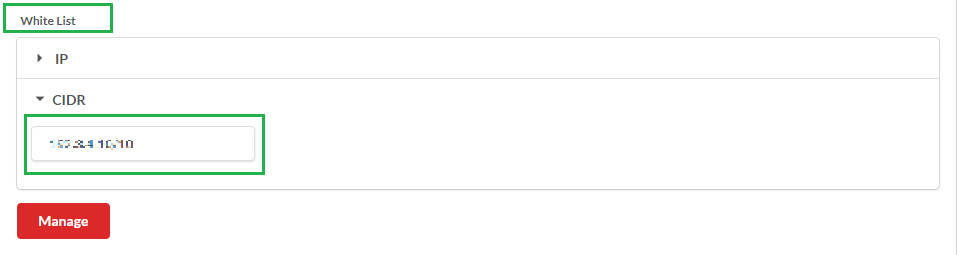
Fig. 3.515 White List CIDR
To Blacklist and Whitelist IPs, users must add multiple CIDR ranges separately.
Note
The subscription advances from the Pending status to the Active status once the user submits the changed settings for propagation right away or after the user syncs the same from the Gateway Sync menu.
Note
The product has to be configured as per its physical architecture taking account of load balancers and proxy configurations. Refer the Installation Guide for more information.
3.27.3.4. Map Subscription to Gateway
To Map Subscription to a Gateway:
Users can map a Subscription to a Production Gateway.
The Select the Gateway you want to map drop-down displays the Gateway that is configured for the publisher organization. From the Select the Gateway you want to map drop-down, choose the Gateway to which you want to map the Subscription.
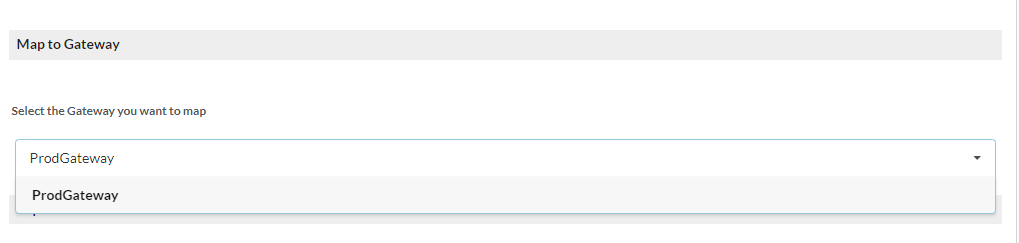
Fig. 3.516 Gateway to Map
Note
It is mandatory to map a Gateway to the Subscription in order for it to propagate. A Subscription can be mapped to only one Gateway and not multiple Gateways.
You can also map the Subscription from the Subscription tab of the selected Gateway. Refer Subscription.
3.27.3.5. Change Subscription Expiration Date
To change subscription expiration date:
Users, irrespective of the plans to which they have subscribed, can change their subscription expiration date using the calender functionality in the date picker box.
Navigate to the Subscriptions Configuration page.
Under Expiration date, click the Date box to display a calendar.
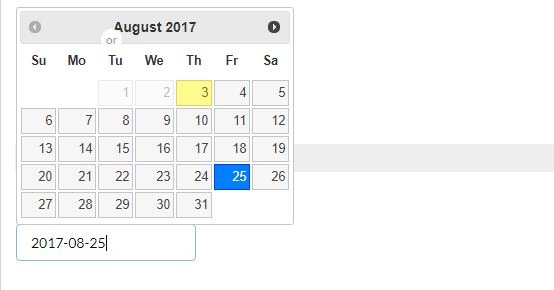
Fig. 3.517 Calendar
In the calendar, select a date/month/year to change the existing date. The new date displays in the Date box.
Note
Users who have subscribed to the non-monetized plans can also change their subscription expiration date.
To toggle the Subscription auto-renewal state:
Navigate to the Subscriptions Configuration page.
Under Expiration date, the Auto-renew Subscription check box displays if auto-renewal is activated while creating the plan.
Under Expiration date, click the Auto-renew Subscription check box to select and enable auto-renewal or uncheck the check box to disable auto-renewal for the subscription.
Note
The auto-renewal option displays when the Subscription Expiry - Developers can enable auto-renewal option is enabled while adding pricing details to the Usage Plan.
Note
“Upon any changes in the subscription, then subscription needs to be repropagated”.
3.27.3.6. Set Fault Configuration
To set the REST Fault Configuration at Subscription Level:
Navigate to the Subscriptions Configuration page.
Scroll down to the Fault Configuration section.
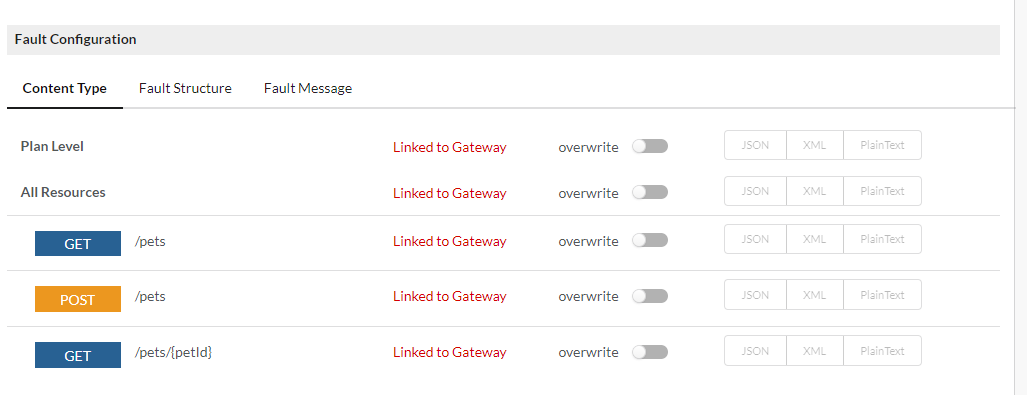
Fig. 3.518 Fault Configuration
Note
Fault configuration can be set only for active subscriptions.
Under Fault Configuration section, click Content Type tab. You can overwrite the configured Content Type at Plan Level and for all/individual Resources. Move the Overwrite toggler to the right to activate overwrite and do the inverse to retain the default Content Type settings. Upon enabling Overwrite, the Content Type options at Plan Level and for all/individual Resources will be enabled.
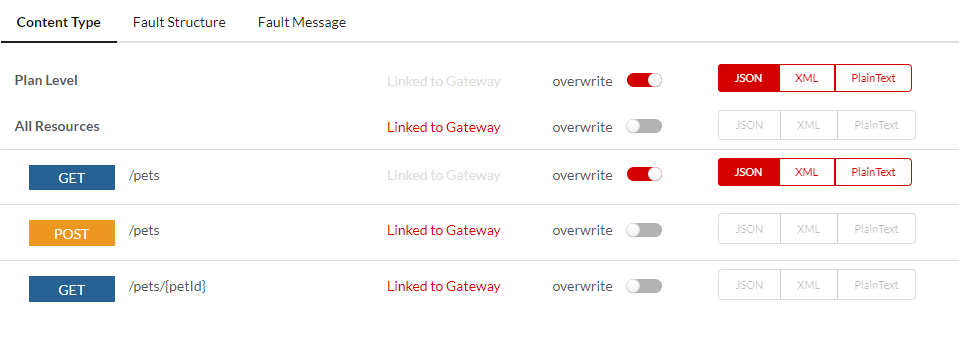
Fig. 3.519 Content Type
Click to select the required Content Type JSON/XML/PlainText to be configured at Plan Level and for each all/individual Resources and then click Submit. This will overwrite the default Content Type settings.
Next, click Fault Structure tab. You can overwrite the configured Fault Structure at Plan level and for all/individual Resources. Move the Overwrite toggler to the right to activate overwrite and do the inverse to retain the default Fault Structure settings. Upon enabling Overwrite, the Fault Structure options at Plan Level and for all/individual Resources will be enabled.
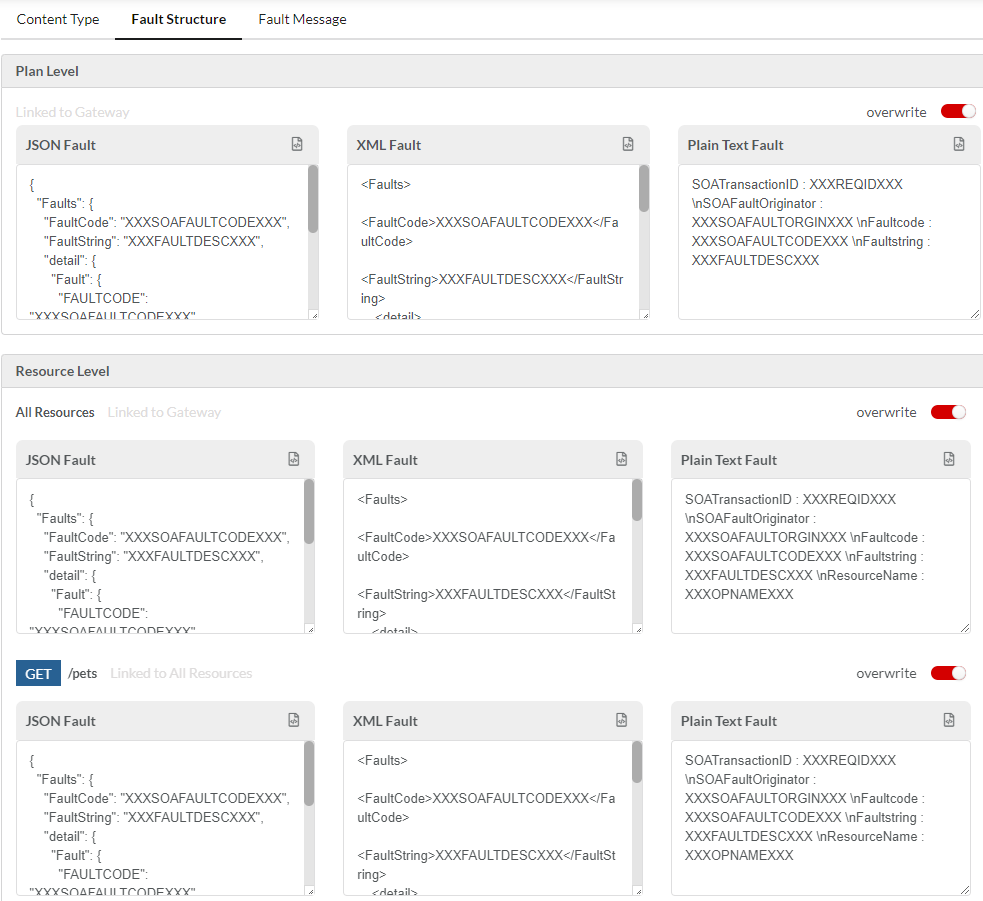
Fig. 3.520 Fault Structure
(Optional) Edit the JSON/XML/Plain Text Fault box to make any required changes to the Fault template at Plan level and for all/individual resources and then click Submit to save the changes.
Next, click Fault Message. You can overwrite the configured Fault Message at Plan level and for all/individual resources. Move the toggler to the right to activate overwrite and do the inverse to retain the default Fault Message settings. Upon enabling Overwrite, the Fault Message options at Plan Level and for all/individual Resources will be enabled.
Note
If Fault Configuration is overwritten for All Resources of a Subscription, then the fault configuration of All Resources will be applicable for each Resource.
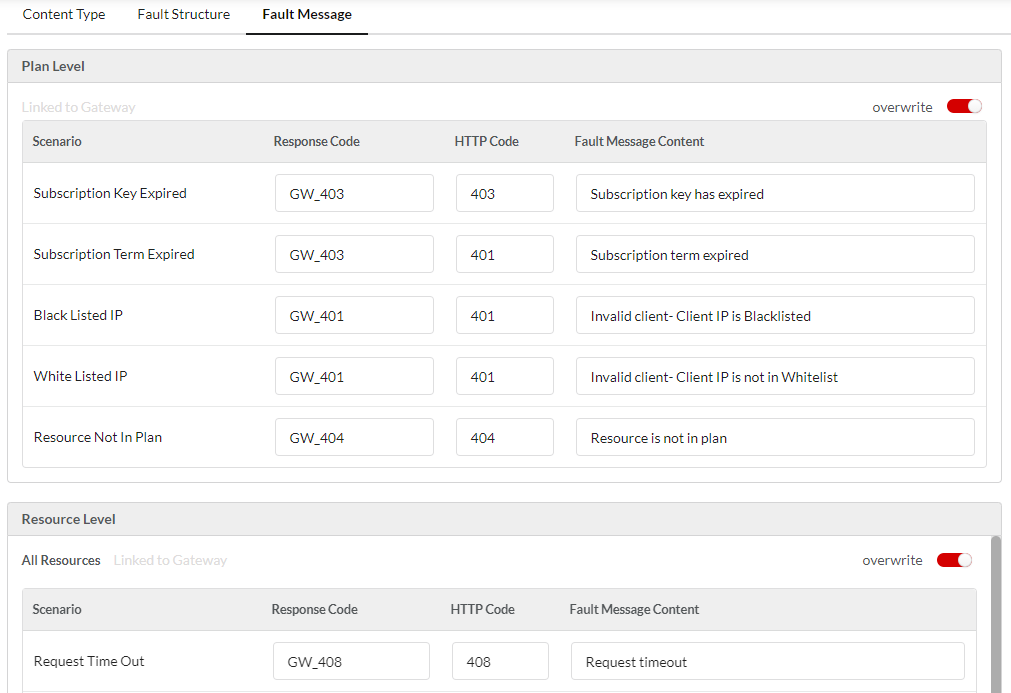
Fig. 3.521 Fault Message
- (Optional) Click the Response Code box corresponding to the Fault scenario to type in a different fault code in the box.
- (Optional) Click the HTTP Code box corresponding to the Fault scenario to type in a different HTTP code in the box.
- (Optional) Click the Fault Message Content box corresponding to the Fault scenario to type in a different Fault Message in the box.
- Click Submit. This will overwrite the default Fault Message settings.
To set the SOAP Fault Configuration at Subscription Level:
Navigate to the Subscriptions Configuration page.
Scroll down to the Fault Configuration section.
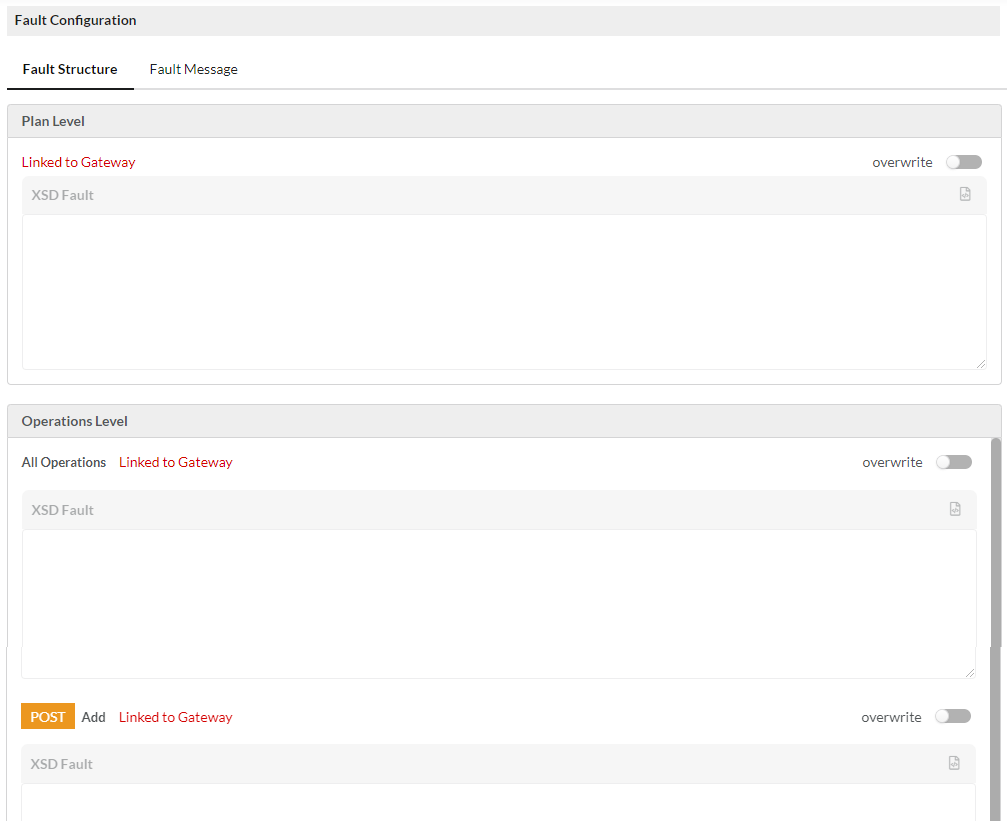
Fig. 3.522 Fault Configuration
Note
Fault configuration can be set only for active subscriptions.
Under Fault Configuration section, click Fault Structure. You can overwrite the configured Fault Structure at Plan level and for all/individual operations. Move the Overwrite toggler to the right to activate overwrite and do the inverse to retain the default Fault Structure settings.
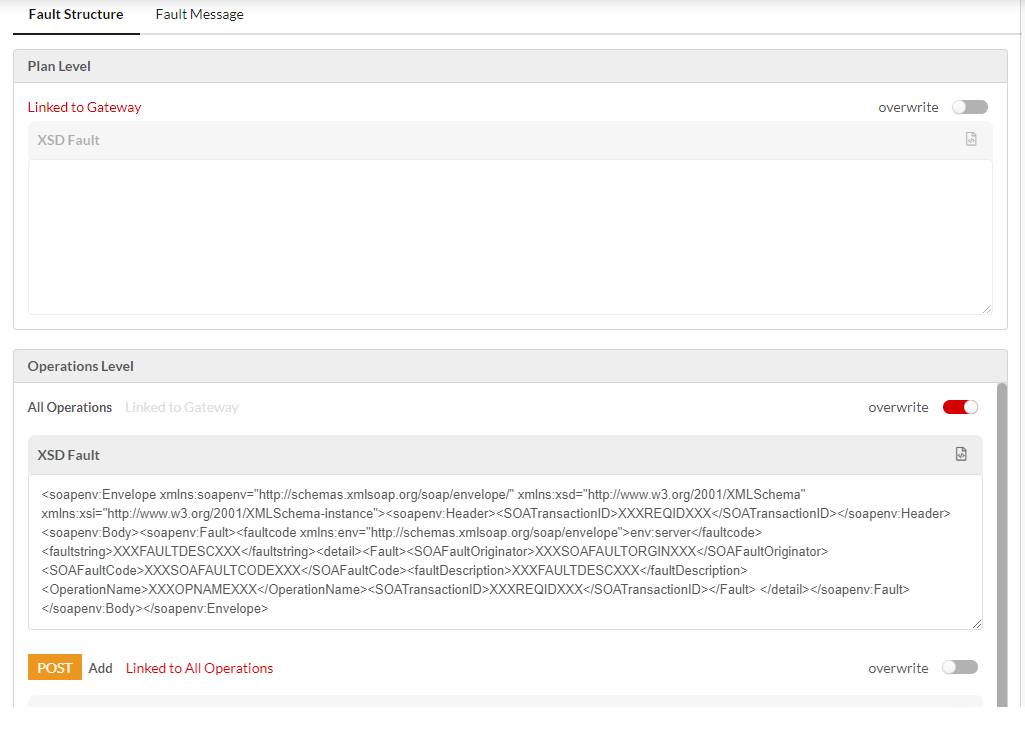
Fig. 3.523 Fault Structure
(Optional) Edit the XML Fault box to make any required changes to the Fault template at Plan level and for all/individual Operations and then click Submit to save the changes.
Next, click Fault Message tab. You can overwrite the configured Fault Message at Plan level and for all/individual Operations. Move the Overwrite toggler to the right to activate overwrite and do the inverse to retain the default Fault Message settings. Upon enabling Overwrite, the Fault Message options at Plan level and for all/individual Operations will be enabled.
Note
If Fault Configuration is overwritten for All Operations of a Subscription, then the fault configuration of All Operations will be applicable on each Operation.
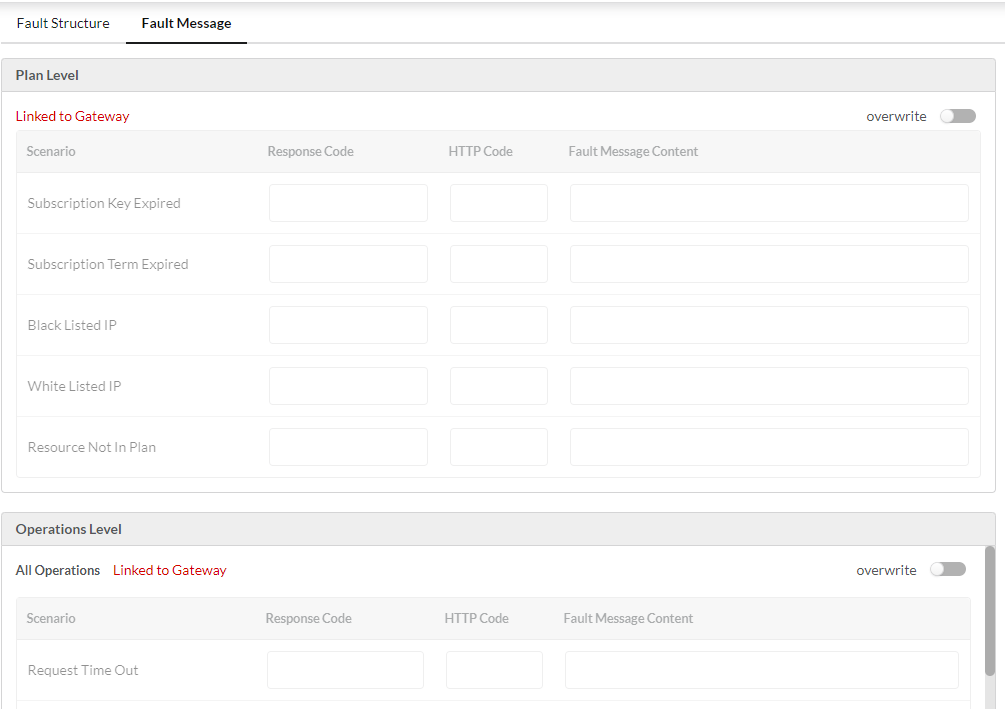
Fig. 3.524 Fault Message
- (Optional) Click the Response Code box corresponding to the Fault scenario to type in a different fault code in the box.
- (Optional) Click the HTTP Code box corresponding to the Fault scenario to type in a different HTTP code in the box.
- (Optional) Click the Fault Message Content box corresponding to the Fault scenario to type in a different Fault Message in the box.
- Click Submit. This will overwrite the default Fault Message settings.
3.27.3.7. Configure Authentication Value
To edit the Configured Authentication Value for the Subscription:
Navigate to the Subscriptions Configuration page.
Under the Authentication section, you can edit the authentication method values that you had configured in the Add Subscription page.
If Authentication Type is Subscription key, a subscription key would have been generated after you add the subscription in the Add Subscription page. This key is auto-generated and not editable.
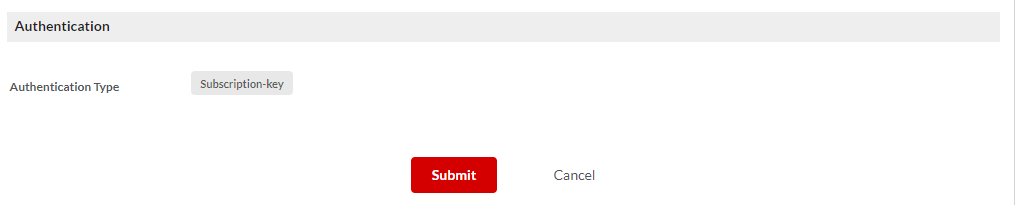
Fig. 3.525 Subscription key
If Authentication Type is Header key, you will be able to edit the header value in the Header Value box.
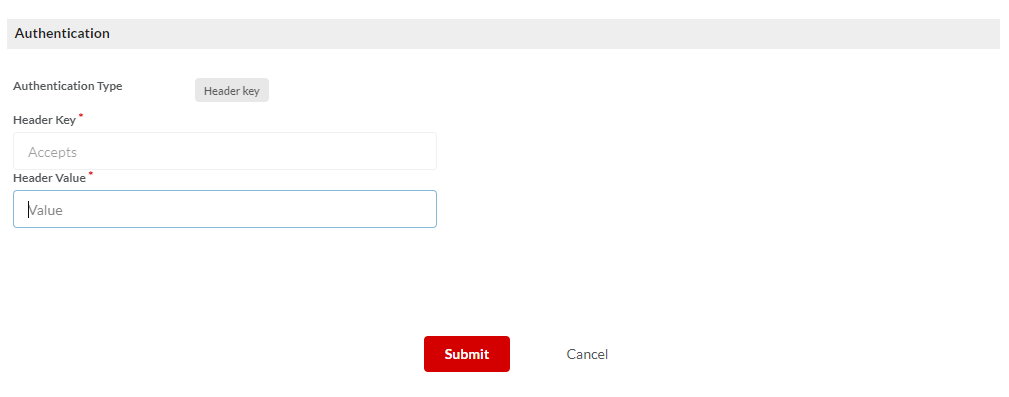
Fig. 3.526 Header key
If Authentication Type is as Query Parameter, you will be able to edit the Query Parameter value in the Query Parameter value box.
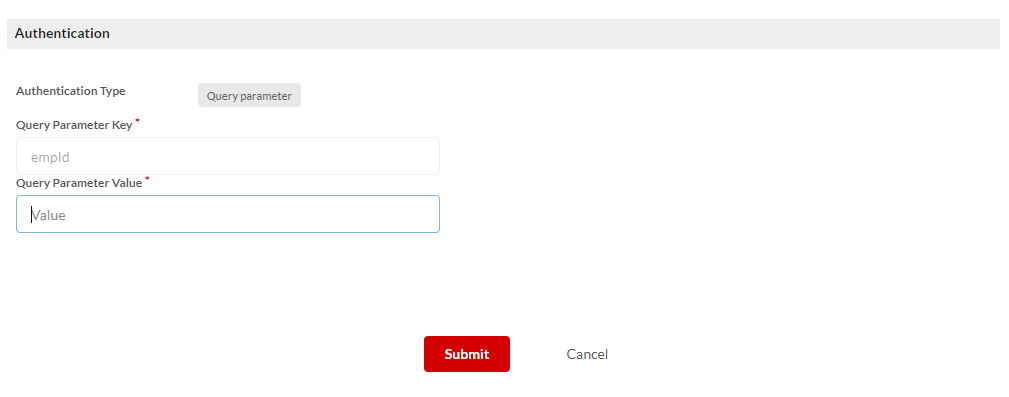
Fig. 3.527 Query Parameter
If Authentication Type is IP Whitelisting, you will be able to edit the IP Address and the CIDR range under the IP and CIDR tabs respectively.
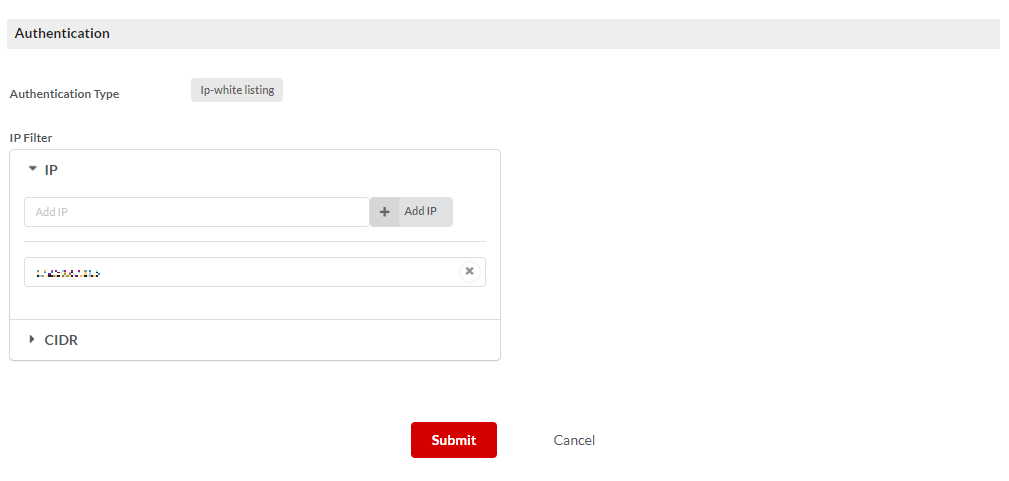
Fig. 3.528 IP/CIDR
Note
It is mandatory to specify the Plan authentication values before submitting the Subscription.
3.27.3.8. Configure Usage Policy
Usage Policy can be configured at plan level (for all resources) as well as at resource level (for individual resources). By default, this will be inherited to all subscriptions for the plan, else this usage policy can be overridden on a specific subscription.
For a plan, if no usage policy is configured at plan level or resource level, the client will be able to consume unlimited number of requests. In such case, Inherit usage policies from the associated plan section will not display any policies. For a plan, if usage policies are configured at plan level or resource level, these will be displayed under Inherit usage policies from the associated plan section. You can override the inherited usage policies at subscription level for all resources or for individual resources from Override inherited usage policies section.
Read the scenario given below to understand when you may be required to override the inherited usage policies at subscription level:
Suppose the usage limits for a policy for plan A at plan level is 300 requests every 5 minutes. Client A and client B have both subscribed to the plan A. Let us suppose that client A is satisfied with the usage limit for policy of plan A while client B is not. Client B wants usage limits for a policy for plan A at plan level to be 200 requests every 5 minutes. In such case, client B can request to override the pre-configured policy for plan A at subscription level (for all resources or individual resources) and define their own usage limits. If done so, the new usage policies will override the policies that was configured for plan A only for client B. Client A’s usage limits for plan A will remain unaffected.
To learn how to create Usage Policy, refer: Create a Named Usage Policy
To view or configure Usage Policy details for a Subscription Plan:
- Navigate to the Subscriptions screen.
- Under the Usage Policies tab, you can see - Inherit usage policies from associated plans and Override inherited usage policies.
Inherit usage policies from associated plan: Under this section, usage policies that are assigned to plan and individual resources are displayed.

Fig. 3.529 Inherit usage policies from associated plan
Override inherited usage policies: Under this section, you can override or update the policies at plan and resource level for subscriptions.
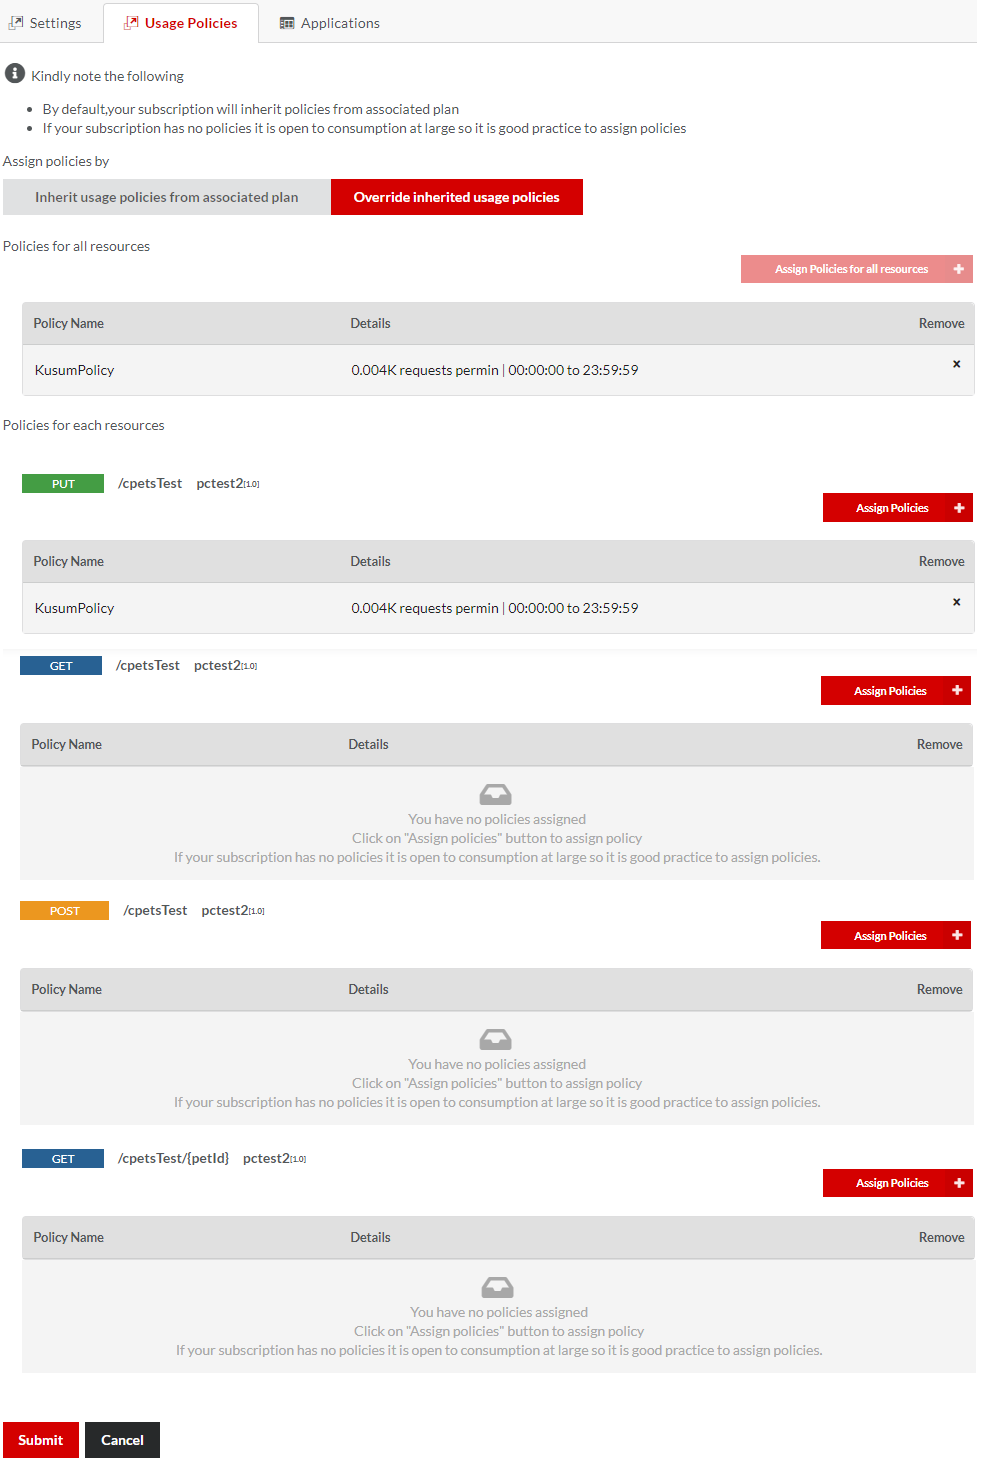
Fig. 3.530 Inherit usage policies from associated plan
To override Usage Policies attached at Plan-level:
Under the Override inherited usage policies section, click Assign Policies for all resources to display the Plan Level - Select Existing Usage Policies dialog box. The dialog box displays a list of all available Usage Policies.
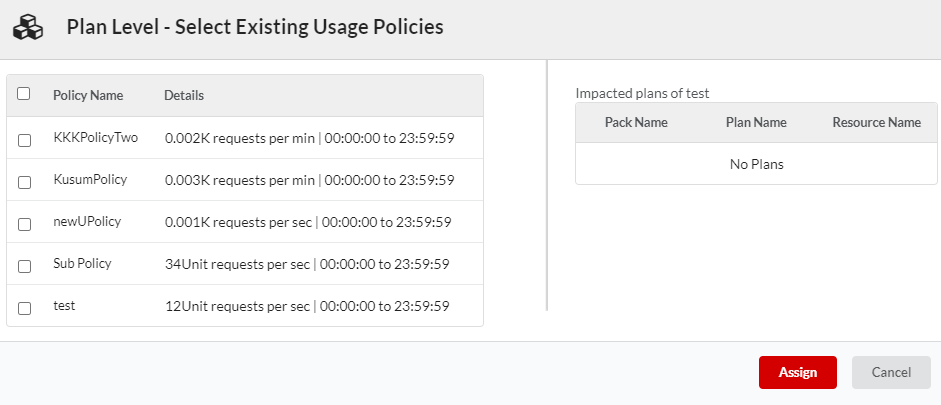
Fig. 3.531 Select Existing Usage Policies
Click to select a check box corresponding to Policy name to attach a different Plan-level Policy to the Subscription than the existing one.
Click Assign to apply the changes. The selected Usage Policy displays below the Policies for all resources list.

Fig. 3.532 Selected Usage Policy at Plan Level
Click the remove icon
 to remove any unwanted Policy that you want to remove from the Subscription at the Plan- level.
Click Submit to save changes. A dialog with the message: ‘Do you want to propagate subscription’ displays. Click Yes to propagate the changes to the Gateway. Alternatively, click No if you wish to propagate later from the Gateway Sync menu.

Fig. 3.533 Propagate Subscription dialog
Note
The subscription advances from the Pending status to the Active status once the user submits the changed settings for propagation right away or after the user syncs the same from the Gateway Sync menu.
To override Usage Policies attached at Resource-level:
Under the Override inherited usage policies section, click Assign Policies for this resource to display Resource-level - Select Existing Usage Policies dialog box. The Resource-level Usage Policies attached to each Resource at the Resource-level (policies attached at the time of creating a Usage Plan) displays.
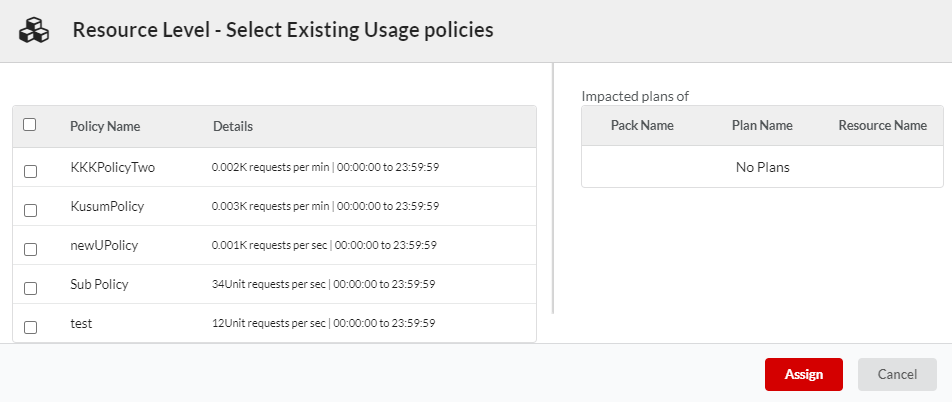
Fig. 3.534 Resource-level Usage Policies
Click to select a check box corresponding to Policy name to attach a different Resource-level Policy to the Subscription than the existing one.
Click Assign to apply the changes. The selected Usage Policy displays below the Resource Level - Usage Policies list.
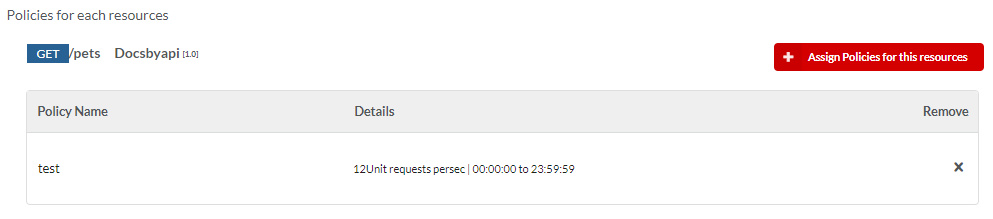
Fig. 3.535 Selected Usage Policy at Resource Level
Click the remove icon
to remove any unwanted Policy that you want to remove from the Resource.Click Submit to save changes. A dialog with the message: ‘Do you want to propagate subscription’ displays. Click Yes to propagate the changes to the Gateway. Alternatively, click No if you wish to propagate later from the Gateway Sync menu.
Fig. 3.536 Propagate Subscription dialog
Note
The subscription advances from the Pending status to the Active status once the user submits the changed settings for propagation right away or after the user syncs the same from the Gateway Sync menu.
Note
If the user overrides usage policy at plan or resource level for a subscription, Override inherited usage policies section will be displayed by default when the user clicks Usage Policies tab of that subscription.
3.27.3.9. View Applications details
To view Applications details for a Subscription Plan:
Navigate to the Subscriptions screen.
Click the row that has the Subscription that you want to configure. The Subscriptions configuration screen displays.
Click to display the Applications tab screen. A list of applications associated with the Subscription Plan displays in accordion tabs.
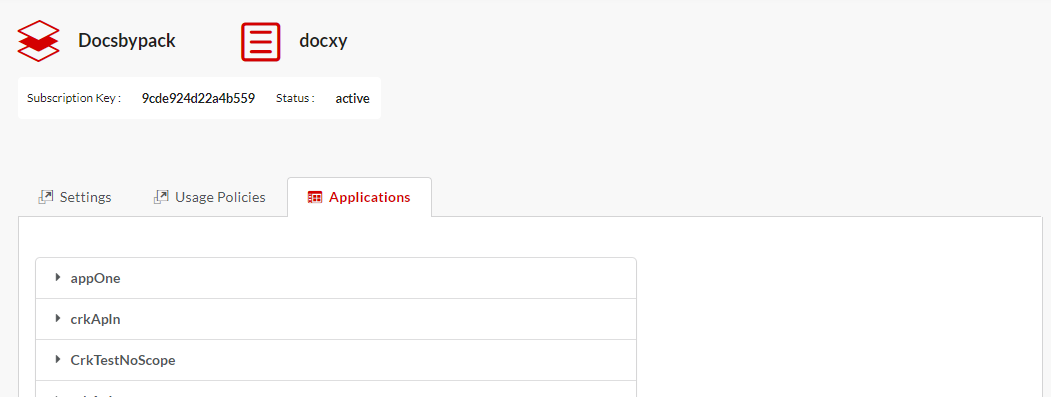
Fig. 3.537 Applications tab
Click the row that has the Application to display an expanded tab.
In the expanded tab, you can view the following details about the application:
- Client ID
- Client Secret
- Overview Details
Next Steps
In the next section, you will learn how to view Statistics and Analytics.